Introduction
Downloading multiple photos from iCloud can be a time-consuming task if you don’t know the proper steps. Whether you want to back up your precious memories or simply want to transfer them to another device, iCloud provides a convenient solution for managing your photos. In this guide, we will walk you through the step-by-step process of downloading multiple photos from iCloud, making it easy for you to access your cherished moments.
iCloud is a cloud storage and syncing service developed by Apple that allows you to store your photos, videos, documents, and other files securely in the cloud. It offers seamless integration with your Apple devices, ensuring that your data is accessible from anywhere at any time. To download multiple photos from iCloud, you don’t need any special software or equipment – just your Apple device and an internet connection. So, let’s get started and learn how to download multiple photos from iCloud in a few simple steps.
Before we begin, make sure you have the latest version of the Photos app installed on your iPhone, iPad, or Mac. This will ensure that you have all the necessary features and improvements needed to follow along with the steps in this guide. Additionally, ensure that your Apple device is connected to a stable Wi-Fi or cellular network to avoid any interruptions during the download process.
Now that you are ready, let’s dive into the step-by-step process of downloading multiple photos from iCloud. By following these instructions, you’ll be able to effortlessly download and access your photos on iCloud Drive in no time.
Step 1: Open the Photos App
To begin the process of downloading multiple photos from iCloud, you’ll first need to open the Photos app on your Apple device.
If you’re using an iPhone or iPad, locate and tap on the Photos app icon on your home screen. The app icon resembles a multicolored flower, making it easy to spot. Once you find it, tap on it to open the app.
If you’re using a Mac, click on the Photos app icon located in your dock or open it via the Applications folder. After launching the app, the main Photos window will appear on your screen.
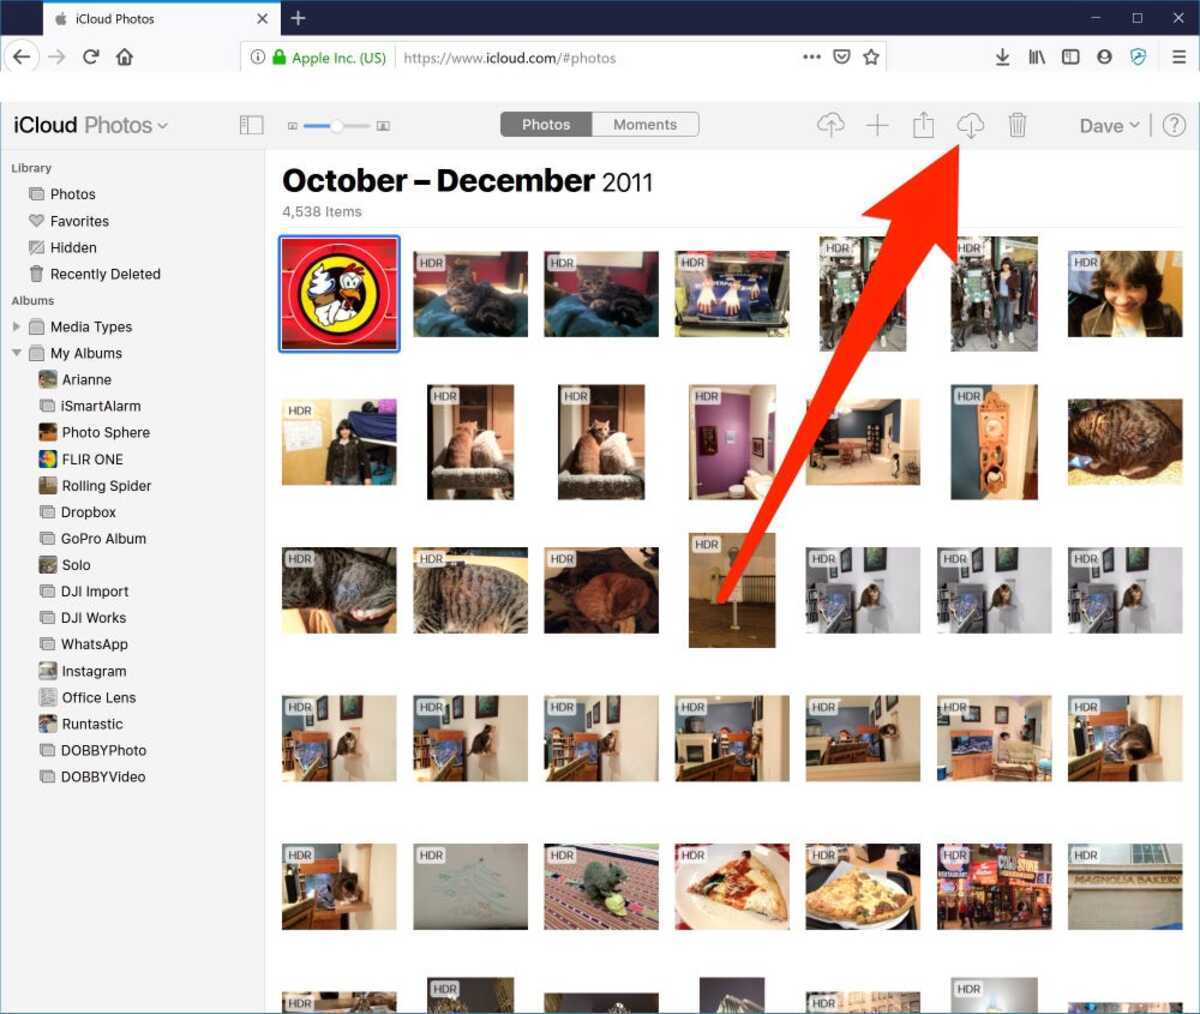
Once you’re in the Photos app, you’ll have access to all your photos and albums stored on your device. The app organizes your photos based on dates, locations, and any custom albums you may have created. You can navigate through your collection by swiping through the photos or using the sidebar menu on a Mac.
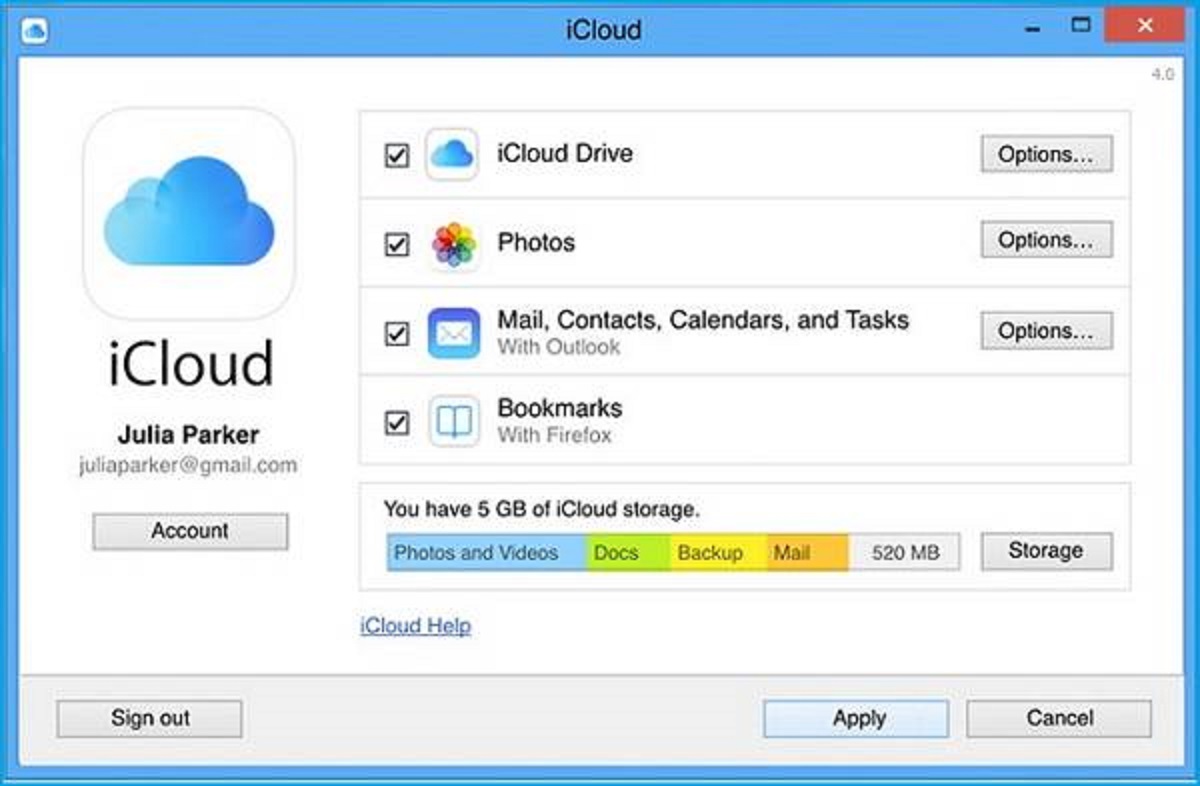
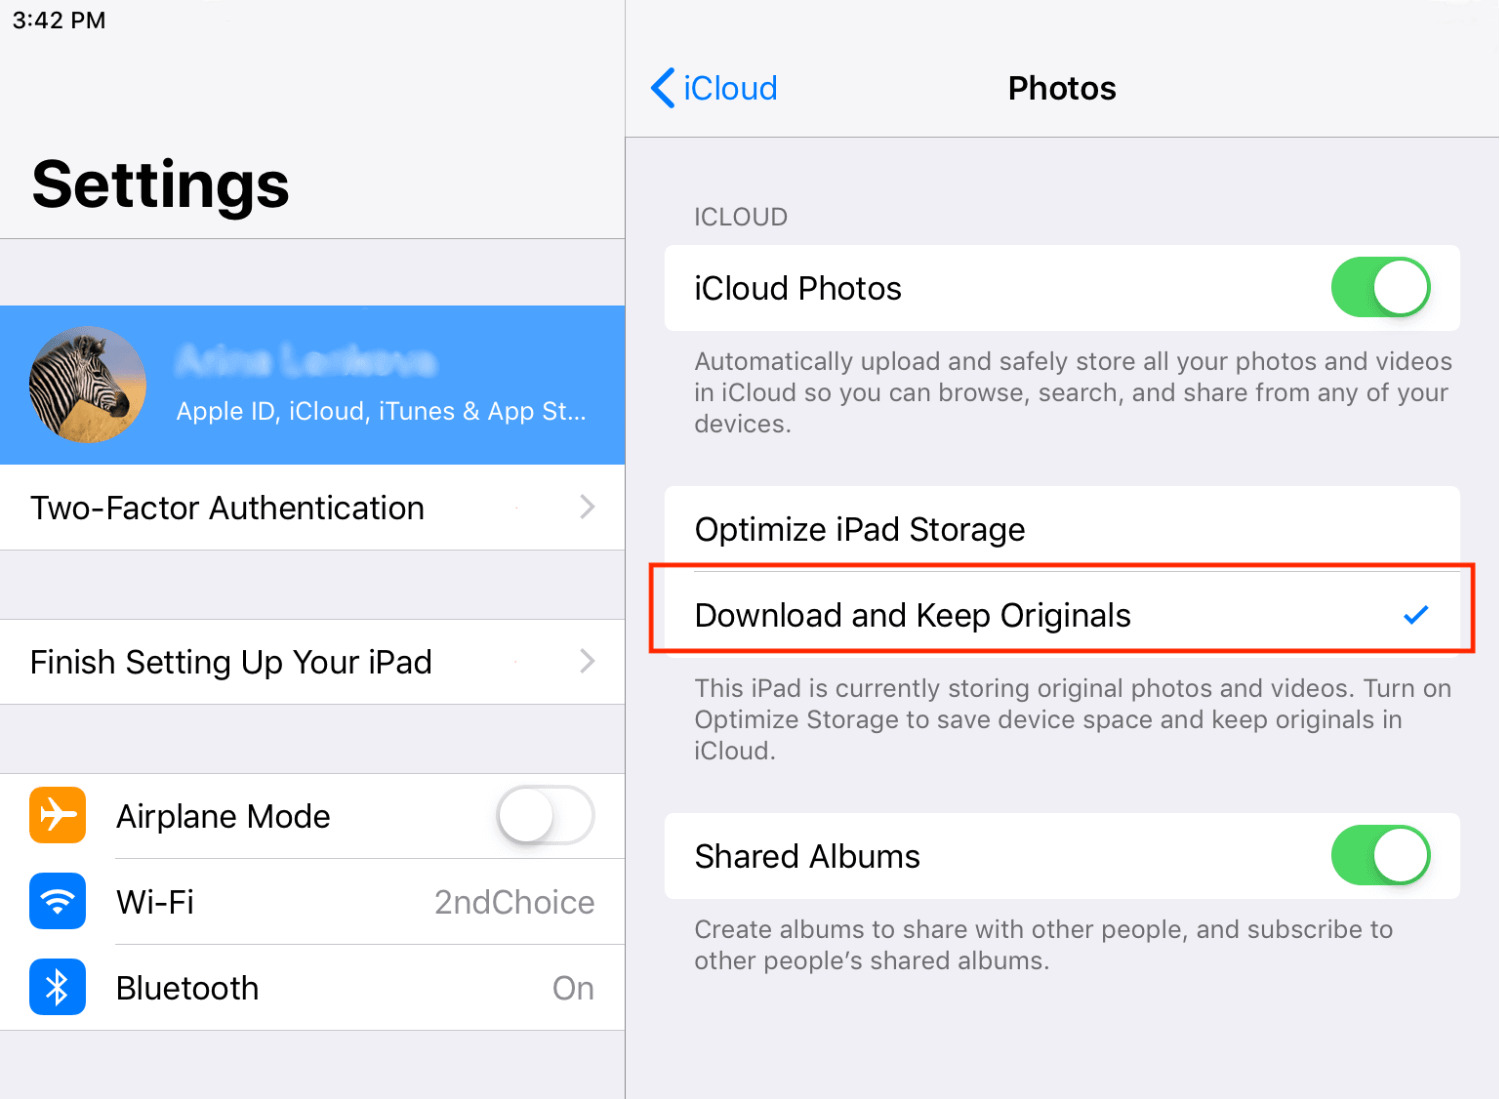
It’s important to ensure that the Photos app is fully synced with iCloud to download the photos you want. You can check the sync status by going to the settings on your device and selecting your Apple ID profile. From there, tap on “iCloud” or “iCloud Photos” to verify that the app is syncing with iCloud.
With the Photos app open and synced to iCloud, you’re now ready to move on to the next step and select multiple photos for downloading.
Step 2: Select Multiple Photos
After opening the Photos app and ensuring it is synced with iCloud, the next step is to select the multiple photos you want to download.
To select multiple photos on an iPhone or iPad, navigate to the album or photo grid where the desired photos are located. Once there, tap on the “Select” button located in the top right corner of the screen. This will enable the selection mode, allowing you to choose multiple photos. You can now tap on each photo you want to download to select them. Selected photos will be highlighted with a blue checkmark.
If you’re using a Mac, the process is slightly different. In the Photos app on your Mac, click on the “Photos” tab in the sidebar to access your photo library. Next, hold down the Command key on your keyboard and click on the individual photos you want to select. Alternatively, you can click and drag your cursor to select a group of photos at once.
Keep in mind that you can select as few or as many photos as you’d like, depending on your needs. Whether you want to download a handful of images or an entire album, the Photos app allows for ultimate flexibility in selecting the photos you want.
If you’re unsure which photos you want to select, you can also use the search feature in the Photos app to narrow down your selection based on keywords, dates, locations, or even people. This can be especially useful if you have a large photo library and need to find specific photos quickly.
Now that you’ve selected the multiple photos you want to download from iCloud, it’s time to move on to the next step and share them to the iCloud Drive.
Step 3: Tap on the Share Button
Once you have selected the multiple photos you want to download from iCloud, the next step is to tap on the share button to initiate the download process.
On an iPhone or iPad, the share button is represented by a square box with an upward-facing arrow. It is typically located at the bottom left or bottom center of the screen when you are in selection mode. Tap on this share button to bring up the sharing options.
On a Mac, the share button can be found in the top right corner of the Photos app window. It is denoted by a square box with an upward-facing arrow. Click on this share button to reveal the sharing options.
After tapping on the share button, a menu will appear with various sharing options. These options may vary depending on the apps you have installed on your device. Scroll through the menu to find and tap on the “Save to Files” option. This will allow you to save the selected photos to your iCloud Drive.
Alternatively, on a Mac, you may see the option to directly select “iCloud Drive” from the share menu. Click on this option to proceed to the next step.
By tapping on the share button and selecting the appropriate option, you are ready to choose the destination folder where the downloaded photos will be saved on iCloud Drive. This brings us to the next step.
Step 4: Choose the iCloud Drive Option
After tapping on the share button in the Photos app and selecting the “Save to Files” or “iCloud Drive” option, the next step is to choose the iCloud Drive as the destination for the downloaded photos.
On an iPhone or iPad, you will be presented with a list of available locations to save the photos. Scroll through the options until you find and select “iCloud Drive” from the list. This will ensure that the downloaded photos are stored in your iCloud storage instead of your device’s local storage.
On a Mac, when you click on the share button and select “iCloud Drive”, a window will appear allowing you to choose the location within your iCloud Drive where the photos will be saved. You can navigate through the folders in your iCloud Drive and select the desired location or create a new folder to store the photos.
By choosing the iCloud Drive option as the destination for the downloaded photos, you are ensuring that they are safely stored in the cloud, accessible across your Apple devices, and won’t take up unnecessary space on your device.
Now that you have selected the iCloud Drive as the destination, it’s time to proceed to the next step and select the specific folder within iCloud Drive where the photos will be saved.
Step 5: Select a Destination Folder
After choosing the iCloud Drive as the destination for the downloaded photos, the next step is to select a specific folder within iCloud Drive where the photos will be saved.
On an iPhone or iPad, you will see a list of folders within your iCloud Drive. You can either choose an existing folder by tapping on it or create a new folder to organize your downloaded photos. To create a new folder, tap on the “New Folder” option and give it a suitable name. Once you have selected or created the folder, tap on the “Save” button to proceed.
On a Mac, when you select the iCloud Drive as the destination, a window will appear displaying your iCloud Drive folders. You can navigate through the folders and select the desired destination folder by clicking on it. If you want to create a new folder, right-click and select the “New Folder” option, then name it appropriately. Finally, click on the “Save” button to continue.
Selecting a destination folder within iCloud Drive helps to keep your downloaded photos organized and easily accessible. It allows you to categorize and group your photos based on your preferences or specific events.
Now that you have chosen the destination folder, it’s time to move on to the next step and start the download process for the selected photos.
Step 6: Start the Download Process
With the destination folder selected within iCloud Drive, it’s now time to initiate the download process for the selected photos.
On an iPhone or iPad, after tapping the “Save” button in the previous step, the Photos app will start processing the photos for download. You will see a progress indicator indicating the status of the download. Depending on the number and size of the selected photos, the download process may take some time. Once the download is complete, you will receive a notification confirming the successful download of the photos to your chosen folder in iCloud Drive.
In the case of a Mac, after clicking the “Save” button to select the destination folder, the Photos app will begin exporting the photos to the chosen location within your iCloud Drive. A progress bar will appear, indicating the status of the download. Once the download is finished, you can close the Photos app and access the downloaded photos in your iCloud Drive at any time.
It’s important to ensure that you have a stable internet connection during the download process to ensure a smooth and uninterrupted transfer of the photos to iCloud Drive.
Now that the download process has been initiated, let’s move on to the final step and explore how to access the downloaded photos on iCloud Drive.
Step 7: Access the Downloaded Photos on iCloud Drive
Once the download process is complete, it’s time to access the downloaded photos in your iCloud Drive.
On an iPhone or iPad, you can access your iCloud Drive by going to the Files app. Locate and tap on the Files app icon on your home screen, which resembles a blue folder. Once in the Files app, tap on the “iCloud Drive” option to open it. From there, navigate to the folder you selected as the destination for the downloaded photos. Tap on the folder to view the photos and browse through them. You can then choose to view, edit, or share the photos as desired.
On a Mac, accessing your iCloud Drive is equally straightforward. Click on the “Finder” icon in your dock or use the “Command + Space” keyboard shortcut to open Spotlight Search. Type in “iCloud Drive” and press “Enter” to open the iCloud Drive folder. Navigate to the destination folder you selected during the download process, and you will find the downloaded photos there. You can now view, edit, or organize the photos on your Mac.
Remember, the downloaded photos on iCloud Drive will sync across all your Apple devices, allowing you to access them on your Mac, iPhone, iPad, or even on the iCloud website.
Now that you have successfully accessed the downloaded photos on your iCloud Drive, you can enjoy and manage them as you see fit. Whether you want to share them with others, create albums, or keep them as a backup, your downloaded photos are safely stored in the cloud and readily accessible whenever you need them.
Conclusion
Downloading multiple photos from iCloud may seem like a daunting task at first, but with the right steps, it becomes a seamless process. In this guide, we have walked you through the seven simple steps to download multiple photos from iCloud and access them on your Apple devices.
By opening the Photos app, selecting multiple photos, tapping on the share button, choosing the iCloud Drive option, selecting a destination folder, and starting the download process, you can effortlessly transfer your photos to iCloud Drive. Finally, accessing the downloaded photos on iCloud Drive allows you to view, organize, and share them across your Apple devices.
Remember to frequently sync your Photos app with iCloud to ensure that all your updated photos are available for download. Additionally, make sure you have a stable internet connection during the download process to avoid any interruptions.
Now that you have mastered the process of downloading multiple photos from iCloud, you have the freedom to organize and share your cherished memories at your fingertips. Enjoy the convenience and flexibility that iCloud offers, and never worry about losing your precious photos again.
So, go ahead and start downloading those multiple photos from iCloud. With these steps, you’ll be able to preserve and enjoy your memories while taking advantage of the power of iCloud storage.