Introduction
Welcome to this step-by-step guide on how to download photos from iCloud to your PC. iCloud is a cloud storage and synchronization service provided by Apple, allowing users to store and access data across multiple devices. If you have a collection of photos stored in your iCloud account and want to transfer them to your PC for backup or further editing, this guide will walk you through the process.
Downloading photos from iCloud to your PC ensures that you have a local copy of your precious memories. It provides an additional layer of security, as you won’t have to solely rely on iCloud for safekeeping. Plus, having your photos on your PC offers the convenience of easy accessibility and the ability to edit them with a variety of software options.
While the process may seem daunting at first, with a few simple steps, you’ll have your iCloud photos safely downloaded to your PC in no time. We’ll guide you through the process, ensuring that you understand each step. Before you begin, make sure you have an active iCloud account and a stable internet connection.
Let’s dive in and explore how to download photos from iCloud to your PC!
Step 1: Enable iCloud Photos on your iPhone
The first step in downloading photos from iCloud to your PC is to ensure that iCloud Photos is enabled on your iPhone. By enabling this feature, your photos will automatically sync with your iCloud account, making them accessible from any device.
To enable iCloud Photos on your iPhone, follow these simple steps:
- Open the Settings app on your iPhone.
- Tap on your name at the top of the screen.
- Select “iCloud” from the menu.
- Tap on “Photos.”
- Toggle on the switch next to “iCloud Photos” to enable it. You may also choose to enable “Optimize iPhone Storage” to save space on your device. This option will store the full-resolution versions of your photos in iCloud, while keeping smaller, optimized versions on your iPhone.
Once you’ve enabled iCloud Photos on your iPhone, it will begin syncing your photo library with your iCloud account. Depending on the number of photos you have, this initial sync may take some time. Make sure you have a stable internet connection and leave your device connected to power to ensure a smooth sync process.
Now that you have iCloud Photos enabled on your iPhone, you’re ready to move on to the next step: installing iCloud for Windows on your PC.
Step 2: Install iCloud for Windows on your PC
In order to download photos from iCloud to your PC, you’ll need to install iCloud for Windows. This software allows you to access your iCloud photos and other files directly from your PC. Follow the steps below to install iCloud for Windows:
- Open a web browser on your PC and navigate to the Apple website.
- Click on the “Download” button to download the iCloud for Windows installer.
- Once the download is complete, locate the installer file and double-click on it to begin the installation process.
- Follow the on-screen instructions to install iCloud for Windows. You may be prompted to agree to the terms and conditions and enter your Apple ID credentials.
- Choose the features you want to enable, such as iCloud Drive, Photos, Mail, Contacts, and Calendar. For downloading photos, make sure the “Photos” option is selected.
- Customize any additional settings according to your preferences.
- Click on the “Install” button to start the installation process.
- Wait for the installation to complete.
- Once the installation is finished, click on the “Finish” button to exit the installer.
Now that iCloud for Windows is successfully installed on your PC, you’re ready to move on to the next step: signing in to iCloud on your PC.
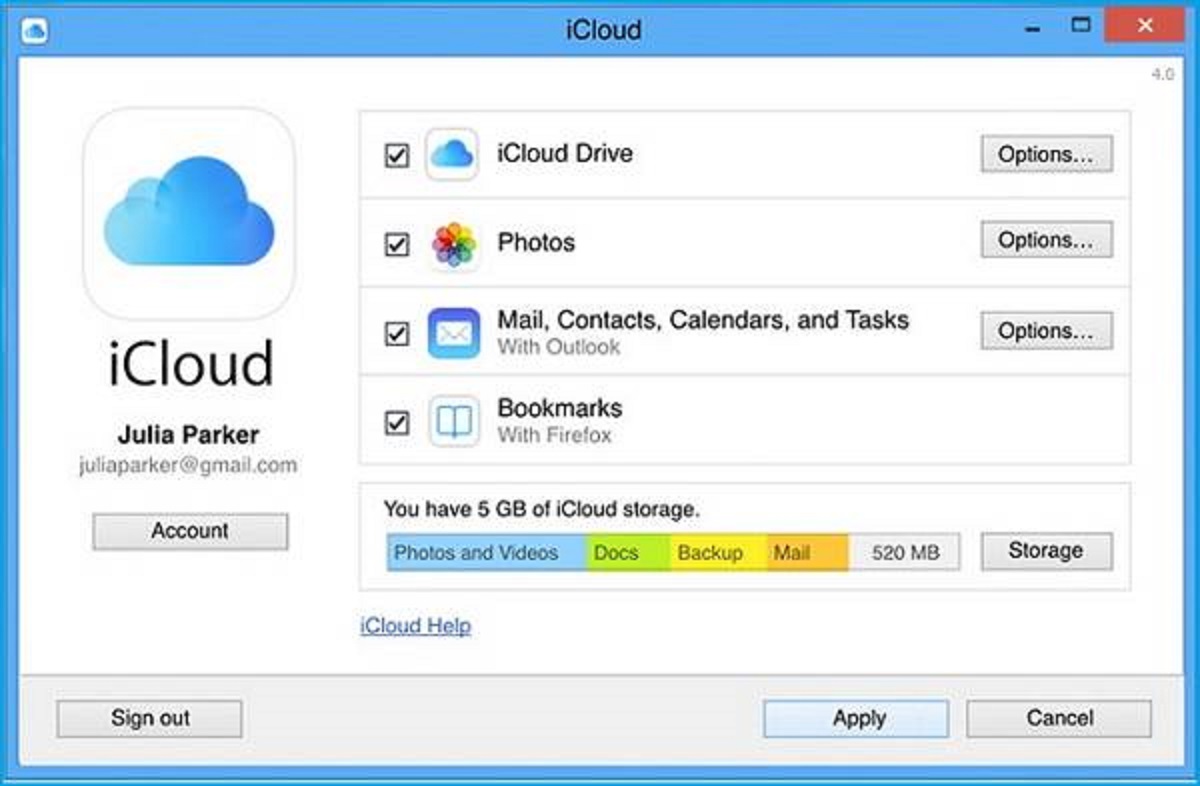
Step 3: Sign in to iCloud on your PC
After installing iCloud for Windows, the next step is to sign in to your iCloud account on your PC. By signing in, you’ll be able to access your iCloud photos and other files directly from your computer. Follow these steps to sign in to iCloud on your PC:
- Open the iCloud for Windows application on your PC. You can find it by searching for “iCloud” in the Start Menu.
- Enter your Apple ID and password in the provided fields.
- Click on the “Sign In” button.
- You may be asked to enter a verification code if you have two-factor authentication enabled on your Apple ID. Follow the on-screen instructions to complete the verification process.
- Once you’re signed in, you’ll see a list of iCloud features that you can enable or disable. Make sure the “Photos” option is checked.
- Click on the “Apply” button to save your changes.
Now that you’re signed in to iCloud on your PC, you can proceed to the next step: choosing iCloud Photos for download.
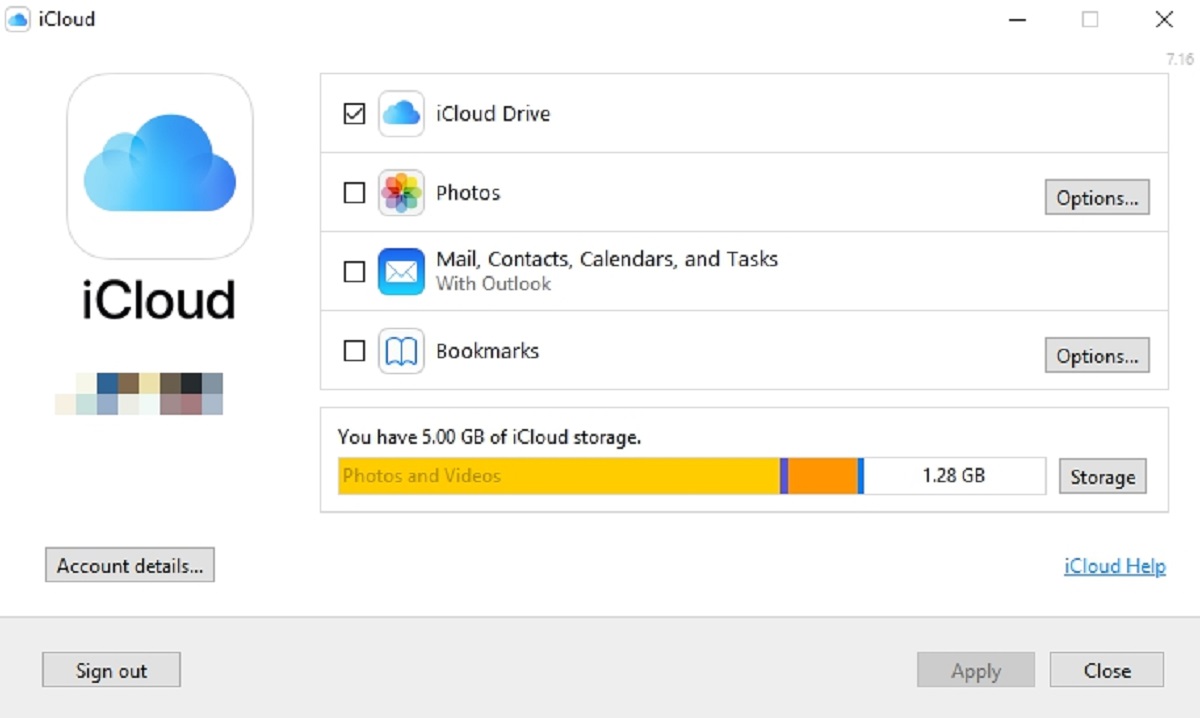
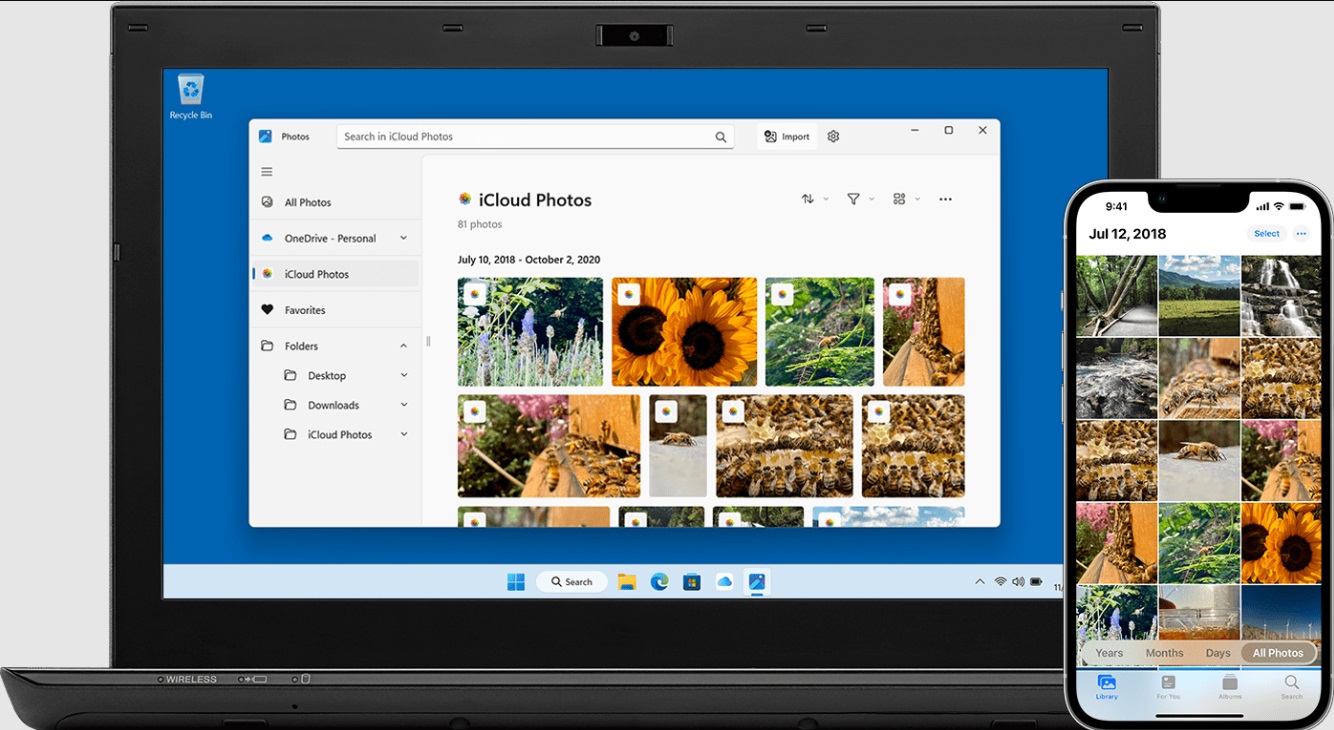
Step 4: Choose iCloud Photos for download
Once you’ve signed in to iCloud on your PC, the next step is to choose the iCloud Photos option for download. This will allow you to access your photos stored in iCloud and download them to your computer. Follow these steps to select iCloud Photos for download:
- Open the iCloud for Windows application on your PC.
- Click on the “Options” button next to the Photos option.
- A new window will appear with several options. Make sure the “Download new photos and videos to my PC” option is checked.
- You can also choose the location where you want to store your iCloud Photos on your computer. By default, they will be saved in the “Pictures” folder. If you want to change the location, click on the “Change” button and select a different folder.
- Click on the “Done” button to save your changes and close the window.
By selecting the “Download new photos and videos to my PC” option, any new photos or videos you capture with your iPhone or upload to iCloud will automatically be downloaded to your computer. This ensures that your local copy of iCloud Photos stays up to date.
With iCloud Photos selected for download, you’re now ready to move on to the next step: selecting the specific photos you want to download.
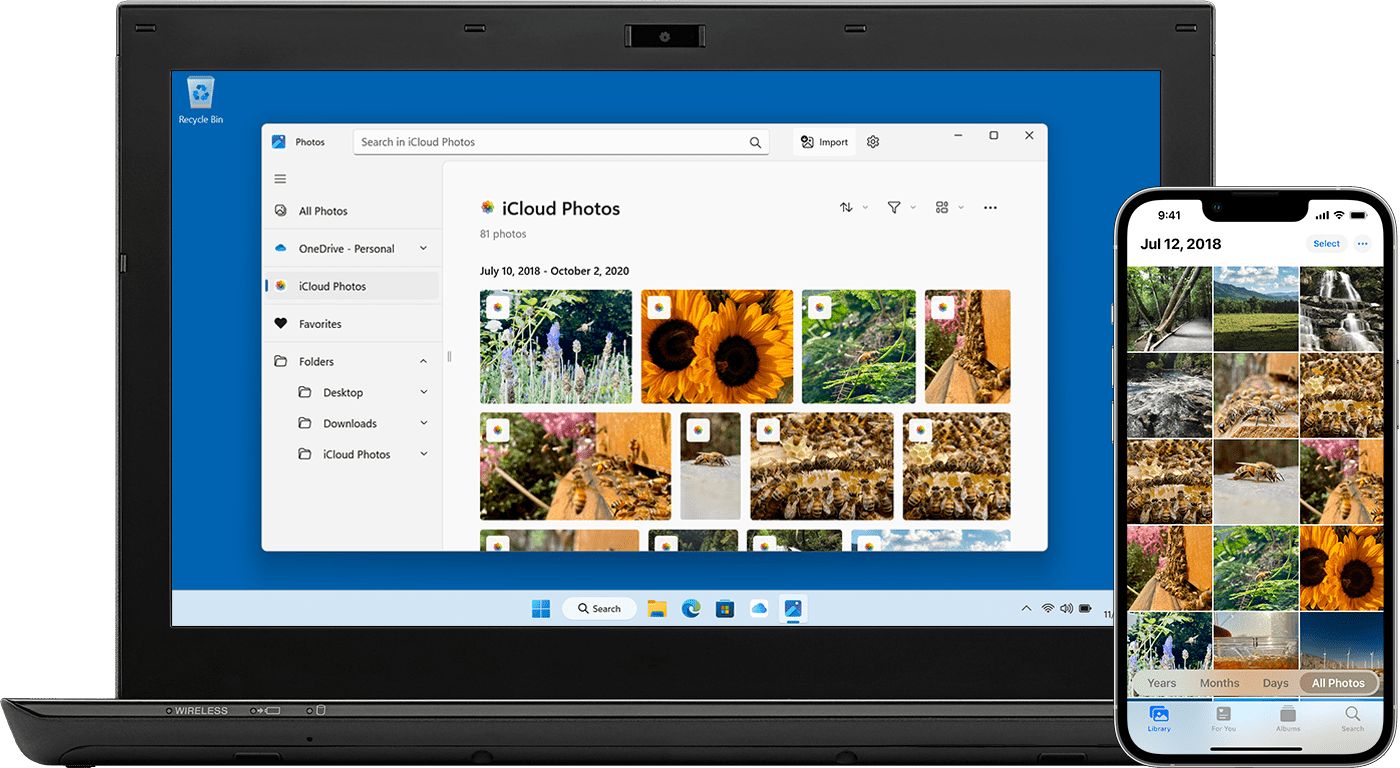
Step 5: Select the photos you want to download
Now that you have iCloud Photos set up for download on your PC, it’s time to select the specific photos you want to download. You have the flexibility to choose individual photos or entire albums for downloading. Follow these steps to select the photos you want to download:
- Open the iCloud for Windows application on your PC.
- Click on the “Photos” icon to open the iCloud Photos folder.
- You will see all your photos and albums listed in the iCloud Photos folder.
- To select individual photos, simply click on each photo you want to download. Selected photos will be highlighted or checked.
- If you want to download an entire album, right-click on the album and select the “Download” option.
- If you want to select multiple photos or albums at once, hold down the Ctrl key (Windows) or the Command key (Mac) while clicking on the desired items.
Take your time to browse through your iCloud Photos and select the ones you want to download. You can choose to download them all or pick specific photos based on your preferences.
Once you have selected the photos you want to download, you’re ready to proceed to the final step: downloading the selected photos to your PC.
Step 6: Download the selected photos to your PC
After selecting the photos you want to download from your iCloud account, it’s time to initiate the download process. By following these steps, you’ll be able to download the selected photos to your PC:
- Open the iCloud for Windows application on your PC.
- Click on the “Photos” icon to open the iCloud Photos folder.
- Ensure that the selected photos or albums you want to download are visible in the iCloud Photos folder.
- Click on the “Download” button located at the top of the iCloud Photos window.
- A pop-up window will appear, asking you to specify the location where you want to save the downloaded photos.
- Choose the desired folder or create a new one for the downloaded photos.
- Click on the “OK” or “Download” button to start the download process.
- Wait for the download to complete. The duration will depend on the number and size of the selected photos.
- Once the download is finished, you can access the downloaded photos in the designated folder on your PC.
By following these steps, you have successfully downloaded the selected photos from your iCloud account to your PC. Now you can safely store, edit, and organize them on your computer for easy access and future use.
Congratulations! You have completed all the steps required to download your photos from iCloud to your PC. Enjoy exploring your captured memories and utilizing them in various ways!
Conclusion
Downloading photos from iCloud to your PC is a straightforward process that ensures you have a local backup of your precious memories. By following the steps outlined in this guide, you can easily transfer your photos and have them readily accessible on your computer.
Enabling iCloud Photos on your iPhone, installing iCloud for Windows on your PC, signing in to your iCloud account, selecting iCloud Photos for download, and choosing the specific photos you want to download are all essential steps in the process. Finally, downloading the selected photos to your PC completes the journey.
Having your photos on your PC provides several benefits, including easy accessibility, the ability to edit them using a variety of software options, and an extra layer of security with a local backup. You can now enjoy the freedom to organize, share, and use your photos in various ways without solely relying on iCloud.
We hope this guide has been helpful in assisting you in the process of downloading photos from iCloud to your PC. Remember, preserving your memories in multiple locations is always a wise choice. So, take the time to safeguard your photos and cherish them for years to come.