Introduction
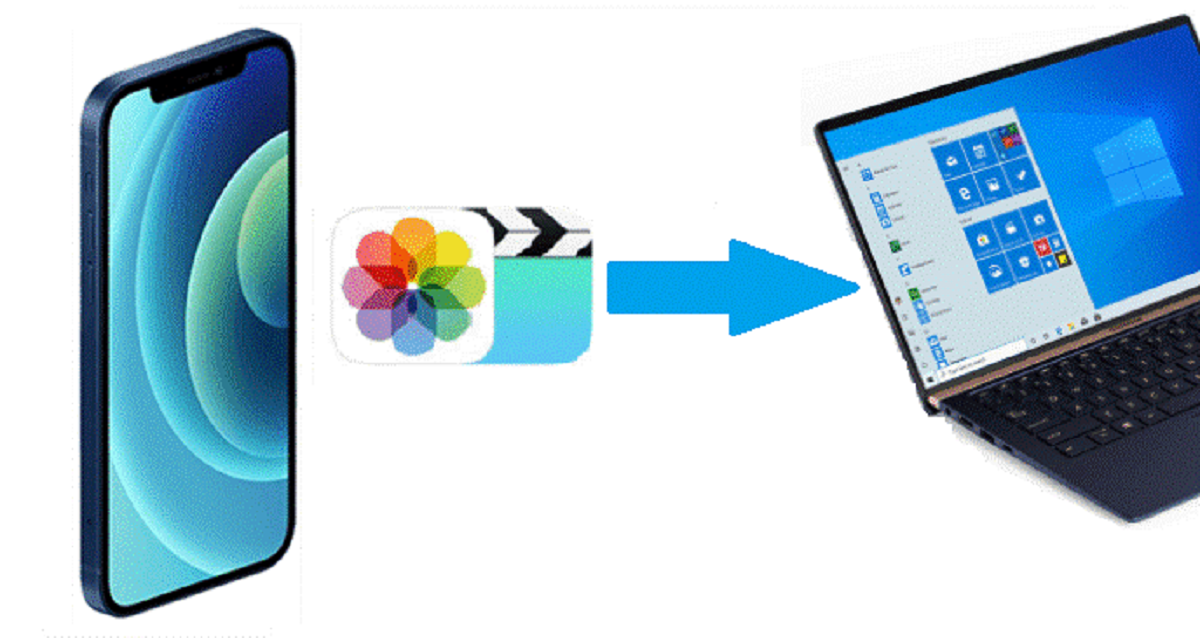
Transferring photos from an iPhone to a PC running Windows 10 is a common need for many iPhone users. Whether you want to free up space on your iPhone by transferring photos to your computer, or you simply need to edit or share your photos on a larger screen, knowing how to transfer photos effectively is essential.
Fortunately, there are multiple methods you can use to transfer photos from your iPhone to a Windows 10 PC. In this article, we will explore five different methods that will allow you to easily transfer your precious memories.
Each method has its own advantages and considerations, so it’s important to choose the method that suits your specific needs and preferences. Whether you prefer a wired connection, want to use a cloud-based service, or opt for a built-in Windows app, we’ve got you covered.
So, if you’re ready to take control of your photo library and transfer your iPhone photos to your PC, let’s dive into the different methods and find the one that works best for you.
Method 1: Using a USB Cable
One of the most straightforward and reliable methods to transfer photos from your iPhone to a Windows 10 PC is by using a USB cable. This method allows for a direct and secure connection between your devices, ensuring a fast and efficient transfer process.
To get started, you will need a Lightning to USB cable, which is included with your iPhone. Once you have the cable, follow these steps:
- Connect your iPhone to your Windows 10 PC using the Lightning to USB cable.
- Unlock your iPhone and, if prompted, trust the computer you are connecting to.
- On your Windows 10 PC, open File Explorer by pressing the Windows key and E simultaneously.
- In File Explorer, you should see your iPhone listed under “This PC” or “Devices and Drives.” Click on your iPhone to open it.
- Within your iPhone folder, locate the “DCIM” folder. This folder contains all the photos and videos stored on your iPhone.
- Select the photos you want to transfer by either dragging and dropping them to a desired folder on your PC or by copying and pasting them.
- Wait for the transfer process to complete. The speed of the transfer will depend on the size and number of photos being transferred.
Once the transfer is complete, you can find your photos in the destination folder on your Windows 10 PC, ready to be edited, shared, or organized as you wish.
Using a USB cable to transfer photos offers a direct and reliable method, especially if you have a large number of photos to transfer or if you prefer not to rely on an internet connection. However, keep in mind that this method requires physically connecting your devices, so it may not be as convenient if you need to transfer photos frequently or on the go.
Method 2: Using iTunes
If you prefer to use software to transfer photos from your iPhone to your Windows 10 PC, iTunes is a reliable option. iTunes is a media management and syncing software developed by Apple, and it allows you to sync your iPhone photos to your computer with ease.
Here’s how you can transfer photos using iTunes:
- Connect your iPhone to your Windows 10 PC using the Lightning to USB cable.
- Open iTunes on your computer. If you don’t have iTunes installed, you can download it from the Apple website.
- In iTunes, click on the device icon located in the upper-left corner of the window. This will take you to the device summary page.
- Select the “Photos” tab from the options listed on the left-hand side.
- Check the box next to “Sync Photos” and choose the folder or app you want to sync photos from.
- Select the albums, events, or faces you want to sync to your computer.
- Click on the “Apply” or “Sync” button located at the bottom-right corner of the window to start the syncing process.
After the syncing process is complete, you can find your iPhone photos in the selected folder or app on your Windows 10 PC. From there, you can access, edit, or organize your photos as needed.
Using iTunes for photo transfer provides a convenient way to manage and sync your iPhone photos with your Windows 10 PC. However, it’s important to note that iTunes is primarily designed for media management and syncing, so the interface and options may feel overwhelming if you’re only looking to transfer a few photos. Additionally, iTunes is no longer included by default on newer versions of Windows, so you may need to manually download and install it if you haven’t done so already.
Method 3: Using iCloud Photos
If you are looking for a wireless and automated way to transfer photos from your iPhone to your Windows 10 PC, using iCloud Photos is an excellent option. iCloud Photos is Apple’s cloud-based storage and syncing service that allows you to access your photos and videos across all your devices.
Here’s how you can transfer photos using iCloud Photos:
- Ensure that your iPhone is connected to a stable Wi-Fi network and that you have iCloud Photos enabled on your iPhone.
- On your Windows 10 PC, open a web browser and navigate to the iCloud website (www.icloud.com).
- Sign in to your iCloud account using your Apple ID and password.
- Once you are logged in, click on the “Photos” icon to access your iCloud Photos.
- Browse through your photos and select the ones you want to download to your PC.
- Click on the download button (looks like a cloud with an arrow pointing down) to download the selected photos to your PC.
After the download is complete, you can find your iCloud Photos in the designated download folder on your Windows 10 PC. From there, you can open, edit, or organize them according to your preferences.
Using iCloud Photos provides a seamless and wireless way to transfer and access your iPhone photos on your Windows 10 PC. It eliminates the need for cables and manual transfers, as your photos are automatically synced across all your devices. However, keep in mind that you need to have sufficient iCloud storage to accommodate your photos, and a stable internet connection is required for seamless syncing.
Method 4: Using Windows Photos App
If you want to transfer photos from your iPhone to your Windows 10 PC without the need for additional software or cloud services, you can utilize the built-in Windows Photos app. The Windows Photos app allows you to import and organize your photos with ease.
Here’s how you can transfer photos using the Windows Photos app:
- Connect your iPhone to your Windows 10 PC using the Lightning to USB cable.
- On your Windows 10 PC, open the Windows Photos app. You can do this by searching for “Photos” in the Start menu.
- In the Photos app, click on the “Import” button located at the top right corner of the window. The app will automatically detect your connected iPhone.
- Select the photos you want to transfer or choose “Import All” to import all the photos from your iPhone.
- Choose the destination folder where you want the imported photos to be saved on your PC.
- Click on the “Continue” button to start the import process.
Once the import process is complete, you can access your iPhone photos in the destination folder on your Windows 10 PC using the Windows Photos app or any other photo viewing/editing software.
Using the Windows Photos app offers a simple and straightforward way to transfer and manage your iPhone photos on your Windows 10 PC. It eliminates the need for additional software or complicated configurations. However, keep in mind that the Windows Photos app doesn’t offer the same level of advanced editing and organizing features as other dedicated photo management software.
Method 5: Using File Explorer
If you prefer a more hands-on approach and want full control over the file transfer process, you can use File Explorer, the built-in file management tool in Windows 10, to transfer photos from your iPhone to your PC. This method allows you to manually locate and copy the photos from your iPhone to your desired folder on your PC.
Here’s how you can transfer photos using File Explorer:
- Connect your iPhone to your Windows 10 PC using the Lightning to USB cable.
- On your Windows 10 PC, open File Explorer by pressing the Windows key and E simultaneously.
- In File Explorer, you should see your iPhone listed under “This PC” or “Devices and Drives.” Click on your iPhone to open it.
- Within your iPhone folder, locate the “DCIM” folder. This folder contains all the photos and videos stored on your iPhone.
- Select the photos you want to transfer by either dragging and dropping them to a desired folder on your PC or by copying and pasting them.
- Wait for the transfer process to complete. The speed of the transfer will depend on the size and number of photos being transferred.
Once the transfer is complete, you can find your photos in the destination folder on your Windows 10 PC. From there, you can view, edit, or organize your photos according to your preferences.
Using File Explorer provides a hands-on and flexible way to transfer photos from your iPhone to your Windows 10 PC. It gives you full control over the transfer process and allows you to manually organize the photos in your preferred folder structure. However, keep in mind that this method might not be as automated or convenient as using dedicated software or cloud services.
Conclusion
Transferring photos from your iPhone to your Windows 10 PC may seem daunting at first, but with these five methods, you can easily transfer your precious memories without hassle. Each method offers its own advantages and considerations, allowing you to choose the one that best suits your needs and preferences.
Using a USB cable provides a direct and reliable connection, ensuring a fast and efficient transfer process. iTunes offers a comprehensive syncing solution for managing your media library. iCloud Photos provides a wireless and automatic way to sync your photos across all your devices. The Windows Photos app offers a convenient built-in option for importing and organizing your photos. Lastly, File Explorer gives you complete control over the file transfer process, allowing for manual organization according to your preferences.
Whether you prefer a wired connection, wireless syncing, or utilizing built-in Windows features, these methods ensure that you can easily transfer your iPhone photos to your Windows 10 PC. Consider your specific needs, such as the number of photos, the frequency of transfers, and the desired level of automation, to determine the most suitable method for you.
Now that you have learned these various methods, you can confidently manage and transfer your iPhone photos to your Windows 10 PC. Free up space on your iPhone, edit your photos on a larger screen, and effortlessly organize your precious memories. With these methods at your disposal, your photo transfer process will be seamless and efficient, allowing you to enjoy your photos in new and exciting ways.