Introduction
Welcome to the digital age where capturing precious moments of our lives has become easier than ever. With our smartphones, specifically iPhones, acting as our trusty companions, we can effortlessly snap photos of our adventures, cherished memories, and special moments. However, transferring these photos from your iPhone to a PC and being able to view them can sometimes be a confusing and laborious task.
In this article, we will explore various methods that will enable you to seamlessly view your iPhone photos on your PC. Whether you prefer using iTunes, Windows Explorer, iCloud, Google Photos, or Dropbox, we have got you covered with step-by-step guidelines. So, let’s dive in and find the method that suits you best.
It’s important to note that all the methods outlined in this article are compatible with both Windows and Mac systems. So, regardless of your operating system, you will be able to follow along and transfer those beautiful memories to your PC.
Now, let’s get started and discover the different ways you can transfer and view your iPhone photos on your PC.
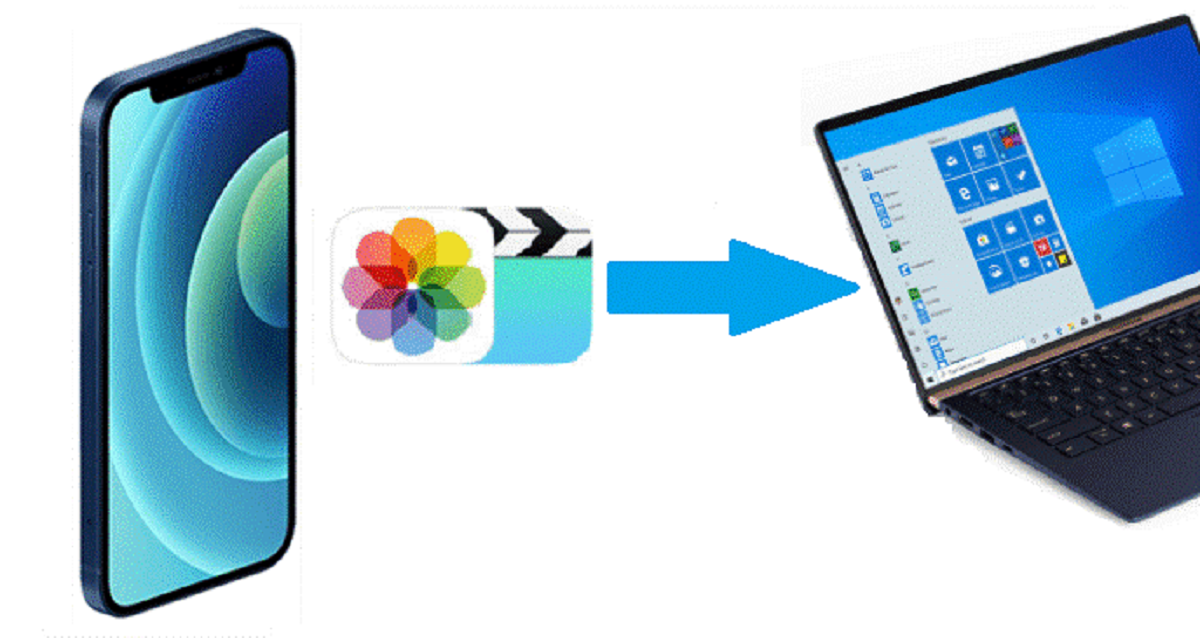
Method 1: Using iTunes
iTunes, Apple’s multimedia software, is not only a platform for managing your music and videos but also offers a convenient way to transfer and view your iPhone photos on your PC. Follow these steps to get started:
- Connect your iPhone to your PC using a USB cable. iTunes should automatically open, but if it doesn’t, launch iTunes manually.
- In the top-left corner of the iTunes window, click on the iPhone icon to open the device settings.
- Click on the “Photos” tab located in the left sidebar.
- Check the box next to “Sync Photos” to enable photo syncing with your PC.
- Select the desired folder or application from which you want to sync your photos.
- Choose whether you want to sync your entire photo library or specific albums or events.
- Finally, click on the “Apply” or “Sync” button to start transferring the photos from your iPhone to your PC.
Once the syncing process is complete, you can open the folder or application you selected earlier to view your iPhone photos on your PC.
Using iTunes to transfer and view your iPhone photos on your PC provides a straightforward method, but it requires the installation of iTunes on your computer. If you already have iTunes installed, this method can be a reliable option for managing your photo library.
Now that you know how to use iTunes to transfer and view your iPhone photos on your PC, let’s explore another method that doesn’t require any additional software.
Method 2: Using Windows Explorer
If you prefer a more direct approach without relying on any additional software, you can use Windows Explorer to view your iPhone photos on your PC. Simply follow these steps:
- Connect your iPhone to your PC using a USB cable.
- On your PC, open Windows Explorer by pressing the “Windows” key and “E” together, or by right-clicking the Start button and selecting “File Explorer”.
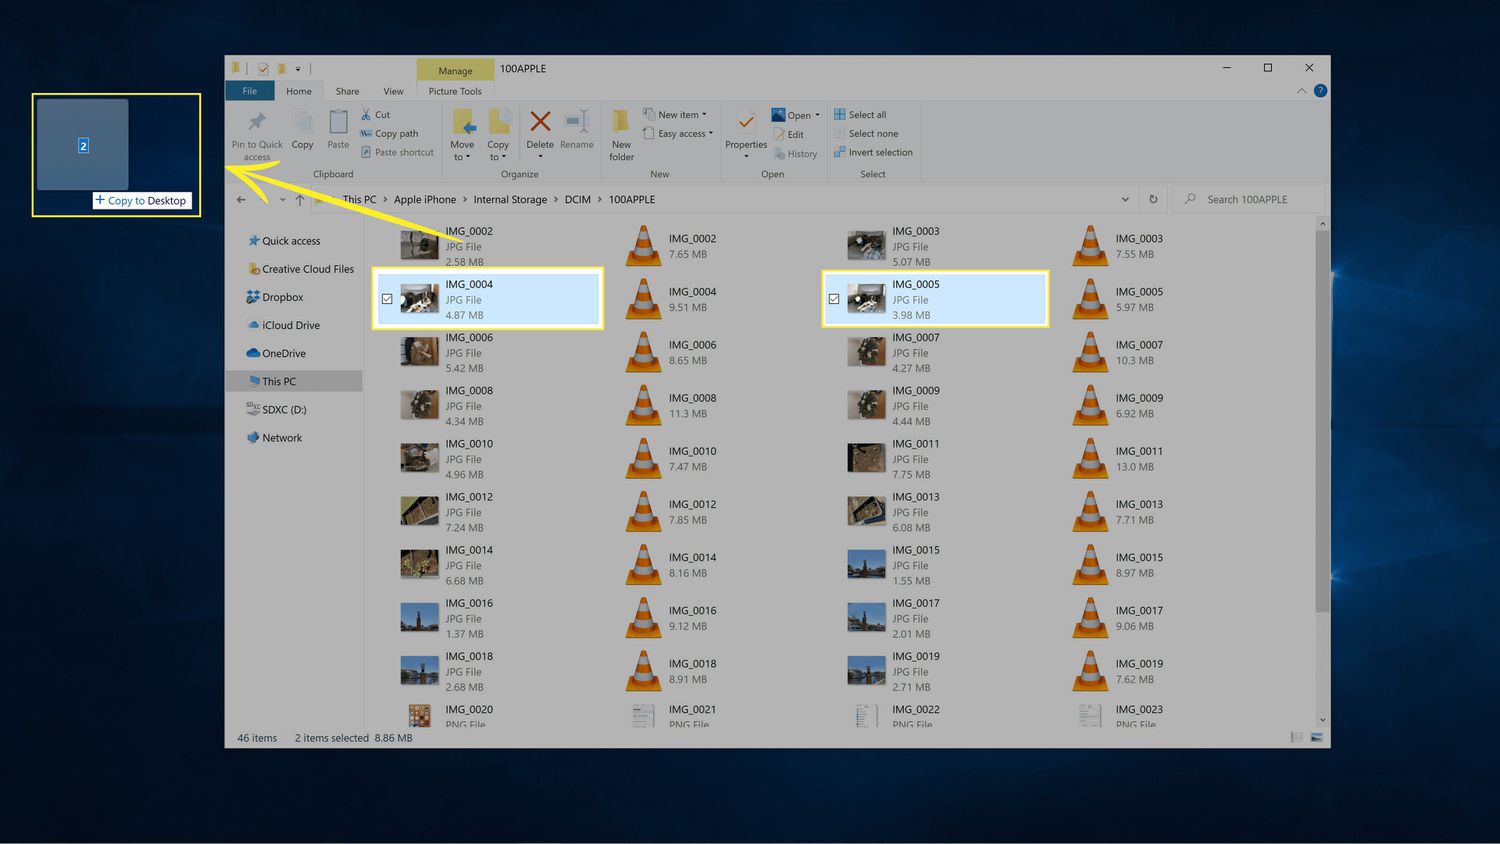
- In the left sidebar of Windows Explorer, under “This PC,” you should see your iPhone listed as a device. Click on it to open your iPhone’s file system.
- Within your iPhone’s file system, navigate to the “DCIM” folder, which stands for Digital Camera Images. This is where your iPhone stores all the photos and videos.
- Open the “DCIM” folder and you will find more folders with names like “100APPLE”, “101APPLE”, and so on. These folders contain your photos and videos.
- Select the desired folder to view the photos it holds.
- You can now copy the photos you want to your PC by selecting them and using the right-click menu options such as “Copy” and then pasting them to the desired location on your PC.
With Windows Explorer, you can easily navigate through your iPhone’s file system and directly access your photos without the need for any additional software. This method provides a simple and efficient way to view and transfer your iPhone photos to your PC.
Now that you know how to use Windows Explorer to view your iPhone photos on your PC, let’s move on to another method that offers cloud-based convenience.
Method 3: Using iCloud
If you have an iCloud account and prefer a more cloud-based approach, you can use iCloud to view and access your iPhone photos on your PC. Follow these steps to get started:
- On your iPhone, go to “Settings” and tap on your name at the top to access your Apple ID settings.
- Tap on “iCloud” and ensure that the “Photos” option is enabled.
- On your PC, open a web browser and visit icloud.com.
- Sign in to your iCloud account using your Apple ID and password.
- Click on the “Photos” icon to access your iCloud Photos.
- Here, you can browse through your photo library, organize them into albums, and even download them to your PC.
- To download a photo, simply click on it to view it in full size, and then click on the “Download” icon in the top-right corner of the photo.
Using iCloud provides a seamless way to access your iPhone photos on your PC, as it automatically syncs your photos across devices. However, it requires an active iCloud account and a stable internet connection. Additionally, it offers limited storage space for free, and you may need to upgrade your iCloud storage if you have a large photo library.
Now that you know how to use iCloud to view your iPhone photos on your PC let’s explore another method that offers cloud storage with cross-platform accessibility.
Method 4: Using Google Photos
If you’re looking for a cross-platform solution that offers cloud storage and easy accessibility, Google Photos is a great option to view and manage your iPhone photos on your PC. Here’s how you can use Google Photos:
- Download the Google Photos app from the App Store and sign in with your Google account on your iPhone.
- Open the app and follow the prompts to enable the backup and sync feature. This will automatically upload your iPhone photos to your Google Photos library in the cloud.
- On your PC, open a web browser and visit photos.google.com.
- Sign in to your Google account using the same credentials as the Google Photos app on your iPhone.
- You will now have access to your entire iPhone photo library through Google Photos. You can browse, search, organize, and even edit your photos directly from the web browser.
- To download a photo from Google Photos to your PC, simply open the photo and click on the three-dot menu icon, then select “Download”.
Google Photos offers unlimited free storage for high-quality compressed photos, and if you prefer to store your photos in their original quality, you may need to upgrade to a paid Google One storage plan.
With Google Photos, you get the convenience of cloud storage, easy accessibility, and the ability to view and manage your iPhone photos across different platforms.
Now that you know how to use Google Photos to view your iPhone photos on your PC, let’s explore another cloud-based option that offers easy file synchronization.
Method 5: Using Dropbox
If you’re already using Dropbox for cloud storage and file synchronization, you can also leverage its features to view and access your iPhone photos on your PC. Follow these steps to utilize Dropbox:
- Download and install the Dropbox app from the App Store on your iPhone.
- Sign in to your Dropbox account or create a new one if you don’t have an existing account.
- After signing in, enable the camera upload feature in the Dropbox app. This will automatically sync your iPhone photos to your Dropbox account.
- On your PC, open a web browser and visit dropbox.com.
- Sign in to your Dropbox account using your credentials.
- Navigate to the “Camera Uploads” folder in your Dropbox account. This folder contains all the photos synced from your iPhone.
- From here, you can view, organize, and even download your iPhone photos to your PC by selecting the desired photos and using the right-click menu options.
Dropbox offers a generous amount of free storage, and if you require more space, you have the option to upgrade to a paid plan. With Dropbox, you not only gain the ability to view and manage your iPhone photos on your PC, but you can also easily share them with others using Dropbox’s sharing features.
Using Dropbox provides a seamless and efficient way to transfer and view your iPhone photos on your PC, especially if you’re already an avid Dropbox user.
Now that you know how to use Dropbox to view your iPhone photos on your PC, let’s wrap up and summarize what we’ve covered.
Conclusion
Transferring and viewing your iPhone photos on your PC is made easier with the various methods we’ve explored in this article. Whether you prefer using iTunes, Windows Explorer, iCloud, Google Photos, or Dropbox, there is a solution to suit your needs.
If you already have iTunes installed on your PC, it provides a direct and familiar way to transfer and view your iPhone photos. Windows Explorer offers a simple and straightforward method without the need for any additional software. If you’re a fan of cloud-based solutions, iCloud provides seamless syncing across your devices, while Google Photos and Dropbox offer the convenience of cloud storage and easy accessibility across different platforms.
Choose the method that best suits your preferences and workflow. Whether you’re a Windows or Mac user, these methods are compatible and accessible for both operating systems.
Remember, each method may have its own advantages and limitations. Some may require additional software installations, while others rely on cloud storage and internet connectivity. Ensure you have the necessary storage space and consider any costs associated with upgrading to premium plans, if required.
Now that you’re equipped with the knowledge of various methods to view your iPhone photos on your PC, go ahead and choose the one that best fits your needs. Start exploring, organizing, and sharing your precious memories right from your PC.
So, connect your iPhone to your PC and dive into your photo gallery with ease. Happy viewing!