Introduction
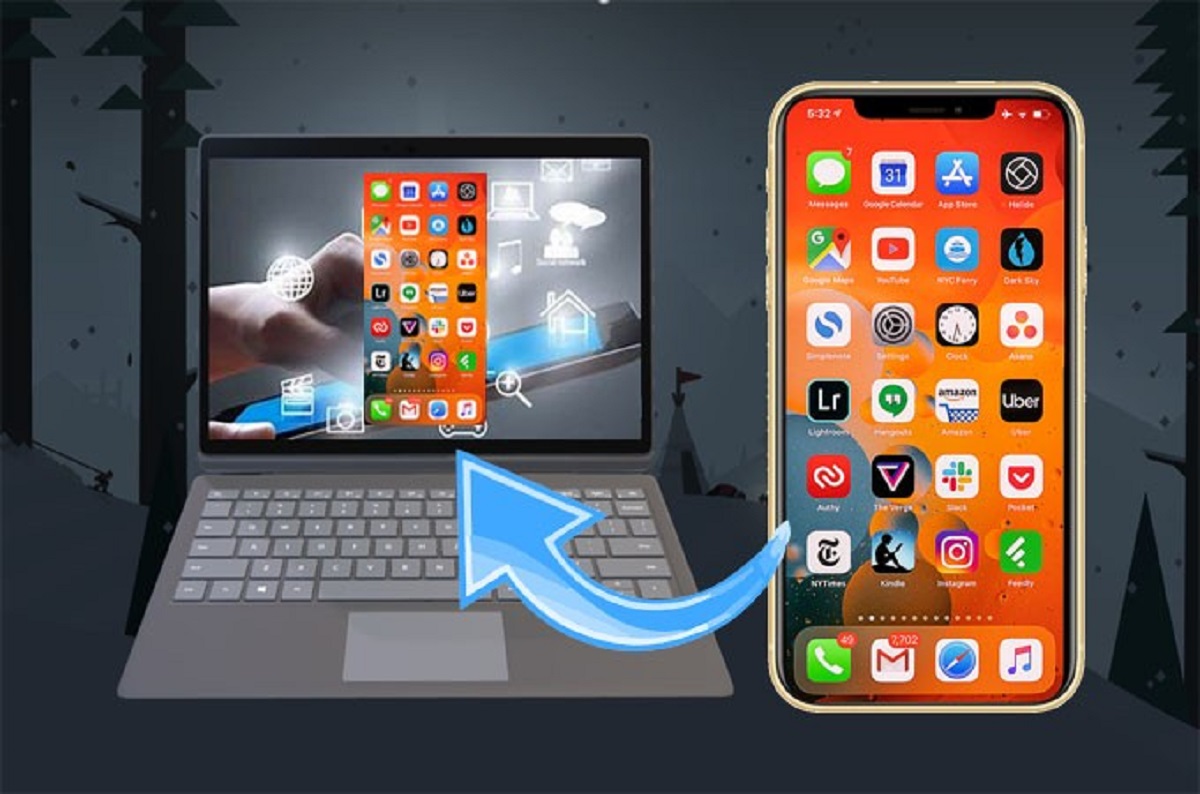
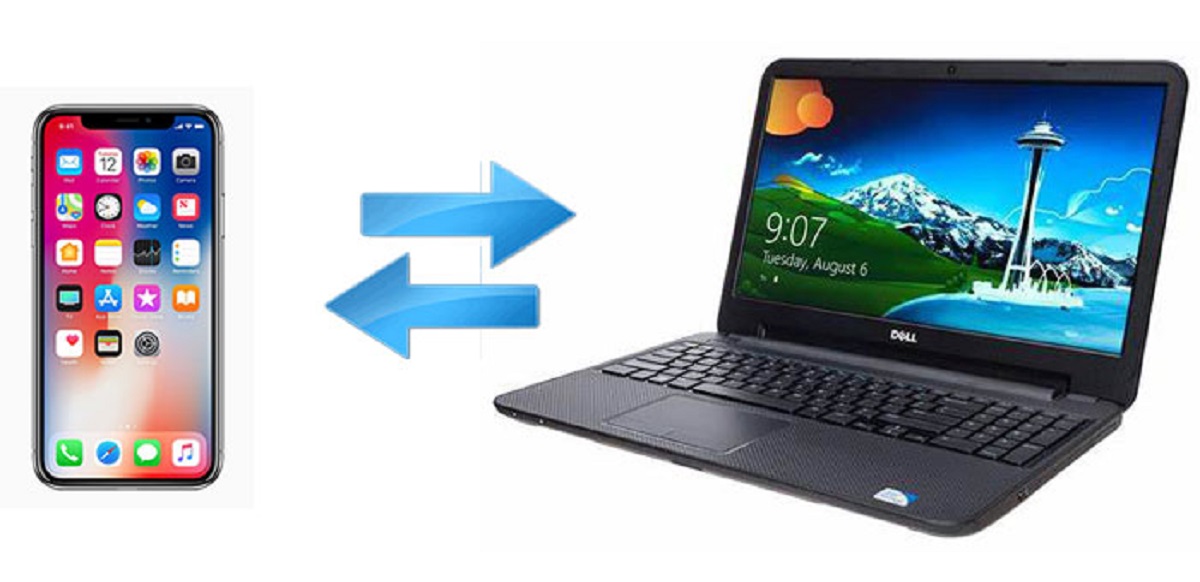
Connecting your iPhone to your PC can be incredibly useful for transferring files, syncing data, and managing your device. Whether you want to back up your photos, transfer music, or simply manage your files, establishing a connection between your iPhone and PC is key. In this article, we will guide you through the steps necessary to connect your iPhone to your PC effortlessly.
By establishing this connection, you’ll be able to take advantage of the features and functionalities offered by Apple’s iTunes software, which acts as the bridge between your iPhone and your PC. iTunes allows you to not only manage your device but also synchronize your music, videos, photos, and other files seamlessly.
It’s important to note that in order to connect your iPhone to your PC, you will need to have iTunes installed on your computer. iTunes is available for both Windows and Mac operating systems and can be downloaded from the official Apple website.
Once you’ve installed iTunes, you can easily connect your iPhone to your PC using a USB cable. This connection will allow you to transfer files, synchronize data, and perform various tasks efficiently.
In the following sections, we will explain each step in detail, ensuring that you have a smooth and successful experience connecting your iPhone to your PC. So, let’s get started and unlock the full potential of your iPhone and PC!
Step 1: Install iTunes on your PC
The first step to connect your iPhone to your PC is to install iTunes on your computer. iTunes is Apple’s official software that allows you to manage and sync your iOS devices, including your iPhone.
To install iTunes on your PC, follow these simple steps:
- Visit the official Apple website and navigate to the iTunes download page.
- Choose the appropriate version of iTunes for your operating system (Windows or Mac).
- Click on the “Download” button and wait for the installation file to finish downloading.
- Once the download is complete, locate the installation file on your computer and double-click on it to begin the installation process.
- Follow the on-screen instructions to complete the installation. You may be asked to agree to the terms and conditions of the software.
- Once the installation is complete, you can launch iTunes by finding it in your list of installed programs or by clicking on the desktop shortcut.
It’s worth noting that you may need to restart your computer after installing iTunes to ensure that all components are properly configured.
By installing iTunes on your PC, you’ll have access to a wide range of features and functionalities for managing your iPhone, including backing up your device, syncing media files, and updating your iOS software.
Now that you have installed iTunes on your PC, you are ready to move on to the next step: connecting your iPhone to your computer using a USB cable.
Step 2: Connect your iPhone to your PC using a USB cable
Now that you have iTunes installed on your PC, it’s time to connect your iPhone to your computer using a USB cable. This connection will establish a link between your device and iTunes, allowing you to transfer files and perform various operations.
Follow these steps to connect your iPhone to your PC:
- Locate the USB cable that came with your iPhone. It usually has a Lightning connector on one end (for newer iPhones) and a USB connector on the other end.
- Connect the USB connector to an available USB port on your PC. Make sure the port is functioning properly.
- Take the other end of the cable with the Lightning connector and plug it into the charging port of your iPhone.
- Once both ends are securely connected, you should see a notification on your iPhone asking for permission to trust this computer. Tap on “Trust” to continue.
At this point, your iPhone should be successfully connected to your PC. You can verify the connection by checking if iTunes recognizes your device. If iTunes opens automatically, you should see your iPhone listed under the Devices section.
Depending on your iPhone’s settings, you may also see a notification on your device asking if you want to allow access to your photos and videos. This allows your computer to access and transfer your media files.
Once the connection is established, you can proceed to the next step: trusting your PC on your iPhone.
Step 3: Trust your PC on your iPhone
After connecting your iPhone to your PC using a USB cable, you may need to trust your computer on your iPhone in order to establish a secure and reliable connection. Trusting your PC ensures that only authorized devices can access your iPhone’s data.
Follow these steps to trust your PC on your iPhone:
- On your iPhone, you should see a pop-up or notification that says “Trust This Computer?”
- Tap on “Trust” to grant permission for your computer to access your iPhone’s data.
- If prompted, enter your iPhone passcode to confirm the trust action.
Once you have trusted your computer, the connection between your iPhone and your PC will become more secure, enabling you to transfer files and perform various functions without any issues.
It’s crucial to remember that if you do not trust your computer on your iPhone, you may encounter difficulties when attempting to sync or access your device’s content through iTunes or other applications.
With the trust successfully established, you can move on to the next step: allowing access to your iPhone on your PC.
Step 4: Allow access to your iPhone on your PC
Once you have connected your iPhone to your PC and trusted the computer on your device, you may need to allow access to your iPhone on your PC. This step is necessary to enable file transfers and synchronization between your iPhone and your computer through iTunes.
Here’s how you can allow access to your iPhone on your PC:
- On your PC, open iTunes if it’s not already open.
- In iTunes, you should see a small iPhone icon located near the top left or top right of the window. Click on the icon to select your iPhone.
- If prompted, enter your iPhone passcode on your device to unlock it. The passcode is required to authorize access to your iPhone’s data.
- In the iTunes window, you may see a pop-up message asking if you want to allow this computer to access information on your iPhone. Click on “Continue” or “Allow” to grant access.
By allowing access to your iPhone on your PC, you give iTunes permission to manage and sync your iPhone’s data, including music, videos, photos, apps, and more. This allows you to transfer files and perform various tasks seamlessly between your iPhone and your computer.
Once you have allowed access on your PC, you can proceed to the next step: syncing your iPhone with iTunes.
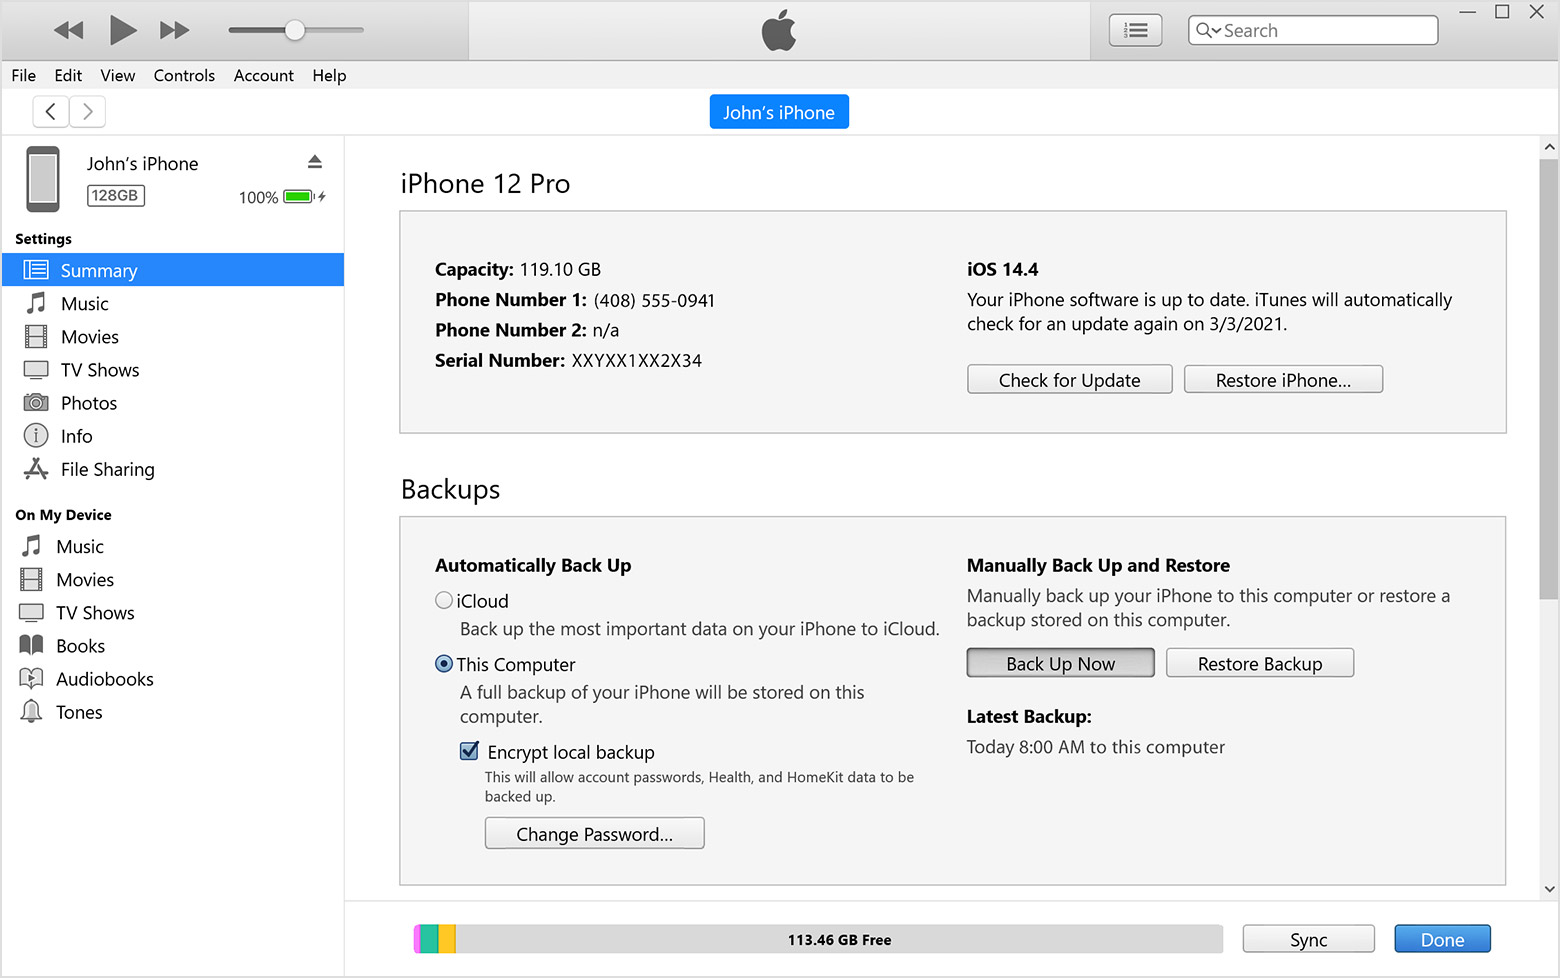
Step 5: Sync your iPhone with iTunes
Now that your iPhone is connected to your PC and access has been enabled, it’s time to sync your device with iTunes. Syncing allows you to keep your iPhone and iTunes library up to date with the latest data, including music, videos, photos, contacts, calendars, and more.
Follow these steps to sync your iPhone with iTunes:
- Make sure iTunes is open on your computer. If it’s not already open, launch it from your desktop or start menu.
- Connect your iPhone to your PC using the USB cable.
- In iTunes, click on the small iPhone icon located near the top left or top right of the window to select your device.
- Within the device settings, you will see different tabs such as “Summary,” “Music,” “Photos,” and more. Click on the desired tab to choose what you want to sync with your iPhone.
- For example, if you want to sync music, go to the “Music” tab and select the playlists, genres, artists, or albums you want to sync. You can also choose to automatically fill free space with songs.
- Once you have selected the desired options, click on the “Apply” or “Sync” button located at the bottom right of the iTunes window to start the syncing process.
- Depending on the amount of data being synced and the speed of your computer, the syncing process may take some time. Avoid disconnecting your iPhone during this process.
- Once the syncing is complete, you will see a message indicating that your iPhone is synced with iTunes. You can now disconnect your iPhone from your PC.
By syncing your iPhone with iTunes, you ensure that all your important data is up to date and easily accessible. You can add new music, photos, and videos to your iPhone, as well as transfer contacts, calendar events, and other essential information between your device and your computer.
With your iPhone and iTunes synced, you can move on to the next step: transferring files between your iPhone and PC.
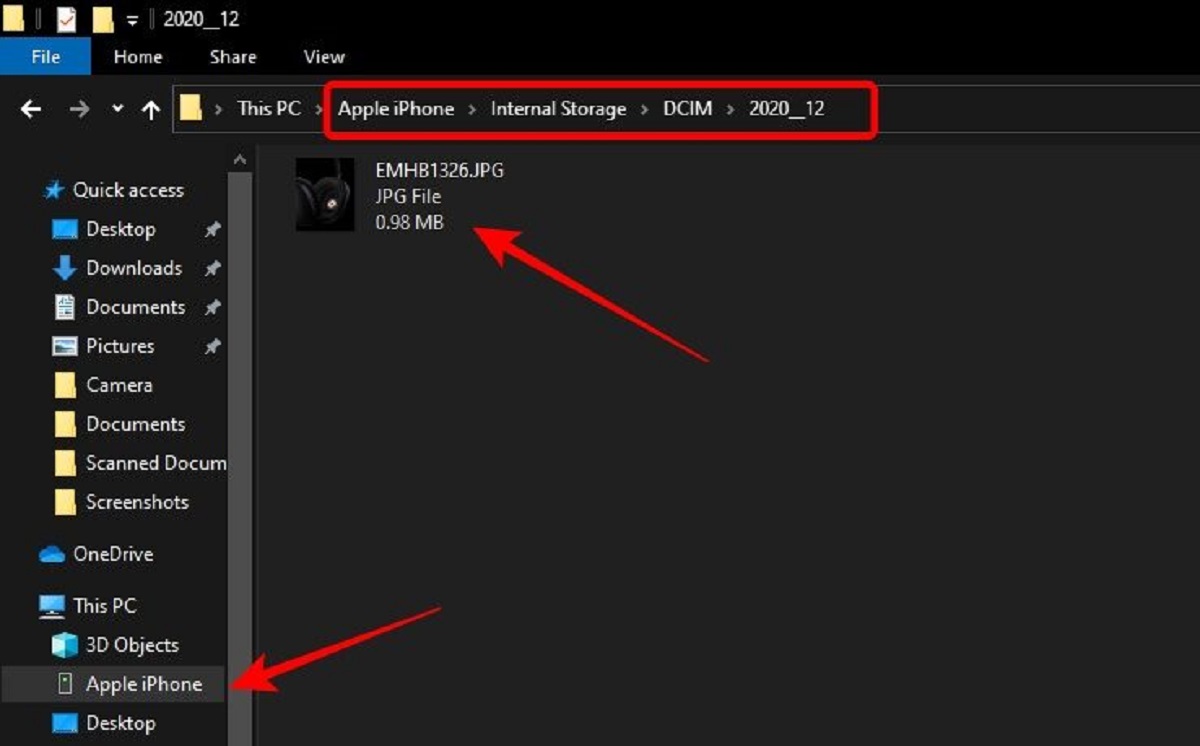
Step 6: Transfer files between your iPhone and PC
Now that your iPhone is connected to your PC and synced with iTunes, you have the ability to transfer files between your device and your computer seamlessly. Whether it’s transferring photos, videos, documents, or any other type of file, iTunes provides a convenient way to manage and organize your files.
Follow these steps to transfer files between your iPhone and PC:
- Ensure that iTunes is open on your computer and your iPhone is connected via the USB cable.
- In iTunes, click on the small iPhone icon located near the top left or top right of the window to select your device.
- Navigate to the specific file category you wish to transfer, such as “Music,” “Photos,” or “File Sharing.”
- To transfer music, for example, go to the “Music” tab and select the songs or playlists you want to transfer from your computer to your iPhone. You can also drag and drop files directly into the iTunes window.
- To transfer photos, go to the “Photos” tab and choose the folders or albums you want to sync with your iPhone. You can also enable the option to automatically sync new photos.
- If you want to transfer other types of files, such as documents or videos, you can use the “File Sharing” feature. Connect your iPhone to your PC, select your device in iTunes, and scroll down to the “File Sharing” section. Here, you can add or remove files from supported apps.
- Once you have made your selections, click on the “Apply” or “Sync” button to initiate the file transfer process.
- Depending on the size of the files and the speed of your computer, the transfer process may take some time. Avoid disconnecting your iPhone during this process.
- Once the transfer is complete, you can access the transferred files directly on your iPhone.
With iTunes, you have the flexibility to transfer and manage files between your iPhone and your PC effortlessly. Whether you want to import music files, back up your photos, or access important documents on the go, iTunes provides a comprehensive solution for file management.
Now that you know how to transfer files between your iPhone and PC, you can proceed to the final step: safely disconnecting your iPhone from your PC.
Step 7: Safely disconnect your iPhone from your PC
Once you have successfully transferred files and completed all the necessary tasks on your iPhone using iTunes, it’s important to safely disconnect your device from your PC. This ensures that no data is lost or corrupted and prevents any potential damage to your iPhone or your computer.
Follow these steps to safely disconnect your iPhone from your PC:
- In iTunes, click on the small iPhone icon located near the top left or top right of the window to select your device.
- Make sure all file transfers and syncing processes are completed.
- In the iTunes window, click on the “Eject” button located next to your iPhone’s name. Alternatively, you can right-click on your iPhone and select “Eject” from the context menu.
- Wait for iTunes to confirm that it is safe to disconnect your iPhone.
- Once you receive the confirmation, you can disconnect the USB cable from your iPhone and your PC.
It is essential to follow the proper disconnecting procedure to avoid any potential data loss or damage. Abruptly disconnecting your iPhone without properly ejecting it from iTunes can result in corruption of files or other issues.
By safely disconnecting your iPhone, you ensure that all your files, settings, and data remain intact and ready for use. This also helps maintain the longevity and performance of your iPhone.
With that, you have completed the process of safely disconnecting your iPhone from your PC. Congratulations on successfully connecting, syncing, and transferring files between your iPhone and your computer using iTunes!
Conclusion
Connecting your iPhone to your PC opens up a world of possibilities for file management, synchronization, and data transfer. With iTunes as the bridge between your iPhone and your computer, you can effortlessly manage your device, transfer files, and keep your data up to date.
In this article, we have guided you through the steps necessary to connect your iPhone to your PC. From installing iTunes, to connecting your iPhone via USB, trusting your PC, allowing access, syncing your device, transferring files, and safely disconnecting, each step plays a crucial role in establishing a seamless connection.
By following these steps, you can unlock the full potential of your iPhone and PC, whether it’s backing up your precious photos, syncing your favorite music, or transferring important documents. iTunes provides a comprehensive solution for managing your iPhone’s data and simplifies the process of file transfer and synchronization.
Remember, during the process, it’s important to trust your computer on your iPhone, allow access on your PC, and properly sync your device with iTunes. This way, you can ensure that your data is secure, organized, and readily available on both your iPhone and your computer.
Now, armed with the knowledge of how to connect your iPhone to your PC, you can take advantage of the benefits offered by the seamless integration between your device and iTunes. Manage your files, keep your data in sync, and make the most of your iPhone and PC combination.
So, go ahead and connect your iPhone to your PC using the steps outlined in this article. Experience the convenience, efficiency, and flexibility that come with a well-connected and synchronized ecosystem.
Enjoy exploring the endless possibilities of connecting your iPhone to your PC and taking your digital experience to new heights!