Introduction
Screen casting has revolutionized the way we enjoy media content, enabling us to wirelessly stream videos, movies, and photos from our devices to a larger screen. With the advent of smart TVs, this feature has become even more accessible and convenient. Screen casting allows you to mirror the display of your smartphone, tablet, or computer onto your smart TV, creating a seamless and immersive viewing experience.
Whether you want to share family photos, watch your favorite show, or give a presentation, screen casting provides a simple yet powerful solution. All you need is a compatible smart TV and a device connected to the same Wi-Fi network. In this article, we will explore the ins and outs of screen casting to a smart TV and guide you through the process step-by-step.
By embracing this technology, you can break free from the constraints of small screens and enjoy content on a larger display, offering better visuals and a more engaging experience. Plus, with the convenience of wireless streaming, you can easily control your content from the comfort of your couch, making it a popular choice for home entertainment.
Whether you want to screen cast from your Android device, iPhone, iPad, Windows PC, or Mac, we’ve got you covered. We’ll walk you through each method, highlighting the specific steps and requirements for a successful screen casting session. Just follow along, and you’ll be screen casting to your smart TV in no time.
What is Screen Casting?
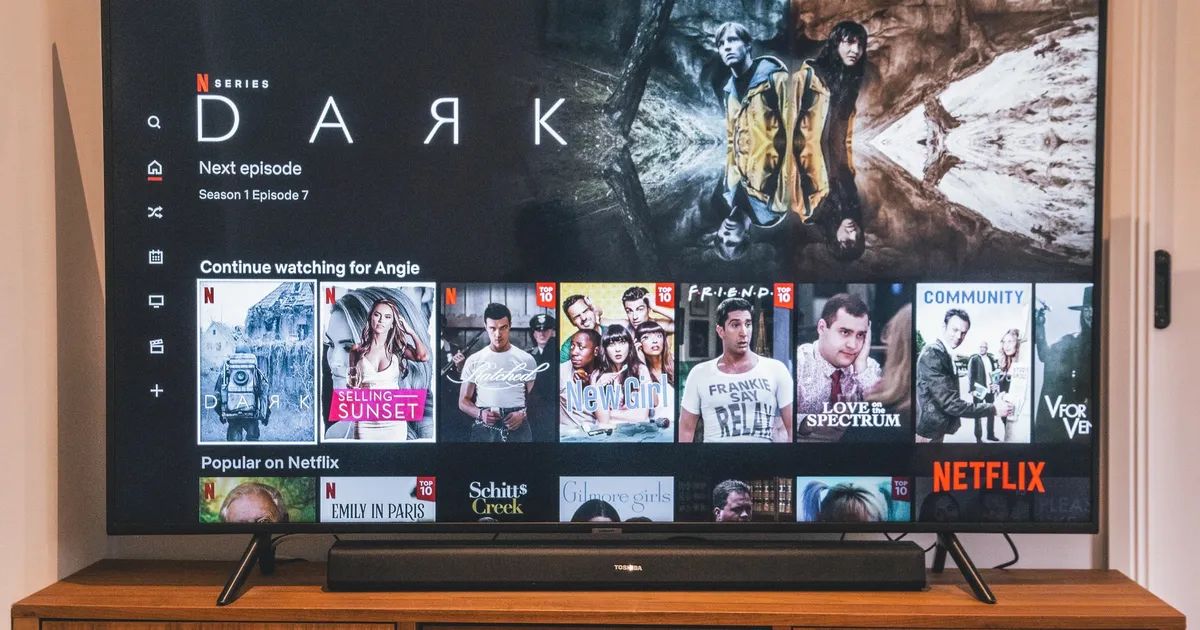
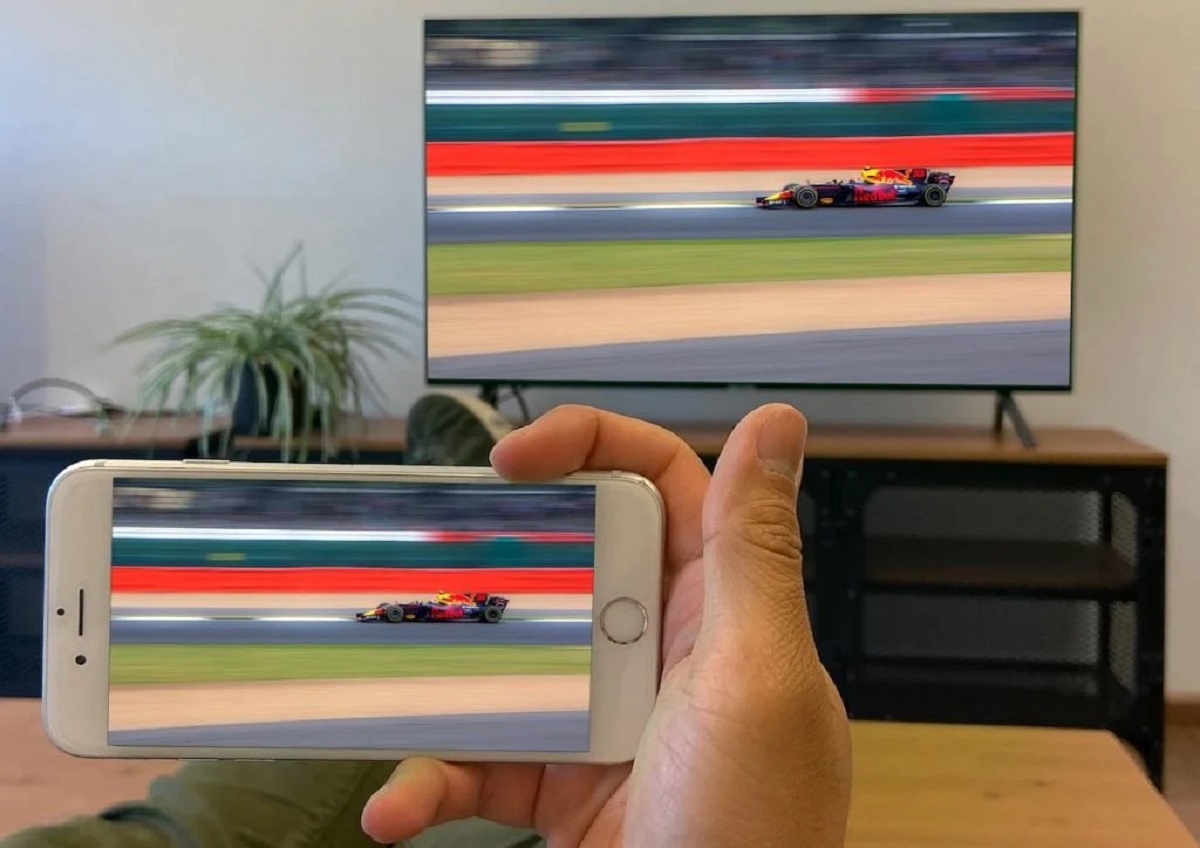
Screen casting is a technology that allows you to wirelessly display the contents of your device’s screen on a larger display, such as a smart TV. It essentially mirrors your device’s screen onto the TV, enabling you to enjoy videos, photos, and other multimedia content on a bigger and more immersive screen.
The process of screen casting involves establishing a connection between your device and the smart TV over the same Wi-Fi network. Once connected, whatever you see on your device’s screen will be replicated on the TV screen in real-time. This includes not only videos and photos but also apps, games, and even web browsing.
Screen casting offers numerous benefits, such as:
- Enhanced Viewing Experience: Watching videos or photos on a larger screen greatly enhances the overall viewing experience. It allows for more detail and better visibility, making it ideal for movie nights with friends and family.
- Shareability: Screen casting provides an easy way to share content with others. Whether it’s showing your vacation photos or giving a presentation at work, you can easily display your content on the TV screen for everyone to see.
- Convenience: With screen casting, you can control and navigate your device’s screen directly from the comfort of your couch. No need to huddle around a small device or worry about limited viewing angles.
- Multi-Tasking: Screen casting allows you to use your device for other tasks while the content is being displayed on the TV. For example, you can browse the web, check emails, or even play games on your device while your favorite movie is streaming on the TV screen.
- Compatibility: Screen casting is widely supported across various devices and operating systems. Whether you have an Android device, iPhone, iPad, Windows PC, or Mac, you can easily connect and screen cast to your smart TV.
Overall, screen casting offers a convenient and versatile way to enjoy content on a larger screen. With just a few simple steps, you can connect your device to your smart TV and unlock a whole new level of entertainment and productivity.
Benefits of Screen Casting to a Smart TV
Screen casting to a smart TV offers a range of benefits that enhance your viewing and entertainment experience. Whether you’re streaming your favorite TV show or sharing a presentation, here are some advantages of using screen casting:
- Large Screen Experience: One of the primary benefits of screen casting is the ability to enjoy content on a much larger screen. Smart TVs usually have larger displays compared to smartphones or tablets, providing a more immersive and cinematic viewing experience. Whether you’re watching movies, videos, or photos, the larger screen enhances detail and creates a theater-like atmosphere right in your living room.
- Wireless Connectivity: Screen casting eliminates the need for messy cables and physical connections. By utilizing wireless connectivity through Wi-Fi, you can easily mirror your device’s screen onto the smart TV without the hassle of dealing with cords or adapters. This makes it convenient to share and enjoy content without any restrictions.
- Convenience and Flexibility: Screen casting allows you to control your device’s screen directly from the comfort of your couch. Whether you want to browse through your photo gallery, scroll through social media, or navigate a presentation, you can do it all effortlessly from your connected device, without the need to physically interact with the TV.
- Multi-Platform Support: Screen casting technology is compatible with various devices and operating systems. Whether you have an Android device, iPhone, iPad, Windows PC, or Mac, you can easily connect and screen cast to your smart TV. This versatility ensures that you can enjoy screen casting regardless of the device you own.
- Sharing and Collaboration: Screen casting provides an excellent platform for sharing content with others. Whether you want to showcase your favorite videos, photos, or presentation slides, screen casting to a smart TV allows you to readily share your content with friends, family, or colleagues. It is especially useful for collaborative work or for sharing memories with loved ones.
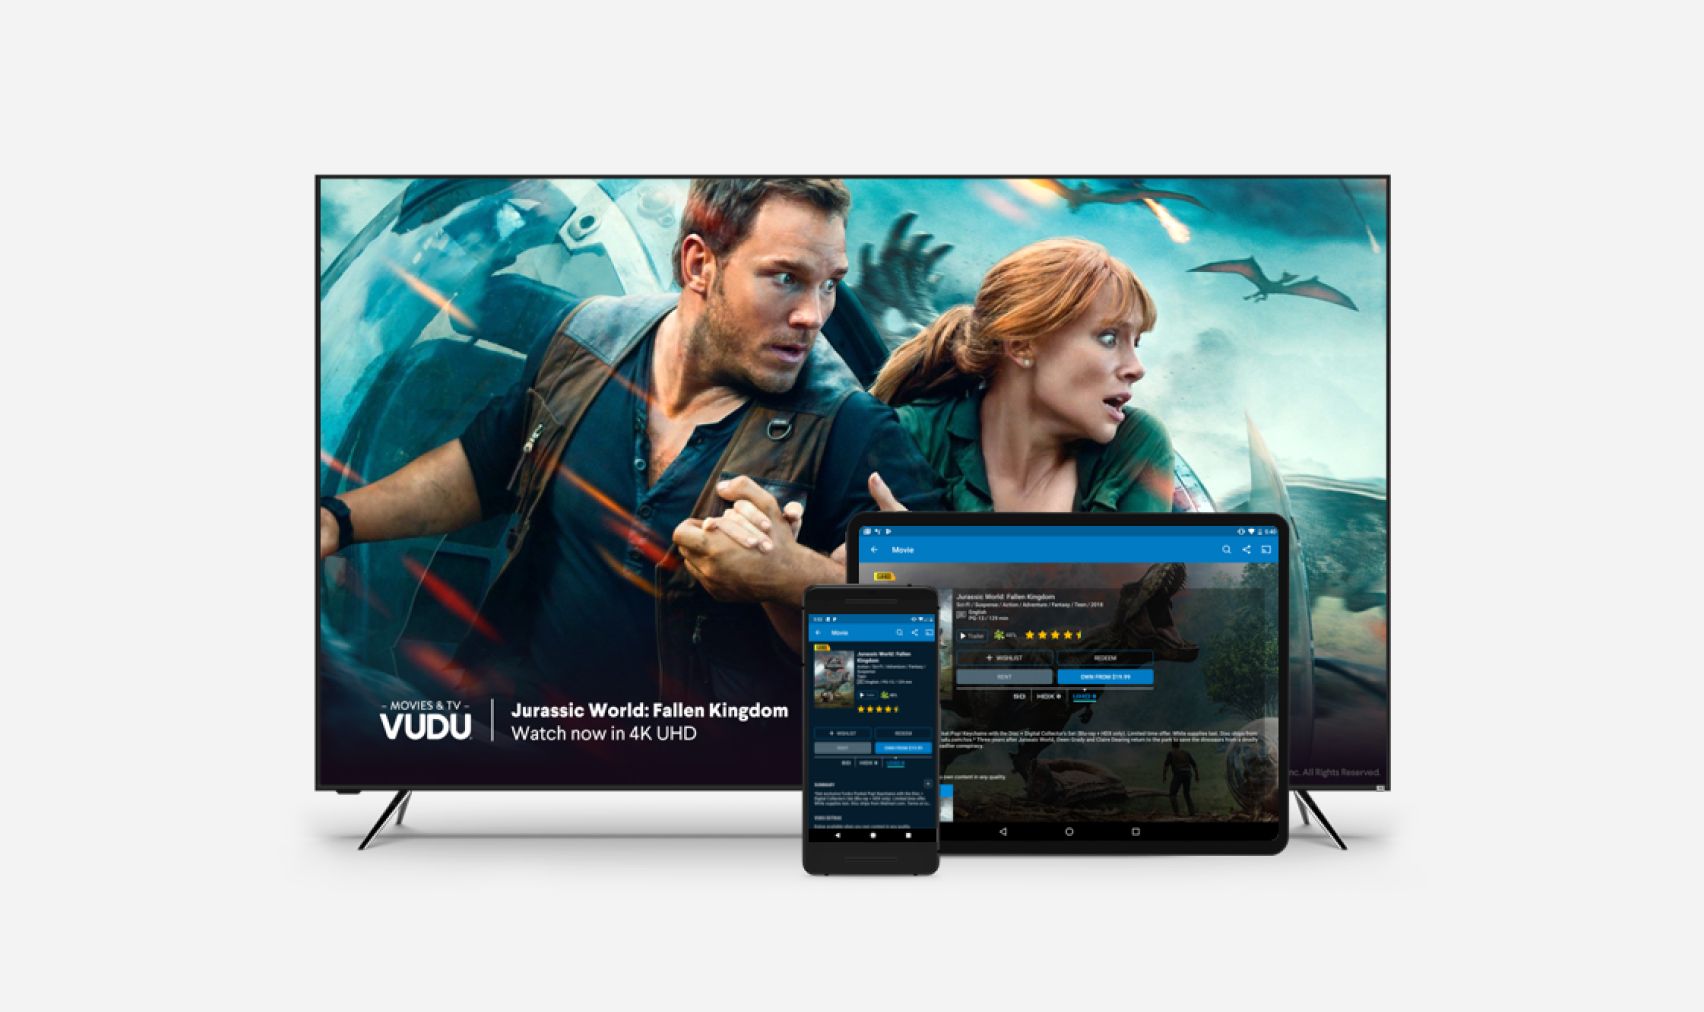
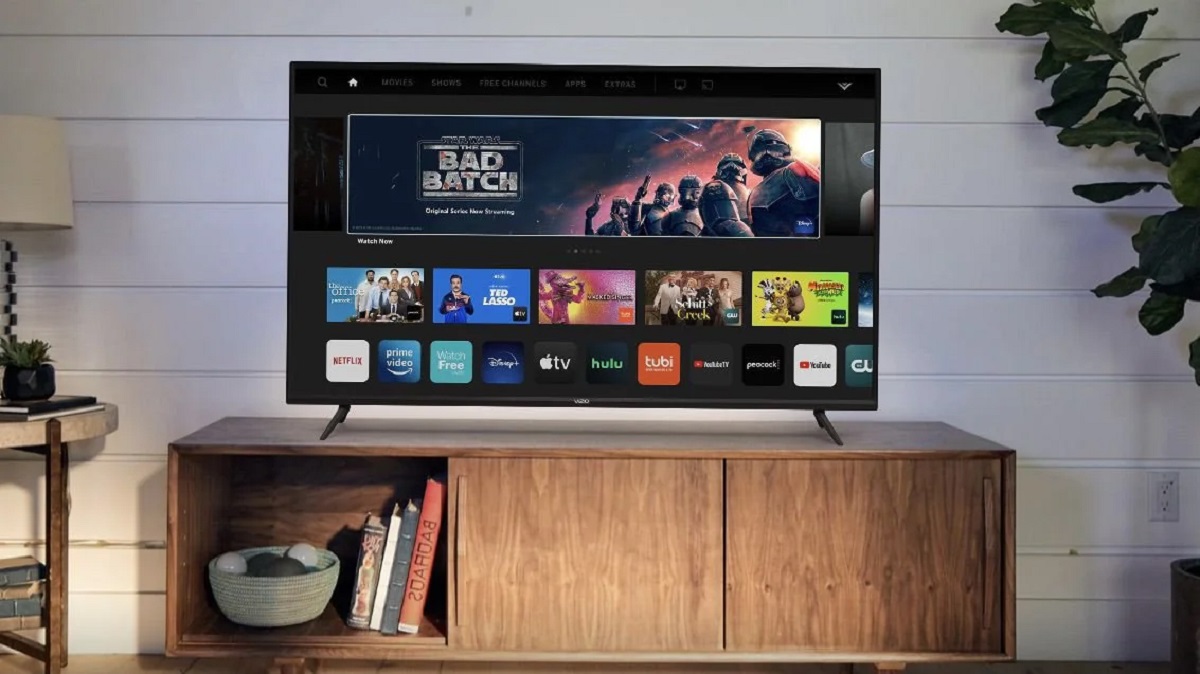
- Seamless Integration with Apps and Services: Many apps and streaming services support screen casting to smart TVs, making it easy to enjoy your favorite content on a larger screen. Whether you want to stream movies or shows from popular apps like Netflix or YouTube, or even play mobile games, screen casting enables seamless integration and enhances the overall experience.
Screen casting to a smart TV opens up a new world of possibilities for entertainment, sharing, and collaboration. It offers a convenient and flexible solution for enjoying content on a larger screen, making it a popular choice for home entertainment systems and professional settings.
How to Screen Cast to a Smart TV
Screen casting to a smart TV is a straightforward process that can be accomplished using different devices and operating systems. Here is a step-by-step guide on how to screen cast to a smart TV:
Step 1: Check Compatibility and Requirements
Before you begin, ensure that your smart TV supports screen casting and that it is connected to the same Wi-Fi network as your device. Additionally, make sure that your device also supports screen casting.
Step 2: Connect your Smart TV to the Same Wi-Fi Network as your Device
Make sure that both your smart TV and your device are connected to the same Wi-Fi network. This is crucial for establishing a connection between your device and the smart TV.
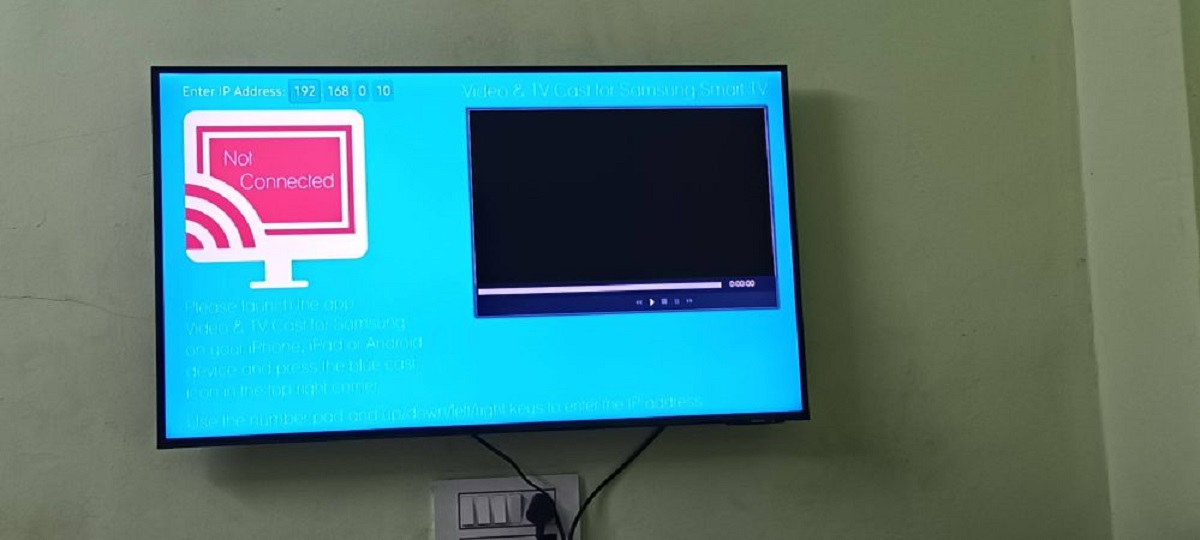
Step 3: Enable Screen Casting on your Smart TV
Access the settings menu on your smart TV and look for the screen casting or mirroring option. Enable this feature to allow your TV to receive screen casting signals from other devices.
Step 4: Screen Cast from an Android Device
On your Android device, open the settings menu and navigate to the screen casting or cast screen option. Tap on it and select your smart TV from the list of available devices. Your Android device’s screen should now be mirrored on the smart TV.
Step 5: Screen Cast from an iPhone or iPad
On your iPhone or iPad, bring up the Control Center by swiping down from the top-right (or bottom depending on your device) corner of the screen. Tap on the screen mirroring or AirPlay button and select your smart TV from the list. Once connected, your device’s screen will be mirrored on the smart TV.
Step 6: Screen Cast from a Windows PC or Laptop
On your Windows PC or laptop, open the Action Center by clicking on the notification icon in the taskbar or by pressing the Windows key + A. Click on the “Connect” or “Project” option and select your smart TV from the available devices. Your PC or laptop’s screen will now be projected onto the smart TV.
Step 7: Screen Cast from a Mac
On your Mac, click on the AirPlay icon located in the menu bar at the top of the screen. Select your smart TV from the list of available devices. Your Mac’s screen will now be mirrored on the smart TV.
It’s important to note that the exact steps and terminology might vary slightly depending on your device’s make and model, as well as the smart TV you’re using. However, the general process remains the same.
Now that you know how to screen cast to a smart TV, you can enjoy your favorite content on a larger screen and enhance your overall viewing experience.
Step 1: Check Compatibility and Requirements
Before you begin the process of screen casting to your smart TV, it’s important to ensure that your devices are compatible and meet the necessary requirements. Here are some factors to consider:
Smart TV Compatibility: Not all smart TVs support screen casting, so it’s essential to check if your TV has this feature. Refer to the user manual or manufacturer’s website to confirm if your smart TV supports screen casting. Additionally, ensure that your smart TV is connected to the same Wi-Fi network as your device.
Device Compatibility: Different devices have varying capabilities for screen casting. Whether you have an Android device, iPhone, iPad, Windows PC, or Mac, make sure that your device is compatible with the screen casting technology. In most cases, devices running on the latest operating systems tend to have built-in screen casting functionality.
Wi-Fi Network: Both your device and smart TV need to be connected to the same Wi-Fi network for screen casting to work. Ensure that the Wi-Fi network is stable and has a strong signal strength to ensure smooth screen casting without interruptions.
App and Service Compatibility: Depending on the content you want to screen cast, ensure that the app or service you are using supports screen casting to a smart TV. Popular streaming apps like Netflix, YouTube, and Disney+ generally have built-in screen casting functionality, making it easier to enjoy your favorite movies and shows on the big screen.
Device Settings: For some devices, screen casting might need to be enabled or configured in the settings menu. Check your device settings to ensure that screen casting is turned on and properly set up. The exact steps to enable screen casting may vary depending on the device and operating system version.
It’s crucial to note that the steps and requirements mentioned above might vary depending on the specific make and model of your smart TV and device. Therefore, it’s always recommended to consult the user manual or online resources specific to your devices for detailed instructions.
By verifying compatibility and meeting the necessary requirements, you can ensure a smooth and successful screen casting experience to your smart TV. Taking the time to check these factors beforehand will save you from any potential compatibility issues and allow you to enjoy a seamless wireless streaming experience.
Step 2: Connect your Smart TV to the Same Wi-Fi Network as your Device
In order to successfully screen cast to your smart TV, it is crucial that both your smart TV and your device are connected to the same Wi-Fi network. This allows them to communicate and establish a connection for screen casting. Here’s how to ensure they’re on the same network:
1. Check Wi-Fi Network: First, make sure that your device is connected to a Wi-Fi network. Open the Wi-Fi settings on your device and ensure that it is connected to the desired network. If not, select the appropriate network and enter any required credentials, such as a Wi-Fi password.
2. Check Smart TV Wi-Fi Settings: On your smart TV, access the settings menu using the remote control or on-screen controls. Look for the Wi-Fi or Network settings option. Depending on your TV’s brand and model, this option may be located in different places within the settings menu. Consult the user manual or manufacturer’s website for specific instructions.
3. Connect Smart TV to Wi-Fi: Within the Wi-Fi or Network settings of your smart TV, you should see a list of available Wi-Fi networks. Locate and select the same Wi-Fi network that your device is connected to. If prompted, enter the Wi-Fi password to establish the connection between the smart TV and the Wi-Fi network.
4. Confirm Connection: Once the smart TV is connected to the Wi-Fi network, ensure that it is receiving a stable and strong signal. You can usually check the Wi-Fi strength or signal bars in the Network settings of your smart TV. A strong and stable connection is essential for smooth and uninterrupted screen casting.
Keep in mind that the process of connecting your smart TV to a Wi-Fi network may vary slightly depending on the brand and model. Some smart TVs may have additional settings or options for advanced Wi-Fi configuration. Consult the user manual or manufacturer’s website for specific instructions tailored to your device.
By connecting both your smart TV and device to the same Wi-Fi network, you ensure that they are on the same communication channel, enabling them to establish a connection for screen casting. This step is vital for the successful transmission of content from your device to the smart TV.
Step 3: Enable Screen Casting on your Smart TV
To screen cast to your smart TV, you need to enable the screen casting or mirroring feature on your TV. This allows your smart TV to receive and display the content from your device. Here’s how to enable screen casting on your smart TV:
1. Access Settings: Depending on your smart TV’s brand and model, the settings menu may be accessed using the remote control or through on-screen controls. Look for the gear or settings icon on your TV’s home screen or remote control to access the settings menu.
2. Find Screen Casting Option: Within the settings menu, navigate to the Network or Display section. Look for an option related to screen casting, screen mirroring, or wireless display. The exact name and location of this option will vary based on your smart TV’s manufacturer and model.
3. Enable Screen Casting: Once you’ve located the screen casting option, select it to enable the feature. This may involve toggling a switch or selecting an option to turn on screen casting. Some smart TVs may require you to enable specific permissions or confirm the connection before screen casting is enabled.
4. Adjust Screen Casting Settings (if available): Some smart TVs may offer additional settings related to screen casting. These settings can include options for quality, display mode, or audio output. Adjust these settings according to your preferences or leave them at their default values for a standard screen casting experience.
5. Confirm Screen Casting Activation: Once you’ve enabled screen casting on your smart TV, a confirmation message or icon may appear on the screen. This indicates that your TV is ready to receive screen cast signals from compatible devices.
Remember that the steps and terminology may vary slightly depending on your smart TV’s brand and model. If you’re unsure about the specific steps to enable screen casting on your TV, consult the user manual or visit the manufacturer’s website for detailed instructions.
By enabling screen casting on your smart TV, you’re allowing it to receive and display the content from your device. This step is vital for establishing the necessary connection between your device and your smart TV, enabling seamless screen casting of your favorite videos, photos, and more.
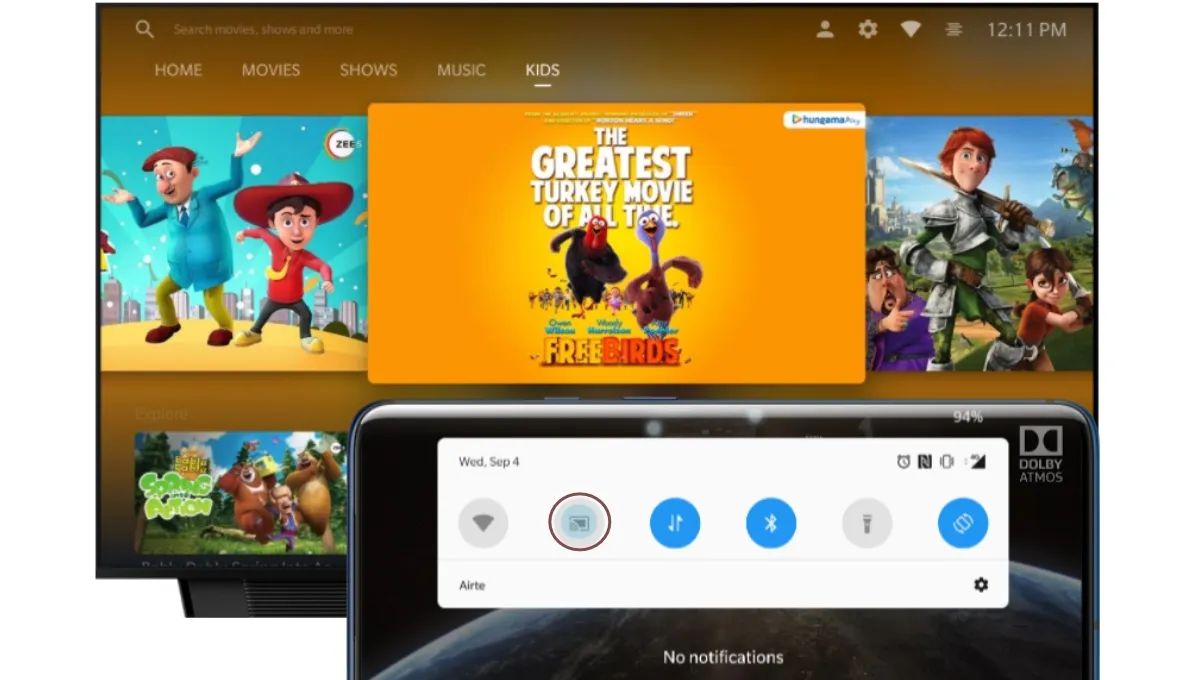
Step 4: Screen Cast from an Android Device
Screen casting from an Android device to your smart TV is a convenient way to enjoy your favorite content on a larger screen. Here are the step-by-step instructions on how to screen cast from an Android device:
1. Open Settings: On your Android device, navigate to the Settings menu. You can usually find it in the app drawer or by swiping down from the top of the screen and tapping on the gear icon.
2. Find Cast or Screen Mirroring: Within the Settings menu, look for an option related to screen casting or screen mirroring. The exact name may vary, but it’s typically labeled as Cast, Cast Screen, or Screen Mirroring.
3. Enable Screen Casting: Tap on the Cast or Screen Mirroring option to enable this feature. A list of available devices will appear. Wait for your smart TV to be detected and displayed in the list.
4. Connect to your Smart TV: Tap on your smart TV’s name in the list of available devices. If prompted, confirm the connection or enter a PIN, as instructed. Your Android device’s screen will now be mirrored on your smart TV.
5. Control Screen Casting: You can now navigate your Android device as usual, and the actions will be mirrored on your smart TV’s screen. Launch apps, play videos, or browse the web, and the content will be displayed on the TV. You can control the volume and playback directly from your Android device or use the TV’s remote control.
If you encounter any issues during the screen casting process, make sure that both your Android device and smart TV are connected to the same Wi-Fi network. Additionally, ensure that screen casting is enabled on your smart TV (refer to Step 3) and that your device’s software is up to date.
It’s important to note that the screen casting process may vary slightly depending on your Android device’s make, model, and the version of the operating system. If you can’t find the precise options mentioned above, consult the device’s user manual or contact the manufacturer for further assistance.
Screen casting from an Android device to a smart TV is a fantastic way to enjoy your favorite content on a bigger screen. Whether you’re streaming videos, playing games, or sharing photos, screen casting enhances the overall experience and allows you to easily share your Android device’s content with others.
Step 5: Screen Cast from an iPhone or iPad
Screen casting from an iPhone or iPad to a smart TV allows you to share your device’s screen with a larger audience. Here’s how you can easily screen cast from an iPhone or iPad:
1. Access Control Center: On your iPhone or iPad, swipe down from the top-right corner of the screen (or up from the bottom, depending on your device model) to access the Control Center.
2. Tap on Screen Mirroring: In the Control Center, look for the Screen Mirroring or AirPlay button. It resembles a rectangle with a triangle at the bottom. Tap on this button.
3. Select your Smart TV: After tapping the Screen Mirroring button, a list of available devices will appear. Locate your smart TV in the list and tap on it to establish the screen casting connection.
4. Confirm the Connection: If prompted, enter a code or PIN to verify the connection between your iPhone or iPad and the smart TV. This step is necessary to ensure a secure and protected connection.
5. Start Screen Casting: Once the connection is established, your iPhone or iPad screen will be mirrored on your smart TV. You can now browse through apps, play videos, show photos, or perform any other actions on your device, and the content will be displayed on the TV screen.
Note: Some apps may have restrictions when it comes to screen casting due to copyright or contractual agreements. In such cases, you may see a message on your device informing you that screen casting is not supported for that particular app.
If you encounter any issues during the screen casting process, make sure that both your iPhone or iPad and your smart TV are connected to the same Wi-Fi network. Additionally, double-check that screen casting or AirPlay is enabled on your smart TV (refer to Step 3) and that your iOS software is up to date.
Remember that the exact steps and terminology may vary slightly depending on your iPhone or iPad model and the version of iOS you’re using. If you’re unable to find the screen mirroring option or encounter any difficulties during the process, consult the iOS device’s user manual or contact Apple Support for further assistance.
Screen casting from an iPhone or iPad provides a practical way to share your device’s screen and content with a larger audience. Whether it’s for watching videos, giving presentations, or sharing photos, screen casting enhances the experience and allows you to enjoy your iOS device’s content on a bigger screen.
Step 6: Screen Cast from a Windows PC or Laptop
Screen casting from a Windows PC or laptop to a smart TV can be easily done to enjoy content on a larger screen. Here’s how you can screen cast from a Windows PC or laptop:
1. Open Action Center: On your Windows PC or laptop, locate the Action Center icon in the taskbar. It typically looks like a speech bubble or a notification icon. Click on this icon to open the Action Center.
2. Click on “Connect” or “Project”: In the Action Center, you should see options related to connecting or projecting your screen. Click on the “Connect” or “Project” option to proceed with screen casting.
3. Select your Smart TV: After clicking on the “Connect” or “Project” option, a list of available devices will appear. Look for your smart TV in the list and click on it to establish the screen casting connection.
4. Confirm the Connection: If prompted, confirm the screen casting connection between your Windows PC or laptop and the smart TV. This may involve entering a code or PIN to establish a secure connection. Follow the on-screen instructions to complete the process.
5. Start Screen Casting: Once the connection is established, your Windows PC or laptop screen will be projected onto your smart TV. You can now view and interact with your PC or laptop’s screen on the TV screen.
If you encounter any difficulties during the screen casting process, ensure that both your Windows PC or laptop and your smart TV are connected to the same Wi-Fi network. Additionally, make sure that screen casting or projection is enabled on your smart TV (refer to Step 3) and that your Windows operating system is up to date.
It’s important to note that the screen casting process may vary slightly depending on your Windows PC or laptop model, as well as the version of your operating system. If you can’t find the exact options mentioned above, refer to the user manual or online resources specific to your device for detailed instructions.
Screen casting from a Windows PC or laptop to a smart TV allows you to enjoy a wide range of content on a larger screen. Whether you’re streaming videos, giving presentations, or using applications, screen casting enhances the experience and lets you utilize the full potential of your Windows device on the big screen.
Step 7: Screen Cast from a Mac
Screen casting from a Mac to a smart TV allows you to share your Mac’s screen and enjoy content on a larger display. Here’s how to screen cast from a Mac:
1. Click on the AirPlay Icon: On your Mac, locate the AirPlay icon in the menu bar at the top of the screen. The icon resembles a rectangle with a triangle at the bottom. Click on this icon to open the AirPlay menu.
2. Select your Smart TV: In the AirPlay menu, a list of available devices will appear. Locate your smart TV in the list and click on it to establish the screen casting connection. If you don’t see your smart TV in the list, ensure that both your Mac and the smart TV are connected to the same Wi-Fi network.
3. Confirm the Connection: If prompted, enter a code or PIN to verify the connection between your Mac and the smart TV. This adds an extra layer of security to ensure a protected and secure connection.
4. Start Screen Casting: Once the connection is established, your Mac’s screen will be mirrored on your smart TV. You can now view and interact with your Mac’s content on the larger TV screen.
5. Adjust Display Settings (if needed): If necessary, make adjustments to the display settings on your Mac to optimize the screen casting experience. You can modify the resolution, mirroring options, and other display settings by going to System Preferences > Displays.
If you encounter any issues during the screen casting process, ensure that both your Mac and your smart TV are connected to the same Wi-Fi network. Also, make sure that screen casting or AirPlay is enabled on your smart TV (refer to Step 3) and that your Mac’s software is up to date.
Please note that the exact steps and wording may vary slightly depending on your Mac model and the version of macOS you are using. If you’re unable to find the AirPlay icon or encounter any difficulties during the process, refer to the Mac’s user manual or contact Apple Support for further assistance.
Screen casting from a Mac allows you to make the most out of your content and enjoy it on a larger screen. Whether you’re watching movies, presenting slideshows, or working on projects, screen casting enhances the experience and enables seamless sharing of your Mac’s content with others.
Troubleshooting Tips
While screen casting to a smart TV is generally a straightforward process, you may encounter some common issues along the way. Here are some troubleshooting tips to help you overcome potential obstacles:
1. Check Wi-Fi Connection: Ensure that both your device and smart TV are connected to the same Wi-Fi network. A stable and strong Wi-Fi connection is crucial for smooth screen casting. If you’re experiencing connectivity issues, try moving your device closer to the Wi-Fi router or restarting your router.
2. Update Device Software: Keeping your device’s software up to date can fix bugs and improve compatibility. Check for software updates on your device and install any available updates before attempting to screen cast.
3. Restart Devices: If you’re encountering issues, try restarting both your device and your smart TV. Powering off and then turning on the devices can help reset their connections and resolve any temporary glitches.
4. Exit Background Apps: Close any unnecessary apps running in the background on your device. Some apps may interfere with screen casting, so it’s best to have only the essential apps open during the screen casting process.
5. Disable VPN or Proxy: If you’re using a virtual private network (VPN) or proxy service on your device, try disabling it, as it can sometimes interfere with screen casting. Once disabled, attempt to screen cast again.
6. Reset Smart TV Settings: If your smart TV is not recognizing your device during screen casting, try resetting the TV’s settings related to screen casting or factory reset the TV. This can help resolve any software glitches or incorrect settings that may be causing the issue.
7. Consult User Manuals and Support: If you’re still encountering difficulties, consult the user manuals for your devices or visit the manufacturer’s support website for troubleshooting guides and resources specific to your model. You may also consider reaching out to customer support for further assistance.
Remember that the screen casting process and troubleshooting tips may vary depending on your specific devices and operating systems. It’s always a good idea to refer to the user manuals and official support channels for accurate and detailed instructions tailored to your devices.
By following these troubleshooting tips, you can overcome common issues and ensure a smooth screen casting experience to your smart TV. Enjoy the benefits of wireless streaming and share your favorite content on the big screen with ease!
Conclusion
Screen casting to a smart TV has become an increasingly popular method for enjoying content on a larger screen. Whether you’re streaming videos, sharing photos, giving presentations, or playing games, screen casting offers a convenient and immersive experience. By following the step-by-step instructions outlined in this guide, you can easily screen cast from various devices, including Android devices, iPhones, iPads, Windows PCs, and Macs.
It’s important to ensure that your devices are compatible, connected to the same Wi-Fi network, and have screen casting functionality enabled. By checking these requirements, you can set up a stable and secure connection between your device and your smart TV.
Screen casting provides numerous benefits, such as enhanced viewing experiences, wireless connectivity, convenience, multi-platform support, and seamless integration with popular apps and services. It allows you to break free from the limitations of smaller screens and enjoy your favorite content on a larger and more immersive display.
If you encounter any difficulties during the screen casting process, refer back to the troubleshooting tips provided in this guide. Checking your Wi-Fi connection, updating device software, and restarting devices can often resolve common issues.
Now that you have the knowledge and tools to screen cast to your smart TV, it’s time to enjoy a whole new level of entertainment and sharing. Whether it’s a movie night with loved ones, a work presentation, or simply browsing through your favorite apps, screen casting enhances the overall experience and brings your content to life on a grander scale.
Embrace the power of screen casting and transform your smart TV into a hub of entertainment and productivity. Happy screen casting!