Introduction
Downloading videos from your iPhone to your PC is a common need, whether you want to save precious memories or transfer videos for editing purposes. However, the process can sometimes seem confusing or complicated, especially if you’re not familiar with the various methods available.
In this article, we will explore five different methods that you can use to easily download videos from your iPhone to your PC. Whether you’re using a Windows computer or wanting to utilize third-party apps, we’ve got you covered.
No matter the reason why you need to download videos from your iPhone to your PC, it’s important to have a reliable and efficient method that suits your needs. We understand the value of your time, so we have carefully researched and selected the most effective and user-friendly methods for you to follow.
From using built-in software like the Photos app and iTunes on Windows, to utilizing File Explorer and iCloud Photos, there are various ways to accomplish your goal. Additionally, we will also explore the option of using third-party apps or software if the built-in methods do not meet your requirements.
Whether you’re a tech-savvy individual or someone who prefers simplicity, the methods provided in this article cater to different skill levels and preferences. So without further ado, let’s dive into the various methods and learn how to download videos from your iPhone to your PC!
Method 1: Using the Photos App on Windows
If you’re using a Windows computer, one of the easiest ways to download videos from your iPhone is by utilizing the built-in Photos app. This method is ideal for those who prefer a straightforward and seamless approach.
Here’s how you can use the Photos app to transfer videos:
- Connect your iPhone to your PC using a USB cable and unlock your iPhone.
- On your PC, open the Photos app. If it doesn’t open automatically, you can find it in the Start menu or by typing “Photos” in the search bar.
- In the Photos app, click on the “Import” button located at the top right corner of the window. The app will then automatically detect and display the photos and videos on your iPhone.
- Select the videos you want to download by clicking on them. You can choose multiple videos by holding down the Ctrl key while selecting.
- Once you’ve selected the desired videos, click on the “Import Selected” button at the top right corner of the window. Alternatively, you can click on the “Import All New Items” button to download all new photos and videos from your iPhone.
- The Photos app will begin transferring the selected videos from your iPhone to your PC. You can monitor the progress in the app, and once the transfer is complete, the videos will be saved in the “Pictures” folder on your PC.
Using the Photos app is a hassle-free method for downloading videos from your iPhone to your PC. It not only allows you to transfer videos quickly but also keeps them organized in the “Pictures” folder, making it easy to locate and access them whenever needed.
Now that you’ve learned how to use the Photos app on Windows, let’s move on to the next method.
Method 2: Using iTunes on Windows
If you prefer to use iTunes as your primary software for managing your iPhone’s media, you can also use it to download videos from your iPhone to your Windows PC. This method is especially useful if you have a large video library on your device and want more control over the transfer process.
Follow these steps to transfer videos using iTunes:
- Connect your iPhone to your PC using a USB cable and launch iTunes if it doesn’t open automatically.
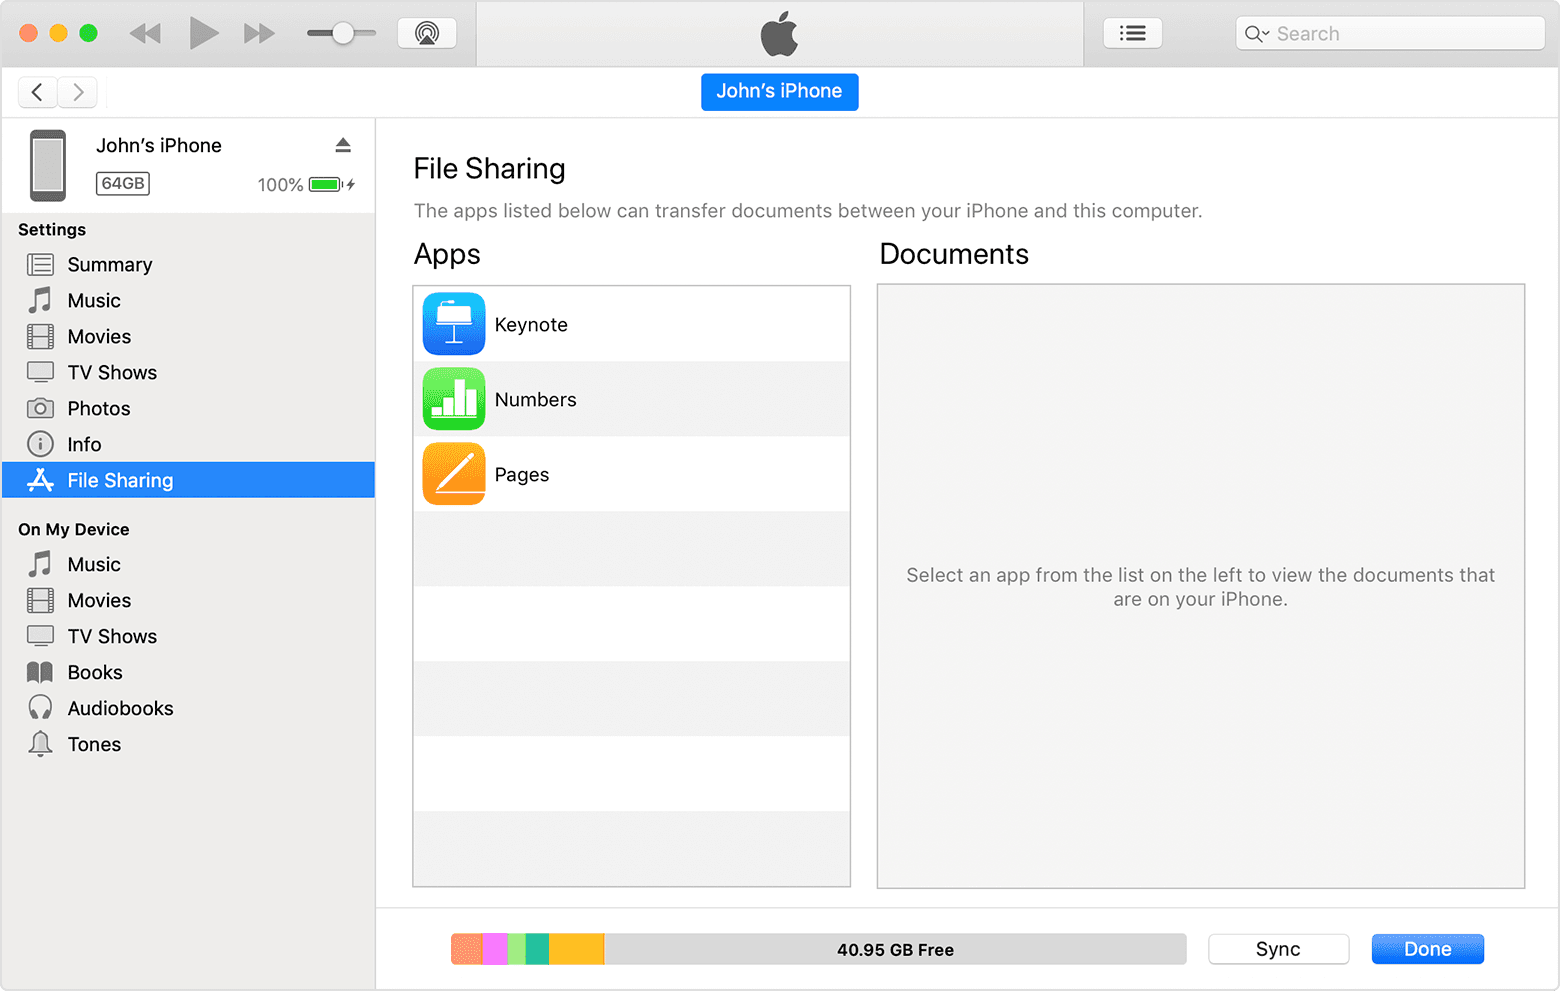
- In iTunes, click on the device icon that appears in the top-left corner of the window. This will take you to the summary page of your iPhone.
- From the sidebar on the left side of the window, click on “Movies” or “TV Shows” depending on the type of video you want to transfer.
- You will see a list of all the videos available on your iPhone. Select the videos you want to download by ticking the checkboxes next to their names.
- Once you’ve selected the desired videos, click on the “Apply” or “Sync” button at the bottom right corner of the window. iTunes will start syncing the selected videos from your iPhone to your PC.
- Once the sync process is complete, you can find the downloaded videos in the “Movies” or “TV Shows” section of your iTunes library on your PC.
Using iTunes provides you with greater control over the transfer process and allows you to manage your videos within the iTunes library. However, it’s worth noting that iTunes can be a bit more complex to navigate compared to other methods. Nevertheless, with a little practice, you’ll become proficient in transferring videos using iTunes.
Now that you’ve learned how to use iTunes on Windows, let’s explore another method to download videos from your iPhone to your PC.
Method 3: Using File Explorer on Windows
If you prefer a more direct and manual approach to downloading videos from your iPhone to your Windows PC, you can make use of File Explorer. This method allows you to access your iPhone’s files directly and transfer videos without the need for additional software.
Here’s how you can download videos using File Explorer:
- Connect your iPhone to your PC using a USB cable. Make sure to unlock your iPhone and grant permission for the computer to access your device.
- On your PC, press the Windows key + E to open File Explorer.
- In the left sidebar of File Explorer, you should see your iPhone listed under the “This PC” or “Devices and Drives” section. Click on your iPhone to expand its contents.
- Navigate to the “DCIM” folder, which stands for Digital Camera Images. This folder contains photos and videos captured by your iPhone.
- Within the “DCIM” folder, you might see multiple subfolders with random names. Open the subfolder that contains the videos you wish to download.
- Select the videos you want to transfer to your PC. You can hold the Ctrl key to select multiple videos. To select all videos in the folder, press Ctrl + A.
- Once you’ve selected the desired videos, right-click on one of the selected videos and choose “Copy” from the context menu.
- Navigate to the destination folder on your PC where you want to save the videos and right-click within the folder. Choose “Paste” from the context menu to transfer the videos from your iPhone to your PC.
Using File Explorer gives you direct access to your iPhone’s files, making it a suitable method for those who want more control over the transfer process and prefer a manual approach. However, it may require more effort to locate the specific videos you want to download, especially if you have many folders on your iPhone.
Now that you’re familiar with using File Explorer on Windows, let’s move on to the next method.
Method 4: Using iCloud Photos
If you’re an avid user of iCloud and have your iPhone photos and videos synced to the cloud, you can easily download videos from iCloud Photos to your Windows PC. This method is convenient for those who rely on iCloud for storage and want a seamless way to access their videos on their computer.
Here’s how to download videos from iCloud Photos:
- On your Windows PC, open a web browser and go to the iCloud website (www.icloud.com).
- Sign in to your iCloud account using your Apple ID and password.
- Once you’re logged in, click on the “Photos” icon to access your iCloud Photos library.
- In the Photos interface, navigate to the album or folder that contains the videos you want to download.
- Locate the specific videos you want to download and click on them to select.
- After selecting the videos, click on the download button (a cloud with an arrow pointing downwards) located in the toolbar. The selected videos will start downloading to your PC.
- The downloaded videos will be saved in your default downloads folder or the folder you have specified in your browser settings.
Using iCloud Photos provides a convenient way to access and download your iPhone videos directly from the cloud, without the need for any cables or additional software. It allows you to manage your videos efficiently and quickly transfer them to your Windows PC.
Now that you’ve learned how to download videos from iCloud Photos, let’s explore one final method to transfer videos from your iPhone to your PC.
Method 5: Using Third-Party Apps or Software
If you’re looking for alternative methods to download videos from your iPhone to your Windows PC, there are several third-party apps and software available that can simplify the process and offer additional features.
Here are a few popular options for transferring videos using third-party apps or software:
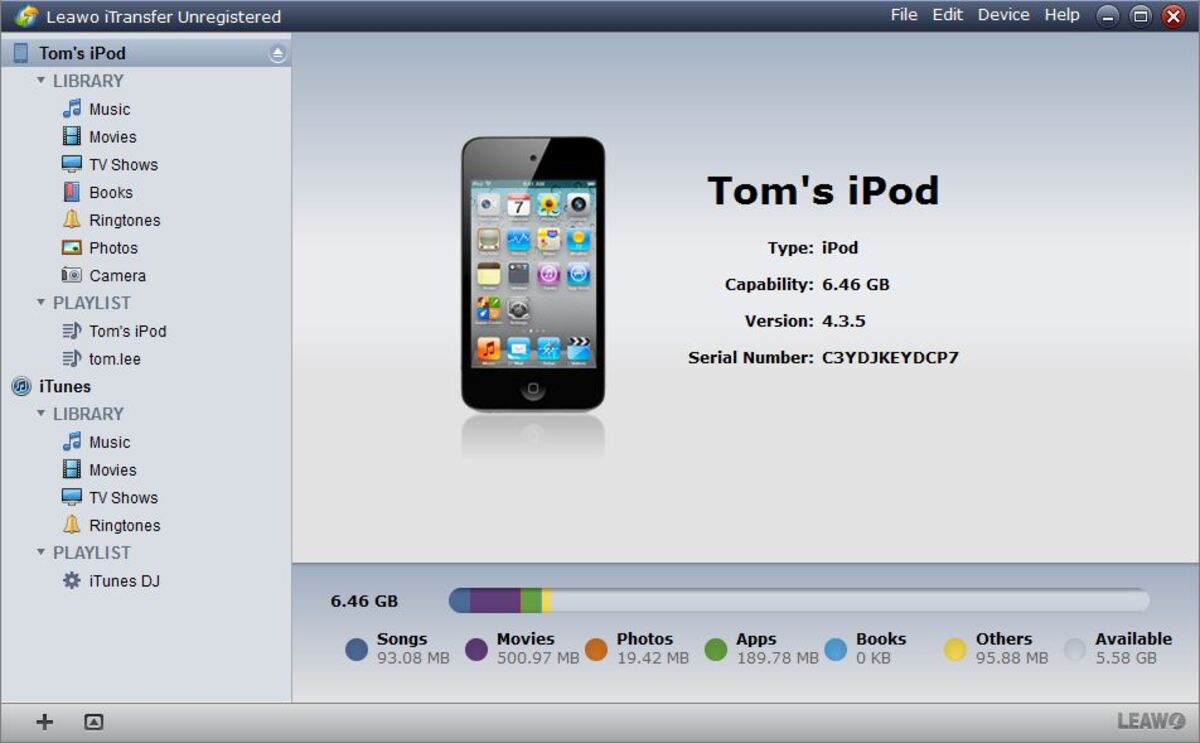
- iMazing: iMazing is a popular iOS device manager that allows you to transfer videos, photos, and other media files between your iPhone and PC. It offers a user-friendly interface and advanced features like converting videos to different formats.
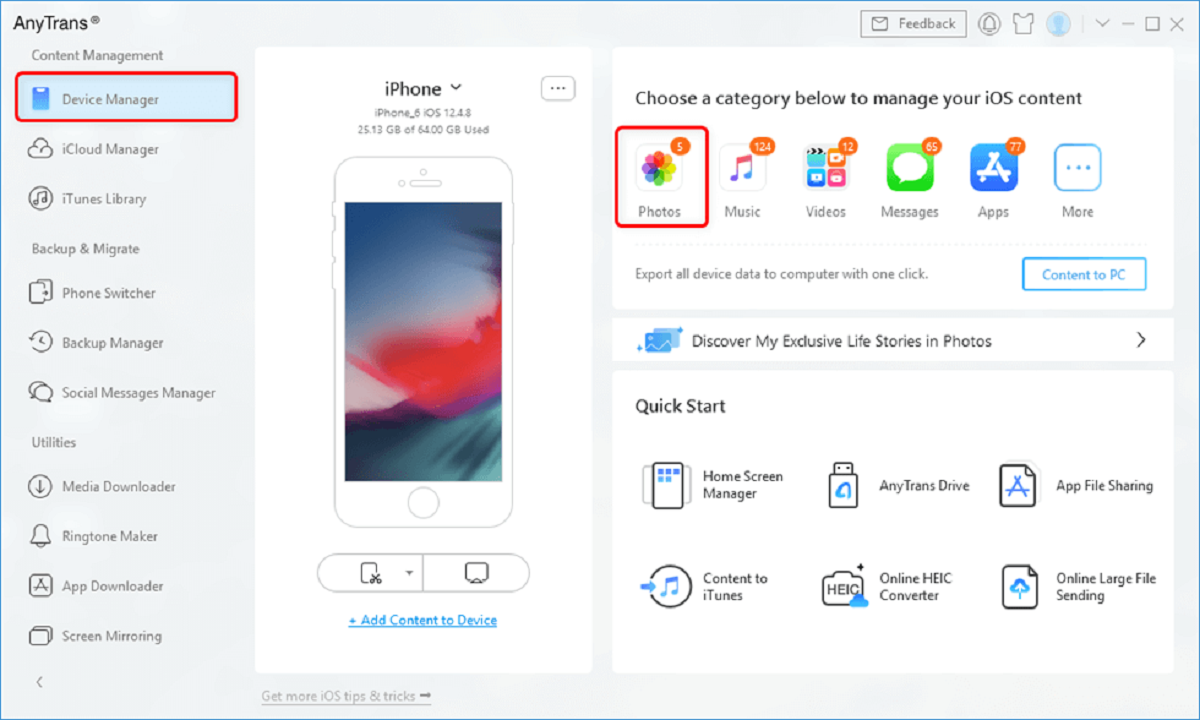
- AnyTrans: AnyTrans is a comprehensive iPhone manager that enables you to transfer videos, music, contacts, and more between your iPhone and PC. It supports various video formats and offers fast and secure transfers.
- Syncios: Syncios is another versatile software that lets you transfer videos, photos, apps, and more between your iPhone and PC. It also provides options for managing and organizing your media files.
To use third-party apps or software for video transfer, follow these general steps:
- Download and install the chosen app or software on your Windows PC.
- Connect your iPhone to your PC using a USB cable.
- Open the app or software, and it will detect your iPhone and display its content.
- Select the videos you want to transfer and choose the destination folder or storage location on your PC.
- Initiate the transfer process, and the app or software will start transferring the selected videos from your iPhone to your PC.
Using third-party apps or software provides you with more flexibility and advanced features compared to the built-in methods. However, it’s important to be cautious and choose reputable apps or software from trusted sources to ensure the security of your data.
Now that you’re familiar with this alternative method of using third-party apps or software, let’s summarize what we’ve covered in this article.
Conclusion
Downloading videos from your iPhone to your PC is essential for various purposes, such as preserving memories, editing videos, or freeing up storage space on your device. Fortunately, there are multiple methods available to cater to your specific needs and preferences.
In this article, we explored five different methods for downloading videos from your iPhone to your Windows PC. We discussed using the built-in Photos app, utilizing iTunes, leveraging File Explorer, accessing iCloud Photos, and employing third-party apps or software.
The Photos app on Windows provides a straightforward and user-friendly approach, while iTunes offers more control over the transfer process. File Explorer allows for direct access to your iPhone’s files, and iCloud Photos enables seamless downloading from the cloud. Third-party apps or software provide additional features and flexibility for video transfers.
Whether you prefer simplicity, control, or advanced options, one of these methods is sure to meet your requirements. Choose the method that suits you best based on your technical proficiency and specific needs.
Remember to follow the instructions carefully for each method to ensure a successful transfer and safeguard the security of your videos and personal data.
Now that you have a comprehensive understanding of how to download videos from your iPhone to your PC, you can confidently preserve your precious memories, edit your footage, or manage your media effectively. Enjoy the convenience and versatility that these methods offer!