Introduction
Welcome to the world of iCloud and its photo library! iCloud is a cloud-based storage and synchronization service provided by Apple, allowing users to access and store their data across multiple devices. One of the most popular features of iCloud is its ability to store and manage photos. With iCloud, you can safely store your precious memories in the cloud and access them from any device, including your laptop.
Downloading photos from iCloud to your laptop is a convenient way to backup your memories or transfer them to other devices. Whether you want to download individual photos or a batch of them, there are multiple methods available to make the process quick and easy.
In this article, we will explore different methods to download photos from iCloud to your laptop. Whether you’re using a Windows PC or a Mac, we’ve got you covered with step-by-step instructions to help you retrieve your pictures effortlessly. So grab your laptop, sign in to your iCloud account, and let’s dive into the world of photo downloading!
Method 1: Downloading Individual Photos
If you only need to download specific photos from your iCloud library to your laptop, this method is for you. Follow these steps to download individual photos:
- Open a web browser on your laptop and go to the iCloud website.
- Sign in to your iCloud account using your Apple ID and password.
- Once you’re logged in, click on the “Photos” app on the iCloud homepage.
- Browse through your photo library and locate the photo you want to download.
- Click on the photo to open it in full-screen mode.
- At the top-right corner of the screen, you’ll see a download icon (a cloud with an arrow pointing downward). Click on it.
- Your browser will initiate the download and prompt you to choose a download location on your laptop. Select the desired folder and click “Save” or “Download” to start the download.
- Wait for the download to complete. The time taken will depend on your internet connection speed and the size of the photo.
- After the download is finished, you can access the photo on your laptop by navigating to the downloaded folder.
Keep in mind that this method allows you to download one photo at a time. If you need to download multiple photos or even your entire photo library, you may want to explore other methods discussed in the following sections.
Method 2: Downloading Multiple Photos
If you have a batch of photos that you want to download from your iCloud library to your laptop, using the iCloud website may become time-consuming. In such cases, you can use the iCloud for Windows app to easily download multiple photos at once. Here’s how:
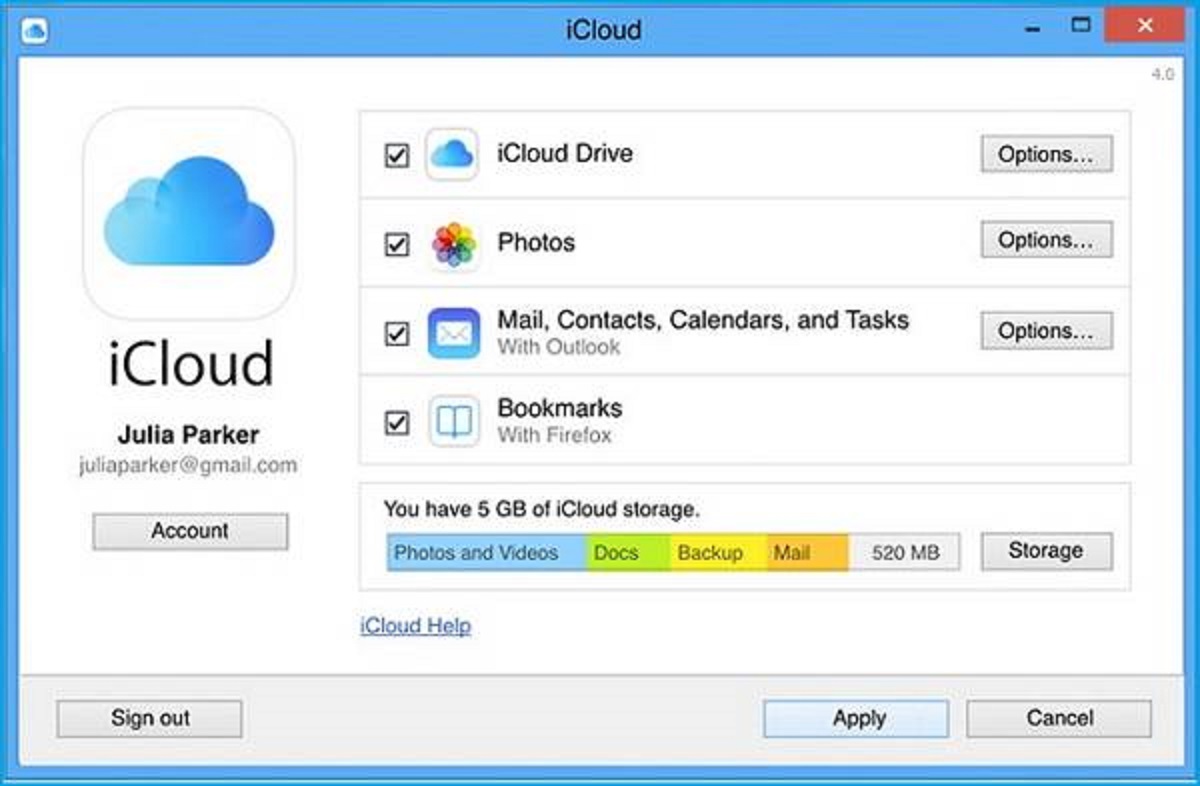
- Make sure you have the iCloud for Windows app installed on your laptop. If you don’t have it, you can download it from the Apple website and install it following the provided instructions.
- Launch the iCloud for Windows app and sign in using your Apple ID and password.
- Once signed in, you will see a list of checkboxes representing different iCloud services. Make sure the “Photos” checkbox is selected.
- Click on the “Options” button next to “Photos.”
- In the pop-up window, select the “Download new photos and videos to my PC” option. You can also choose other options such as keeping your photo library up to date on your PC.
- Click “Done” and then “Apply.”
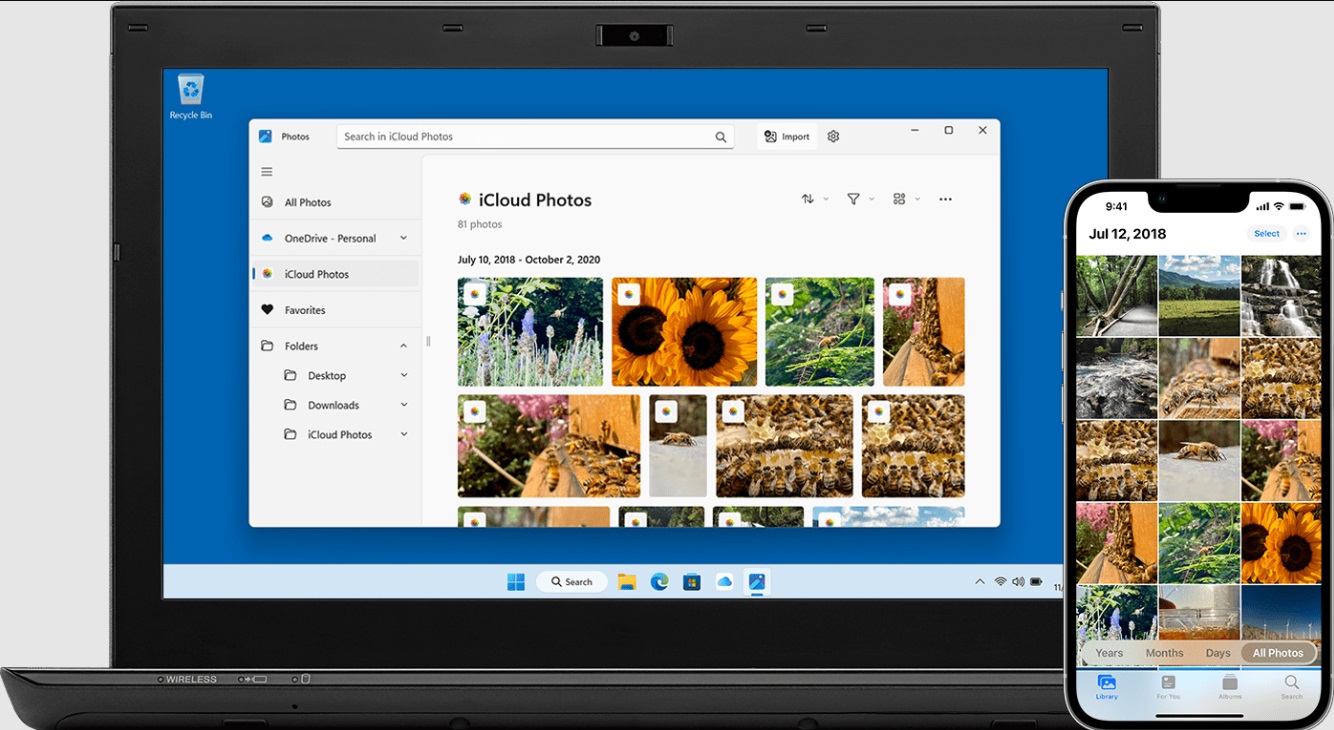
- Open the File Explorer on your Windows laptop and navigate to the “iCloud Photos” folder.
- Here, you will find all your iCloud photos organized by year and month. Browse through the folders to locate and select the photos you want to download.
- Once selected, right-click on the photos and choose “Copy.”
- Navigate to the desired location on your laptop where you want to save the photos.
- Right-click on the destination folder and choose “Paste.” Windows will initiate the file transfer, and you can monitor the progress in the File Explorer.
- Once the transfer is complete, you can access the downloaded photos in the chosen destination folder.
This method allows you to download multiple photos at once, making it a time-saving option when dealing with a large number of pictures. However, if you’re using a Mac, there is an alternative method specifically designed for macOS users, which we will discuss next.
Method 3: Using iCloud for Windows
If you’re a Windows user and want a more streamlined method to download your entire iCloud photo library, you can leverage the power of the iCloud for Windows app. With this app, you can sync your entire photo collection from iCloud to your Windows laptop. Here’s how to set it up:
- Ensure that you have the iCloud for Windows app installed on your laptop. If not, download it from the Apple website and follow the installation instructions.
- Launch the iCloud for Windows app and log in to your iCloud account using your Apple ID.
- In the iCloud for Windows app, you will find a list of checkboxes representing different iCloud services. Make sure the “Photos” checkbox is selected, and then click on the “Options” button next to it.
- In the Photos Options window, choose “Download photos and videos” and select the options that suit your preferences, such as retaining folder structure or optimizing storage.
- Click “OK” and then “Apply” to save your settings.
- Wait for the iCloud for Windows app to download your entire photo library to your laptop. The time taken will depend on the size of your library and your internet connection speed.
- Once the download is complete, you can access all your iCloud photos in the “iCloud Photos” folder in File Explorer.
Using iCloud for Windows offers a seamless and automated way to download your entire photo library, ensuring that you have a local copy of all your photos on your Windows laptop. This method is particularly useful if you prefer to have all your photos readily available and organized on your computer’s hard drive.
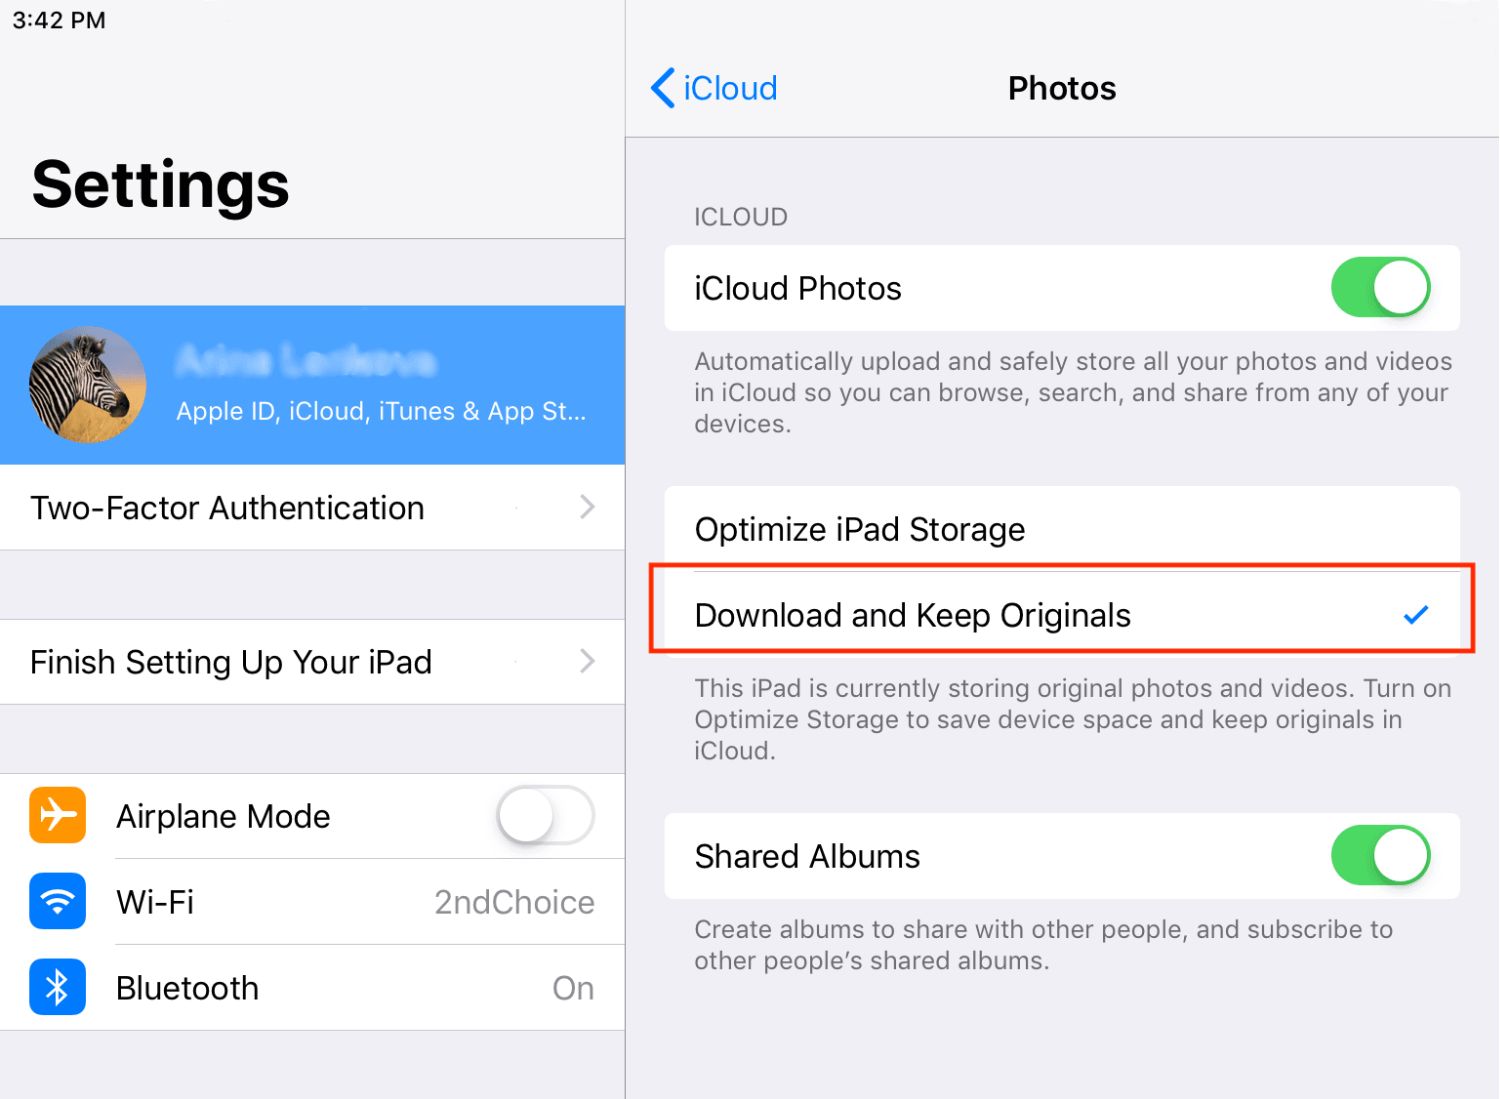
Method 4: Using iCloud Photos on Mac
If you’re a Mac user, downloading photos from iCloud is even more straightforward with the native iCloud Photos feature. This feature seamlessly integrates with the Photos app on your Mac, allowing you to access your entire iCloud photo library effortlessly. Follow these steps to download your photos:
- Open the Photos app on your Mac.
- In the menu bar at the top of the screen, click on “Photos” and select “Preferences.”
- In the Preferences window, navigate to the “iCloud” tab.
- Check the box next to “iCloud Photos” to enable syncing your photos with iCloud on your Mac.
- Choose the options that suit your preferences, such as whether to optimize storage or download originals.
- Click on the “Download Originals” button if you want to download the full-resolution versions of your photos to your Mac; otherwise, the optimized versions will be stored, taking up less disk space.
- Wait for your Mac to download all the photos from iCloud. The time taken depends on the size of your library and your internet connection speed.
- Once the download is complete, you can access your iCloud photos through the Photos app on your Mac.
Using iCloud Photos on Mac provides you with a seamless experience, as your photos are automatically downloaded and maintained in your Photos library. This method offers the convenience of having your entire photo collection easily accessible on your Mac, anytime and anywhere.
Conclusion
Downloading photos from iCloud to your laptop is a simple and efficient way to back up your memories, transfer them to other devices, or simply have a local copy for easy access. Throughout this article, we explored different methods to download photos from iCloud, catering to various scenarios and operating systems.
If you only need to download individual photos, utilizing the iCloud website allows you to download photos one by one with ease. On the other hand, if you have a batch of photos to download, using the iCloud for Windows app enables you to download multiple photos simultaneously, saving you time and effort.
For Windows users who want to sync their entire photo library, the iCloud for Windows app provides a streamlined solution. And for Mac users, the built-in iCloud Photos feature seamlessly integrates with the Photos app, allowing for easy access to your photos on your Mac.
Remember to choose the method that best fits your needs and preferences. Whether you’re using a Windows laptop or a Mac, iCloud provides robust and convenient solutions to manage and access your photos across all your devices.
So, next time you want to download photos from iCloud to your laptop, refer back to this article and follow the step-by-step instructions provided. With just a few clicks, you’ll have your precious memories safely stored on your laptop for you to enjoy and share.