Introduction
Downloading photos from your iPad to a Windows computer is a common task that many iPad users need to accomplish. Whether you want to backup your precious memories or simply transfer them to your computer for editing or sharing purposes, knowing how to download photos from your iPad to a Windows computer can be incredibly useful.
Fortunately, there are several methods available to accomplish this task. In this article, we will explore three different methods that you can use to download photos from your iPad to a Windows computer. These methods include using iCloud, using iTunes, and using Windows File Explorer.
Each method has its own advantages and may be more suitable for different situations. By understanding how each method works, you will be able to choose the one that best fits your needs and preferences.
Before we dive into the specific methods, it is important to note that the steps provided in this article assume that you have access to a reliable internet connection, a Windows computer, and an iPad with stored photos. Additionally, make sure that your iPad is updated to the latest version of iOS to ensure compatibility with the methods outlined in this article.
Now, let’s explore each method in detail to learn how to download photos from your iPad to a Windows computer.
Method 1: Using iCloud
iCloud is Apple’s cloud storage service that allows you to store and access your photos, documents, and other files across multiple devices. If you have enabled iCloud Photo Library on your iPad, you can access your photos from any device with an internet connection, including your Windows computer. Here’s how to download photos from your iPad to a Windows computer using iCloud:
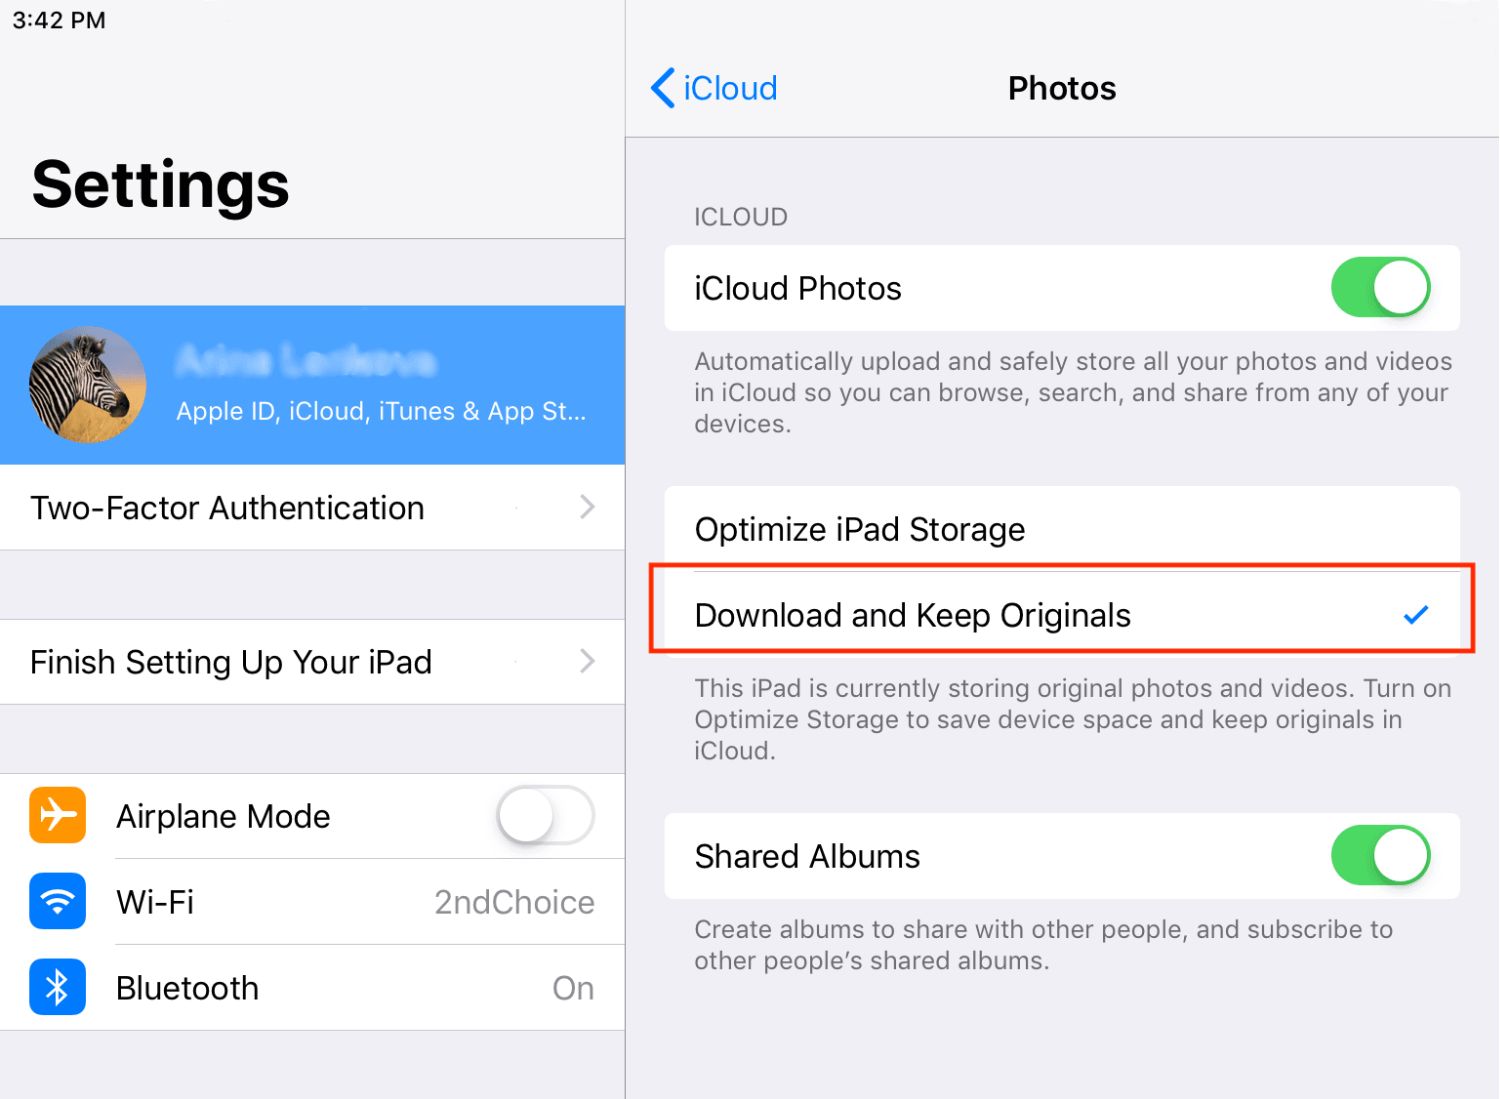
- On your iPad, go to Settings and tap on your Apple ID at the top of the screen.
- Tap on iCloud, then select Photos.
- Toggle on the “iCloud Photos” option.
- Ensure that your iPad is connected to a Wi-Fi network and that iCloud Photo Library is syncing your photos.
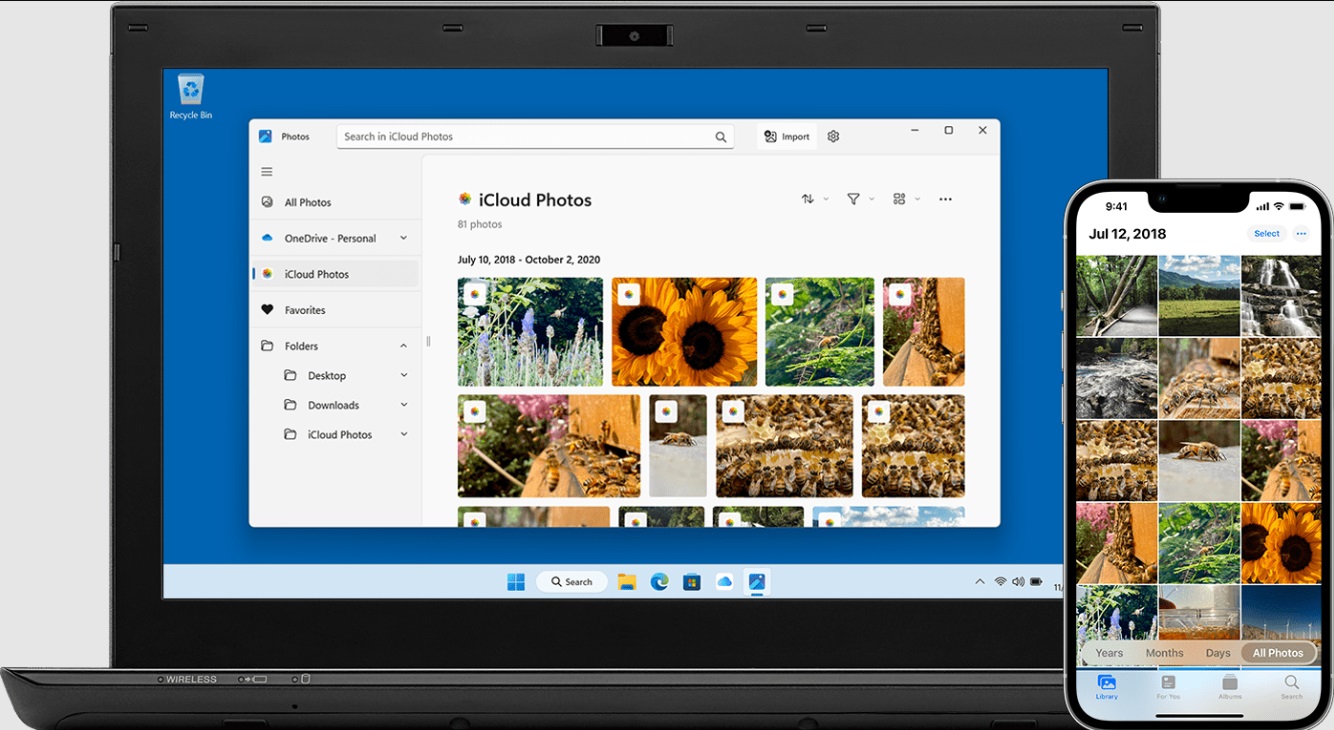
- On your Windows computer, open a web browser and visit www.icloud.com.
- Sign in with your Apple ID and password.
- Click on the Photos icon to access your iCloud Photo Library.
- Browse through your albums or use the search feature to locate the photos you want to download.
- Select the photos you want to download by holding down the Ctrl key (Cmd key on a Mac) and clicking on the photos.
- Once the desired photos are selected, click on the download button, usually represented by a cloud with a downward arrow.
- Your selected photos will now be downloaded to your Windows computer.
Using iCloud to download photos offers the convenience of accessing your entire photo library from any device with an internet connection. However, keep in mind that this method requires a stable internet connection and sufficient iCloud storage space to store all your photos.
Now that you know how to download photos from your iPad to a Windows computer using iCloud, let’s explore another method using iTunes.
Method 2: Using iTunes
If you prefer to use a direct connection between your iPad and Windows computer, you can use iTunes to transfer your photos. Here’s how you can download photos from your iPad to a Windows computer using iTunes:
- Connect your iPad to your Windows computer using a USB cable.
- If prompted on your iPad, enter your passcode and select “Trust This Computer.”
- Launch iTunes on your Windows computer. If you don’t have iTunes installed, you can download it from the official Apple website.
- Click on the device icon that appears in the top-left corner of the iTunes window.
- In the sidebar, click on “Photos” under the “Settings” section.
- Check the box next to “Sync Photos” and choose the folder or application you want to sync your photos from.
- Select the specific albums or folders that contain the photos you want to download.
- Click on the “Apply” or “Sync” button at the bottom-right corner of the iTunes window.
- Wait for the synchronization process to complete. This may take some time depending on the number and size of the photos.
- Once the synchronization is finished, you can disconnect your iPad from the computer.
- On your Windows computer, navigate to the folder where you chose to sync your photos. You will find all the downloaded photos there.
Using iTunes to download photos provides a direct and reliable connection between your iPad and Windows computer. However, it requires the installation of iTunes software on your computer and the use of a USB cable to establish the connection.
Now that you know how to download photos from your iPad to a Windows computer using iTunes, let’s explore one last method using Windows File Explorer.
Method 3: Using Windows File Explorer
If you prefer a straightforward and manual approach, you can use Windows File Explorer to transfer your photos from your iPad to your Windows computer. Here’s how to do it:
- Connect your iPad to your Windows computer using a USB cable.
- If prompted on your iPad, enter your passcode and select “Trust This Computer.”
- On your Windows computer, press the Windows key + E to open Windows File Explorer.
- In the left sidebar, under “This PC,” you should see your connected iPad listed as a device.
- Click on your iPad to access its files.
- Navigate to the “DCIM” folder. This is the default location where your iPad stores your photos.
- You might find multiple folders inside the “DCIM” folder, each containing different sets of photos. Open the folders to locate the photos you want to download.
- Select the desired photos by holding down the Ctrl key and clicking on the photos.
- Right-click on the selected photos and choose “Copy” from the context menu.
- Choose a destination folder on your Windows computer where you want to save the copied photos.
- Right-click on the destination folder and select “Paste” from the context menu.
- Wait for the copying process to complete. This may take some time depending on the number and size of the photos.
- Once the copying is finished, you can disconnect your iPad from the computer.
Using Windows File Explorer to download photos gives you full control over the files you want to transfer. However, it requires a manual selection and copying process and might not provide the same level of convenience as the previous methods.
Now that you know how to download photos from your iPad to a Windows computer using Windows File Explorer, you can choose the method that best suits your needs and start transferring your precious photos!
Conclusion
Downloading photos from your iPad to a Windows computer is a fundamental task that allows you to backup, edit, and share your precious memories. In this article, we explored three different methods to achieve this goal: using iCloud, using iTunes, and using Windows File Explorer.
Using iCloud provides the convenience of accessing your entire photo library from any device with an internet connection. It requires enabling iCloud Photo Library on your iPad and signing in to iCloud on your Windows computer. This method is ideal for those who want seamless access to their photos across multiple devices.
If you prefer a direct connection between your devices, using iTunes is a reliable option. It involves connecting your iPad to your Windows computer via a USB cable, selecting the photos you want to transfer, and syncing them using iTunes. This method is suitable for those who prefer a more traditional and straightforward approach.
For a manual and hands-on experience, using Windows File Explorer is a viable method. It involves connecting your iPad to your Windows computer via a USB cable, navigating to the DCIM folder on your iPad, selecting and copying the desired photos, and pasting them into a destination folder on your computer. This method offers complete control over the transfer process.
Whichever method you choose, it is important to ensure you have a stable internet connection, the latest iOS version on your iPad, and sufficient iCloud storage space or iTunes installed on your computer. Following the step-by-step instructions outlined in this article will help you successfully download photos from your iPad to your Windows computer.
Now that you have the knowledge and tools to transfer your photos, you can easily organize, edit, and share your memories with ease. Preserve your valuable moments and keep them safe by regularly backing up your iPad photos to your Windows computer.
Enjoy the convenience of having your photos accessible on both your iPad and Windows computer, and never worry about losing your cherished moments again!