Introduction
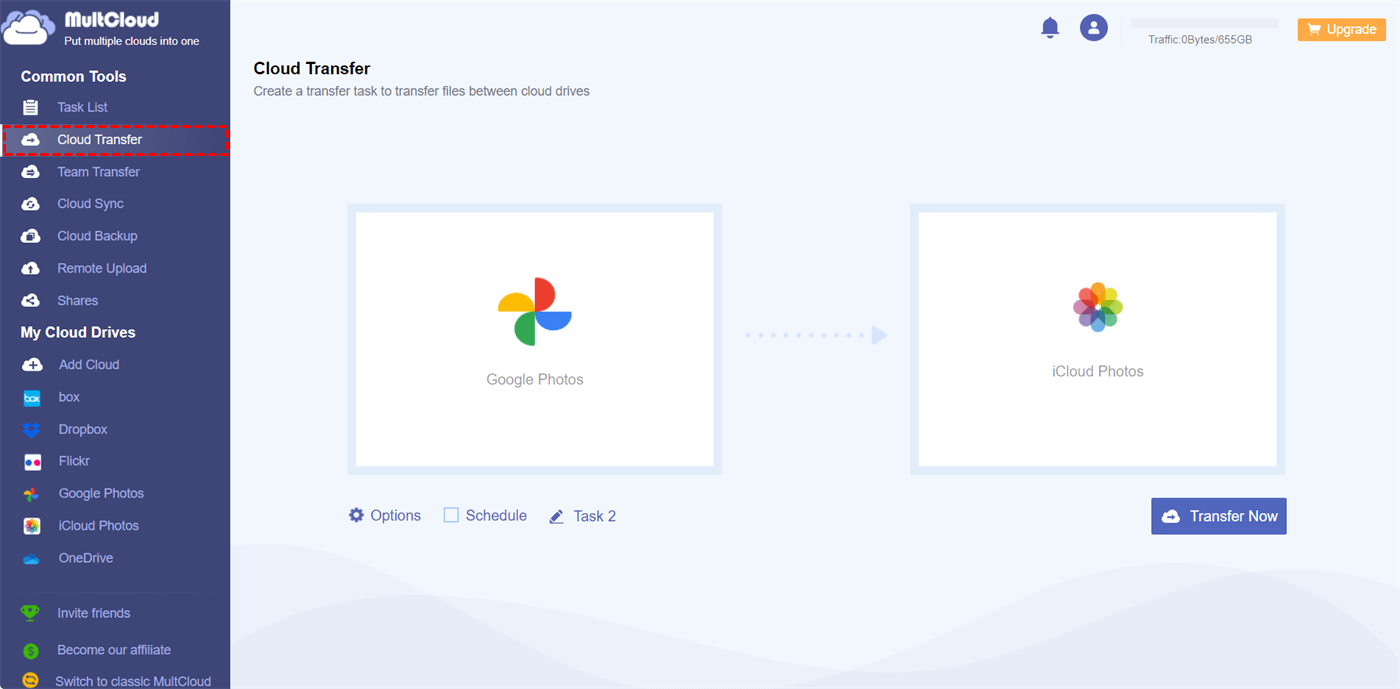
Welcome to our guide on how to move your Google Photos to iCloud! Google Photos and iCloud are both popular cloud storage options for managing and backing up your precious memories. However, if you’ve decided to switch from Google Photos to iCloud or simply want to have your photos in both platforms, this guide will walk you through the process step by step.
Migrating your photos from Google Photos to iCloud has several advantages. By consolidating your photos into iCloud, you can easily access and manage them across all your Apple devices, including iPhones, iPads, and Macs. Additionally, iCloud provides seamless integration with other Apple services and applications, such as the Photos app and shared albums.
In this guide, we will cover everything you need to know to successfully transfer your Google Photos to iCloud. From creating an iCloud account to importing your photos, we will provide detailed instructions to make the process as smooth as possible. Even if you are new to iCloud or have minimal technical experience, fret not! We will explain each step in a beginner-friendly manner.
Before we dive into the steps, please note that the time it takes to complete the transfer may vary depending on the size of your photo library and your internet connection speed. It is recommended to have a stable internet connection and ensure that you have enough storage space in your iCloud account to accommodate your photos.
Now that we have covered the basics, let’s get started with the first step: creating an iCloud account. Follow along, and you’ll soon be enjoying your precious memories in iCloud!
Step 1: Create an iCloud Account
The first step in transferring your Google Photos to iCloud is to create an iCloud account if you don’t already have one. An iCloud account allows you to access various Apple services, including iCloud Photo Library, which is where your photos will be stored.
Here’s how to create an iCloud account:
- Open a web browser and go to the iCloud website (www.icloud.com).
- Click on the “Create Apple ID” or “Sign Up” option.
- You will be prompted to enter your personal information, such as your name, email address, and password. Provide the required details and click “Next” or “Continue”.
- Choose your date of birth and security questions to help secure your account. Provide the necessary information and proceed.
- Read and accept the terms and conditions of iCloud by checking the box and clicking “Agree” or “Accept”.
- Verify your email address by entering the six-digit verification code sent to the email you provided.
- Once your email is verified, your iCloud account will be created, and you can proceed to set up iCloud Photo Library.
Congratulations! You now have an iCloud account that will allow you to store and access your photos. In the next step, we will guide you through setting up iCloud Photo Library and preparing it for the transfer of your Google Photos.
Step 2: Set up iCloud Photo Library
Once you have created your iCloud account, the next step is to set up iCloud Photo Library. This feature enables you to sync and access your photos across all of your Apple devices seamlessly. Here’s how to set up iCloud Photo Library:
- On your iPhone or iPad, go to “Settings” and tap on your Apple ID at the top of the screen.
- Tap “iCloud” and then “Photos”.
- In the Photos settings, toggle on the “iCloud Photos” option. This will ensure that all your photos are backed up to iCloud and accessible on your Apple devices.
- You can also choose to enable the “Optimize iPhone Storage” option. This feature optimizes the storage on your device by keeping lower-resolution versions of your photos while the full-resolution versions remain in iCloud.
- If you have a Mac, you can enable iCloud Photo Library by opening the Photos app, going to “Preferences”, and selecting the “iCloud” tab. Tick the box next to “iCloud Photos” to enable it on your Mac.
- Ensure that you have a stable internet connection, as initial syncing may take some time depending on the size of your photo library.
That’s it! Your iCloud Photo Library is now set up, and your photos will automatically start syncing to iCloud. Once all your photos have been uploaded to iCloud, you can proceed to download your Google Photos data and import it into iCloud, which we will cover in the next step.
Step 3: Download Google Photos Data
Before you can import your Google Photos into iCloud, you need to download your photo library data from Google Photos. Google provides a simple way to export your photos and videos so that you can transfer them to another platform. Follow these steps to download your Google Photos data:
- Open a web browser and visit the Google Takeout website: takeout.google.com
- Sign in with the Google account associated with your Google Photos.
- Scroll down the page and locate the “Select data to include” section. Click on “Deselect all” to uncheck all options.
- Scroll down and find “Google Photos” on the list. Check the box next to it to include your photos in the export.
- Scroll to the bottom of the page and click on “Next”.
- On the next screen, you can customize the export settings if you wish. By default, all your photos will be included. You can also choose the file type and size. Click on “Create export” to initiate the download.
- Google will prepare your photos for export, and once the process is complete, you will receive an email notification with a download link.
- Click on the download link provided in the email to start downloading your Google Photos data.
- The downloaded data will be in a compressed format (ZIP file). Extract the ZIP file to access your photos and videos.
Great! Now that you have your Google Photos data downloaded and ready, let’s move on to the next step: importing your Google Photos into iCloud.
Step 4: Import Google Photos to iCloud
Now that you have your Google Photos data downloaded, it’s time to import them into iCloud. Follow these steps to transfer your Google Photos to iCloud:
- On your computer, open a web browser and go to the iCloud website: www.icloud.com
- Sign in to your iCloud account using your Apple ID and password.
- Click on the “Photos” app icon on the iCloud dashboard.
- In the Photos app, click on the “Upload” button, usually represented by a cloud with an upward arrow.
- Select the folder containing your downloaded Google Photos data.
- Choose the photos and videos you want to import to iCloud. You can select multiple files by holding down the Ctrl (Windows) or Command (Mac) key while clicking on the files.
- Click on the “Open” button to start the upload process.
- Your selected Google Photos will now begin uploading to your iCloud account. The time it takes will depend on the size of the files and your internet connection speed.
- Once the upload is complete, your Google Photos will be available in your iCloud Photo Library.
That’s it! You have successfully imported your Google Photos into iCloud. You can now access them on any of your Apple devices connected to your iCloud account.
Note: It’s important to maintain a stable internet connection throughout the upload process to ensure the smooth transfer of your photos to iCloud. Additionally, make sure you have sufficient free space in your iCloud storage to accommodate the imported photos.
Now that your Google Photos are safely stored in iCloud, let’s move on to the final step: managing your iCloud storage to keep it clean and organized.
Step 5: Keep your iCloud Storage Clean
After transferring your Google Photos to iCloud, it’s essential to keep your iCloud storage clean and organized. Here are some tips to help you manage your iCloud storage:
- Regularly review and delete unnecessary files: Take the time to go through your iCloud Photo Library and determine if there are any photos or videos that you no longer need. By deleting unwanted files, you can free up valuable storage space for new memories.
- Utilize the “Optimize iPhone Storage” option: If you enabled this option during the iCloud Photo Library setup, your device will automatically store lower-resolution versions of your photos on your device. As a result, your iCloud storage won’t fill up quickly, and you can still access your full-resolution photos whenever needed.
- Consider upgrading your iCloud storage plan: If you find that your current storage plan is consistently reaching its limit, it may be worth upgrading to a higher storage tier. This will provide you with ample space to store not only your photos but also other data like videos, documents, and app data.
- Manage app backups and data: Some apps may automatically back up significant amounts of data to iCloud. Evaluate which apps are using the most iCloud storage and consider disabling backup for those that are not crucial. Additionally, periodically review and delete unnecessary app data.
- Use iCloud Photo Sharing: Instead of storing all your photos in iCloud Photo Library, you can create shared albums and invite friends and family to contribute. This way, you can share and access photos without taking up your individual iCloud storage.
- Regularly sync and back up your devices: By keeping your devices in sync and regularly backing up data to iCloud, you can avoid accumulating duplicate files and ensure that your important data is protected.
By following these tips, you can effectively manage your iCloud storage and keep it organized to accommodate your growing collection of photos and other files.
With that, you have completed the process of moving your Google Photos to iCloud and learned how to maintain a clean iCloud storage. Enjoy seamless access to your photos across all your Apple devices and have peace of mind knowing that your memories are backed up in the cloud.
Conclusion
Congratulations! You have successfully learned how to move your Google Photos to iCloud. By following the step-by-step instructions in this guide, you have transferred your precious memories to iCloud, allowing you to access them seamlessly across all your Apple devices.
Creating an iCloud account, setting up iCloud Photo Library, downloading your Google Photos data, and importing them into iCloud were all essential steps in the migration process. Additionally, we discussed the importance of keeping your iCloud storage clean and organized to optimize its functionality.
With your photos safely stored in iCloud, you can enjoy the convenience of accessing, managing, and sharing your memories with ease. The integration of iCloud with other Apple services and applications enhances your overall experience and ensures that your photos are well-preserved for years to come.
Remember to periodically review and delete unnecessary files, utilize the “Optimize iPhone Storage” option, and consider upgrading your iCloud storage plan if needed. These practices will help you make the most of your iCloud storage and accommodate new memories as they are captured.
Thank you for following our guide on how to move your Google Photos to iCloud. We hope this tutorial has been helpful, and you can now fully embrace the benefits of storing your photos in iCloud. Enjoy the convenience, accessibility, and peace of mind that iCloud offers as you continue to capture and cherish your special moments!


