Introduction
Welcome to this comprehensive guide on how to delete photos from your phone without removing them from Google Photos. With the ever-increasing number of photos we capture on our smartphones, it’s essential to manage our photo libraries efficiently. Google Photos provides a convenient solution for storing and organizing our precious memories. However, you might find yourself in a situation where you want to free up space on your phone but keep all your photos safely backed up in the cloud.
Deleting photos from your phone but not from Google Photos is the perfect solution to achieve a clutter-free device while preserving your cherished images. Whether you’re an Android or iOS user, this guide will walk you through various options to accomplish this task seamlessly.
No matter which device or operating system you use, we’ve got you covered. We’ll explain step-by-step instructions for different apps and platforms, ensuring that you can easily follow along regardless of your technical proficiency.
By the end of this guide, you’ll have a clear understanding of how to delete photos from your phone without removing them from Google Photos. You’ll be able to manage your photo library efficiently, freeing up valuable storage space without worrying about losing any precious memories.
So, let’s dive in and explore the different methods you can use to keep your Google Photos intact while deleting photos from your phone!
Why Delete Photos From Phone But Not Google Photos?
Deleting photos from your phone while keeping them stored in Google Photos offers several advantages and considerations. Here are a few reasons why you might choose this approach:
- Free up storage space: One of the primary reasons to delete photos from your phone is to free up valuable storage space. Smartphones often have limited internal storage, and large photo libraries can quickly consume that space. By deleting the photos from your device, you can make room for new apps, videos, or other important files.
- Access photos from any device: Storing your photos in Google Photos allows you to access them from any device with an internet connection. Whether you’re using a smartphone, tablet, or computer, you can effortlessly view and share your stored photos without the need to have them physically saved on each device.
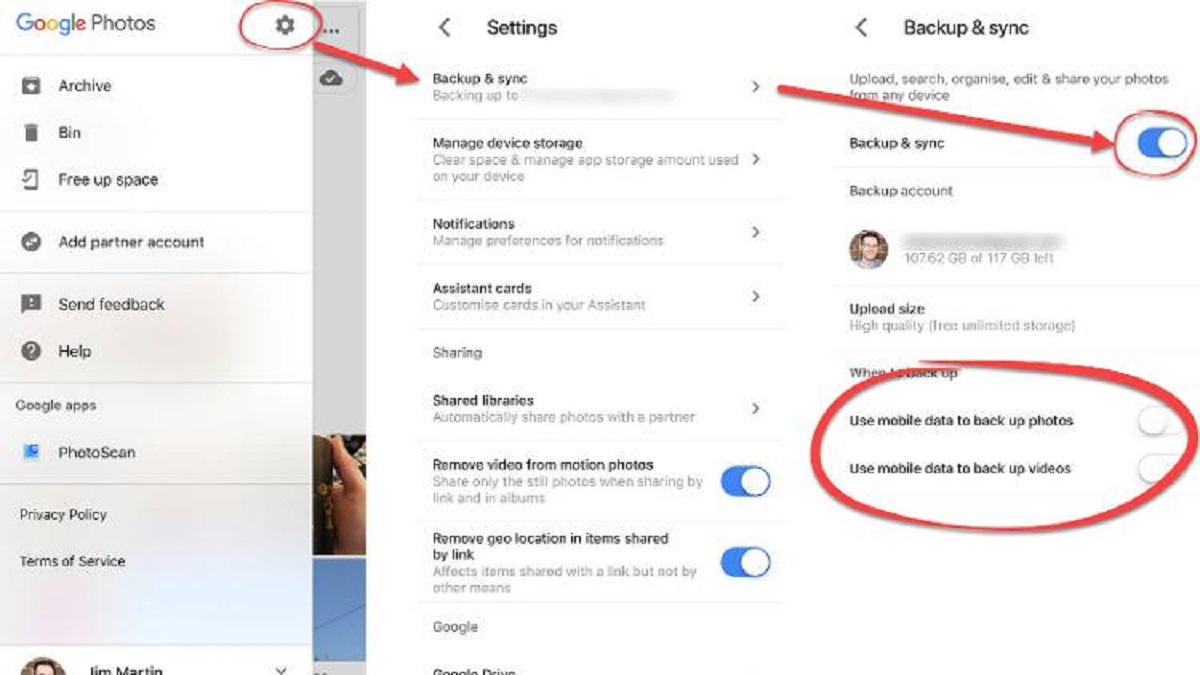
- Automatic backup and sync: Google Photos offers automatic backup and syncing features, ensuring that your photos are securely stored in the cloud. By deleting the photos from your phone but not Google Photos, you can have peace of mind knowing that your memories are safely backed up and accessible whenever you need them.
- Organization and search capabilities: Google Photos provides powerful organization and search features. You can create albums, add tags, and easily search for specific photos based on people, places, or objects. By keeping your photos in Google Photos, you can take advantage of these features without cluttering up your phone’s gallery with an abundance of images.
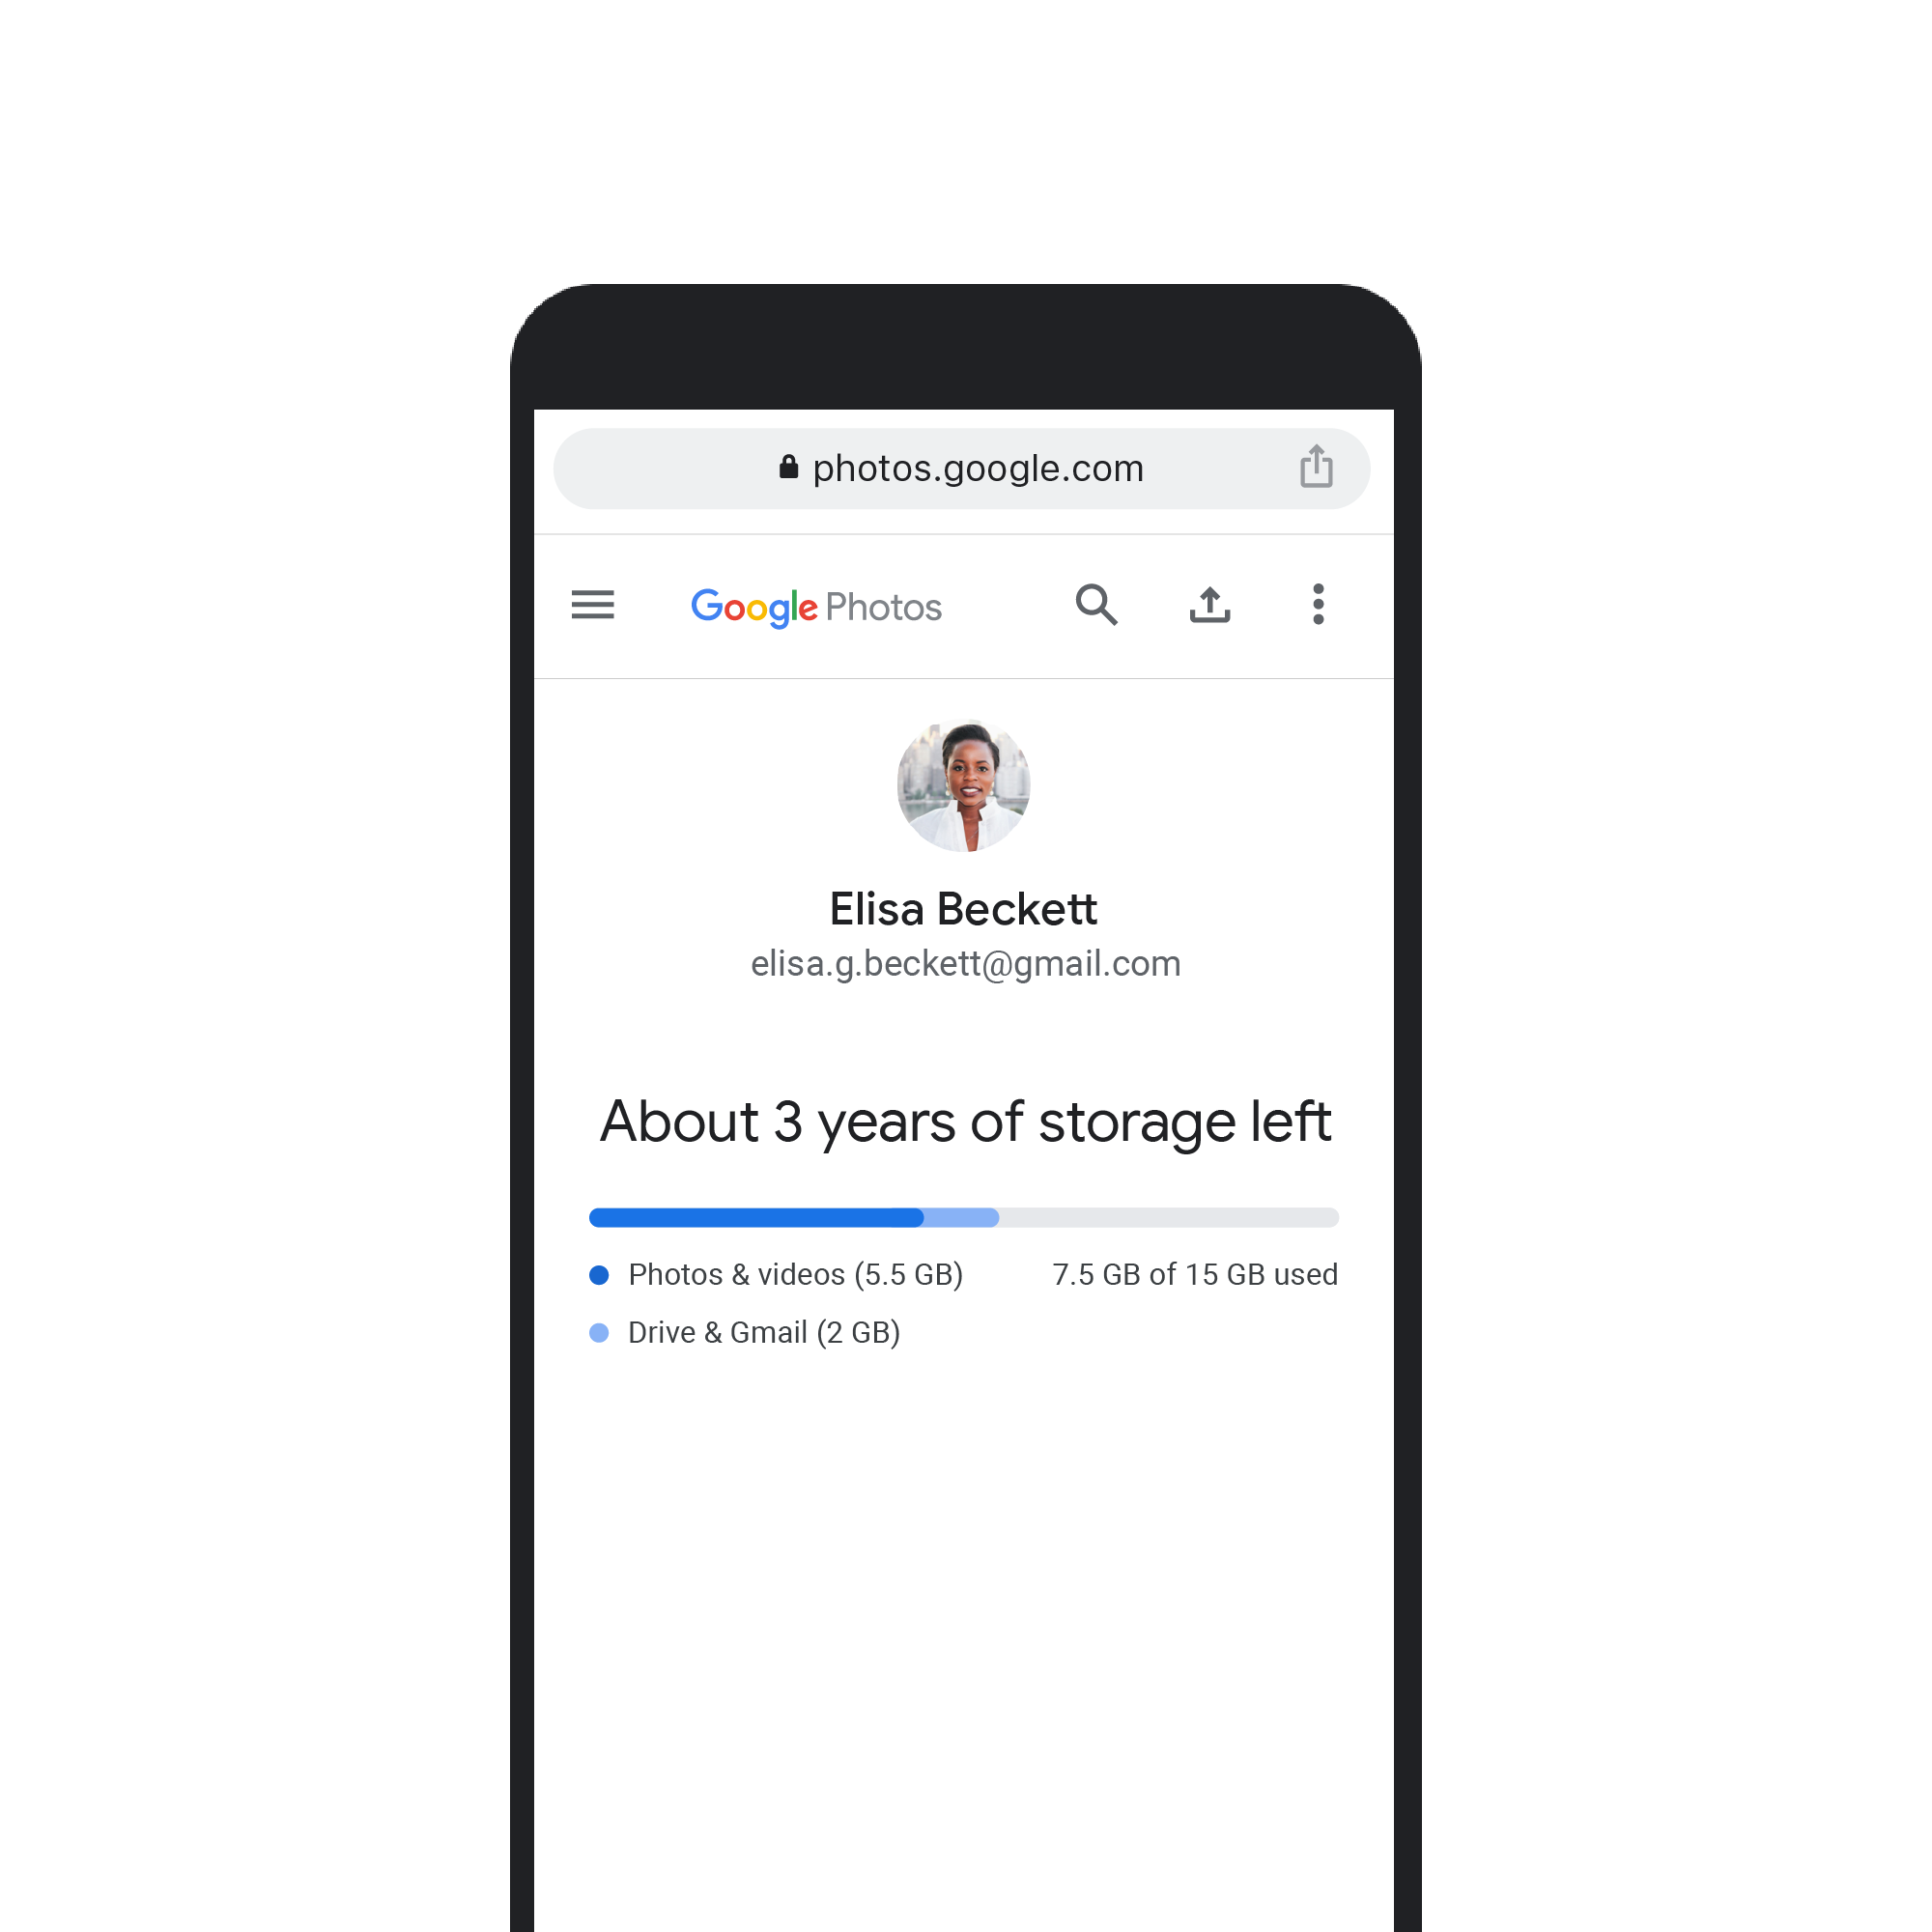
When considering deleting photos from your phone but not Google Photos, it’s important to note that you should have a reliable internet connection to access your photos in the cloud. Additionally, while Google Photos offers free storage for high-quality photos, there is a storage limit for original quality photos. Be mindful of the storage space you have available and consider upgrading if needed.
With these advantages in mind, let’s explore the step-by-step guide for deleting photos from your phone while preserving them in Google Photos!
Step-by-Step Guide to Deleting Photos From Phone But Not Google Photos
Now that you understand the benefits of deleting photos from your phone without removing them from Google Photos, let’s explore the step-by-step guide for accomplishing this task. We’ll cover various options based on your device and operating system.
- Using the Google Photos App: If you primarily use Google Photos for managing your photo library, this option is the most straightforward. Open the Google Photos app on your phone, select the photos you want to delete, and tap the trash bin icon. These photos will be removed from your device’s gallery while remaining safely stored in Google Photos.
- Using the Files App (Android): If you prefer a file manager approach, Android users can utilize the Files app. Open the Files app, navigate to the “Pictures” or “Gallery” folder, select the photos you want to delete, and tap the delete icon. Remember, this method will not remove the photos from Google Photos.
- Using the Photos App (iOS): iOS users can use the built-in Photos app for managing their photo library. Open the Photos app, navigate to the “Photos” tab, select the photos you want to remove, and tap the trash bin icon. Confirm the deletion, and these photos will be deleted from your device while remaining in Google Photos.
- Using the Gallery App (Samsung): Samsung users can take advantage of the Gallery app for deleting photos from their phones while preserving them in Google Photos. Open the Gallery app, select the photos you want to delete, tap on the three-dot menu, and choose “Move to Trash.” Similar to other methods, these photos will be removed from your device’s gallery but not from Google Photos.
- Using the iCloud Photos App (iOS): If you use iCloud Photos to sync your photos across Apple devices, you can manage your photo library directly through the iCloud Photos app. Open the app, select the photos you want to delete, and tap the trash bin icon. These photos will be deleted from your device while remaining accessible through Google Photos and other iCloud-connected devices.
- Using the Google Photos Website: If you prefer managing your photos on a computer, you can use the Google Photos website. Access the website, sign in to your Google account, select the photos you want to delete, and click on the trash bin icon. These photos will be removed from your phone while remaining in Google Photos.
By following these step-by-step instructions, you can easily delete photos from your phone without removing them from Google Photos. Choose the method that aligns with your device and preferences, and enjoy a clutter-free phone while keeping all your memories safely backed up in the cloud!
Option 1: Using the Google Photos App
If you primarily use Google Photos for managing your photo library, deleting photos from your phone without removing them from Google Photos is a breeze. Follow these simple steps:
- Open the Google Photos app on your phone.
- Navigate to the “Photos” tab to access your entire photo library.
- Select the photos you want to remove from your device. You can do this by tapping on individual photos or using the select button to choose multiple photos at once.
- Once you’ve selected the desired photos, tap the trash bin icon at the top of the screen.
- A prompt will appear asking you to confirm the deletion. Tap “Move to trash” to proceed.
By following these steps, the selected photos will be removed from your phone’s gallery, freeing up storage space. However, these photos will remain safely stored in Google Photos, accessible from any device with an internet connection.
Deleting photos from your phone using the Google Photos app is especially convenient because it offers an intuitive interface and straightforward organization features. You can create albums, add tags, and easily search for specific photos based on people, places, or objects.
With this option, you can confidently remove photos from your phone, knowing that you won’t lose them. The photos will still be available for you to view, edit, and share through the Google Photos app or website.
Now that you’ve learned how to delete photos from your phone using the Google Photos app, feel free to explore the other options outlined in this guide to find the one that best suits your needs and device.
Option 2: Using the Files App (Android)
If you prefer a file manager approach, Android users can utilize the Files app to delete photos from their phone without removing them from Google Photos. Follow these steps to accomplish this:
- Open the Files app on your Android device. If you don’t have it installed, you can download it from the Google Play Store.
- Navigate to the “Pictures” or “Gallery” folder. The exact location may vary depending on your device and file structure.
- Once you’re in the appropriate folder, tap and hold on the photo you wish to delete. You can select multiple photos by tapping on each one.
- After selecting the desired photos, look for the delete icon (usually represented by a trash bin). Tap on it to begin the deletion process.
- A confirmation message will appear, asking if you want to delete the selected photos. Confirm by tapping “OK” or “Delete” to proceed.
By following these steps, the selected photos will be deleted from your device’s gallery, providing you with more storage space. However, it’s important to note that these photos will remain safe and accessible in your Google Photos account.
Using the Files app to delete photos offers a simple and efficient method for managing your photo library. It allows you to navigate through different folders on your phone and select specific photos for deletion. This can be particularly useful when you want to organize your photos beyond what Google Photos offers.
Remember that deleting photos using the Files app will not remove them from your Google Photos library. You can still view, edit, and share these photos through the Google Photos app or website on any device.
Now that you’ve learned how to use the Files app to delete photos while preserving them in Google Photos, continue reading to discover other options specifically tailored for iOS and Samsung users.
Option 3: Using the Photos App (iOS)
iOS users can take advantage of the built-in Photos app to delete photos from their iPhone without removing them from Google Photos. Here’s how you can do it:
- Open the Photos app on your iOS device. You can find it on your home screen.
- Navigate to the “Photos” tab to access your entire photo library.
- Tap on the “Select” button located at the top-right corner of the screen.
- Choose the photos that you want to delete. You can tap on each photo individually or swipe your finger across multiple photos to select them in bulk.
- Once you have selected the desired photos, tap the trash bin icon located at the bottom-right corner of the screen.
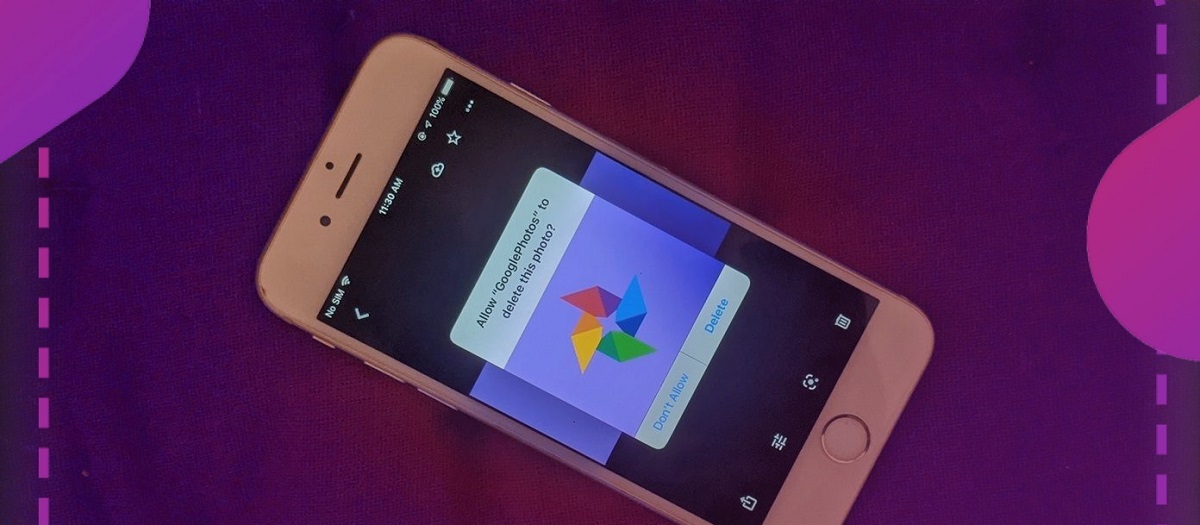
- A confirmation message will appear, asking you to confirm the deletion of the selected photos. Tap on “Delete [number] Photos” to proceed.
By following these steps, the selected photos will be deleted from your iPhone’s gallery, freeing up storage space. However, these photos will still be safely stored in Google Photos, allowing you to access and manage them from any device.
Using the Photos app on iOS provides a seamless and integrated way to manage your photos. You can easily browse through your photo library, organize them into albums, and even perform basic editing tasks.
Remember that deleting photos using the Photos app will not remove them from your Google Photos account. They will remain accessible via the Google Photos app or website, and you can view, edit, and share them as usual.
Now that you’ve learned how to use the Photos app to delete photos without removing them from Google Photos, let’s explore other options specifically designed for Samsung users and those who prefer using the iCloud Photos app on iOS.
Option 4: Using the Gallery App (Samsung)
If you are a Samsung user, you can delete photos from your device’s gallery without removing them from Google Photos using the built-in Gallery app. Here’s how you can do it:
- Open the Gallery app on your Samsung device. You can find it in the app drawer or on your home screen.
- Navigate to the album or folder containing the photos you want to delete.
- Tap and hold on one of the photos you wish to remove. This will activate the selection mode.
- Tap on additional photos to select them. You can choose multiple photos by tapping on each one.
- Once you have selected the desired photos, tap on the three-dot menu icon located at the top-right corner of the screen.
- From the options that appear, tap on “Move to Trash” or “Delete” to remove the selected photos from your device’s gallery.
By following these steps, the selected photos will be deleted from your Samsung device’s gallery while remaining intact in your Google Photos account.
The Gallery app on Samsung devices provides a user-friendly interface for managing your photos. You can organize them into albums, create stories, and easily browse through your entire photo collection.
It’s important to note that deleting photos using the Gallery app will not remove them from your Google Photos library. You can still view, edit, and share these photos through the Google Photos app or website on any device.
Now that you’re familiar with using the Gallery app to delete photos while keeping them in Google Photos, continue reading to discover other options, such as using the iCloud Photos app on iOS and managing photos through the Google Photos website.
Option 5: Using the iCloud Photos App (iOS)
If you use iCloud Photos to sync your photos across Apple devices, you can delete photos from your iPhone without removing them from Google Photos using the iCloud Photos app. Here’s how you can do it:
- Open the iCloud Photos app on your iOS device. This app should be pre-installed on your iPhone, iPad, or iPod touch.
- Navigate to the “Photos” tab to access your entire photo library synced with iCloud.
- Select the photos you want to delete. You can tap on individual photos or swipe your finger across multiple photos to select them in bulk.
- Tap on the trash bin icon at the bottom of the screen to delete the selected photos from your device.
- Confirm the deletion by tapping on “Delete [number] Photos.”
By following these steps, the selected photos will be removed from your iPhone while remaining safely stored in your Google Photos account.
Using the iCloud Photos app provides a seamless way to manage your photo library, especially if you rely on iCloud for syncing your photos across your Apple devices. With iCloud Photos, you can access and view your photos on all your devices, including your iPhone, iPad, Mac, and even on the iCloud Photos website.
Deleting photos using the iCloud Photos app does not remove them from your Google Photos library. You can continue to access and manage these photos through the Google Photos app or website on any device.
Now that you know how to use the iCloud Photos app to delete photos without removing them from Google Photos, let’s explore the final option, which involves managing your photos through the Google Photos website.
Option 6: Using the Google Photos Website
If you prefer managing your photos on a computer or laptop, you can delete photos from your phone without removing them from Google Photos by using the Google Photos website. Here’s how:
- Access the Google Photos website by opening a web browser and navigating to photos.google.com.
- Sign in to your Google account if you haven’t already.
- Click on the “Photos” tab to view your entire photo library.
- Select the photos you want to delete by clicking on them. To select multiple photos, hold down the Ctrl (Windows) or Command (Mac) key while clicking on each photo.
- Once you have selected the desired photos, click on the trash bin icon located in the upper-right corner of the screen.
- A dialog box will appear, asking for confirmation to delete the selected photos. Click on “Move to trash” to proceed.
By following these steps, the selected photos will be moved to the trash in your Google Photos account, effectively removing them from your phone’s gallery while keeping them securely stored online.
Managing your photos through the Google Photos website offers a convenient way to organize and edit your photos. You can create albums, add tags, and easily search for specific photos based on people, places, or objects.
Remember that deleting photos using the Google Photos website will not remove them from your Google Photos library. You can still access and view these photos through the Google Photos app on your phone or other devices.
Now that you’ve learned how to use the Google Photos website to delete photos from your phone while preserving them in Google Photos, you have several options to choose from based on your device and preferences.
Conclusion
Managing your photo library and freeing up storage space on your phone is essential for a clutter-free and efficient device. With the step-by-step guide provided in this article, you now have multiple options to delete photos from your phone without removing them from Google Photos.
Whether you prefer using the Google Photos app, the Files app (Android), the Photos app (iOS), the Gallery app (Samsung), the iCloud Photos app (iOS), or the Google Photos website, each option offers a simple and effective way to handle your photos.
By utilizing these methods, you can easily remove photos from your phone’s gallery while knowing that they remain safe and accessible in your Google Photos library. Whether you’re an Android or iOS user, a Samsung enthusiast, or someone who relies on iCloud Photos, there’s a solution for everyone.
Remember to consider the advantages of freeing up storage space, accessing photos from any device, benefiting from automatic backup and sync, and leveraging powerful organization and search capabilities within Google Photos. These features make it easy to manage and enjoy your photo collection.
So go ahead, take the time to declutter your phone, and enjoy the peace of mind that comes with knowing your precious memories are securely stored in the cloud.
Now that you’ve learned how to delete photos from your phone but not Google Photos, you can create space for new memories while keeping the old ones just a tap away.
Choose the method that suits your needs, follow the step-by-step instructions, and achieve a clean and well-organized photo library on your device while safely preserving your memories in Google Photos!