Introduction
Google Photos is a popular cloud storage service that offers users the ability to back up and access their photos and videos from any device. While it’s a convenient feature for many, there may be instances when you want to disable or pause the backup process. Whether you’re looking to save storage space on your device or simply want more control over which photos are being backed up, Google Photos provides options to customize your backup settings.
In this article, we will guide you through the steps to stop Google Photos from backing up on Android devices and iPhones. We will also cover how to pause the backup temporarily, limit backup to Wi-Fi only, adjust backup settings, and even delete backed-up photos if needed.
By understanding these features and settings, you’ll be able to take control of your Google Photos backup and tailor it to your preferences. So, let’s dive in and explore how you can manage your Google Photos backup effortlessly.
Disabling Backup on Android Devices
If you’re an Android user and want to disable the backup feature on Google Photos, you can easily do so by following these simple steps:
- Open the Google Photos app on your Android device.
- Tap on the three horizontal lines in the top-left corner to open the navigation menu.
- Select “Settings” from the menu.
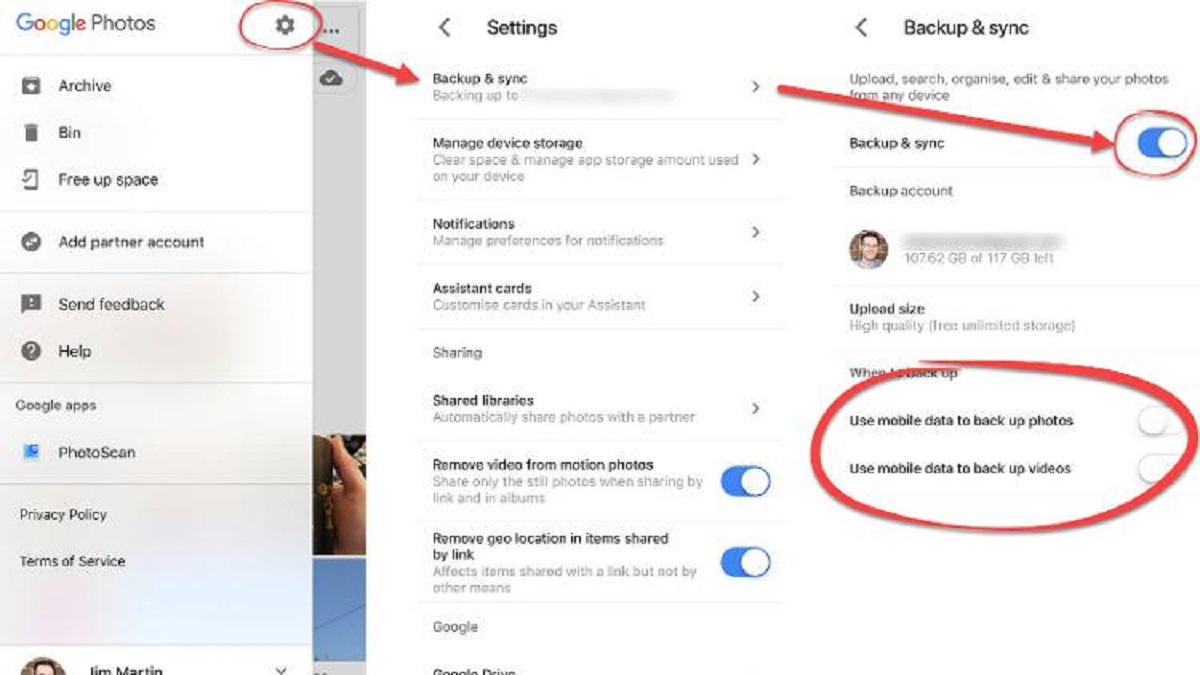
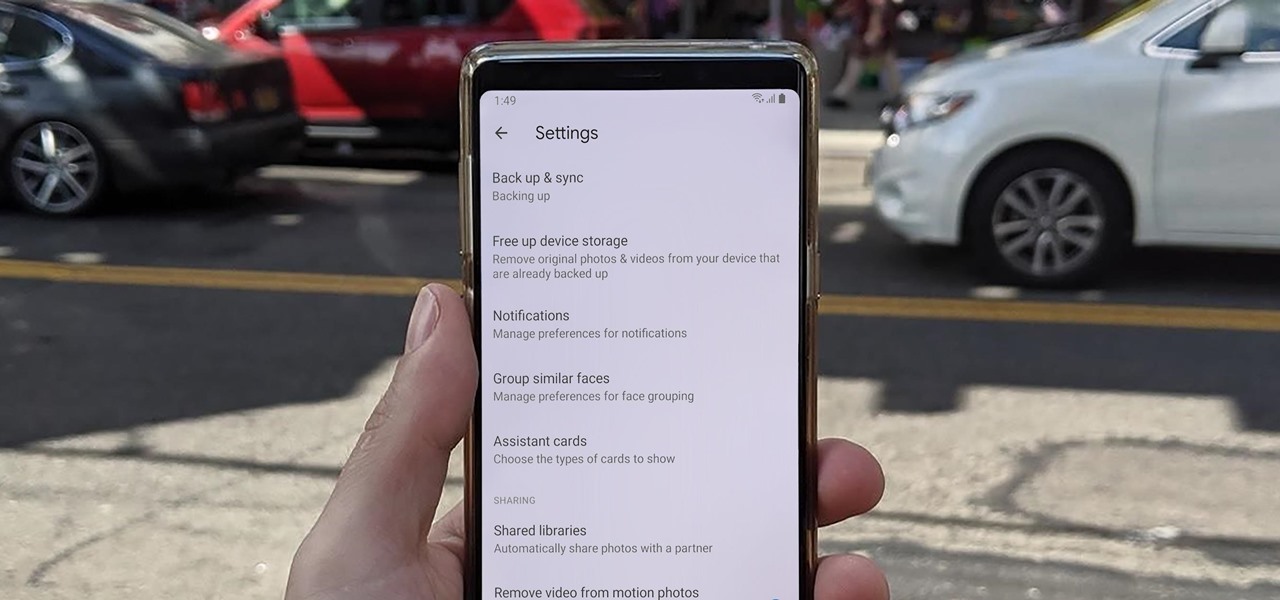
- Tap on “Back up & sync.”
- Toggle off the “Back up & sync” option to disable the backup feature.
By turning off the “Back up & sync” option, you stop Google Photos from automatically backing up your photos and videos. This means that any new photos or videos you capture or save on your device will not be uploaded to your Google Photos account unless you manually select and upload them.
Disabling the backup feature can be useful if you have limited storage on your device or if you prefer to manually manage which photos and videos are backed up. However, keep in mind that by disabling the backup, you won’t have access to your photos and videos on other devices unless you manually upload them.
If you change your mind and want to re-enable the backup feature, simply follow the same steps mentioned above and toggle on the “Back up & sync” option.
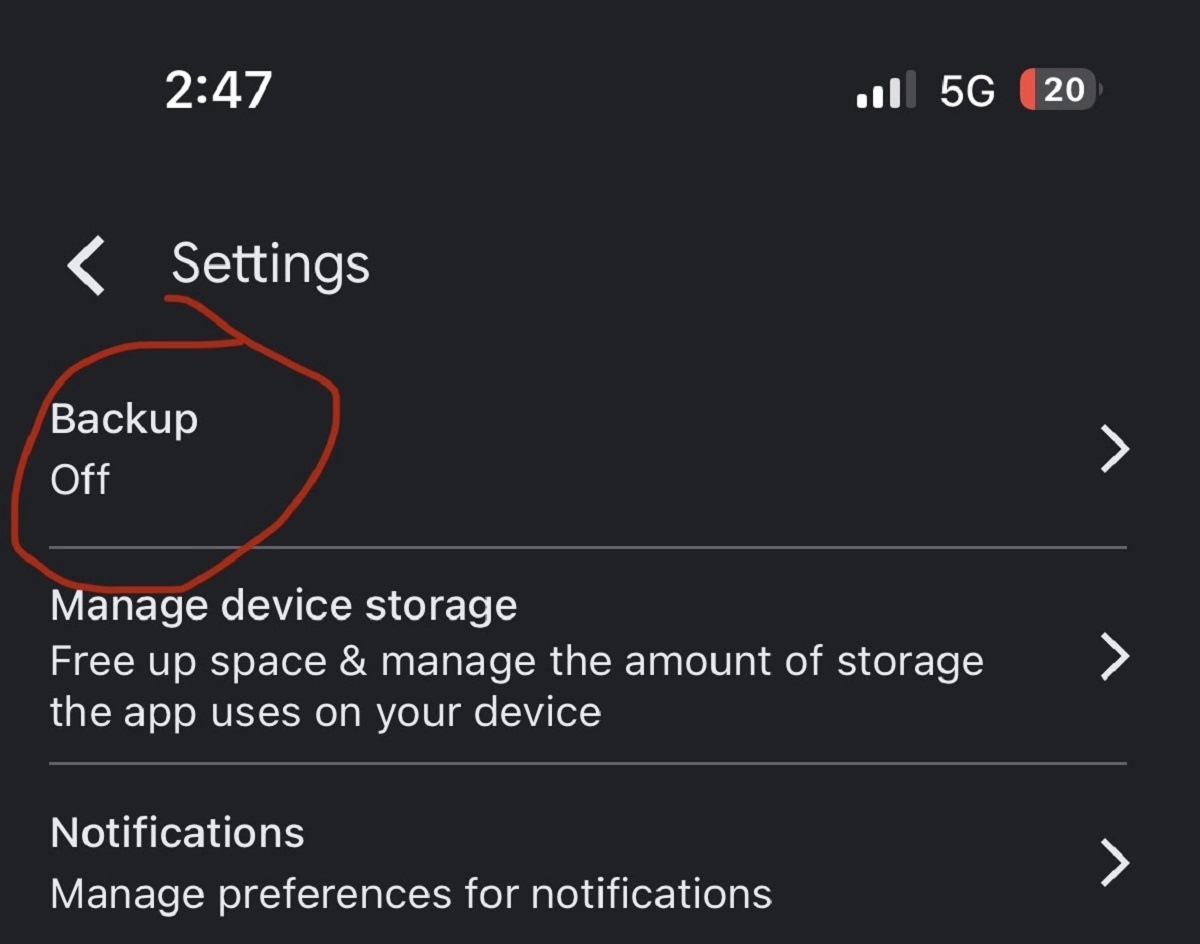
Disabling Backup on iPhone
If you’re an iPhone user and wish to disable the backup feature on Google Photos, you can do so by following these steps:
- Launch the Google Photos app on your iPhone.
- Tap on your profile picture in the top-right corner to open the menu.
- Select “Photos settings” from the menu.
- Tap on “Back up & sync.”
- Toggle off the “Back up & sync” option to disable the backup feature.
By turning off the “Back up & sync” option, you instruct Google Photos to stop automatically backing up your photos and videos from your iPhone to your Google account. As a result, any new photos or videos you capture or save on your device won’t be uploaded to Google Photos unless you manually select and upload them.
Disabling the backup feature can be beneficial if you want more control over which photos and videos are saved to your Google Photos account. However, it’s important to note that when you disable the backup, you won’t be able to access your iPhone photos and videos through the Google Photos app on other devices unless you manually upload them.
If you change your mind and want to re-enable the backup feature, simply follow the same steps mentioned above and toggle on the “Back up & sync” option.
Pausing Backup on Android Devices
If you want to temporarily pause the backup process on Google Photos for your Android device, you can do so by following these steps:
- Open the Google Photos app on your Android device.
- Tap on the three horizontal lines in the top-left corner to open the navigation menu.
- Select “Settings” from the menu.
- Tap on “Back up & sync.”
- Tap on “Pause backup” and select the desired duration (2 or 8 hours, 1 day, or until manually resumed).
By pausing the backup, Google Photos will temporarily stop uploading new photos and videos from your Android device to your Google account. This is useful when you’re experiencing slow or limited internet connectivity or if you simply want to conserve your data usage.
Once the selected duration is over, the backup process will automatically resume. However, if you want to manually resume the backup process before the selected duration, you can follow the same steps mentioned above and tap on “Resume backup.”
It’s important to note that pausing the backup on one device does not affect the backup settings of other devices linked to the same Google Photos account. Each device has its own backup settings.
Pausing Backup on iPhone
If you’re using Google Photos on your iPhone and want to temporarily pause the backup process, you can do so by following these steps:
- Launch the Google Photos app on your iPhone.
- Tap on your profile picture in the top-right corner to open the menu.
- Select “Photos settings” from the menu.
- Tap on “Back up & sync.”
- Tap on “Pause backup” and choose the desired duration (2 or 8 hours, 1 day, or until manually resumed).
By pausing the backup, Google Photos will temporarily stop uploading new photos and videos from your iPhone to your Google account. This can be useful when you’re in a situation with limited internet connectivity or if you want to conserve your data usage.
Once the selected duration is over, the backup process will automatically resume. However, if you want to manually resume the backup process before the selected duration, you can follow the same steps mentioned above and tap on “Resume backup.”
Keep in mind that pausing the backup on your iPhone does not affect the backup settings on other devices linked to your Google Photos account. Each device has its own backup settings, and pausing the backup on one device won’t impact the backup process on others.
Limiting Backup to Wi-Fi Only
If you want to save your mobile data and only allow Google Photos to back up your photos and videos when connected to Wi-Fi, you can set your backup settings accordingly. Here’s how:
- Open the Google Photos app on your device.
- Tap on the three horizontal lines in the top-left corner to open the navigation menu.
- Select “Settings” from the menu.
- Tap on “Back up & sync.”
- Scroll down to find the “Upload settings” section.
- Toggle on the “Use Wi-Fi only” option.
Enabling this option ensures that Google Photos will only back up your photos and videos when your device is connected to a Wi-Fi network. It prevents the app from using your mobile data for uploading, which can be particularly useful if you have limited data plans or expensive data charges.
Keep in mind that when you restrict backup to Wi-Fi only, it may delay the uploading process if you take a lot of photos or videos and are frequently away from Wi-Fi networks. However, once your device is connected to Wi-Fi again, the backup process will resume automatically.
If you prefer to use mobile data for backup until a Wi-Fi connection is available, you can toggle off the “Use Wi-Fi only” option and allow Google Photos to back up your media using data connectivity. Just be mindful of your mobile data usage if you have limited data plans.
Adjusting Backup Settings on Android Devices
Google Photos offers a range of backup settings that you can customize on your Android device. Here’s how you can adjust these settings:
- Open the Google Photos app on your Android device.
- Tap on the three horizontal lines in the top-left corner to open the navigation menu.
- Select “Settings” from the menu.
- Tap on “Back up & sync.”
Within the “Back up & sync” settings, you’ll find several options to modify your backup preferences:
- Back up device folders: This allows you to choose specific folders on your device to back up to Google Photos. Simply tap on “Back up device folders” and toggle on/off the folders you want to include/exclude from the backup.
- Upload size: By default, Google Photos offers two options for the upload size: “High quality” and “Original quality.” The “High quality” option provides unlimited free storage for compressed photos and videos, while the “Original quality” option retains the original resolution but counts against your Google account storage quota. Tap on “Upload size” to select the desired option.
- Roaming: If you want to prevent Google Photos from using your data plan while you’re roaming internationally, you can toggle off this option.
- Notify for new devices: Enabling this option will send a notification to your device whenever Google Photos detects a new device connected to your Google account and prompts you to choose whether to back up photos and videos from that device as well.
By adjusting these backup settings according to your preferences, you can have more control over which folders are backed up, the quality of the uploaded media, and how Google Photos handles roaming and new devices.
Adjusting Backup Settings on iPhone
To adjust the backup settings for Google Photos on your iPhone, follow these steps:
- Launch the Google Photos app on your iPhone.
- Tap on your profile picture in the top-right corner to open the menu.
- Select “Photos settings” from the menu.
- Tap on “Back up & sync.”
Within the “Back up & sync” settings, you can customize various options to tailor your backup preferences:
- Backup mode: You can choose between two backup modes: “Express” and “Original.” The “Express” mode offers unlimited free storage for compressed photos and videos, while the “Original” mode retains the original resolution but counts against your Google account storage quota. Tap on “Backup mode” to select the desired option.
- Upload size: This option allows you to choose the size at which your photos and videos will be uploaded. You can select between “High quality” and “Original quality.” “High quality” compresses the media to save storage space, while “Original quality” maintains the original resolution. Tap on “Upload size” to make your selection.
- Backup while charging: By enabling this option, Google Photos will only back up your media when your iPhone is connected to a power source, conserving battery life. Toggle on/off this option based on your preference.
- Cellular data back up: If you want to allow Google Photos to back up your photos and videos using your mobile data, you can enable this option. Be cautious with your data usage if you have limited data plans.
By adjusting these backup settings, you can personalize how Google Photos handles the backup process on your iPhone. Whether it’s selecting the backup mode, upload size, or specifying charging preferences, these settings allow you to customize your Google Photos experience according to your needs.
Deleting Backed Up Photos
If you want to remove backed-up photos from your Google Photos account, you can do so by following these steps:
- Open the Google Photos app on your device.
- Select the photo or photos you want to delete.
- Tap on the three-dot menu icon in the top-right corner.
- Choose “Delete from device” to remove the photo only from your device or “Delete from Google Account” to delete it from both your device and Google Photos.
- Confirm the action when prompted.
Deleting the photo from your device or Google Account will permanently remove it from your collection, including any backups made. However, it’s important to note that deleting a photo from your device or Google Photos doesn’t affect other devices linked to your Google Account unless you delete it individually from all devices or sync the changes.
If you want to delete multiple photos at once, you can select multiple photos before tapping on the three-dot menu icon. Alternatively, you can also delete entire albums or folders by selecting them and using the same delete options mentioned above.
Keep in mind that once a photo is deleted, it cannot be recovered unless you have a backup stored elsewhere. Therefore, exercise caution when deleting photos from your Google Photos account to avoid any accidental or permanent loss of your precious memories.
Conclusion
Managing the backup settings on Google Photos allows you to have more control over how your photos and videos are stored and accessed. Whether you’re using an Android device or an iPhone, adjusting these settings is easy and can greatly enhance your experience with the app.
By disabling the backup feature, you can save storage space on your device or selectively choose which photos and videos to back up. Pausing the backup temporarily is useful when you have limited internet connectivity or want to conserve data usage. Limiting backup to Wi-Fi only ensures that your mobile data is not used for uploading media.
Furthermore, adjusting backup settings allows you to specify which device folders to back up, choose the upload size, and control roaming and new device notifications. It’s important to consider your storage capacity, data plan, and personal preferences when customizing these settings.
If you ever need to remove backed-up photos from your Google Photos account, you can easily delete them on your device, either individually or in bulk. Just be mindful that deleted photos can’t be recovered unless you have a backup elsewhere.
With these tips and instructions, you can now take full advantage of Google Photos to manage your media without any hassle. So, explore the features, adjust the settings as per your needs, and enjoy a seamless and customized Google Photos experience.