Introduction
Welcome to the era of digital photography, where capturing precious moments has become easier than ever before. With the rise of smartphones equipped with high-quality cameras, people now have the ability to take countless photos and store them digitally. Google Photos has emerged as one of the most popular platforms for storing and managing these digital memories.
Google Photos offers a wide range of features, including unlimited storage for high-resolution photos and videos, automatic backup, and advanced search capabilities. However, there may be instances where you want to turn off certain features of Google Photos or even disable it completely.
In this article, we will explore several methods to turn off Google Photos based on different scenarios and platforms. Whether you want to stop the automatic backup of your photos, revoke access from specific apps, or disable Google Photos entirely, we have you covered.
Before we dive into the methods, it’s important to note that disabling Google Photos will affect how your photos and videos are backed up, organized, and accessible. Take the necessary precautions and consider alternative solutions, such as using other cloud storage services, before proceeding with the methods outlined in this article.
Now, let’s explore various methods to turn off Google Photos on different devices and platforms, empowering you to regain control over your digital photo management.
Method 1: Disabling Google Photos Sync
If you want to stop Google Photos from automatically syncing and backing up your photos and videos, you can follow these steps:
- Open the Google Photos app on your device.
- Tap on your profile picture or initials at the top right corner of the screen to access the menu.
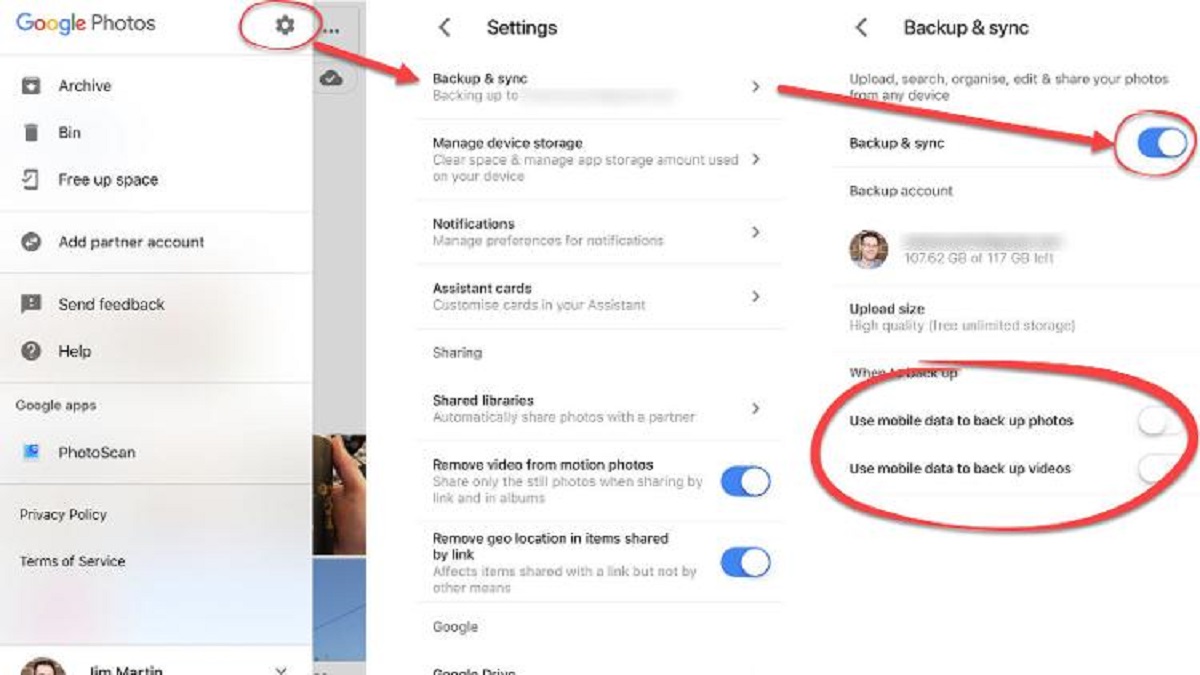
- Select “Photos settings” from the menu.
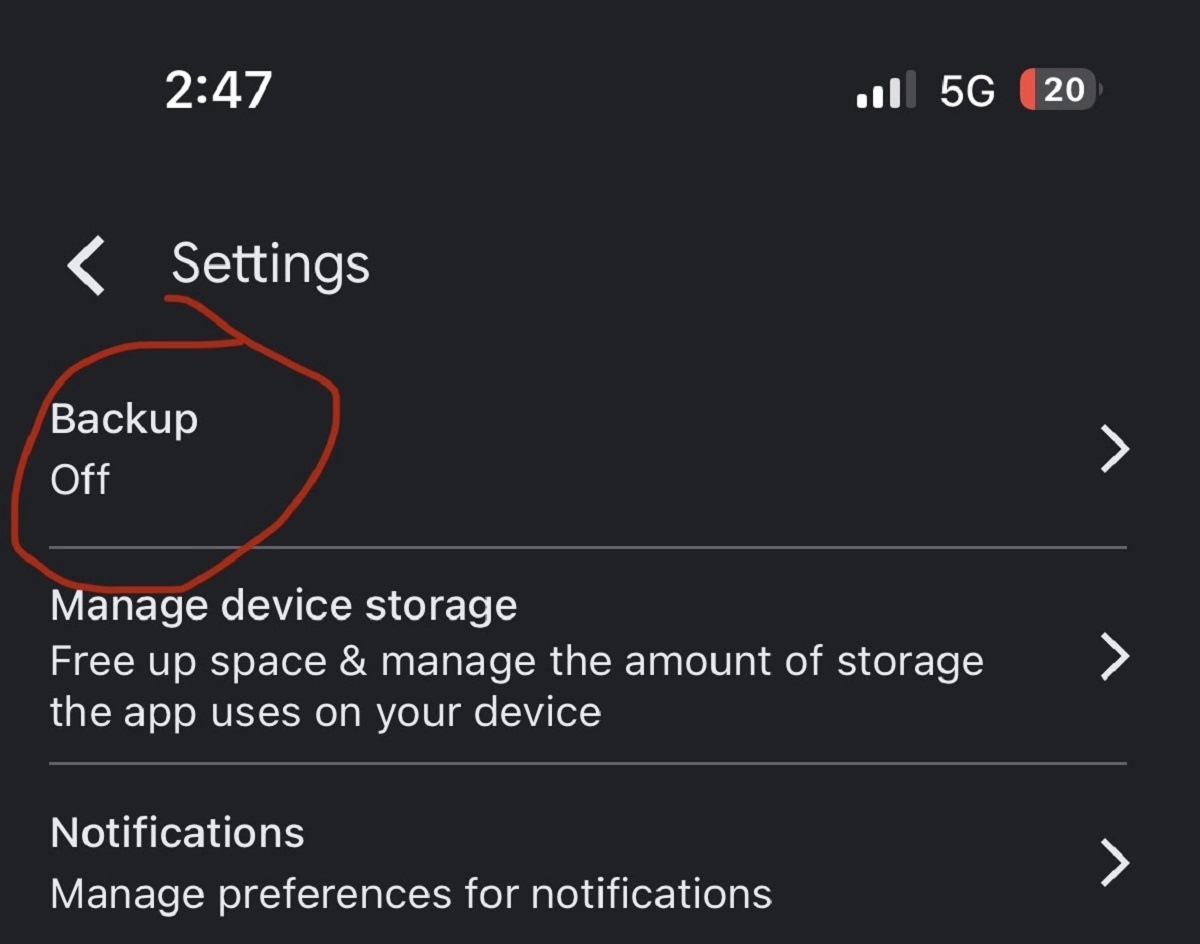
- In the “Back up & sync” section, toggle off the switch next to “Back up & sync”. This will disable the automatic syncing of your photos and videos to Google Photos.
By disabling the sync feature, you have successfully turned off the automatic backup of your media files. However, keep in mind that any changes or edits made on one device will no longer sync across other devices.
If you want to enable the sync feature again in the future, simply follow the same steps and toggle on the switch next to “Back up & sync” in the “Photos settings” menu.
Proceed to the next method if you’d like to learn how to revoke Google Photos access for individual apps.
Method 2: Revoking Google Photos Access for Individual Apps
If you have certain apps that are accessing your Google Photos and you want to revoke their access, you can follow these steps:
- Open the Google Photos app on your device.
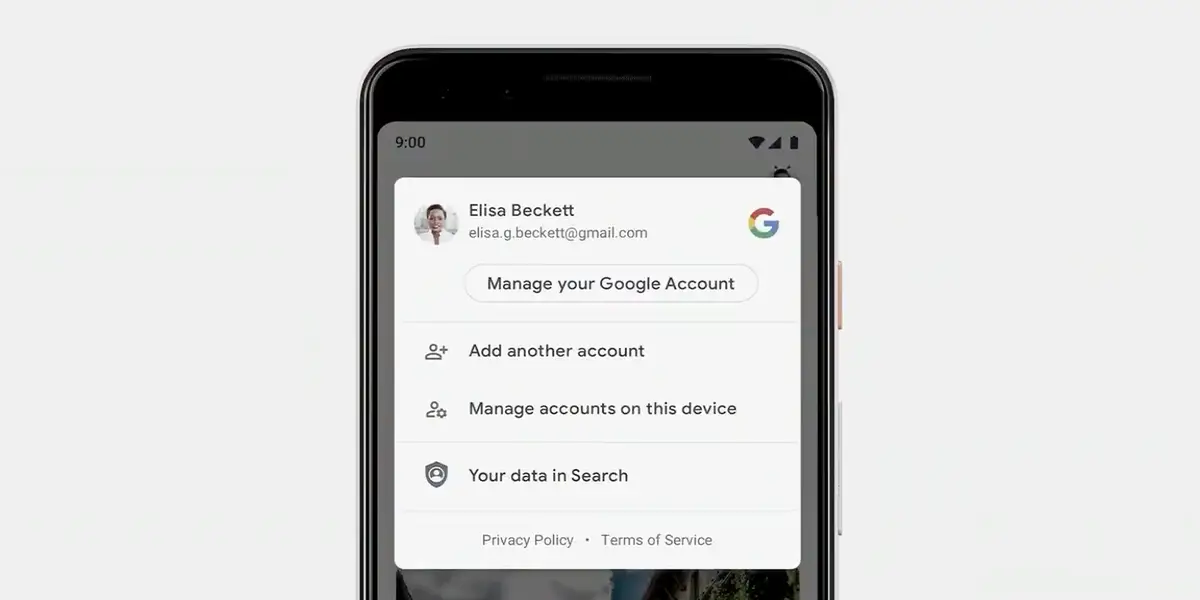
- Tap on your profile picture or initials at the top right corner of the screen to access the menu.
- Select “Manage your Google Account” from the menu. This will open your Google Account settings.
- Navigate to the “Security” tab and scroll down to find the section labeled “Third-party apps with account access”.
- Click on “Manage third-party access” to view a list of apps that have permission to access your Google Photos.
- Review the apps and their access permissions. To revoke access for a specific app, click on the app’s name and follow the instructions to remove its access to Google Photos.
By revoking access for specific apps, you can ensure that only trusted and necessary applications can access your Google Photos. This provides an added layer of privacy and control over your media files.
Remember that revoking access for an app means it will no longer be able to view or manipulate your photos and videos stored in Google Photos. If you change your mind later, you can grant access again by following the same steps and allowing permission for the desired app.
Continue reading to discover how to turn off auto backup on Android devices.
Method 3: Turning off Auto Backup on Android Devices
If you prefer not to have your Android device automatically backup your photos and videos to Google Photos, you can disable the auto backup feature using the following steps:
- Open the Google Photos app on your Android device.
- Tap on your profile picture or initials at the top right corner of the screen to access the menu.
- Select “Photos settings” from the menu.
- In the “Back up & sync” section, tap on “Back up device folders”.
- You will see a list of folders available for backup. Tap on the toggle switch next to the folders you want to exclude from automatic backup. This will turn off the auto backup for those specific folders.
- Confirm your selection by tapping on “Turn off & delete”. Note that this will stop the backup of photos and videos from the selected folders.
By turning off the auto backup for specific folders, you have more control over which media files get backed up to Google Photos. This allows you to exclude sensitive or unnecessary files from being included in the backup process.
If you change your mind and want to enable auto backup for the previously excluded folders, simply follow the same steps and toggle on the switch next to the desired folders. Google Photos will resume backing up the selected folders automatically.
Continue reading to learn how to disable Google Photos on iOS devices.
Method 4: Disabling Google Photos on iOS Devices
If you’re using an iOS device and want to disable Google Photos, you can follow these steps:
- Open the Settings app on your iOS device.
- Scroll down and tap on “Google Photos”.
- Tap on “Photos & Camera”.
- Toggle off the switch next to “Read and Write”. This will revoke Google Photos’ access to your device’s camera roll and prevent it from syncing new photos.
Once you disable Google Photos on your iOS device, it will no longer have access to your photos and videos stored in the camera roll. However, any media files that were already backed up to Google Photos will still be accessible through the Google Photos app.
If you change your mind and want to re-enable Google Photos on your iOS device, simply follow the same steps and toggle on the switch next to “Read and Write”. This will grant access to Google Photos, allowing it to sync and backup your camera roll again.
Now that you know how to disable Google Photos on iOS devices, let’s explore the next method, which involves restricting background data usage for Google Photos.
Method 5: Restricting Background Data Usage for Google Photos
If you want to conserve your mobile data or restrict the background data usage for Google Photos, you can follow these steps:
- Open the Settings app on your Android device.
- Scroll down and tap on “Apps” or “Applications”, depending on your device’s settings.
- Find and tap on “Google Photos” in the list of installed apps.
- Tap on “Data usage” or “Mobile data & Wi-Fi”.
- Toggle on the switch that says “Restrict app background data” or a similar option.
By restricting background data usage for Google Photos, you are preventing the app from using your mobile data in the background. This can help reduce data consumption and improve overall data usage management on your device.
Keep in mind that restricting background data may affect the app’s ability to sync, update, and backup your photos and videos in real-time. If you have an unreliable internet connection or want to save data, this method can be useful. However, you may need to manually open the app and allow it to sync when you have a stable Wi-Fi connection to ensure your media files are backed up.
Next, we will be discussing how to clear cache and data for Google Photos. Read on to learn more.
Method 6: Clearing Cache and Data for Google Photos
If you are experiencing issues with Google Photos or want to free up storage space on your device, clearing the cache and data for the app can help. Follow these steps to clear cache and data for Google Photos:
- Open the Settings app on your Android device.
- Scroll down and tap on “Apps” or “Applications”, depending on your device’s settings.
- Find and tap on “Google Photos” in the list of installed apps.
- Tap on “Storage” or “Storage & cache”.
- Tap on “Clear cache” to remove temporary files that may be taking up space on your device.
- If you want to free up even more space or reset the app, tap on “Clear data” or “Delete data”. Please note that clearing data will remove all locally stored photos, albums, and preferences within the app. Your synced data will be preserved in your Google account.
Clearing the cache and data for Google Photos can help resolve technical issues, improve app performance, and reclaim storage space on your device. However, keep in mind that clearing data will log you out of the app, and you’ll need to sign back in and set up the app again.
Now that you know how to clear cache and data for Google Photos, let’s move on to the final method: uninstalling the Google Photos app.
Method 7: Uninstalling Google Photos App
If you have decided that Google Photos no longer serves your needs or you want to free up space on your device, uninstalling the app is a viable option. Follow these steps to uninstall the Google Photos app:
- Go to the home screen of your device and find the Google Photos app icon.
- Tap and hold on the app icon until a menu appears.
- Select “Uninstall” or “Remove” from the menu.
- Confirm the uninstallation when prompted.
By uninstalling the Google Photos app, you are removing it from your device, along with any locally stored photos, albums, and preferences. However, your photos and videos backed up to Google Photos will still be accessible through your Google account.
If you decide to reinstall the app in the future, you can download it again from the Google Play Store (for Android devices) or the App Store (for iOS devices) and sign in to your Google account to regain access to your stored media.
Keep in mind that uninstalling the app means you won’t have access to the convenient features and tools provided by Google Photos. Consider your storage and photo management needs before proceeding with this method.
With the last method covered, you now have a range of options to turn off Google Photos based on your preferences and requirements. Choose the method(s) that suit your needs and take control of your digital photo management.
Conclusion
Managing your digital photos and videos is essential in this age of smartphones and easy access to media. Google Photos has been a popular choice for many users, offering features like automatic backup, unlimited storage, and advanced search capabilities. However, there may come a time when you want to turn off certain features or disable Google Photos entirely.
In this article, we explored seven methods to turn off Google Photos based on different scenarios and platforms:
- Disabling Google Photos sync to stop automatic backup.
- Revoking Google Photos access for individual apps to enhance privacy and control.
- Turning off Auto Backup on Android devices to have more control over the backup process.
- Disabling Google Photos on iOS devices to revoke access and prevent syncing with the camera roll.
- Restricting background data usage for Google Photos to conserve mobile data.
- Clearing cache and data for Google Photos to resolve issues and free up storage space.
- Uninstalling the Google Photos app to remove it from your device entirely.
Remember that each method has its own implications, and you should consider your specific needs before implementing them. Disabling Google Photos or certain features may impact automatic backup, sync capabilities, and the accessibility of your media files across devices.
Whether you want to regain control over your digital photo management, conserve mobile data, or explore alternative solutions, the methods outlined in this article serve as a guide to help you achieve your desired outcome.
Before taking any action, consider backing up your photos and videos using alternative methods or storage services to ensure the safety and accessibility of your precious memories. Additionally, keep in mind that Google Photos offers a variety of features that can simplify photo management, so carefully assess your needs and preferences before turning off or uninstalling the app.
With these methods at your disposal, you now have the knowledge to make informed decisions about how to turn off Google Photos or customize its settings according to your preferences. Take control of your digital photo management journey and enjoy the freedom of managing your media files on your terms.