Google Maps app is one of the greatest platforms for navigation ever invented. It exceeds all expectations in terms of coverage and scope of information. It’s also really good at encouraging people to appreciate geography and mapping. This navigation software is helping people make informed decisions while on the road.
Throughout the years, Google has invested in Google Maps to make it better and more detailed. Google Maps has been rather low-key about its accomplishments. However, we know that the recent version carries a wide array of features and hidden functions. In this article, we will walk you through some of the most useful and unique features of the Google maps app. In addition, we will also provide a step by step guide on how you can use each feature.
What is Google Maps?
Google Maps app is a navigation, mapping and lifestyle application. The original app was the result of a series of acquisitions by Google Maps. It was launched in 2005 with the basic feature of a digital world map. Google Maps has the largest repository of detailed maps in the world. It also offers a variety of map views depending on what you need or wants to see. Being the product of a technology leader has set Google Maps to a platform of high expectations. Thus far it has not failed to deliver and has even set the bar of excellence for its competitors.
Google Maps collects data from three sources. One is through purchasing information from national mapping agencies. Next is free data from crowdsourced or public domain information. Google Maps users also contribute to the repository of GPS data through the in-app Map Maker. User data is collected from millions of people when they use the GPS navigation feature.
Google Maps has an API feature that allows for its maps to be linked to third-party websites. It also marks major locations for almost every country around the world. Nearly every historical, commercial and government location has been reflected onto its maps. Nonetheless, Google has not stopped searching for ways to improve its maps. Over time, the application kept developing novel features. It even added overlays to its maps. There is little doubt to many users that Google Maps is one of the best in the navigation app front. The main reason is, of course, its full set of unique features and excellent navigation capabilities.
What are the notable features of Google Maps?
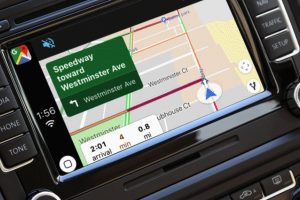
Google Maps app has a long list of features that surpass its classification as a mere navigation app. One notable feature is a GPS navigation that involves hands-free, turn-by-turn voice navigation. It also provides real-time updates on traffic conditions. These are marked on the maps in color-coded lines representing how heavy or light the traffic is. Google maps also offers different modes depending on transportation type. These include planning for traveling by car, bicycle, and air. Other notable and unique features include Google Street View and personalized maps.
The app’s integration with Google Assistant is another notable feature. The Google Assistant uses AI technology. The AI assistant can take verbal commands from the user. It can search the internet, activate controls on the device, and even order items online. Luckily for Google Maps, this AI technology is not present in any other navigation app. The feature was also made available for motorcycle and driving modes. For more information, you can refer to this article about the best and most useful hidden features of Google Maps.
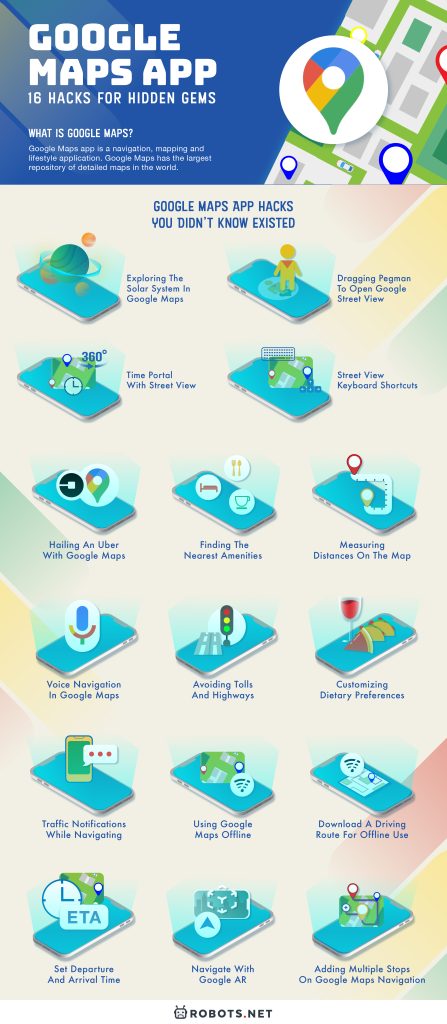
Google Maps App Hacks You Didn’t Know Existed
The Google Maps app has been in existence for more than a decade now. Fortunately for current users, the app has seen a lot of improvement since then. The Google Maps you see now might even confuse you as to what type of app it really is. And the current version is always enough to keep you occupied and informed. For this purpose, we would like to share with you a list of the lesser-known, but useful features of Google Maps. We’ll also tell you how to work your way around them.
Exploring the Solar System in Google Maps

Google Maps is a great reference for exploring nearly any location on Earth. But you probably didn’t know that it can also be used to get a glimpse of other worlds. Yes, you read that right. Google Maps has recently extended its mapping scope. The newest addition are to include celestial bodies outside Earth. It recently acquired a new collection of maps and photos from the International Space station. It also includes photos taken of other planets and celestial bodies.
All photos from the International Space station were taken by the astronauts themselves. Google also acquired photos of celestial bodies taken by NASA and ESA space crafts. Among the list of planets and moons are familiar names Mercury, Venus, Earth, and Mars. Meanwhile, there are also unheard-of celestial bodies like Ganymede, Callisto, and Mimas. These are the moons of our neighboring planets. Here’s how to view Space on Google Maps:
- Start by selecting any location on Earth and click on the Satellite view option. This is the box on the lower left-hand corner of the basic map.
- Zoom out of your location. The Zoom button is the minus sign (-) on the lower right-hand side of the map. Keep clicking until the Space sidebar appears.
- The Space sidebar should appear with a list of planets and moons. This includes an indoor view of the International Space Station. Note: It might take anywhere from seven to ten clicks before the Space feature appears.
- Click on the planet you want to explore (i.e. Mars). Rotate and zoom in on any area using your mouse. You’ll notice in the close-up view that some areas have lines and edges. This is because the map is made up of photos patched up together.
Dragging Pegman to open Google Street View
Pegman is a yellow human figure used to represent the Street View feature. The icon might look like an animated Oscar figurine, but it’s a very useful tool. The Street View lets you access the panoramic images of hundreds or even thousands of streets all over the world. Google is even inviting civilians, businessmen, and map enthusiasts to serve as contributors to Google Street Views. Explore Street View with these steps:
- Open the Google Maps app.
- Click on the Pegman icon on the bottom right end of your map. Click on the figure. Note: Hovering your mouse over Pegman will show Browse Street View images.
- You will see light blue lines and squiggles on your map. This indicates where Street View is available. Indoor imagery will appear as orange dots.
- Click and drag Pegman to any area of the map. You’ll notice that Pegman disappears from the toolbar when you pick him up.
- Unclick Pegman to drop him in the selected area. The map should zoom in on the area and the Street View will be visible. It’s also a good idea to zoom in on the exact area so you don’t have to scroll the entire street on Street View.
- If you want to select a different area, click on the Back icon (arrow facing to the left) on the upper left corner of your map.
Time Portal with Street View

The time portal feature under Google Street View allows you to see older photos of the same location. These 360-degree panoramic photos were taken by Google over the course of ten years. In any case, the photos are available on the app and you could get a glimpse of what has changed. Unfortunately, this feature is only available for select areas with Street View. Here’s how to access the time portal feature on Street View:
- Open the Google Maps app.
- Type in any city, landmark or street address into the search bar. Select Enter.
- Enable Street View by clicking on the Pegman icon.
- Drag Pegman towards the map. Drop him along any area highlighted in blue. Note that doing this on a map without blue highlights will not work.
- While on Street View, click on the white clock icon on the upper left-hand side of the map. A timeline and slider will appear, allowing you to select the year you want to view. The timeline can go as far back as ten years ago when Google started the project.
Street View Keyboard Shortcuts
The Street View lets you have a panoramic, high-definition view of major streets. A mouse is usually used to navigate this feature. However, there are keyboard shortcuts to make this easier. If you have to follow a certain street or area on the maps for some time, it might be worth taking note of these shortcuts:
- A button OR left arrow key: rotates 45 degrees in a counter-clockwise direction
- D button OR right arrow key: rotates 45 degrees in a clockwise direction
- W button OR page-up key: looks up towards the sky
- S button OR page down key: looks down towards the road
- The plus key (+): zooms in for a close-up view of any part of the street.
The page-up and page-down keys can also be used to move forwards and backward on any street. Just make sure that the zoom level is set to zero to make this work. Otherwise, the page-up and page-down keys will make you look up to the sky or down at the ground.
Hailing an Uber with Google Maps

Uber is a ride-sharing app integrated into Google Maps. What this means is that you can book a ride with Uber right through Google Maps. Here’s how to book a ride with Uber using Google Maps:
- Open the Google Maps app.
- Enter the address or name of your desired destination and let it map out normally.
- Under the Ride Services option on the location tab, you’ll see the Uber Ride options listed. The Ride Services tab looks like a stick figure with one arm raised, hailing a car.
- You will see ride options for both Uber and Lyft. Only Uber will let you complete the transaction without leaving the Maps app.
- Tap on the Request button under the specific type of transportation you would like to book. Select your payment method. The options for Uber are POOL, Uber X, and UberXL. The request is broadcast to drivers near the area. You will receive a confirmation should any of them accept it.
- Select the Book It button. You will see the current location of the car on the map and its progress towards your location.
Finding the Nearest Amenities
Nowadays most people have multiple errands and appointments in one day. Regardless of where you are, all you need is Google Maps and an active internet connection to get by. If you are a busy, adventurous sort of person, you might like the Explorer feature of Google Maps. It allows you to search for commercial establishments nearby. The establishments are grouped into categories. This is to make it easier for you to find what you are looking for. Here’s how to access this feature:
- Open the Google Maps app.
- Search for any location. The more specific, the better.
- You will see a drop-down menu on the upper-left corner of the map. Select the See travel times, traffic and nearby places button.
- The drop-down toolbar will display categories of commercial establishments. Click on the commercial category you would like to see on your map. Each would have a unique button design. The categories on the drop-down menu are restaurants, hotels, bars, and coffee shops.
- Click on the More button for more categories. This should reveal additional categories. These include banks, parking lots, gas stations, groceries, hospitals, post offices, etc.
- After clicking on any category, the search results will appear as red mini-pins and red dots. There are also mini pins showing the top results. Purple pins are also present. These are advertisements for establishments in the area.
- To go back to your original search on the map, click on the X button.
Measuring Distances on the Map

If you’re curious how far New York is to Washington D.C., you don’t need to use search bar to find out the answer. The Google Maps app has a ruler feature that lets you measure the distance between two or more points on any map. Here are the steps to use this feature:
- Open the Google Maps app.
- Touch and hold anywhere on the map. You will see a red pin appear and this should serve as your first point.
- Tap the name of the place where the red pin is. A Dropped pin notification will appear on your screen. From among the options, select Measure distance.
- Select the circular Add point button found on the bottom right part of the screen. You will start to see a trail of blue dots and a black button. Keep scrolling the screen towards the area you want and drop the pin on the exact spot.
- At the bottom, you should see the distance in miles (mi) or kilometers (km). The distance keeps adding up as you add more points.
- To add additional places, just keep selecting the Add point option. Drop the pins on the exact areas you want to add.
- If you want a general scale to show up for all maps, you can enable the Show scale on map option under Settings.
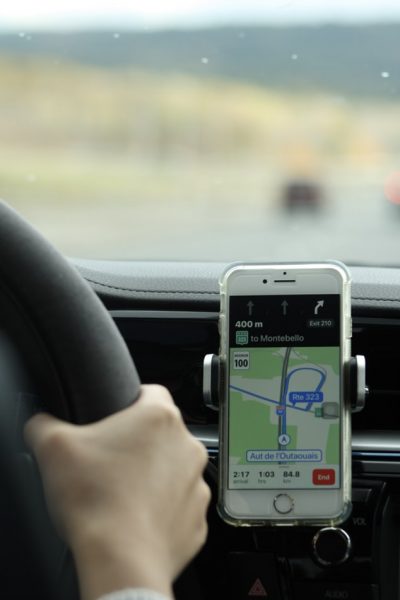
Voice Navigation in Google Maps
Driving and navigating with your phone are two actions that don’t go together. Safety measures usually require you to choose one or the other. But with the voice navigation function, you can do both. The voice navigation feature allows for hands-free turn-by-turn navigation. Unfortunately, you’ll need to ensure an active internet connection for this to work. Here’s how to activate voice navigation on Google Maps:
- Open the Google Maps app.
- Begin by selecting your destination and route. Select a destination by dropping a pin on the exact location.
- Select Directions from the main horizontal toolbar at the bottom of the map. The software will highlight the optimal route.
- Activate voice navigation using the toolbar under settings. To do this, tap on the Menu toolbar on the upper right-hand corner of the map. This button has three horizontal lines.
- Tap on the Settings icon below. Under Settings, select Navigation settings.
Note: The default options are already functional. But you can customize the volume, voice selection, and other settings. These are all under the Sound and Voice menu.
Avoiding Tolls and Highways

Part of the GPS capabilities of Google Maps is the ability to warn you about traffic, tolls and highways. By showing you exactly what you want to avoid, you can avoid them. This gives you the ability to choose the route you want and also saves you time, energy and money. Avoid inconveniences along the road with the following steps:
- Open the Google Maps app.
- Begin by selecting your destination and route. Select a destination by dropping a pin on the exact location.
- Select Directions from the main horizontal toolbar at the bottom of the map. The software will highlight the optimal route (in blue) to your destination.
- Tap the three vertical dots on the right side of your location. Select Route options. A notification will appear with three options. These include the option to avoid highways, tolls, and ferries.
- Select avoid tolls and avoid highways. Tap on Done and then the blue Start button located at the bottom left corner of the screen.
Customizing Dietary Preferences
Everyone has food preferences. Unfortunately, the default restaurant notifications on Google Maps doesn’t show your favorite places. If you are looking for something specific to eat, Google Maps can help narrow down your options. You can configure it to limit notifications to the places that fit your food preferences. You could also exclude places that serve dishes that violate your dietary restrictions. Help Google understand your food preferences with the following steps:
- Open the Google Maps app.
- Tap on your profile icon. This is represented by either your photo or a gray circular button. Select Settings.
- Under the Exploring Places toolbar, select Food and drink preferences.
- Add dietary preferences and types of places that you are interested in. There’s also a toolbar for types of cuisine you are less interested in. You can fill out each section by adding items. Tap Add (+) then select a type of cuisine.
- Once done, select Add Preferences.
Traffic Notifications While Navigating

Everyone knows that Google maps allows you to see real-time traffic conditions. Traffic data are color-coded to make it easy for you to understand the situation up ahead. Red is for heavy traffic. Orange is for mild to moderate traffic. And Green is for no traffic. Enable these color-coded warnings with the following steps:
- Open the Google Maps app.
- At the top of the map, select Go (car symbol) or Commute (house symbol).
- Set your destination by dropping a pin on the map.
- Select Start for when you leave. You will see information about your ETA. There’s also information about recommended and alternate routes, and traffic delays.
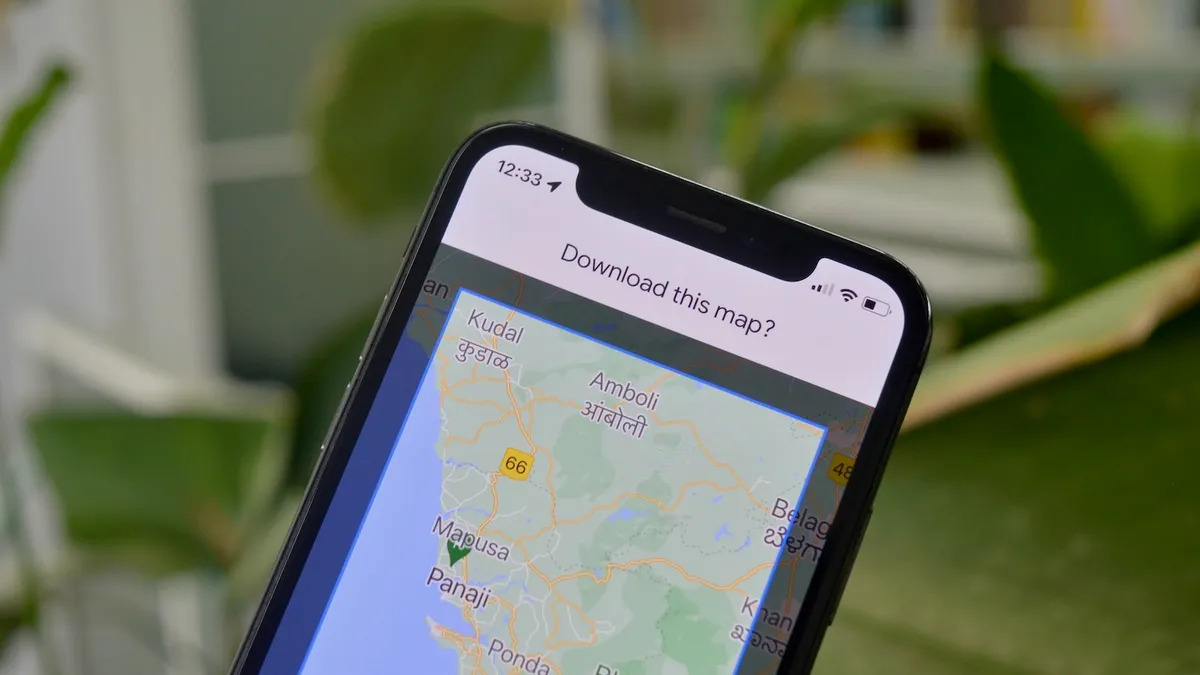
Using Google Maps Offline
The majority of Google Maps features require a solid internet connection to work. Unfortunately, this may not always be possible. Consequently, Google Maps offers a workaround. The offline maps feature lets you to save some of its maps for when you don’t have an internet connection. It’s great when you’re going on an off-road trip in case you get lost.
By default, offline maps are only available for fifteen days following your download. You can keep them offline for an indefinite period. However, you’ll need to activate the automatic updates in order to do this. In addition, the Google Maps cache has a storage limit. This means you can only download a certain number of maps before the cache capacity maxes out. Nonetheless, you can still make use of offline maps. Here’s how to download for offline use:
- Open the Google Maps app.
- Make sure you’re connected to Google maps and sign in to the app.
- Key in any location on the main search bar.
- At the bottom, tap the name of the address of the place and click on More from the upper left-hand corner of the map. Select offline maps.
- Drag or zoom the blue square area to identify the portion you want to capture. Unfortunately, the zooming functions are limited to this feature. Which means you can only have a macro view of a certain area.
- Click Download from the lower right-hand corner of the map. Once the file has been downloaded, click on the three-dot button on the right-hand side of the map and select View.
- To see other maps that you can download offline, click on Recommended maps.
Download a Driving Route for Offline Use
Saving routes and driving directions are also available offline. However, this only includes the basic route. Real-time traffic information, alternate routes, or lane guidance will not be included. In the absence of an internet connection, your offline maps will be the basis for navigation. In any case, here is how to download a route for offline use:
- Open the Google Maps app and key in any destination by dropping a pin.
- Under the main toolbar, select Directions. Select your mode of transit.
- Tap the information bar from the bottom of the map. Select Save offline.
Set Departure and Arrival Time
Google Maps has added a scheduling function with the Depart At feature. Actually, there are two options within that feature. Depart At will calculate your approximate ETA. Arrive By will calculate the approximate time you should leave.
The software takes into consideration real-time traffic conditions for certain hours. This way, you can easily change the optimal time when you have to leave. In addition, you can easily adjust your schedule to make sure that you won’t be late for your appointment. Always be on time with these steps:
- Open the Google maps app and key in your destination and desired starting point. Note that your current location is set as the starting point by default but this can be changed.
- Tap on the overflow button located on the upper right-hand side of the map. This button has three vertical dots on it.
- Select Set depart and arrival time.
- Choose either the Depart At or Arrive By buttons and key in the time and day you want to leave or arrive.
- You should see an estimated time of arrival based on the time you provided. To make any changes to the time, simply click on the arrow next to the resulting Arrive By or Depart At time. The calculation is adjusted automatically.
Navigate with Google AR

Google Maps has recently updated its navigation feature with something called Google AR. Augmented Reality is a new form of technology that superimposes digital images on a user’s view of the real world. In this case, digital images can appear on a live screen of a camera.
The software can identify a user’s location through the live stream footage of the road or path ahead. In addition, the AR technology can provide visual and verbal directions. These directions can appear through the camera app of any phone or tablet. Here are the steps to access Google Maps AR:
- Download the application first from the Google Play Store app. Follow instructions for installation.
- Input a relatively close destination.
- Tap on Directions. Click on Start AR. This should be right next to the Start button. The camera view should launch.
- Pan your phone slowly in a sweeping motion. Allow the camera to capture the buildings around you as you walk. The camera is going to try and find your current location.
- You will get audio and visual markers telling you where you currently are and where you need to go.
Note that the Google Maps AR mode is only available for walking mode. Thus, it is highly suggested to pick a relatively close destination/walking distance. The feature is also limited to areas with recently published Google Street Views. It will also not work under low-light conditions, so it’s best used during the day. Check out these articles for more information on Google AR maps technology and other applications of AR technology.
Adding Multiple Stops on Google Maps Navigation
On any given day, the average person probably has more than one location to go to. Going to work, buying groceries, playing sports all require different locations and schedules. With Google Maps, you can mark all the places you need to be at by adding stops to your map. You could also use the GPS navigation and voice direction for multiple locations. This will make sure that you don’t get lost, and more importantly, you don’t miss a stop. This feature is available for driving, transit, walking, and cycling modes. Add stops to your route with the following steps:
- Open the Google Maps app.
- Click Directions.
- Drop a pin to indicate your destination and correct the starting point. Note that your current location is set as the starting point by default but this can be changed.
- Once a route has been set, click on the overflow button on the upper right-hand side of the map. This button has three vertical lines on it.
- Select Add Stop. Click on the Add Stop search bar that appears below the second address.
- Select Choose on Map.
- Scroll on the map to match the red pin to the exact location you want to add. Click OK.
- To keep adding stops, repeat Steps five to seven (5 to 7).
- Click Done on the lower right corner of the map when your route is complete.
Final thoughts on Google Maps Hacks

Google Maps is readily available for most tablets and phones, and it’s completely free! We can’t even understand how Google managed to compile this many features. Nonetheless, we are extremely grateful that they did so. Should you be interested in exploring other Google products, we highly recommend Google Mail and Google Drive.
Just a word of warning. The app, as wonderful as it is, cannot account for the lack of vigilance and awareness about user safety. All users are advised to exercise precaution in using any application. It’s also advisable to observe cyber-security practices. Take measures to keep your location and travel information safe. You can use an antivirus software for added protection. Also keep in mind that the main purpose of the app is for information purposes only. Therefore, it must only be used for legitimate purposes.
With these Google Maps app hacks, we hope that we have been able to show you just what Google Maps can do. With the right information, you’ll be able to maximize the app for both navigation and leisure.