Introduction
The advent of cloud storage has revolutionized the way we store and manage our digital files, including photos. Among the many cloud storage services available, iCloud stands out as a popular choice for Apple users.
iCloud Photo Library is a convenient feature that allows users to access their photos and videos from any Apple device connected to their iCloud account. However, there may be times when you want to free up space on your iCloud account or have an extra backup of your precious memories. In such cases, transferring photos from iCloud to an external hard drive is the ideal solution.
This article will guide you through the process of moving your photos from iCloud to an external hard drive. We will explore different methods that work on both Windows and macOS systems, ensuring that you can find a suitable option regardless of the device you use.
Before diving into the methods, it’s important to note that the steps outlined here assume you have already set up iCloud Photo Library on your device and have a stable internet connection. With that said, let’s explore the various methods available to transfer your photos from iCloud to an external hard drive.
Understanding iCloud Photo Library
iCloud Photo Library is a feature provided by Apple that seamlessly syncs and stores all your photos and videos across all your Apple devices. With iCloud Photo Library enabled, any photo or video you take on your iPhone, iPad, or Mac will automatically be uploaded to iCloud and accessible from all your devices.
One of the major advantages of using iCloud Photo Library is the ability to access your entire photo library from any device with an internet connection. This means you can view, edit, and share your photos and videos on your iPhone, iPad, Mac, or even through the iCloud website on a Windows PC.
In addition to the convenience of accessing your photos from anywhere, iCloud Photo Library also helps save valuable device storage space. When enabled, iCloud Photo Library automatically optimizes and manages the storage of your photos and videos on your devices. It intelligently stores smaller, device-optimized versions of your media while keeping the original, higher-resolution versions in iCloud.
Another useful feature of iCloud Photo Library is the ability to share specific albums or individual photos with friends and family. You can create shared albums, invite people to view and contribute to them, and even allow others to add their own photos and videos to the shared album.
It’s important to note that iCloud Photo Library counts towards your available iCloud storage. Apple provides 5GB of free storage with every iCloud account, but if you have a large photo library, you may need to consider purchasing additional storage space, which is available at various subscription tiers.
Now that we have a better understanding of iCloud Photo Library and its features, let’s move on to the next section, where we’ll discuss the steps required to prepare for transferring your photos from iCloud to an external hard drive.
Preparing to Transfer Photos from iCloud to External Hard Drive
Before you begin transferring your photos from iCloud to an external hard drive, there are a few important steps you should take to ensure a smooth and successful transfer.
Firstly, it’s crucial to have a reliable external hard drive with sufficient storage capacity to accommodate your photo library. Make sure the hard drive is formatted correctly and compatible with your device’s operating system.
Next, you’ll need to ensure that you have a stable internet connection. Since you will be downloading your photos from iCloud, a reliable and high-speed internet connection is essential to prevent any interruptions or data loss during the transfer process.
Additionally, it’s wise to organize your iCloud Photo Library before initiating the transfer. This can involve creating specific albums or folders to categorize your photos, deleting any unnecessary duplicates or unwanted images, and ensuring that your library is well-structured and free from clutter.
Furthermore, it’s recommended to have a backup of your photo library before starting the transfer process. While the transfer itself is unlikely to result in data loss, it’s always better to be safe than sorry. Consider creating a backup of your iCloud Photo Library on an external hard drive or using a cloud-based backup service.
Finally, familiarize yourself with the methods available for transferring photos from iCloud to an external hard drive. This will allow you to choose the method that suits your device and preferences best. In the upcoming sections, we will explore various methods, including downloading photos from iCloud.com, using iCloud for Windows, utilizing the Photos app on macOS, and leveraging the Image Capture app on macOS.
By following these preparatory steps, you can ensure a seamless and successful transfer of your photos from iCloud to an external hard drive. With everything in place, you’re ready to proceed to the next section where we will discuss the first method: downloading photos from iCloud.com.
Method 1: Downloading Photos from iCloud.com
If you prefer not to install any additional software on your computer, downloading photos from iCloud.com is a straightforward method to transfer your photos from iCloud to an external hard drive.
Here’s how to do it:
1. Open a web browser on your computer and go to icloud.com.
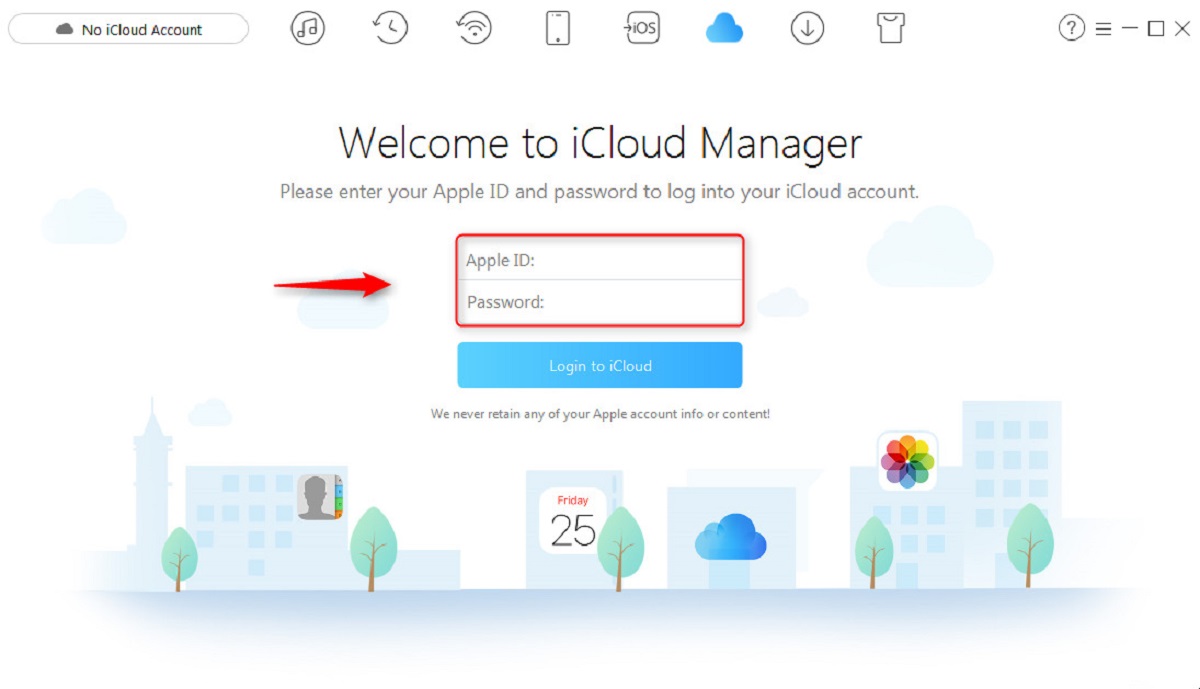
2. Sign in to your iCloud account using your Apple ID and password.
3. Once you’re logged in, click on the “Photos” icon from the iCloud main menu.
4. In the Photos app, you can navigate through your albums and select the photos or albums you want to download. To select multiple photos, hold down the Shift or Command key (for Windows and macOS, respectively) while clicking on the desired images.
5. After selecting the photos, click on the download icon, which is represented by a cloud with an arrow pointing downward. This will initiate the download process.
6. Depending on the number and size of the selected photos, the download process may take some time. Once the download is complete, the photos will be saved to your computer’s default download location.
7. Now that the photos are saved on your computer, you can connect your external hard drive and copy the downloaded photos to the desired location on the drive.
Note: If you have a large photo library or wish to download all your photos, it may be more efficient to download them in batches rather than all at once.
This method allows you to download your photos directly from iCloud.com and transfer them manually to the external hard drive. It provides flexibility and control over which photos to download, but it can be time-consuming if you have a large photo library.
In the next section, we will explore an alternate method using iCloud for Windows, which provides a more automated and convenient way to transfer your photos from iCloud to an external hard drive.
Method 2: Using iCloud for Windows
If you’re using a Windows computer, Apple provides a software called iCloud for Windows that allows you to access your iCloud files and photos directly on your PC. This includes the ability to download and transfer your photos from iCloud to an external hard drive.
Follow these steps to transfer your photos using iCloud for Windows:
1. Start by downloading and installing iCloud for Windows from the official Apple website.
2. Once installed, open the iCloud for Windows application and sign in to your iCloud account using your Apple ID and password.
3. In the iCloud for Windows app, make sure the “Photos” option is selected and click on the “Options” button next to it.
4. In the Photos Options window, choose the “Download new photos and videos to my PC” option. You can also select the “Keep a copy of the photos and videos on this PC” option if you want to retain a local backup on your computer.
5. Click on the “Apply” button to save the changes.
6. Now, access the File Explorer on your Windows computer and navigate to the iCloud Photos folder. By default, it should be located within your user folder.
7. Within the iCloud Photos folder, you will find subfolders that represent your iCloud albums. Open the desired albums and select the photos you want to transfer to the external hard drive.
8. Connect your external hard drive to your Windows computer and copy the selected photos from the iCloud Photos folder to the desired location on the hard drive.
With iCloud for Windows, you can have a more seamless and automated process of transferring your photos from iCloud to an external hard drive. The software handles the synchronization of photos between your iCloud account and your Windows computer, allowing you to easily access and manage your photo library.
If you prefer using a macOS device, the next section will discuss an alternative method using the built-in Photos app for macOS.
Method 3: Using the Photos App on macOS
If you’re using a macOS device, you can utilize the built-in Photos app to transfer your photos from iCloud to an external hard drive. The Photos app provides a straightforward and efficient way to manage your photo library and perform the transfer.
Here’s how you can use the Photos app on macOS to transfer your photos:
1. Open the Photos app on your macOS device.
2. Make sure you are signed in to your iCloud account by going to “Photos” in the menu bar and selecting “Preferences.” Navigate to the “iCloud” tab and ensure the “iCloud Photos” option is checked.
3. Once you’re logged in and have iCloud Photos enabled, the Photos app will begin synchronizing your photo library.
4. In the Photos app, select the albums or individual photos you want to transfer to your external hard drive. You can hold down the Command key and click on the desired images to select multiple items.
5. With the photos selected, go to “File” in the menu bar and choose the “Export” option. Alternatively, you can use the keyboard shortcut Command + Shift + E.
6. In the Export dialog box, choose the external hard drive as the destination for the exported photos. You can create a new folder or select an existing one on the hard drive.
7. Customize any export settings as needed, such as the file format, quality, and size.
8. Click on the “Export” button to initiate the transfer of the selected photos to the external hard drive.
9. Once the export process is complete, you can safely disconnect the external hard drive from your macOS device.
Using the Photos app on macOS provides a convenient and intuitive way to manage and transfer your photos from iCloud to an external hard drive. It allows you to selectively choose the photos you want to transfer and provides flexibility in customization options, such as file format and quality.
If you prefer using a macOS device and want a more straightforward and streamlined method, the next section will discuss an alternative method using the Image Capture app on macOS.
Method 4: Using the Image Capture App on macOS
The Image Capture app on macOS provides another easy and efficient method to transfer your photos from iCloud to an external hard drive. This method offers simplicity and a straightforward approach to managing and transferring your photos.
Follow these steps to use the Image Capture app on macOS:
1. Connect your macOS device to your external hard drive.
2. Open the Image Capture app by searching for it in Spotlight or locating it in the Applications folder on your Mac.
3. Once the Image Capture app is open, you will see a list of connected devices on the left-hand side of the window. Select your iOS device from the list.
4. In the main window, you will see a grid of thumbnails representing the photos on your iOS device. Here, you can select the specific photos or albums you want to transfer to the external hard drive. To select multiple photos, hold down the Command key and click on the desired images.
5. Make sure the destination is set to your external hard drive. You can adjust the destination by clicking on the “Import To” drop-down menu and selecting the appropriate drive.
6. Customize any additional settings, such as file format, file name, and subfolder options, according to your preferences.
7. Once you have selected the desired photos and adjusted the settings, click on the “Import” button to initiate the transfer of the selected photos to the external hard drive.
8. Once the transfer is complete, you can safely disconnect your macOS device from the external hard drive.
Using the Image Capture app on macOS offers a simple and no-fuss method to transfer photos from iCloud to an external hard drive. It allows for easy selection of specific photos or albums and provides customization options for file handling.
With the methods discussed in this article, you have a range of options to choose from based on your preference and the devices you use. Whether you opt for downloading photos from iCloud.com, using iCloud for Windows, the Photos app on macOS, or the Image Capture app on macOS, you can easily transfer your photos and enjoy the benefits of having a backup on an external hard drive.
Now that you have the necessary information and methods at your disposal, you can confidently proceed to transfer your photos from iCloud to an external hard drive and ensure the safety and accessibility of your valuable memories.
Transferring Photos to an External Hard Drive
Once you have downloaded or exported your photos from iCloud using the method of your choice, it’s time to transfer them to your external hard drive. The process may vary slightly depending on your operating system, but the basic steps remain the same.
Here’s a general guide on how to transfer your photos to an external hard drive:
1. Connect your external hard drive to your computer using the appropriate cable or connection method.
2. Open the file explorer or finder on your computer and locate your downloaded or exported photos. This may be in your default download folder or in a location you specified during the download/export process.
3. Navigate to the location of your external hard drive in the file explorer or finder. This could be a separate drive letter on Windows or a mounted volume on macOS.
4. Create a new folder on your external hard drive to organize your transferred photos, if desired. You can give it a relevant name, such as “iCloud Photos” or “Photo Backup”.
5. Select the downloaded or exported photos from your computer and copy them by either right-clicking and selecting “Copy” or using the keyboard shortcut (Ctrl + C on Windows, Command + C on macOS).
6. Paste the copied photos into the newly created folder on your external hard drive by either right-clicking and selecting “Paste” or using the keyboard shortcut (Ctrl + V on Windows, Command + V on macOS).
7. If you have a large number of photos, the transfer process may take some time. It’s important to be patient and allow the files to copy completely to your external hard drive.
8. Once the transfer is complete, you can verify that all your photos have been successfully transferred by opening the newly created folder on your external hard drive and checking the contents.
9. Safely eject the external hard drive from your computer to ensure that no data is lost. On Windows, you can do this by right-clicking on the drive and selecting “Eject”. On macOS, you can drag the drive icon to the trash can or use the eject button in the finder.
By following these steps, you can safely and efficiently transfer your photos from your computer to an external hard drive. Doing so ensures that you have an additional backup of your valuable memories and helps free up space on your computer or iCloud account.
Now that you have successfully transferred your photos to an external hard drive, you can enjoy the peace of mind that comes with having a secure backup of your precious memories.
Conclusion
Transferring photos from iCloud to an external hard drive is a practical solution for freeing up space and ensuring the safety of your valuable memories. In this article, we explored various methods to help you accomplish this task.
We began by understanding the functionality of iCloud Photo Library and its benefits. We then prepared for the transfer by ensuring the availability of a reliable external hard drive, organizing our photo library, and having a backup in place.
Next, we discussed the four methods to transfer photos: downloading from iCloud.com, using iCloud for Windows, utilizing the Photos app on macOS, and using the Image Capture app on macOS. Each method offers its own advantages, catering to different user preferences and device compatibility.
Finally, we looked at the process of transferring photos to an external hard drive, emphasizing the importance of following proper steps to ensure a successful transfer and taking precautions when disconnecting the hard drive from the computer.
By transferring your photos to an external hard drive, you not only create additional space but also enhance the security and accessibility of your precious photo library. Having a separate backup provides peace of mind, knowing that your memories are safeguarded even in the event of device failure or accidental file deletion.
Choose the method that suits your needs and operating system, and enjoy the benefits of an organized, spacious, and secure photo storage system. Remember to regularly update your backup and keep your external hard drive safely stored.
Now that you have a comprehensive understanding of the different methods available, it’s time to take action. Start the transfer process today and ensure that your cherished photos are preserved for years to come.