Introduction
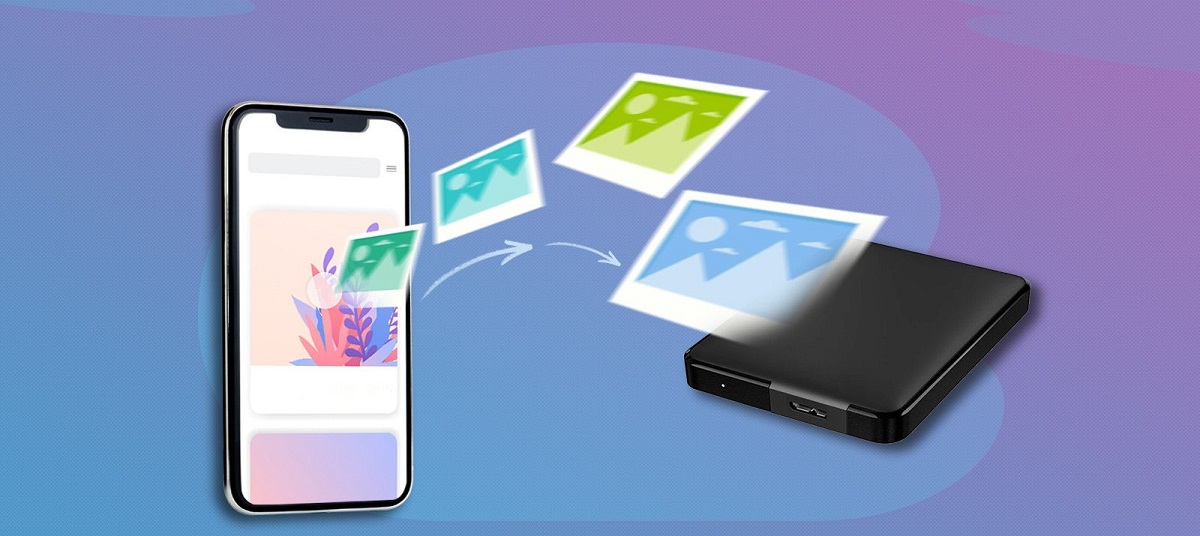
Transferring data from iCloud to an external hard drive can be a valuable way to free up space on your iCloud storage and ensure that your important files are safely backed up. Whether you have a large collection of photos, videos, documents, or other files stored in your iCloud Drive, moving them to an external hard drive allows you to keep them easily accessible while creating more room in your iCloud storage.
Backing up your iCloud data to an external hard drive also provides an additional layer of security, as it reduces the risk of losing your files in the event of device damage or data corruption. Additionally, having your data stored on an external hard drive enables you to conveniently transfer your files to different devices or share them with others without relying solely on iCloud.
In this guide, we will walk you through the step-by-step process of transferring data from iCloud to an external hard drive on your Mac. Whether you are looking to transfer a few files or a large volume of data, these instructions will help you accomplish your goal quickly and easily.
Before proceeding with the transfer, ensure that you have a compatible external hard drive and that it is properly connected to your Mac. It is also recommended to have the latest version of iCloud and macOS installed to avoid any compatibility issues. Now, let’s dive into the process of transferring your iCloud data to an external hard drive!
Step 1: Connect External Hard Drive to your Mac
The first step in transferring data from iCloud to an external hard drive is to connect the external hard drive to your Mac. This will allow you to access and transfer files between the two devices.
Start by locating an available USB or Thunderbolt port on your Mac. Depending on the type of external hard drive you have, you may need to use a USB or Thunderbolt cable to establish the connection. Plug one end of the cable into the corresponding port on your Mac and the other end into the external hard drive.
Once connected, you should see the external hard drive icon appear on your desktop or in the Finder sidebar. This indicates that your Mac has recognized the external hard drive and it is ready to be accessed.
If the external hard drive does not appear on your desktop or Finder, you may need to format it to a compatible file system. To do this, open the Disk Utility application on your Mac, select the external hard drive from the list of available devices, and choose the appropriate file system format, such as Mac OS Extended (Journaled) or ExFAT. Be aware that formatting the external hard drive will erase any existing data, so make sure to back up any important files before proceeding.
Once your external hard drive is connected and recognized by your Mac, you are ready to move on to the next step of transferring data from iCloud to the external hard drive.
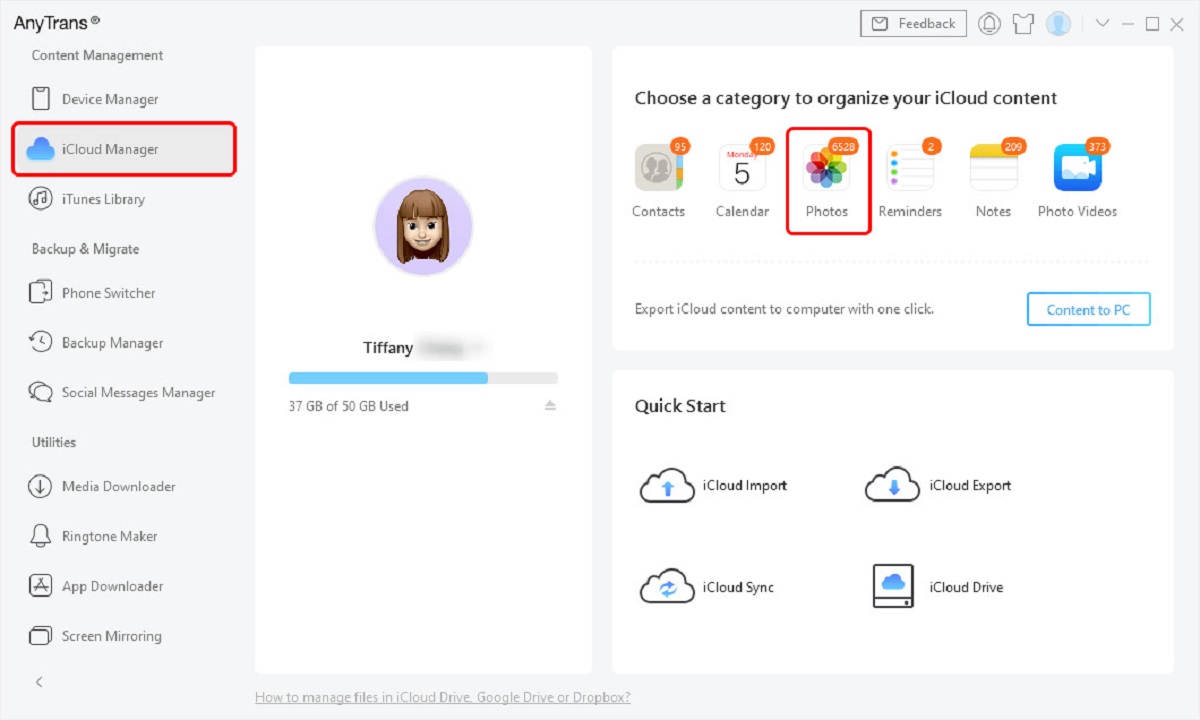
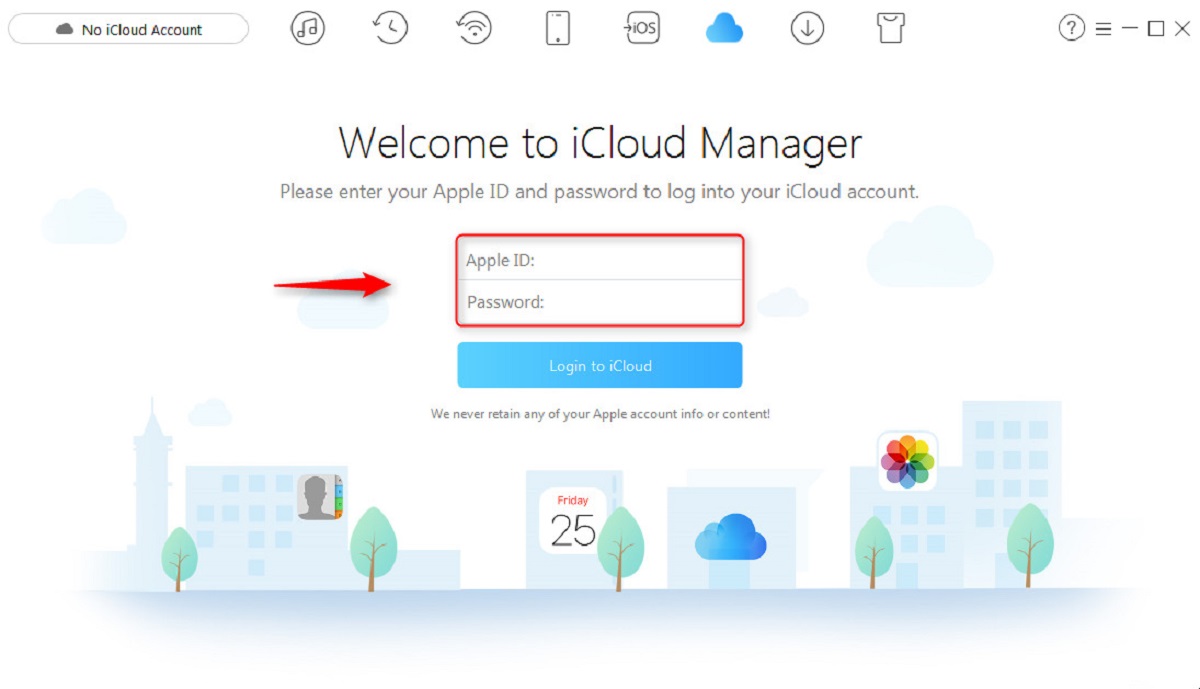
Step 2: Open iCloud Drive on your Mac
To transfer your files from iCloud to an external hard drive, you’ll first need to open iCloud Drive on your Mac. iCloud Drive is the cloud storage service provided by Apple, and it allows you to access and manage files stored in your iCloud account.
To open iCloud Drive, follow these steps:
- Click on the Apple menu in the top-left corner of your screen and select “System Preferences” from the drop-down menu. Alternatively, you can click on the “System Preferences” icon in your Dock.
- In the System Preferences window, click on the “Apple ID” or “iCloud” option. This will open the iCloud settings on your Mac.
- Once in the iCloud settings, find and click on the “iCloud Drive” checkbox. This will enable iCloud Drive on your Mac and allow you to access your files.
- You can also customize the settings for iCloud Drive by clicking on the “Options” button next to the iCloud Drive checkbox. Here, you can specify which apps and files are synced to iCloud Drive. For the purpose of transferring data to the external hard drive, it is recommended to enable syncing for all relevant apps or files.
- Once you have enabled iCloud Drive, the iCloud Drive folder will appear in the Finder sidebar on your Mac. You can also access it by opening a Finder window and selecting “iCloud Drive” from the left-hand sidebar.
Now that you have successfully opened iCloud Drive on your Mac, you are ready to proceed to the next step of selecting the files you want to transfer to the external hard drive.
Step 3: Select the files you want to transfer
Once you have opened iCloud Drive on your Mac, it’s time to select the files you want to transfer to your external hard drive. iCloud Drive organizes your files into folders, making it easy to locate and select the specific files you wish to transfer.
Follow these steps to select the files:
- Open the iCloud Drive folder either by clicking on it in the Finder sidebar or navigating to it in a Finder window.
- Within the iCloud Drive folder, you will find all your files and folders that are stored in your iCloud account. Browse through the folders and subfolders to locate the files you want to transfer.
- To select multiple files, hold down the Command key on your keyboard and click on each file you want to transfer. This allows you to select multiple individual files.
- If you want to select all the files in a folder, click on the folder to highlight it, and then press Command + A on your keyboard. This will select all the files within the folder.
- If you want to select a range of files, click on the first file, hold down the Shift key, and then click on the last file in the range. This will select all the files between the first and last file.
As you select files, you will notice that they become highlighted or marked with a checkmark, indicating that they are ready for the transfer. Take your time to carefully select the files you want to transfer, ensuring that you have included all the necessary files and not included any unnecessary ones.
Once you have selected all the files you wish to transfer, you are ready to proceed to the next step of copying the selected files to the external hard drive.
Step 4: Copy the selected files to the External Hard Drive
With the files selected in iCloud Drive, you are now ready to copy and transfer them to your external hard drive. Follow these steps to complete the process:
- Right-click (or Control+click) on one of the selected files and choose “Copy” from the context menu. Alternatively, you can press Command+C on your keyboard to copy the files.
- Once the files are copied, open a new Finder window and navigate to your external hard drive. If necessary, you can find it on your desktop or in the Finder sidebar.
- Once you have reached your external hard drive, right-click (or Control+click) in an empty space and choose “Paste” from the context menu. Alternatively, press Command+V on your keyboard to paste the files.
- The selected files will begin copying from iCloud Drive to your external hard drive. The time it takes to complete this process will depend on the size of the files and the speed of your Mac and external hard drive.
- Ensure that you have sufficient free space available on your external hard drive to accommodate the copied files. If necessary, you might need to free up space on the external hard drive or consider using multiple external hard drives.
During the copying process, you can monitor the progress of the transfer by observing the file transfer status in the Finder window. Once the files have been successfully copied to your external hard drive, you can proceed to the next step to ensure the transfer is complete.
It is important to note that the files copied to the external hard drive will maintain their original file structure, including any folders or subfolders they were stored in within iCloud Drive. This will allow for easy organization and retrieval of files on your external hard drive.
Step 5: Wait for the transfer to complete
After copying the selected files from iCloud Drive to your external hard drive, it is important to allow the transfer process to complete before disconnecting the external hard drive. This ensures that all the selected files are successfully transferred and avoids any potential data loss or corruption.
The time it takes for the transfer to complete will vary depending on several factors, including the size and number of files being transferred, the speed of your Mac and external hard drive, and the available USB or Thunderbolt connection speed.
While the transfer is taking place, it is advisable to avoid interrupting or interfering with the process. This means refraining from unplugging or disconnecting the external hard drive, restarting your Mac, or closing the Finder window in which the transfer is occurring.
You can monitor the progress of the transfer by keeping an eye on the Finder window. Depending on the version of macOS you are using, you may see a status bar or progress indicator that shows the percentage of the transfer completed. If your version of macOS does not provide a progress indicator, you can manually check the destination folder on your external hard drive to see if the copied files are appearing.
Keep in mind that the time it takes to complete the transfer can range from a few minutes to several hours, depending on the size of the files and the speed of your devices. It is recommended to initiate the transfer when you have sufficient time and resources available to ensure a smooth and uninterrupted process.
Once the transfer is completed, you can proceed to the final step of safely disconnecting the external hard drive from your Mac.
Step 6: Safely disconnect the External Hard Drive
After the transfer is complete and you have confirmed that all the selected files have been successfully copied to your external hard drive, it is important to follow the proper steps to safely disconnect the device from your Mac.
Here’s how to safely disconnect the external hard drive:
- First, ensure that any file transfer or data access processes involving the external hard drive are completed. Make sure that no files are currently being copied, moved, or accessed from the external hard drive.
- Close any open Finder windows or applications that might be accessing the external hard drive or its contents.
- Locate the external hard drive icon on your desktop or in the Finder sidebar. Right-click (or Control+click) on the icon and select “Eject” from the context menu. Alternatively, you can simply drag the icon to the Trash or use the Eject button next to the external hard drive in the Finder sidebar.
- Wait for a moment until you see a notification or confirmation message that it is safe to disconnect the external hard drive. This message may vary depending on your macOS version.
- Once you receive the confirmation, gently unplug the USB or Thunderbolt cable connecting the external hard drive to your Mac. Make sure to remove it straight and avoid pulling it at an angle or with excessive force.
By following these steps, you ensure that the external hard drive is safely disconnected from your Mac without causing any damage to the device or compromising the transferred files.
It is important to note that abruptly disconnecting the external hard drive without properly ejecting it can result in data loss, file corruption, or potential damage to the device. Taking a moment to go through the proper steps of safely disconnecting the external hard drive will help protect your data and maintain the integrity of your files.
With the external hard drive safely disconnected, you have successfully completed the process of transferring your selected files from iCloud to the external hard drive.
Conclusion
Transferring data from iCloud to an external hard drive is a valuable process that allows you to free up space on your iCloud storage and securely backup your important files. By following the steps outlined in this guide, you can easily and effectively transfer your files from iCloud to an external hard drive.
Throughout this guide, we covered the importance of connecting your external hard drive to your Mac, opening iCloud Drive, selecting the files you want to transfer, copying the selected files to the external hard drive, waiting for the transfer to complete, and safely disconnecting the external hard drive from your Mac.
Transferring your files from iCloud to an external hard drive provides numerous benefits. It allows you to manage your storage more efficiently, reduce the risk of data loss, and have portable access to your files. Additionally, backing up your files to an external hard drive provides an added layer of security and peace of mind.
Remember to always handle your external hard drive and files with care. Safely ejecting the external hard drive and following proper data transfer protocols ensures that your files remain intact and your devices are protected from damage.
Regardless of whether you are transferring a small number of files or a large volume of data, the process is straightforward and can be easily accomplished with a few simple steps. Take the time to organize and select the files you want to transfer, and ensure that you have sufficient storage space available on your external hard drive.
Now that you have learned how to transfer your files from iCloud to an external hard drive, you can enjoy the convenience of accessing and managing your files without relying solely on iCloud storage. So go ahead, start the transfer process, and enjoy the freedom and flexibility that comes with storing your files on an external hard drive!