Introduction
Backing up your MacBook Pro is of utmost importance to ensure the safety and security of your valuable data. Imagine if your MacBook Pro gets stolen, damaged, or crashes unexpectedly – you could potentially lose all your important files, photos, and documents. That’s why it is crucial to have a backup strategy in place.
A backup is essentially a copy of your data that can be safely stored elsewhere. By creating regular backups, you can avoid the devastating impact of data loss and restore your files quickly and easily. In this article, we will explore the different methods available to backup your MacBook Pro and guide you through the steps to set up each method.
Whether you are a student, a professional, or a casual user, backing up your MacBook Pro is essential to protect your digital life. It not only safeguards your work documents, but also preserves your cherished memories captured in photos and videos. Don’t wait until it’s too late – take action now to ensure the safety of your data.
In the following sections, we will explore the various methods available to backup your MacBook Pro, including Time Machine, iCloud Backup, External Hard Drives, and Cloud Storage Services. We will discuss the steps involved in setting up each method, as well as provide some best practices to help you establish a regular backup routine. By the end of this article, you will have the knowledge and confidence to safeguard your important files and enjoy peace of mind knowing that your data is protected.
Importance of Backing Up Your MacBook Pro
Backing up your MacBook Pro is not just a good practice, it is imperative to protect your valuable data and prevent potential disasters. Your MacBook Pro contains essential documents, photos, videos, and other files that hold great significance in both your personal and professional life. Here are several reasons why backing up your MacBook Pro is so crucial:
1. Protection from Hardware Failure: Hard drives can fail, and computers can crash unexpectedly. By having a backup of your MacBook Pro, you can easily recover your data even if your hardware fails. This ensures that your important files are always accessible, even in the event of a hardware malfunction.
2. Defense against Loss and Theft: Unfortunately, laptops are an attractive target for thieves. If your MacBook Pro gets stolen, you may lose not only an expensive device but also valuable data. By regularly backing up your MacBook Pro, you can safeguard your files and minimize the impact of theft or loss.
3. Protection against Accidental Deletion: We all make mistakes, and sometimes important files can accidentally get deleted. Having a backup ensures that even if you accidentally delete a file, you can easily restore it from your backup without any hassle.
4. Recovery from Software Issues: Software bugs, viruses, and malware can wreak havoc on your MacBook Pro, leading to data corruption or loss. With a backup in place, you can restore your MacBook Pro to a previous state and recover your files, should any software issues arise.
5. Preservation of Precious Memories: Your MacBook Pro likely contains treasured photos, videos, and important moments captured in digital form. Losing these files would be heartbreaking, as they cannot be replaced. By backing up your MacBook Pro, you can ensure that your precious memories are always safe and readily available.
By realizing the critical importance of backing up your MacBook Pro, you can take proactive measures to protect your data and minimize the potential risks of data loss. In the following sections, we will explore different methods that you can use to create backups of your MacBook Pro, ensuring the safety and security of your valuable files and information.
Different Methods to Backup Your MacBook Pro
There are various methods available to backup your MacBook Pro, each with its own advantages and considerations. Let’s explore four popular methods for creating backups:
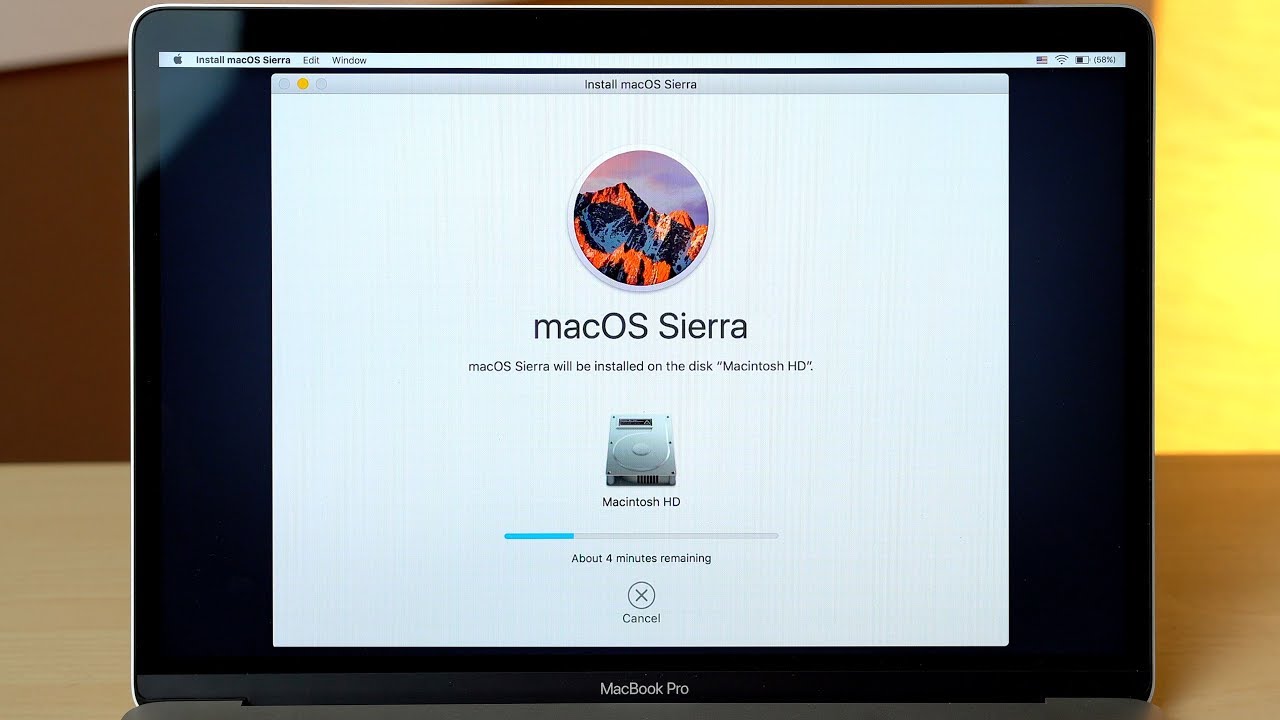
- Time Machine: Time Machine is a built-in backup feature in macOS that allows you to create automatic backups of your entire MacBook Pro. It is convenient and easy to set up, making it an excellent choice for most users. Time Machine keeps hourly backups for the past 24 hours, daily backups for the past month, and weekly backups for as long as your external storage device allows.
- iCloud Backup: iCloud is Apple’s cloud storage service that offers a seamless way to backup your MacBook Pro. With iCloud Backup, your data is automatically backed up to the cloud, making it accessible from any Apple device. This method is ideal for users who want their data to be securely stored off-site and accessible from multiple devices.
- External Hard Drive: Using an external hard drive is a straightforward and cost-effective method to backup your MacBook Pro. You can manually copy your files to the external drive or use third-party backup software for automated backups. External hard drives offer ample storage capacity and can be easily disconnected and stored separately for added security.
- Cloud Storage Services: There are numerous cloud storage services available, such as Google Drive, Dropbox, and OneDrive, that offer backup solutions for your MacBook Pro. These services allow you to store your files in the cloud, ensuring accessibility from anywhere with an internet connection. Cloud storage services often provide a certain amount of free storage, with the option to purchase additional space as needed.
It’s important to choose the backup method that best suits your needs and preferences. Consider factors such as storage capacity, ease of use, level of automation, and cost when deciding which method to use. In the following sections, we will provide step-by-step instructions for setting up each backup method, so you can easily protect your MacBook Pro and ensure the safety of your data.
Method 1: Time Machine
Time Machine is a reliable built-in backup feature in macOS that allows you to easily create automatic backups of your MacBook Pro. It is simple to set up and offers seamless data restoration, making it an excellent choice for most users. Follow the steps below to set up Time Machine and start creating backups:
- Connect an External Storage Device: Begin by connecting an external storage device, such as an external hard drive or SSD, to your MacBook Pro. Time Machine will use this device to store your backups. Ensure that the storage device has enough free space to accommodate your backup needs.
- Open Time Machine Preferences: Click on the Apple menu in the top-left corner of your screen and select “System Preferences.” In the System Preferences window, click on “Time Machine.”
- Turn on Time Machine: In the Time Machine preferences pane, you’ll see an option to turn on Time Machine. Click on the “On” button to enable Time Machine.
- Select Backup Disk: Time Machine will automatically detect your connected storage device. Click on “Select Disk” to choose the external storage device as your backup disk. Select the desired disk from the list and click “Use Disk.”
- Customize Backup Options (Optional): By default, Time Machine will back up your entire MacBook Pro, including your system files, applications, and user data. If you want to exclude specific files or folders from the backup, click on the “Options” button and add them to the exclusion list.
- Enable Encryption (Optional): If you want to secure your backups with encryption, click on the “Encrypt Backup Disk” option. Enter a secure password when prompted. Please note that you must remember this password as it will be required to access your backups.
- Start Backing Up: Once you have customized your settings, Time Machine will start the initial backup process. This may take some time depending on the size of your data. Subsequent backups will occur automatically, as long as your external storage device is connected to your MacBook Pro.
With Time Machine, you can rest assured that your important files are continuously backed up, providing you with peace of mind and the ability to restore your data with ease. Regularly check your backups to ensure they are up to date, and consider keeping an off-site backup for added protection. Remember to keep your external storage device in a safe and secure location to prevent data loss or theft. Time Machine is an effective backup solution that can safeguard your MacBook Pro and protect your valuable data from various risks.
Method 2: iCloud Backup
iCloud Backup offers a convenient and seamless way to backup your MacBook Pro to Apple’s cloud storage service. With iCloud, your data is automatically backed up and encrypted for secure storage. Follow the steps below to backup your MacBook Pro using iCloud:
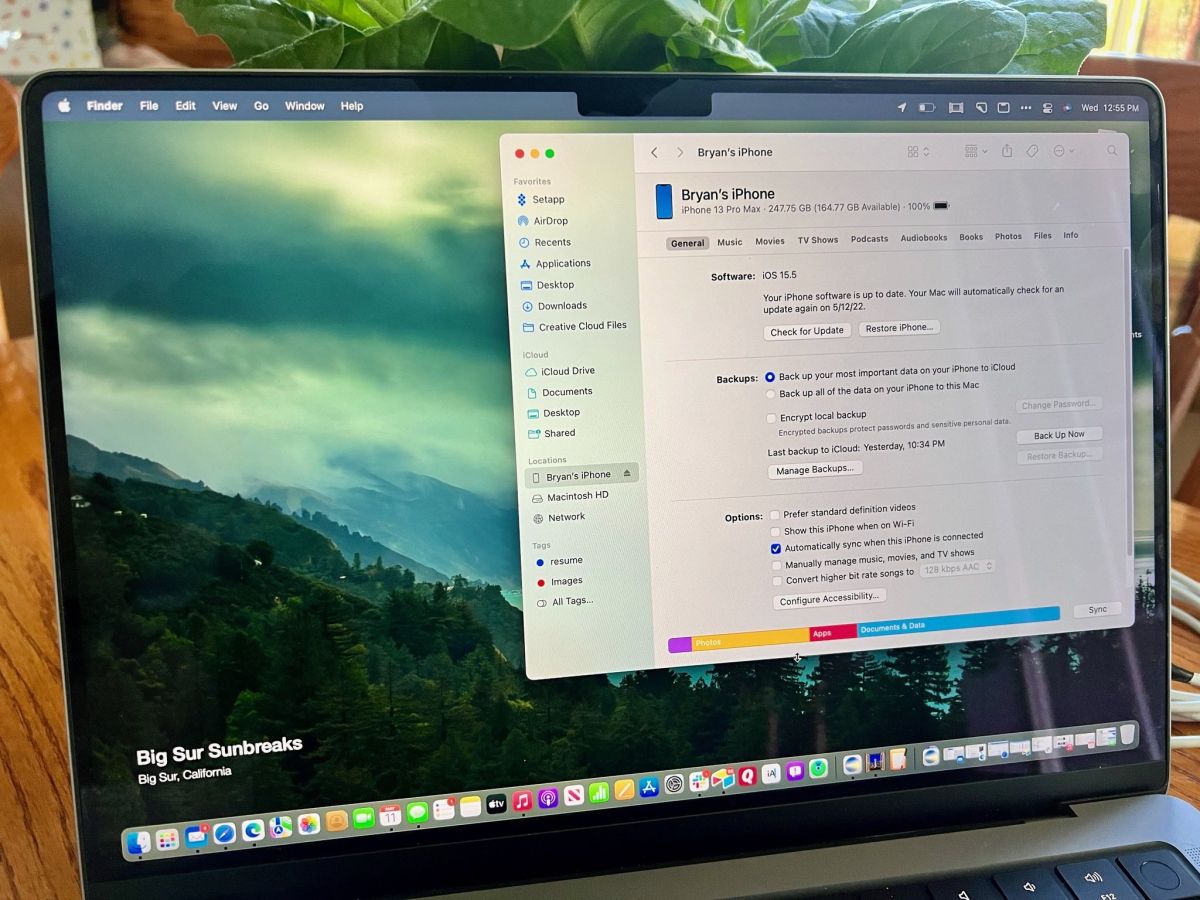
- Enable iCloud: Start by ensuring that iCloud is enabled on your MacBook Pro. Click on the Apple menu in the top-left corner of your screen, select “System Preferences,” and click on “Apple ID.” In the Apple ID preferences pane, navigate to the “iCloud” tab and sign in with your Apple ID. Make sure the “iCloud Drive” checkbox is selected.
- Check iCloud Backup: In the iCloud preferences pane, make sure the “iCloud Backup” option is selected. This ensures that your MacBook Pro is included in the automatic iCloud backups.
- Connect to Wi-Fi: To backup your MacBook Pro using iCloud, ensure that your computer is connected to a stable Wi-Fi network. iCloud backups require an internet connection to upload your data to the cloud storage.
- Start Backup Process: iCloud will automatically back up your MacBook Pro when it is connected to power, in sleep mode, and connected to Wi-Fi. The backup process will occur in the background, and you can continue using your MacBook Pro as usual.
- Check Backup Status: To check the status of your iCloud backup, open the Apple menu, select “System Preferences,” and click on “Apple ID.” In the Apple ID preferences pane, navigate to the “iCloud” tab and click on “Manage” next to “iCloud Storage.” Here, you can see the status of your backups and the available storage space.
- Restore Data from iCloud Backup: If you ever need to restore your MacBook Pro from an iCloud backup, you can do so during the setup process or through the “System Preferences” > “Apple ID” > “iCloud” > “Manage” > “Backups” menu. Select the desired backup and follow the on-screen instructions to restore your data.
Using iCloud Backup provides you with easy access to your data from any Apple device and ensures that your files are securely stored off-site. However, note that the amount of free iCloud storage is limited, and you may need to purchase additional storage if you exceed your allocated limit. Regularly monitor your iCloud backup status and consider alternatives if you require more storage space. With iCloud Backup, you can have peace of mind knowing that your MacBook Pro data is protected and easily recoverable in case of loss, damage, or accidental deletion.
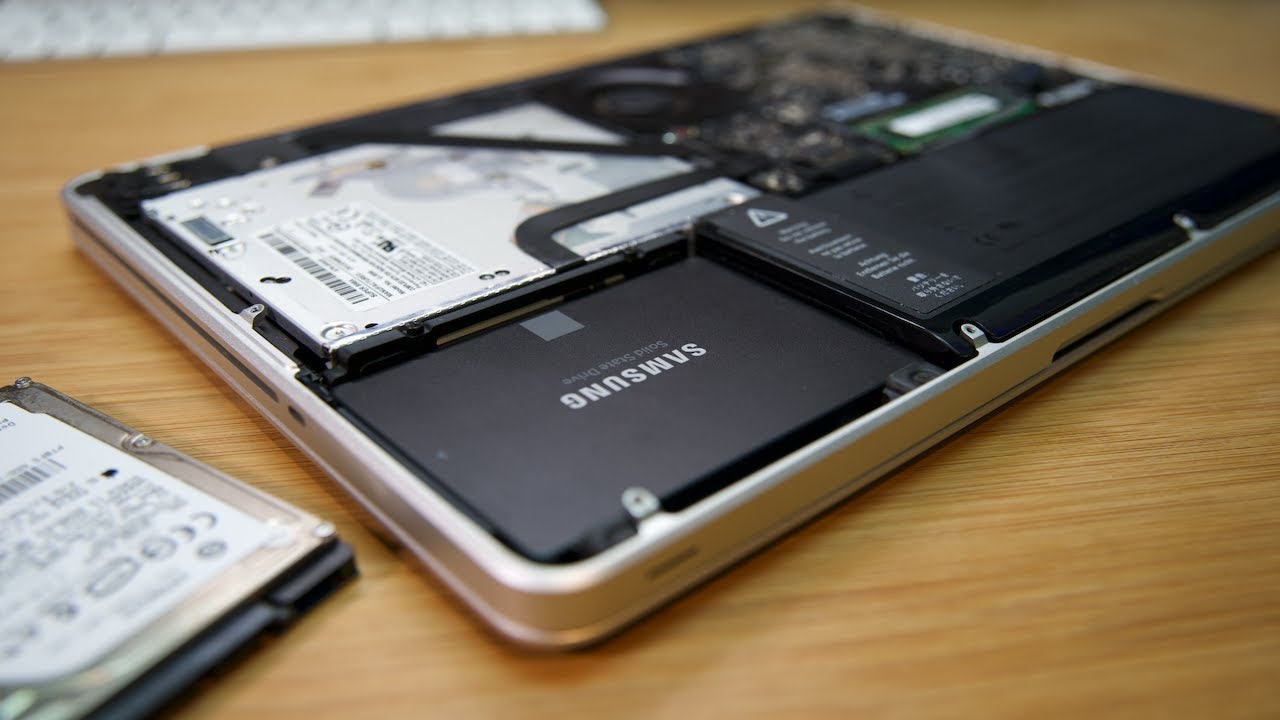
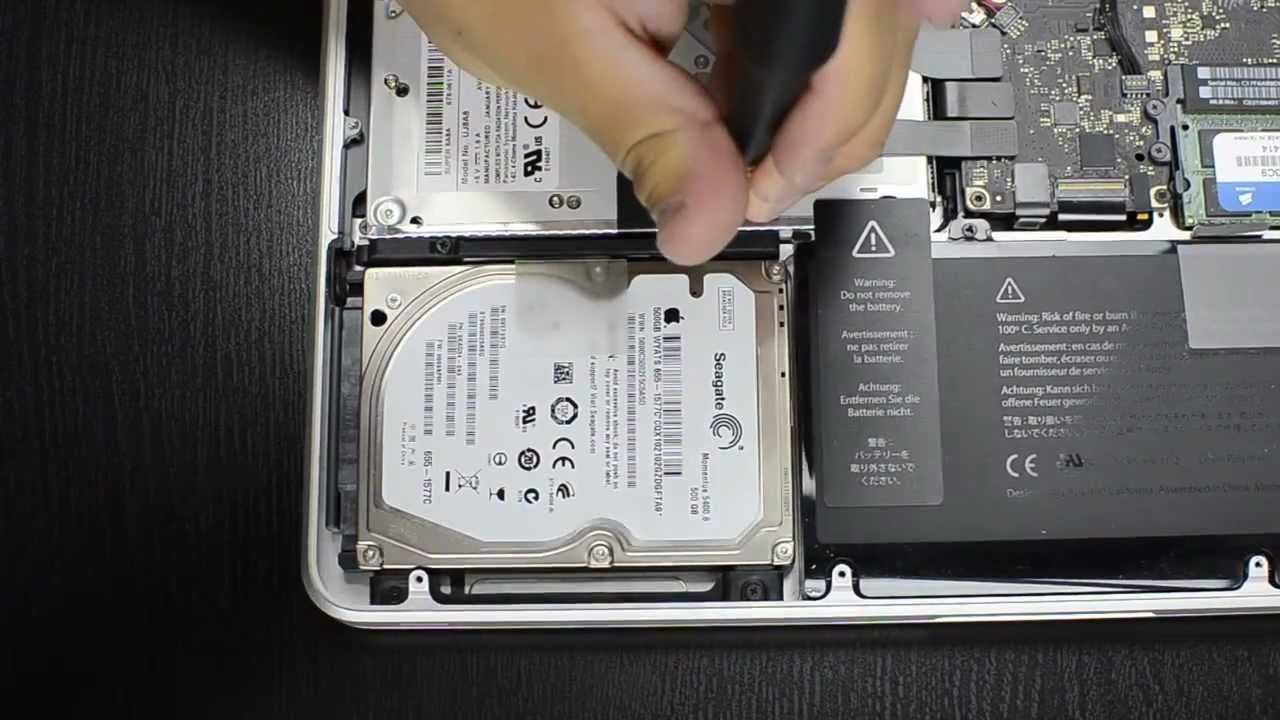
Method 3: External Hard Drive
Using an external hard drive is a popular and cost-effective method to backup your MacBook Pro. It allows you to manually transfer your files to an external storage device, providing you with control over your backups. Follow the steps below to backup your MacBook Pro using an external hard drive:
- Connect the External Hard Drive: Start by connecting your external hard drive to your MacBook Pro using a USB or Thunderbolt cable. Ensure that the external hard drive has sufficient storage capacity to accommodate your backup needs.
- Open Finder: Once the external hard drive is connected, open a Finder window on your MacBook Pro. You can do this by clicking on the Finder icon in the dock or using the keyboard shortcut Command + Space and typing “Finder.”
- Select Files/Folders to Backup: In the Finder window, navigate to the files or folders that you want to backup. You can select specific files or folders by clicking on them while holding the Command key, or you can choose to backup your entire MacBook Pro by selecting the root directory.
- Copy and Paste: With the files or folders selected, right-click and choose “Copy” from the context menu. Then, navigate to the connected external hard drive in the Finder window and right-click again, this time selecting “Paste” to copy the files to the external hard drive. Alternatively, you can use the keyboard shortcut Command + C to copy and Command + V to paste.
- Monitor and Update Backups: It is essential to regularly monitor and update your backups to ensure they are up to date. Set a reminder to perform backups on a regular basis, especially for important files and documents that frequently change. Consider using backup software to automate the backup process and schedule regular backups.
- Safely Eject the External Hard Drive: After each backup session, it is crucial to safely eject the external hard drive from your MacBook Pro. This ensures that no data is being transferred or accessed, minimizing the risk of data corruption. To safely eject the external hard drive, right-click on its icon in the Finder window and select “Eject.”
Using an external hard drive as your backup method gives you control over your data and provides an extra layer of security. Remember to keep your external hard drive in a safe and secure location when not in use to prevent loss, theft, or physical damage. Regularly check your backups to ensure they are successful and consider creating multiple backups or keeping an off-site backup for added protection. By using an external hard drive for backup, you can have peace of mind knowing that your valuable data is securely stored and easily accessible whenever you need it.
Method 4: Cloud Storage Services
Cloud storage services offer a convenient and reliable method to backup your MacBook Pro. With cloud storage, your data is securely stored on remote servers, providing you with easy access to your files from anywhere with an internet connection. Follow the steps below to backup your MacBook Pro using cloud storage services:
- Choose a Cloud Storage Provider: Start by selecting a cloud storage service that suits your needs. Some popular options include Google Drive, Dropbox, OneDrive, and iCloud Drive. Consider factors such as storage capacity, pricing plans, and compatibility with macOS when making your decision.
- Create an Account: Visit the website of your chosen cloud storage provider and create a new account if you don’t have one already. Follow the registration process and provide the necessary information to set up your account.
- Install the Cloud Storage App: Once you have created your account, download and install the official app for the cloud storage service on your MacBook Pro. The app will allow you to sync your files between your local storage and the cloud storage account.
- Sign In to the App: Launch the cloud storage app and sign in using your account credentials. This will establish a connection between your MacBook Pro and the cloud storage service.
- Configure Backup Settings: In the app settings, you may have the option to customize the backup settings. This can include selecting which files or folders to backup, setting up automatic backups, and enabling versioning to track file changes over time. Adjust the settings according to your preferences.
- Start the Backup Process: Once you have configured the backup settings, the app will start the initial backup process. This may take some time depending on the size of your data and the speed of your internet connection. Subsequent backups will occur automatically whenever changes are detected in the selected files or folders.
- Access and Restore Your Files: With your data backed up to the cloud storage service, you can now access your files from any device with an internet connection. If you ever need to restore your files to your MacBook Pro, you can do so by downloading them from the cloud storage app or using the web interface provided by the service.
Cloud storage services offer the advantage of easy access to your files from multiple devices and platforms. They also provide an extra layer of protection by storing your data on remote servers. However, it’s important to consider the storage capacity limitations of the service and be aware of any additional costs associated with exceeding the free storage limit. Regularly monitor your cloud storage account to ensure that your backups are up to date, and consider creating multiple backups or using a combination of cloud storage services and other backup methods for added redundancy and security. By utilizing cloud storage services, you can have confidence knowing that your MacBook Pro data is easily accessible, protected, and recoverable whenever you need it.
Steps to Backup Your MacBook Pro Using Time Machine
Time Machine is a built-in backup feature in macOS that makes it easy to create automatic backups of your MacBook Pro. Follow these steps to set up and use Time Machine for backing up your precious data:
- Connect an External Storage Device: Start by connecting an external storage device, such as an external hard drive or SSD, to your MacBook Pro. Make sure the storage device has sufficient capacity to store your backups.
- Open Time Machine Preferences: Click on the Apple menu in the top-left corner of the screen and select “System Preferences.” In System Preferences, click on “Time Machine” to open the Time Machine preferences pane.
- Enable Time Machine: In the Time Machine preferences pane, click on the “On” button to enable Time Machine.
- Select the Backup Disk: Time Machine will automatically detect your connected external storage device. Click on “Select Disk” and choose the external storage device as your backup disk.
- Customize Backup Options (Optional): If you want to exclude certain files or folders from the backup, click on the “Options” button and add them to the exclusion list.
- Turn on Encryption (Optional): If you want to encrypt your backups for added security, select the “Encrypt Backup Disk” option and set a password.
- Start the Backup Process: Once you have customized your settings, Time Machine will start the initial backup process. This may take some time, depending on the amount of data being backed up.
- Monitor Backup Progress: Keep an eye on the Time Machine icon in the menu bar. It shows the current status of the backup process. You can click on the icon to see detailed information about the backup progress.
- Perform Regular Backups: Time Machine will automatically perform hourly, daily, and weekly backups, as long as your external storage device is connected to your MacBook Pro. Ensure that your external storage device is connected regularly to keep your backups up to date.
- Restore Files from Backup: If you ever need to restore your files from a Time Machine backup, click on the Time Machine icon in the menu bar or open the Time Machine preferences pane. Navigate to the desired date and time and select the files or folders you want to restore. Click on the “Restore” button to restore the selected files to their original location.
By following these steps, you can easily set up Time Machine and create regular backups of your MacBook Pro. Remember to monitor your backups to ensure they are successfully completed and consider keeping an off-site backup or using additional backup methods for added security. With Time Machine, you can have peace of mind knowing that your valuable data is protected and can be easily restored whenever needed.
Steps to Backup Your MacBook Pro Using iCloud Backup
iCloud Backup provides a convenient way to automatically back up your MacBook Pro to Apple’s cloud storage service. Follow these steps to set up and use iCloud Backup for backing up your valuable data:
- Enable iCloud: Ensure that iCloud is enabled on your MacBook Pro. Click on the Apple menu in the top-left corner of the screen, select “System Preferences,” and click on “Apple ID.” In the Apple ID preferences pane, go to the “iCloud” tab and sign in with your Apple ID. Make sure the “iCloud Drive” checkbox is selected.
- Check iCloud Backup: In the iCloud preferences pane, ensure that the “iCloud Backup” option is selected. This enables your MacBook Pro to be included in the automatic iCloud backups.
- Connect to Wi-Fi: To backup your MacBook Pro using iCloud, make sure your computer is connected to a stable Wi-Fi network. iCloud backups require an internet connection to upload your data to the cloud storage.
- Start Backup Process: iCloud will automatically back up your MacBook Pro when it is connected to power, in sleep mode, and connected to Wi-Fi. The backup process happens in the background, allowing you to continue using your MacBook Pro as usual.
- Monitor Backup Status: To check the status of your iCloud backup, open the Apple menu, select “System Preferences,” and click on “Apple ID.” In the Apple ID preferences pane, go to the “iCloud” tab and click on “Manage” next to “iCloud Storage.” Here, you can see the status of your backups and the available storage space.
- Restore from iCloud Backup: If you need to restore your MacBook Pro from an iCloud backup, you can do so during the setup process or through the “System Preferences” > “Apple ID” > “iCloud” > “Manage” > “Backups” menu. Select the desired backup and follow the instructions to restore your data.
By following these steps, you can set up iCloud Backup and ensure that your MacBook Pro is continuously backed up to the cloud storage. Remember to monitor your iCloud storage space and upgrade if needed to accommodate your backup requirements. iCloud Backup provides a convenient and secure solution for protecting your important data, allowing you to easily restore your MacBook Pro to a previous state if necessary.
Steps to Backup Your MacBook Pro Using an External Hard Drive
Using an external hard drive is a simple and efficient method to back up your MacBook Pro. Follow these steps to set up and use an external hard drive for backing up your important data:
- Connect the External Hard Drive: Start by connecting the external hard drive to your MacBook Pro using a USB or Thunderbolt cable. Ensure that the hard drive has sufficient storage capacity to accommodate your backups.
- Open Finder: Launch Finder on your MacBook Pro by clicking on the Finder icon in the dock or using the Command + Spacebar shortcut and typing “Finder”.
- Select Files or Folders to Backup: Use Finder to navigate to the files or folders you want to back up. You can select specific files or folders by holding the Command key and clicking on the items, or you can choose to back up your entire MacBook Pro by selecting the root directory.
- Copy the Files to the External Hard Drive: Right-click on the selected files or folders, and from the context menu, choose “Copy”. Then, navigate to the external hard drive in the Finder window, right-click again, and select “Paste” to copy the files to the external hard drive. Alternatively, you can use the keyboard shortcuts Command + C to copy and Command + V to paste.
- Monitor and Update Backups: Regularly check and update your backups to ensure they are up to date. Establish a routine and set reminders to perform backups on a regular basis, especially for important files and documents that are frequently updated.
- Safely Eject the External Hard Drive: Once you have completed the backup process, it is important to properly eject the external hard drive from your MacBook Pro. Right-click on the external hard drive icon in Finder and select “Eject” to ensure that no data is being transferred and the drive can be safely disconnected.
By following these steps, you can easily back up your MacBook Pro using an external hard drive. Remember to keep the external hard drive in a safe and secure location when not in use to prevent loss, theft, or physical damage. Regularly monitor and update your backups to ensure that your important files are protected and easily recoverable in case of any unexpected events.
Steps to Backup Your MacBook Pro Using Cloud Storage Services
Cloud storage services provide a convenient and secure way to back up your MacBook Pro. Follow these steps to set up and use cloud storage services for backing up your important data:
- Choose a Cloud Storage Provider: Research and choose a cloud storage provider that fits your needs and preferences. Popular options include Google Drive, Dropbox, OneDrive, and iCloud Drive.
- Create an Account: Visit the website of your chosen cloud storage provider and create a new account if you don’t have one already. Follow the registration process and provide the necessary information to set up your account.
- Install the Cloud Storage App: Download and install the official app for the cloud storage service on your MacBook Pro. The app will allow you to sync your files between your local storage and the cloud storage account.
- Sign In to the App: Launch the cloud storage app on your MacBook Pro and sign in using your account credentials. This will establish a connection between your computer and the cloud storage service.
- Set Up File Syncing: Configure the app to sync your files and folders with the cloud storage service. You can choose to sync all files or specific folders depending on your needs. Any changes you make to the synced files will be automatically reflected in your cloud storage account.
- Monitor Sync Status: Keep an eye on the sync status of your files. The cloud storage app typically displays a progress bar or icon to indicate the status of file syncing. Ensure that all files are successfully synced before closing the app or shutting down your MacBook Pro.
- Access and Restore Your Files: With your data backed up to the cloud storage service, you can easily access your files from any device with an internet connection. If you ever need to restore your files to your MacBook Pro, you can do so by downloading them from the cloud storage app or using the web interface provided by the service.
By following these steps, you can set up and use cloud storage services effortlessly to back up your MacBook Pro. Keep in mind that the amount of free storage offered by cloud storage providers is often limited, so monitor your storage usage and consider upgrading if necessary. Also, ensure that you have a stable internet connection when syncing your files to the cloud storage service. Backing up your data with cloud storage provides convenience, accessibility, and an extra layer of protection for your important files and documents.
Best Practices for Regular Backups
Regular backups are vital for ensuring the safety and security of your data. To make the most out of your backup strategy and protect your MacBook Pro effectively, consider the following best practices:
- Establish a Backup Schedule: Set a regular backup schedule that suits your needs and the frequency of your data changes. Whether it’s daily, weekly, or monthly, sticking to a consistent backup routine ensures that your important files are always up to date.
- Use Multiple Backup Methods: Relying on a single backup method can potentially leave you vulnerable to data loss. Combine different backup methods, such as Time Machine, external hard drives, and cloud storage services, for added redundancy and protection.
- Utilize Incremental Backups: Incremental backups only save the changes made since the last backup, minimizing the time and storage space required. This ensures that only the necessary data is backed up, improving efficiency and reducing the backup duration.
- Store Backups Off-Site: While having local backups is essential, consider keeping an off-site backup as well. This protects your data from physical damage, theft, or disasters that might affect your primary backup location. Cloud storage or external hard drives stored in another location can serve as off-site backups.
- Encrypt Your Backups: Encrypting your backups adds an extra layer of security, especially when using cloud storage services or external hard drives. Encryption ensures that your data remains private and protected, even if the backup media is accessed by unauthorized individuals.
- Regularly Test Restores: Perform occasional test restores to ensure that your backups are functional and can be successfully restored if needed. It’s important to verify that your backup files are intact and can be accessed without any issues.
- Monitor Backup Status and Storage Space: Regularly keep an eye on the backup status and available storage space of your backup methods. This allows you to address any errors, resolve storage limitations, and ensure that your backups are running smoothly.
- Update Backup Software and Firmware: Keep your backup software and firmware up to date to benefit from the latest security patches and performance improvements. Regularly check for updates and install them promptly to ensure optimal backup functionality.
- Organize and Document Your Backup System: Maintain a clear and organized backup system. Keep track of your backup methods, storage devices, and schedules. Documenting your backup system helps you easily locate and manage your backups and assists in the event of data restoration.
- Consider Professional Data Recovery Services: In situations where data loss occurs due to hardware failure or other unforeseen circumstances, professional data recovery services can help retrieve your lost data. It’s advisable to research and identify reputable data recovery experts before an emergency occurs.
By implementing these best practices, you can ensure the effectiveness and reliability of your backup strategy. Regular backups, combined with the appropriate backup methods and precautions, safeguard your MacBook Pro and protect your valuable data against potential loss or damage.
Conclusion
Backing up your MacBook Pro is a critical task that should never be overlooked. Whether it’s protecting your important work documents, preserving cherished memories captured in photos and videos, or securing valuable data from unexpected mishaps, having a reliable backup strategy in place is essential.
In this article, we explored different methods to backup your MacBook Pro, including Time Machine, iCloud Backup, external hard drives, and cloud storage services. Each method offers its own advantages and considerations, allowing you to choose the one that best suits your needs and preferences.
We discussed the steps involved in setting up each backup method, highlighting the importance of regularly monitoring and updating backups to ensure that your data is always protected. By following best practices like establishing a backup schedule, utilizing multiple backup methods, and storing backups off-site, you can further enhance the security and reliability of your backups.
Remember that accidents happen, and data loss can occur in various forms. By proactively creating backups and adhering to a backup routine, you can mitigate the devastating effects of data loss and ensure that your data is always accessible and recoverable.
Investing time and effort into setting up and maintaining backups is a small price to pay for the peace of mind that comes with knowing that your important files and memories are protected. So, whether you choose to utilize Time Machine, iCloud Backup, an external hard drive, or a cloud storage service, take action now to implement a robust backup system for your MacBook Pro.
By regularly backing up your MacBook Pro, you empower yourself with the ability to restore your data from a recent backup and continue seamlessly in the event of loss, theft, hardware failure, or accidental deletion. Don’t wait until it’s too late – prioritize the safety of your data with frequent and comprehensive backups.
Remember, the true value of a backup lies in its ability to protect your precious files, provide peace of mind, and minimize disruption when unforeseen circumstances arise. Your MacBook Pro holds a wealth of invaluable data, and by implementing a solid backup strategy, you can ensure its longevity and safeguard your digital life.