Introduction
Factory resetting your MacBook Pro 2017 may seem like a drastic measure, but it can be a useful solution in certain situations. Whether you’re planning on selling your MacBook Pro, experiencing persistent software issues, or simply want to start fresh, a factory reset can restore your device to its original settings and resolve many issues.
A factory reset erases all the data and settings on your MacBook Pro, so it’s crucial to back up your files beforehand. This ensures that you don’t lose any important documents, photos, or other valuable data during the process. Once your MacBook Pro is reset, it will be as if you just unboxed it, ready to be set up again from scratch.
In this guide, we will walk you through the steps to factory reset your MacBook Pro 2017 and provide alternative methods to accomplish the same goal. Additionally, we will cover how to restore your data after the reset, ensuring you can continue where you left off, while enjoying the benefits of a clean and refreshed system.
Why Factory Reset Your MacBook Pro 2017?
There are several reasons why you might consider factory resetting your MacBook Pro 2017. Let’s explore some of the common scenarios where a reset can be beneficial:
Resolving Performance Issues: Over time, your MacBook Pro may start to slow down or experience frequent crashes. This can be due to accumulated software clutter, corrupt files, or conflicts between different applications. Performing a factory reset can help eliminate these issues by restoring your device to its original state, improving performance and stability.
Preparing to Sell or Give Away: If you’re planning to sell or give away your MacBook Pro, it’s essential to remove all your personal data and settings. A factory reset ensures that your files are permanently deleted, reducing the risk of data breach or identity theft.
Starting Fresh: Sometimes, you may want to start with a clean slate on your MacBook Pro. Whether you want to get rid of unnecessary programs, clear out cluttered files, or simply refresh the system, a factory reset provides a fresh start. It allows you to set up your device from scratch, ensuring optimal performance and a personalized experience.
Resolving Persistent Software Issues: If you’re facing recurring software problems, such as freezes, compatibility conflicts, or unresponsive applications, a factory reset can help resolve these issues. By wiping out all the software and settings, you eliminate any underlying problems and give yourself a clean slate to work with.
In summary, performing a factory reset on your MacBook Pro 2017 can be beneficial for various reasons. It can help resolve performance issues, prepare the device for sale or giveaway, provide a fresh start, and address persistent software issues. However, it’s crucial to back up your data before proceeding with the reset to ensure that you don’t lose any important files. In the following sections, we will guide you through the step-by-step process of performing a factory reset on your MacBook Pro 2017, as well as alternative methods you can explore.
Prepare for Factory Reset
Before you proceed with the factory reset of your MacBook Pro 2017, it’s important to take a few preparatory steps to ensure a smooth and hassle-free process. Here are the essential tasks you need to complete before initiating the reset:
Backup Your Data: A factory reset erases all the data on your MacBook Pro, so it’s crucial to back up your files to prevent any loss. You can use Time Machine, an external hard drive, or cloud storage services like iCloud or Google Drive to create a backup of your important files, documents, photos, and any other data you wish to preserve.
Disable FileVault Encryption: If you have enabled FileVault encryption on your MacBook Pro, it’s recommended to disable it before performing a factory reset. Open “System Preferences,” select “Security & Privacy,” and navigate to the “FileVault” tab. Click the lock icon, enter your password, and then click “Turn Off FileVault.” This will ensure a smoother reset process.
Sign Out of iCloud and Other Accounts: To prevent any potential synchronization issues or data loss, sign out of your iCloud account and any other accounts linked to your MacBook Pro. Go to “System Preferences,” click on “Apple ID,” and choose “Overview” from the sidebar. Click on “Sign Out” and follow the prompts to sign out of your iCloud account. Similarly, make sure you sign out of any other accounts, such as iTunes or App Store, to avoid complications during the reset.
Deauthorize Your MacBook Pro: If you have authorized your MacBook Pro to access iTunes content, it’s important to deauthorize it to prevent any licensing or authorization issues in the future. Open iTunes, go to “Account,” and select “Authorize this computer.” If the option is already grayed out, it means that the MacBook Pro is already deauthorized and you can proceed without any further action.
Make a List of Installed Apps and Serial Numbers: Before the reset, make a note of the applications you have installed on your MacBook Pro and any associated serial numbers or license information. This will help you reinstall and activate the software after the reset is complete.
By completing these preparatory tasks, you ensure that your data is safely backed up, important accounts are signed out, and authorization issues are avoided. With everything in order, you’re now ready to proceed with the factory reset of your MacBook Pro 2017.
Step-by-step Guide to Factory Reset MacBook Pro 2017
Performing a factory reset on your MacBook Pro 2017 is a straightforward process. Follow these step-by-step instructions to reset your device to its original settings:
Step 1: Backup Your Data: Before proceeding with the reset, ensure that you have backed up all your important files, documents, photos, and any other data you wish to preserve. Use Time Machine, an external hard drive, or cloud storage services to create a backup.
Step 2: Restart Your MacBook Pro: Click on the Apple menu in the top-left corner of your screen and select “Restart.” Alternatively, you can hold down the power button until your MacBook Pro turns off, and then press it again to turn it back on.
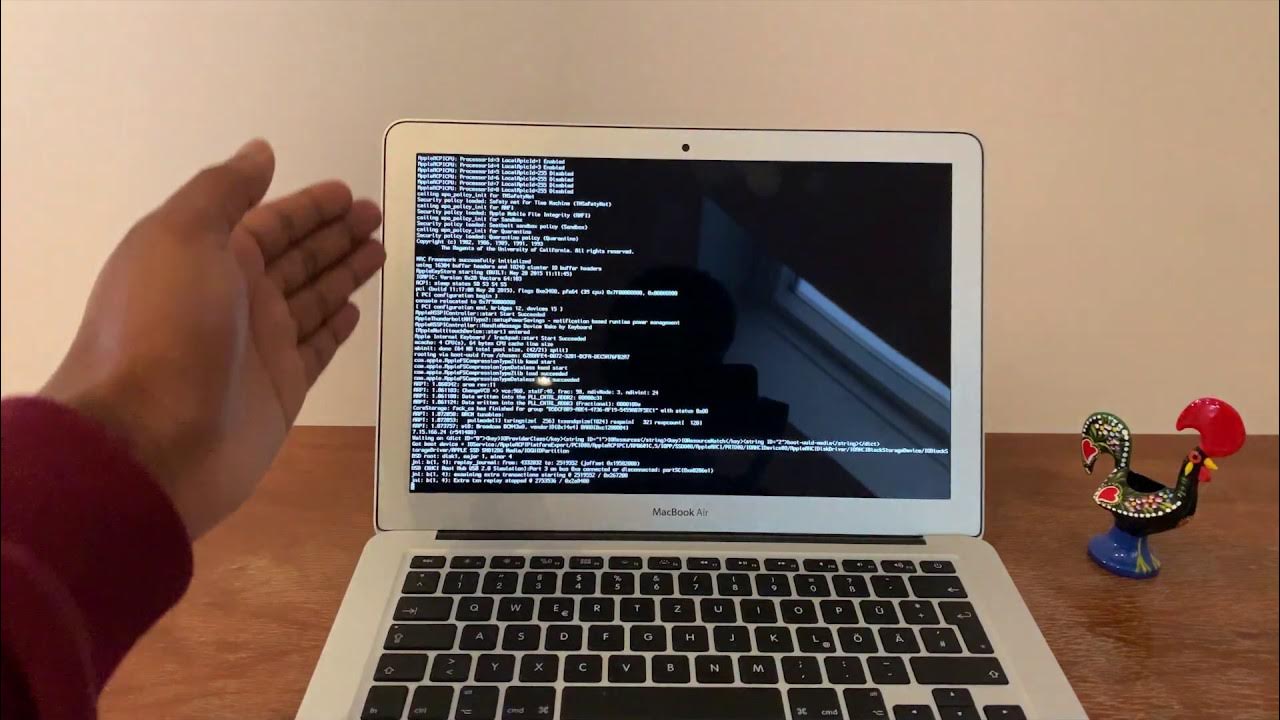
Step 3: Enter Recovery Mode: As your MacBook Pro restarts, immediately press and hold down the “Command” (⌘) and “R” keys simultaneously until the Apple logo or a spinning globe appears. This will boot your MacBook Pro into the Recovery Mode.
Step 4: Choose Disk Utility: In the macOS Utilities window, select “Disk Utility” and click “Continue.” This will open the Disk Utility application, where you can manage and erase your disk.
Step 5: Erase the Disk: In the Disk Utility window, select your internal disk (usually named “Macintosh HD” or similar) from the sidebar. Click on the “Erase” tab and choose a format (e.g., APFS or Mac OS Extended) for your disk. Enter a name for the disk and click “Erase” to wipe out all the data on your MacBook Pro.
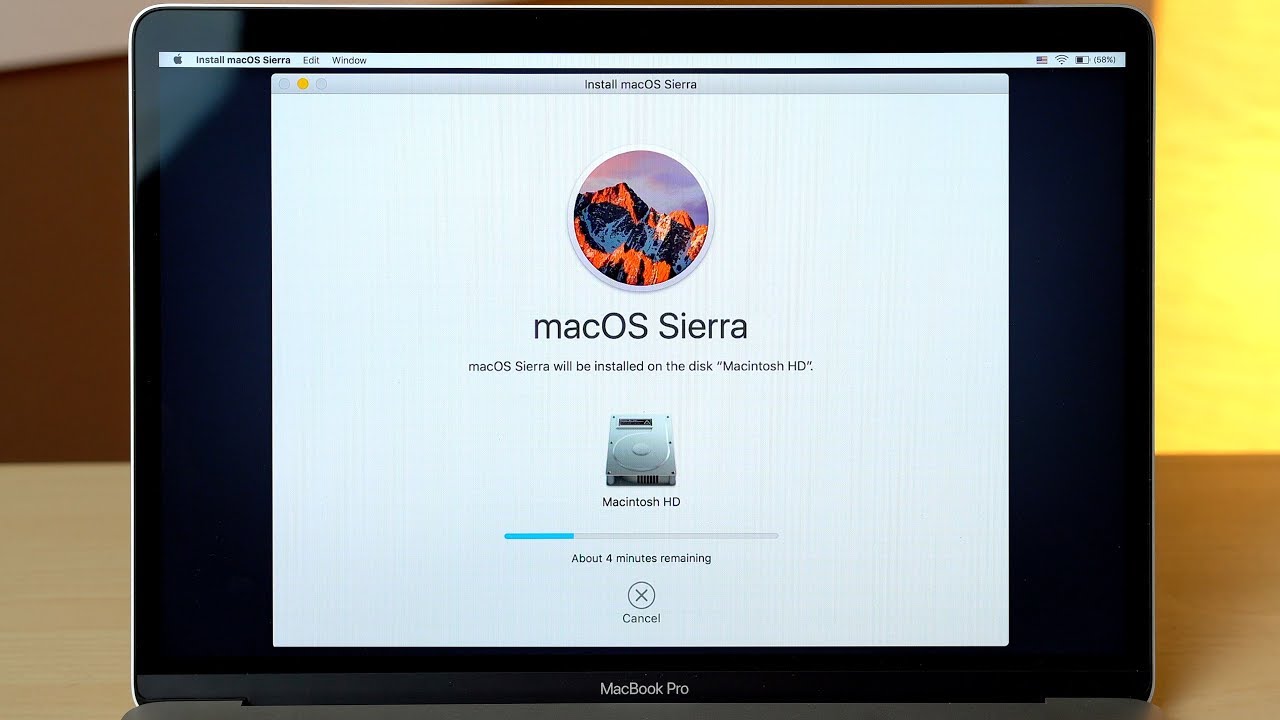
Step 6: Reinstall macOS: After the disk is erased, close the Disk Utility window to return to the macOS Utilities menu. Select “Reinstall macOS” and click “Continue.” Follow the on-screen prompts to reinstall the macOS operating system on your MacBook Pro.
Step 7: Complete the Setup: Once the macOS installation is complete, your MacBook Pro will restart and guide you through the initial setup process. Follow the on-screen instructions to set up your language, time zone, iCloud account, and other preferences. You can then restore your backed-up data from Time Machine or other sources.
That’s it! You have successfully performed a factory reset on your MacBook Pro 2017. Enjoy using your device with a fresh start and improved performance.
Alternative Methods to Factory Reset MacBook Pro 2017
In addition to the traditional method of performing a factory reset through the macOS Utilities, there are a couple of alternative methods you can explore to reset your MacBook Pro 2017.
Method 1: Internet Recovery: If your MacBook Pro doesn’t have a recovery partition or the recovery partition is damaged, you can use the Internet Recovery feature to perform a factory reset. This method allows you to reinstall the macOS directly from Apple’s servers. To initiate Internet Recovery, hold down the “Option” (⌥), “Command” (⌘), and “R” keys simultaneously while restarting your MacBook Pro. Follow the on-screen prompts to access the recovery tools and perform the reset.
Method 2: Firmware Password Reset: If you have set a firmware password on your MacBook Pro and cannot access the recovery tools, you will need to reset the firmware password before performing a factory reset. This can be done by contacting Apple Support or visiting an Apple Store with proof of ownership. Once the firmware password is reset, you can proceed with the factory reset using the methods mentioned above.
Method 3: Installation Media: If you have a bootable external drive or macOS installation media, you can use it to perform a factory reset on your MacBook Pro. Connect the external drive or insert the installation media, restart your MacBook Pro, and hold down the “Option” (⌥) key. Select the external drive or installation media as the startup disk and follow the on-screen instructions to reinstall the macOS and perform the reset.
It’s important to note that alternative methods may have specific requirements or limitations. For example, Internet Recovery requires a stable internet connection, and using installation media requires creating a bootable drive or having the original macOS installation disk. It’s recommended to follow the method that best suits your situation and ensure you have the necessary resources before proceeding with the reset.
By exploring these alternative methods, you have additional options to factory reset your MacBook Pro 2017. Whether you choose the traditional method or one of the alternatives, the goal remains the same—to restore your device to its original settings and enjoy a fresh start with improved performance.
Restoring Your Data After Factory Reset
After performing a factory reset on your MacBook Pro 2017, you will need to restore your data to get back to where you left off. Here are the steps to follow for a smooth data restoration process:
Step 1: Setup Assistant: Once you have completed the initial setup of your MacBook Pro after the factory reset, you will be prompted to choose a few preferences. At this stage, you can choose to restore your data from a Time Machine backup or another backup source.
Step 2: Time Machine Backup: If you backed up your data using Time Machine, connect your Time Machine backup drive to your MacBook Pro. The Setup Assistant will detect the backup and give you the option to restore your files, applications, and preferences. Select the backup source and follow the on-screen instructions to restore your data.
Step 3: Other Backup Sources: If you used other backup methods, such as an external hard drive or cloud storage, make sure your backup is accessible. Connect the external storage device or log in to your cloud storage account and locate your backup files. Manually copy the files back to their original locations on your MacBook Pro.
Step 4: Reinstall Applications: After restoring your files and data, you may need to reinstall the applications you previously had installed on your MacBook Pro. Refer to the list you made before the factory reset and install the applications from their original sources. Use any license keys or serial numbers you have to activate the software.
Step 5: Set Up Preferences: Once your data and applications are restored, take the time to configure your preferences and settings according to your needs. This includes personalizing your desktop, setting up email accounts, restoring browser bookmarks, and adjusting system preferences.
Step 6: Verify Data Integrity: After the restoration process, it’s essential to verify the integrity of your restored data. Open your files and applications to ensure they are functioning correctly. Check for any missing or corrupted files and restore them from your backup if necessary.
By following these steps, you can smoothly restore your data after a factory reset and get your MacBook Pro 2017 back to its previous state. Remember to be patient during the data restoration process, as it may take some time depending on the size of your backup and the number of files and applications you are restoring.
Conclusion
Performing a factory reset on your MacBook Pro 2017 can be a valuable solution to a variety of situations. Whether you’re experiencing performance issues, preparing to sell your device, or simply want a fresh start, a factory reset allows you to restore your MacBook Pro to its original settings and resolve various software issues.
In this guide, we discussed the importance of backing up your data before performing a factory reset and provided a step-by-step guide to help you through the process. We also explored alternative methods, such as Internet Recovery or using installation media, as well as the necessary steps to restore your data after the reset.
Remember, always back up your important files and documents before proceeding with a factory reset. This ensures that you don’t lose any valuable data during the process. Additionally, take the time to prepare your MacBook Pro by disabling FileVault encryption, signing out of iCloud and other accounts, and deauthorizing your device.
When it comes time to perform the factory reset, follow the instructions carefully, whether through the traditional macOS Utilities or by utilizing alternative methods. After the reset, take the necessary steps to restore your data, reinstall applications, and configure your preferences.
By performing a factory reset, you can give your MacBook Pro 2017 a fresh start and resolve any software issues that may have been plaguing your device. It’s an effective way to improve performance and ensure a smooth and personalized user experience.
Remember, if you’re unsure about any step or encounter any difficulties during the process, it’s always a good idea to consult the official Apple support website or seek assistance from an authorized service provider to ensure proper guidance.
So whether you’re looking to optimize performance, prepare your MacBook Pro for sale, or simply start afresh, a factory reset is an effective solution to bring your device back to its original state.