Introduction
Welcome to our guide on how to install a solid state drive (SSD) in a MacBook Pro. Upgrading your MacBook Pro’s hard drive to an SSD can significantly improve its performance, allowing for faster boot times, quicker application launches, and smoother multitasking. Whether you’re a professional seeking a productivity boost or a casual user looking to enhance your overall computing experience, installing an SSD is a worthwhile investment.
Before we dive into the step-by-step instructions, let’s briefly discuss what an SSD is and why it’s beneficial. Unlike traditional hard drives that use spinning platters to store data, an SSD utilizes flash memory technology. This not only eliminates the mechanical components prone to failure but also enables faster data access and transfer speeds.
By replacing the internal hard drive of your MacBook Pro with an SSD, you can expect faster file transfers, improved system responsiveness, and reduced application load times. Whether you’re working with large media files, running resource-intensive software, or simply multitasking, the increased speed and performance will undoubtedly enhance your computing experience.
However, before we begin, it’s important to note that opening your MacBook Pro and replacing internal components may void your warranty. If your MacBook Pro is still covered by AppleCare or another warranty plan, it’s essential to determine if the installation of an SSD will impact your coverage. Additionally, if you’re uncomfortable performing the installation yourself, it’s always a good idea to consult a professional technician or authorized service provider for assistance.
In this guide, we will walk you through the process of installing an SSD in your MacBook Pro. We’ll cover everything from gathering the necessary tools and materials to configuring the new drive and restoring your data after the installation. So, if you’re ready to boost your MacBook Pro’s performance and reap the benefits of an SSD, let’s get started!
Step 1: Gather the necessary tools and materials
Before you begin the installation process, it’s important to gather all the essential tools and materials you’ll need. Here is a list of items you should have on hand:
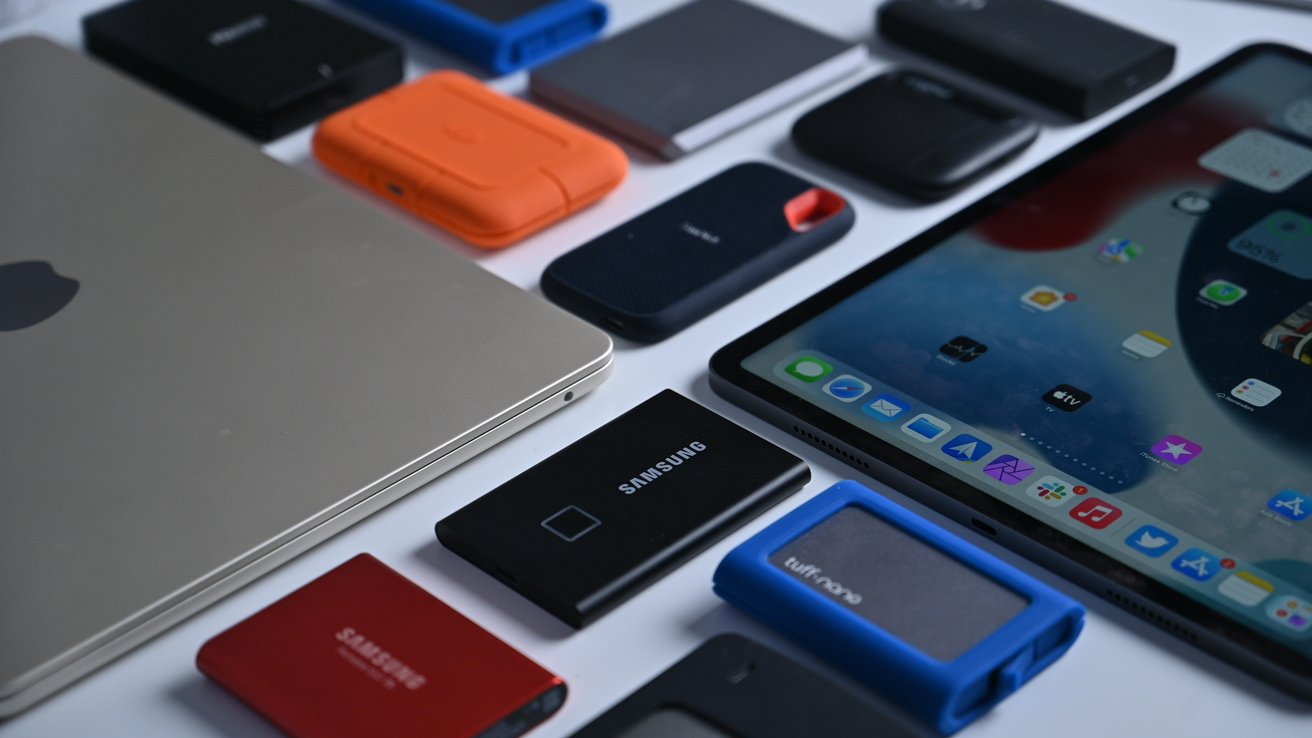
- A solid state drive – Ensure that the SSD you choose is compatible with your MacBook Pro model. Consider factors such as storage capacity and brand reputation when making your selection.
- A MacBook Pro-compatible screwdriver set – You’ll need a set of precision screwdrivers, such as Phillips head and Torx screwdrivers, to remove the screws holding your MacBook Pro’s bottom cover and hard drive in place.
- An external hard drive or cloud storage solution – Before removing the existing hard drive from your MacBook Pro, it’s crucial to back up your important data. An external hard drive or a cloud-based storage service will allow you to safely store your files and ensure they can be easily restored later.
- An antistatic wrist strap (optional) – While not necessary, an antistatic wrist strap can help protect your MacBook Pro’s internal components from static electricity during the installation process.
- A clean and well-lit workspace – Find a spacious area with good lighting to work on your MacBook Pro. This will make it easier to see small screws and other components, reducing the chances of losing anything during the installation.
Once you have gathered all the necessary tools and materials, double-check that everything is in good working condition. Inspect your SSD for any signs of damage or defects, and ensure your external hard drive or cloud storage solution has enough storage space to accommodate your data. With these items at the ready, you’ll be well-prepared to proceed with the installation of your new SSD in your MacBook Pro.
Step 2: Prepare your MacBook Pro for installation
Before you can install your new solid state drive (SSD), it’s essential to prepare your MacBook Pro for the installation process. Follow these steps to get your MacBook Pro ready:
- Power off your MacBook Pro: Ensure that your MacBook Pro is powered off completely. This will prevent any potential damage to the internal components during the installation process.
- Disconnect all external peripherals: Before proceeding, unplug any external peripherals, such as monitors, keyboards, mice, and USB devices. This will minimize the risk of accidentally damaging these accessories or interfering with the installation process.
- Ground yourself: To protect your MacBook Pro from static electricity, it’s important to ground yourself by touching a metal surface or wearing an antistatic wrist strap. This helps prevent electrostatic discharge, which can potentially damage delicate internal components.
- Remove the battery (if removable): If you own a MacBook Pro with a removable battery, carefully remove it by following the manufacturer’s instructions. This step does not apply if you have a MacBook Pro model with an integrated battery.
- Press and hold the power button: After removing the battery (if applicable), press and hold the power button for about 5 seconds. This helps discharge any residual electricity in the system.
By following these steps, you’ll ensure that your MacBook Pro is in an optimal state for the installation process. Taking the time to properly prepare your device will minimize the risk of damaging internal components and help ensure a smooth and successful SSD installation.
Step 3: Back up your data
Before proceeding with the installation of your new solid state drive (SSD), it’s crucial to back up your important data. This step ensures that in case of any unforeseen issues during the installation process, you’ll still have a copy of your files and can easily restore them later. Here’s how you can back up your data:
- Choose a backup method: There are several backup methods available, including using an external hard drive or utilizing a cloud storage service. Select the method that best suits your needs and preferences.
- Connect your external hard drive or set up cloud storage: If you’re using an external hard drive, connect it to your MacBook Pro using an appropriate cable. If you prefer cloud storage, sign up for a reliable cloud service and set it up on your MacBook Pro.
- Select the files you want to back up: Determine which files and folders are critical for your needs. These may include documents, photos, videos, music, and any other files that you can’t afford to lose.
- Transfer or sync your files: Depending on your chosen backup method, transfer your files to your external hard drive or upload them to your cloud storage. If you’re using an external hard drive, you can simply drag and drop files to the designated drive. If you opt for cloud storage, follow the provider’s instructions to upload your files.
- Verify your backup: After the transfer or upload is complete, take a moment to verify that your files have been successfully backed up. Double-check that all essential data is present and accessible.
Remember, it’s important to keep your backup secure. Ensure that your external hard drive is stored in a safe location, and if you’re using cloud storage, protect your account with a strong password. Regularly update your backup to include any new or modified files. By backing up your data before the SSD installation, you can proceed with peace of mind, knowing that your important files are safeguarded.
Step 4: Remove the bottom cover of your MacBook Pro
Now that you have backed up your data, it’s time to remove the bottom cover of your MacBook Pro. This will allow you to access the internal components and proceed with the installation of your new solid state drive (SSD). Follow these steps:
- Gather the necessary tools: Ensure that you have the appropriate screwdriver(s) on hand. The specific type of screwdriver required will depend on your MacBook Pro model.
- Flip your MacBook Pro upside down: Place your MacBook Pro on a clean and stable surface, with the Apple logo facing downwards.
- Identify the screws securing the bottom cover: Examine the bottom cover of your MacBook Pro and locate the screws holding it in place. These screws are typically located along the edges or in specific corners.
- Use the appropriate screwdriver to remove the screws: Carefully unscrew the designated screws using the appropriate screwdriver. Be sure to keep track of the screws and their respective positions, as they may be different sizes or have specific placements.
- Set aside the screws in a safe place: To avoid misplacing or mixing up the screws, it’s helpful to use a small container or magnetic mat to hold them while you work.
- Gently remove the bottom cover: Once all the screws are removed, lift the bottom cover of your MacBook Pro using gentle pressure. Take care not to force or bend the cover, as this can cause damage.
- Inspect the interior: With the bottom cover removed, take a moment to inspect the interior of your MacBook Pro. Familiarize yourself with the position of the current hard drive and other internal components that you may need to access for the SSD installation.
By carefully following these steps, you will successfully remove the bottom cover of your MacBook Pro, providing access to the internal components. This prepares you for the next steps in the installation process, allowing you to seamlessly proceed with replacing the hard drive with your new solid state drive.
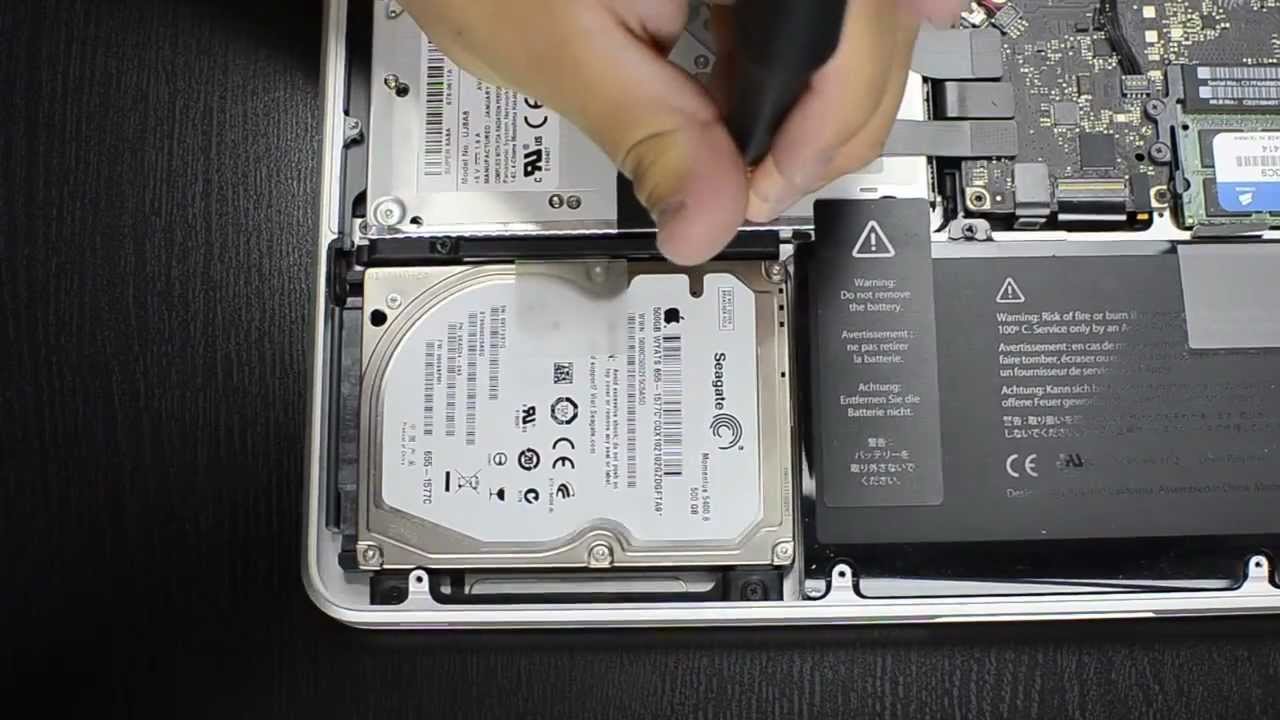
Step 5: Locate the hard drive and remove it
With the bottom cover of your MacBook Pro removed, it’s time to locate the existing hard drive and prepare it for removal. Follow these steps to locate and remove the hard drive:
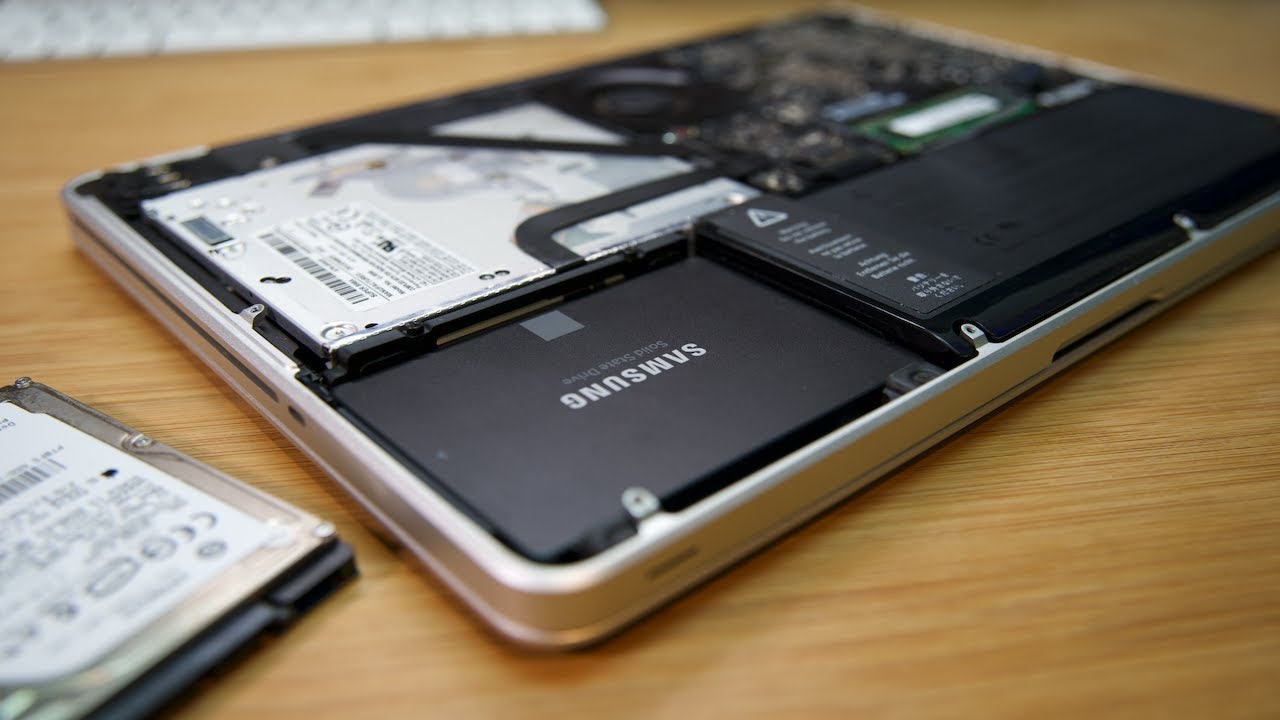
- Identify the hard drive: Inside your MacBook Pro, you will find the hard drive typically located near the center or side of the device. It will be a small rectangular or square-shaped component.
- Disconnect the cables: Carefully detach any cables connected to the hard drive. These cables may include data cables and power cables. Take note of how they are connected for later reference.
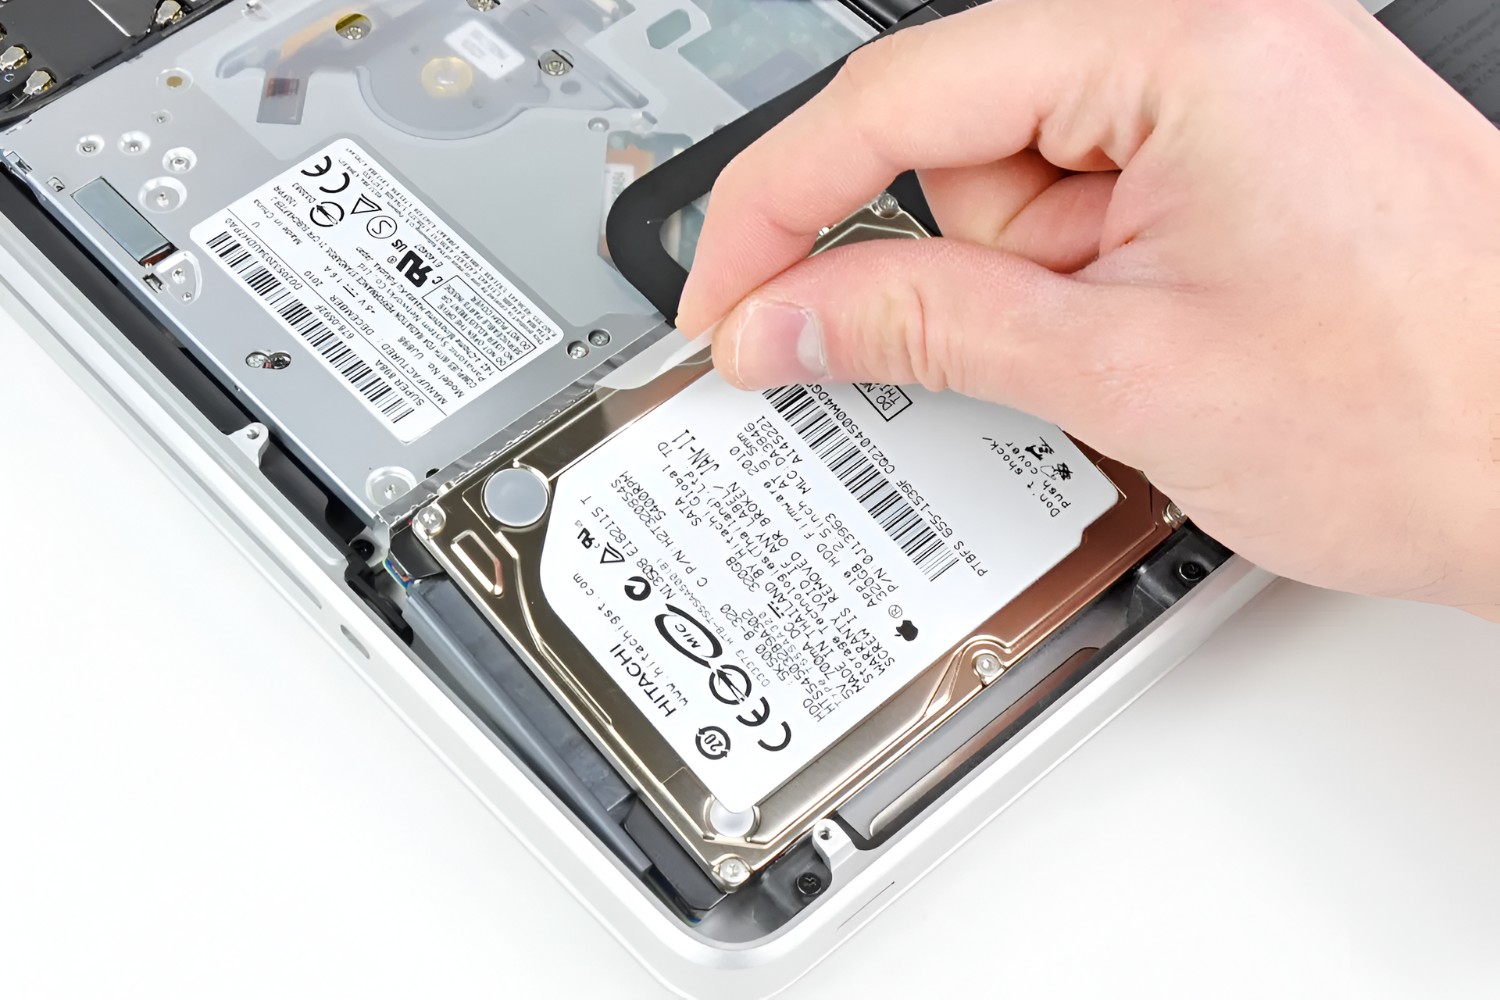
- Remove the mounting screws: Identify the screws securing the hard drive to the MacBook Pro’s chassis. Use the appropriate screwdriver to carefully remove these screws. Set them aside in a safe place to avoid misplacement.
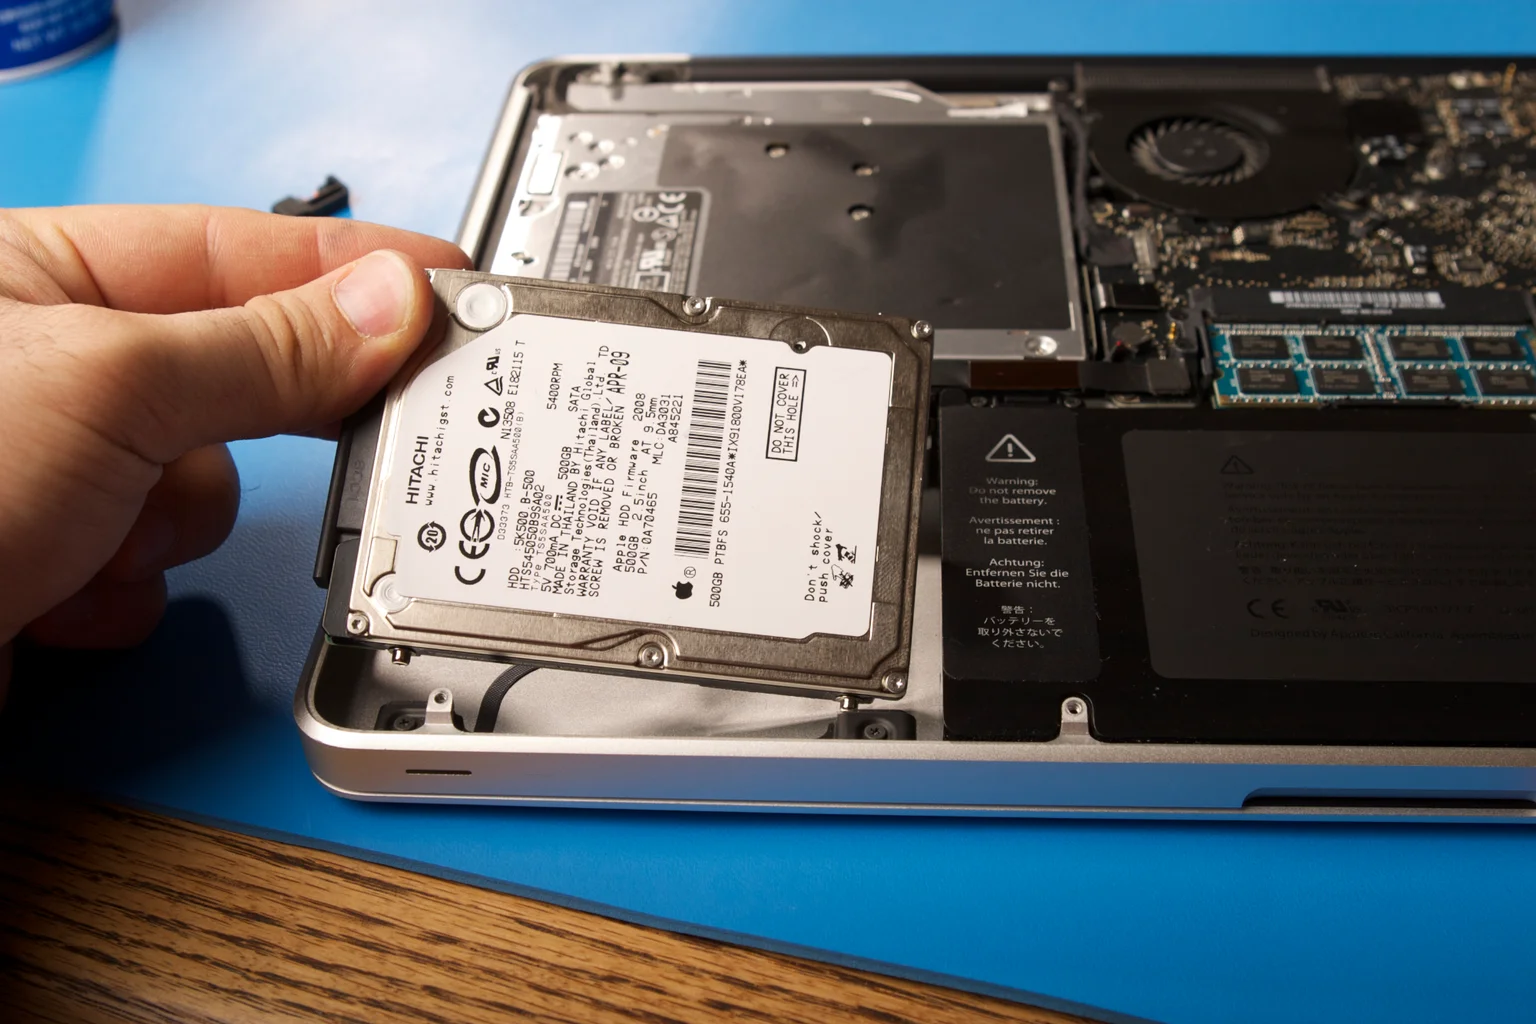
- Gently remove the hard drive: Once the screws are removed, gently pull the hard drive out of its slot or bay. Take care not to damage any surrounding components or cables.
- Set the old hard drive aside: Place the removed hard drive in a safe location, as you may want to keep it as a backup or sell it, depending on its condition and storage capacity.
As you follow these steps, be cautious and gentle when handling the hard drive and its cables. Take note of any connectors, brackets, or mounting mechanisms that are specific to your MacBook Pro model. This will help you in correctly installing the new solid state drive later in the process.
By successfully locating and removing the existing hard drive, you have completed a crucial part of the installation process. You are now ready to proceed with preparing the new solid state drive for installation in your MacBook Pro.
Step 6: Prepare the solid state drive for installation
With the old hard drive removed from your MacBook Pro, it’s time to prepare the new solid state drive (SSD) for installation. Here are the steps to follow:
- Inspect the SSD: Carefully examine the new SSD for any signs of damage or defects. Ensure that it matches the specifications and compatibility requirements for your MacBook Pro model.
- Check for data and power connectors: Take note of the connectors on the SSD. You may find data connectors such as SATA or NVMe connectors, as well as power connectors. Make sure you understand the type of connectors your MacBook Pro requires and if any adaptors or cables are needed.
- Attach mounting brackets (if needed): Depending on the SSD and your MacBook Pro model, you may need to attach mounting brackets or adapters to ensure a secure fit. Refer to the SSD manufacturer’s instructions or consult online resources for guidance specific to your setup.
- Insert the SSD in the correct orientation: Align the SSD with the slot or bay used for storage devices in your MacBook Pro. Insert it firmly, using gentle pressure, until it is fully seated and securely in place. Ensure that the connectors line up with the appropriate ports.
- Secure the SSD with mounting screws: If your SSD requires mounting screws, use the appropriate screws to secure it to the MacBook Pro’s chassis. Tighten them carefully, but avoid over-tightening, as this can damage the SSD or surrounding components.
- Reconnect data and power cables: Attach the necessary data and power cables to the SSD, ensuring a secure and proper connection. Refer to any labeling or markings on the cables and SSD for correct alignment.
Take your time during this step to ensure that the SSD is correctly prepared for installation. Double-check all connections and alignments to prevent any issues later on. Once you have completed these steps, you are now ready to install the solid state drive into your MacBook Pro in the next section.
Step 7: Install the solid state drive into your MacBook Pro
Now that you have prepared the solid state drive (SSD), it’s time to install it into your MacBook Pro. Follow these steps to complete the installation:
- Align the SSD in the designated slot: Carefully position the SSD in the slot or bay designated for storage devices in your MacBook Pro. Ensure that it is properly aligned and that the connectors match up with the respective ports.
- Insert the SSD with gentle pressure: Apply gentle pressure to insert the SSD into the slot or bay. Make sure it is fully seated, with no visible gaps. Avoid inserting the SSD at an angle, as this can damage the connectors.
- Secure the SSD: If required, use the provided screws to secure the SSD to the MacBook Pro’s chassis. Tighten the screws firmly but gently, ensuring that they are snug without over-tightening.
- Reconnect any disconnected cables: Attach the data and power cables to the SSD, ensuring a secure connection. Refer to labels or markings on the cables and SSD for correct alignment.
- Double-check all connections: Before proceeding, double-check that all connections are secure and properly aligned. This will help prevent any issues during the next steps of the installation process.
Take your time and be gentle throughout this step to avoid any damage to the SSD, connectors, or surrounding components. Properly connecting and securing the SSD ensures a stable installation and optimal performance. With the SSD installed, you are now ready to move on to securing the drive and reattaching the bottom cover.
Step 8: Secure the drive and reattach the bottom cover
With the solid state drive (SSD) installed in your MacBook Pro, it’s time to secure the drive and reattach the bottom cover. Follow these steps to complete this final stage of the installation process:
- Ensure the SSD is securely in place: Double-check that the SSD is properly seated and secured. Ensure that all cables are firmly connected, and there is no movement or loose connections.
- Retrieve the screws: Gather the screws that you set aside when removing the bottom cover earlier in the process.
- Align the bottom cover: Position the bottom cover over the MacBook Pro’s chassis, aligning it with the screw holes.
- Insert and tighten the screws: Place each screw in its corresponding hole and tighten them carefully and evenly using the appropriate screwdriver. Be sure not to overtighten the screws, as this could potentially damage the MacBook Pro’s casing.
- Test the bottom cover: Once all the screws are securely fastened, check that the bottom cover is properly aligned and seated. Gently press on various areas of the cover to ensure it doesn’t move or feel loose.
By properly securing the solid state drive and reattaching the bottom cover, you are ensuring the stability and protection of the internal components. This step concludes the installation of the SSD in your MacBook Pro, bringing you one step closer to experiencing improved performance and responsiveness. In the next step, we will power on your MacBook Pro and configure the new drive.
Step 9: Power on your MacBook Pro and configure the new drive
After securing the solid state drive (SSD) and reattaching the bottom cover, it’s time to power on your MacBook Pro and configure the new drive. Follow these steps to complete the setup:
- Plug in your MacBook Pro: Connect your MacBook Pro to a power source using the appropriate power adapter.
- Press the power button: Press and hold the power button until you see the Apple logo appear on the screen. Release the button to turn on your MacBook Pro.
- Wait for the startup process: Allow your MacBook Pro to boot up, which may take a few moments. You should see the familiar macOS startup screen.
- Follow the on-screen instructions: Once your MacBook Pro has started up, follow the on-screen prompts to configure the new solid state drive. This may involve setting up a new macOS installation or transferring data from your backup.
- Complete the initial setup: Depending on your specific setup needs, you may be prompted to configure preferences, create a user account, and connect to a Wi-Fi network. Follow the prompts to complete the initial setup process.
- Verify the proper functioning of the new drive: Once the initial setup is complete, take a moment to verify that your MacBook Pro recognizes and functions properly with the new solid state drive. Test the performance and responsiveness of your system to ensure everything is working as expected.
During this step, make sure to carefully follow the on-screen instructions and provide any necessary input to complete the setup process. Configuring your new drive ensures that your MacBook Pro is ready to take full advantage of the improved performance offered by the solid state drive. In the final step, we will restore your data from the backup to complete the installation.
Step 10: Restore your data from the backup
With your new solid state drive (SSD) installed and your MacBook Pro configured, it’s time to restore your data from the backup you created earlier. Follow these steps to complete the restoration process:
- Access your backup: Connect your external hard drive or access your cloud storage service where you stored your data backup.
- Select the files to restore: Identify the files and folders you want to restore to your MacBook Pro. This may include documents, photos, videos, music, and any other important files you backed up.
- Transfer the files to your MacBook Pro: Depending on your backup method, you may need to copy the files from your external hard drive to your MacBook Pro or download them from your cloud storage service. Follow the appropriate steps for your specific backup setup.
- Organize your restored files: Once the files are transferred, organize them according to your preferred file structure. Create folders and subfolders as needed to keep your files organized and easily accessible.
- Verify the completeness of the restore: Double-check that all files and folders you intended to restore are present and accessible on your MacBook Pro.
- Test the functionality of your restored data: Open some of your restored files to ensure they open correctly and are not corrupted or damaged. Test any software or applications that rely on the restored data to ensure they function properly.
Take your time during this step to ensure that all your important data is successfully restored and accessible on your MacBook Pro. The restoration process will ensure that your files are in their original state, allowing you to continue working seamlessly with your favorite applications and tools.
Once you have completed the restoration process, you can enjoy the improved performance and responsiveness of your MacBook Pro with the new solid state drive. Take a moment to appreciate the enhanced speed and efficiency that the SSD brings to your computing experience!
Conclusion
Congratulations! You have successfully installed a solid state drive (SSD) in your MacBook Pro. By following the step-by-step instructions in this guide, you have enhanced the performance and responsiveness of your MacBook Pro, allowing for faster boot times, quicker application launches, and smoother multitasking.
The installation process involved gathering the necessary tools and materials, preparing your MacBook Pro, backing up your data, removing the bottom cover, locating and removing the old hard drive, preparing the SSD, installing the SSD, securing the drive, and reattaching the bottom cover. Finally, you powered on your MacBook Pro, configured the new drive, and restored your data from the backup.
Now, with your new SSD in place, your MacBook Pro is ready to deliver improved performance and efficiency. You can enjoy faster file transfers, improved system responsiveness, and reduced application load times. Whether you’re a professional working with resource-intensive software or a casual user seeking a more seamless computing experience, the benefits of an SSD are undeniable.
Remember, it’s crucial to properly prepare and handle your MacBook Pro and SSD throughout the installation process. Take your time, follow the instructions diligently, and exercise caution to avoid any damage to your device or components.
Thank you for following our guide on how to install a solid state drive in a MacBook Pro. We hope this information has been helpful and that you are now enjoying the improved performance of your MacBook Pro. If you have any further questions or need assistance, don’t hesitate to reach out to a professional technician or authorized service provider. Happy computing!