Introduction
Welcome to our comprehensive guide on how to install a solid state drive (SSD) on a MacBook Pro. Upgrading to an SSD can significantly improve the performance and responsiveness of your MacBook Pro, giving it a new lease on life. If you’ve been experiencing slow boot times, lagging applications, or limited storage capacity, installing an SSD is a cost-effective solution.
Before we dive into the step-by-step process, let’s briefly explain what a solid state drive is and why it’s beneficial. Unlike traditional hard drives, SSDs have no moving parts, which makes them faster, more reliable, and quieter. They use flash memory technology to store data, resulting in faster data access and transfer speeds. Additionally, SSDs are more durable as they are resistant to shock, vibration, and temperature fluctuations.
Upgrading to an SSD can considerably reduce your MacBook Pro’s boot time, improve the opening and closing of applications, and enhance overall system performance. Furthermore, SSDs consume less power, resulting in improved battery life, making them an excellent choice for MacBook Pro users on the go.
In this guide, we’ll cover everything you need to know to successfully install a solid state drive on your MacBook Pro. We’ll walk you through each step, from gathering the necessary tools and materials to formatting and initializing the new SSD. Whether you’re a tech-savvy enthusiast or a first-time upgrader, this guide will help you achieve a seamless SSD installation.
Before getting started, it’s important to note that performing any hardware modifications to your MacBook Pro may void your warranty. If your MacBook Pro is still under warranty, consider contacting an authorized service provider or Apple support for assistance. If you’re confident in your technical skills and don’t mind voiding your warranty, let’s begin the installation process.
Step 1: Gather the necessary tools and materials
Before you begin the installation process, it’s essential to gather all the required tools and materials. Having everything prepared beforehand will ensure a smooth and hassle-free SSD installation. Here’s a checklist of what you’ll need:
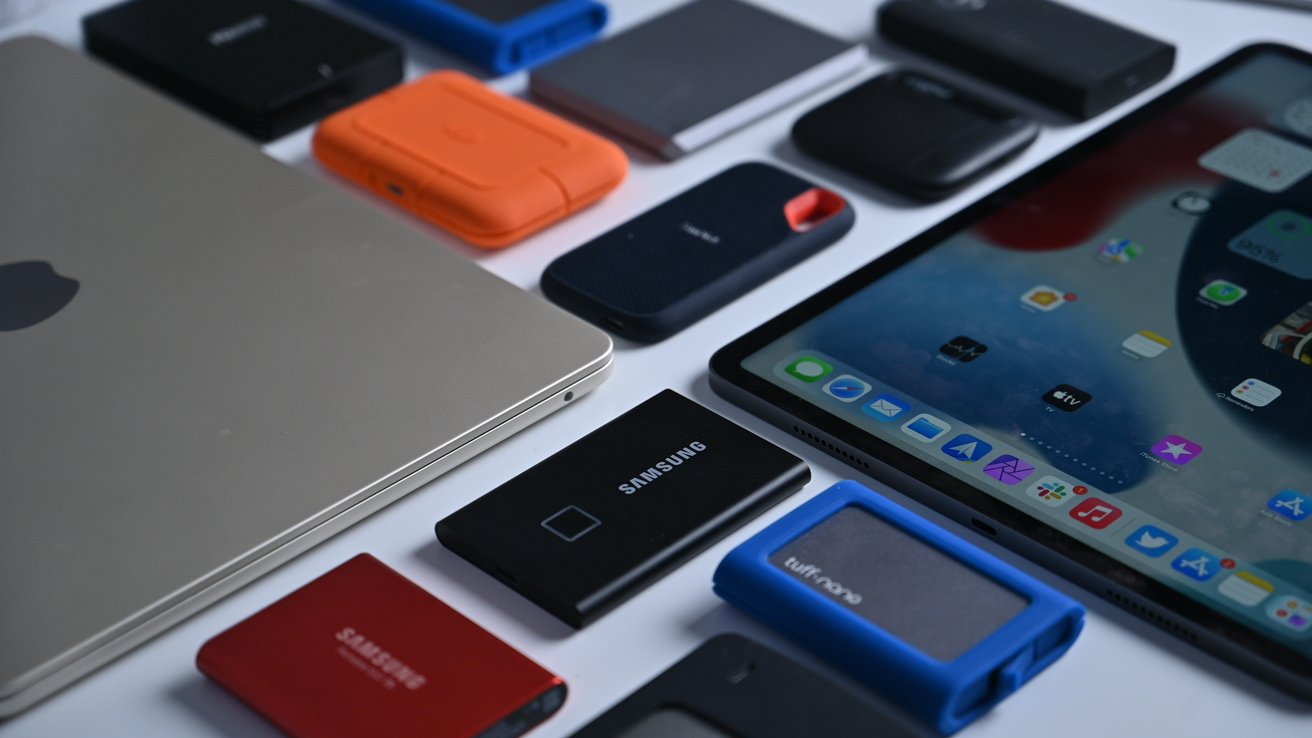
- Compatible SSD: Make sure to purchase an SSD that is compatible with your specific MacBook Pro model. Check the manufacturer’s specifications or consult the official Apple website for a list of recommended SSDs.
- MacBook Pro model: Identify the exact model of your MacBook Pro. This information will be necessary when selecting the appropriate tools and SSD.
- Small Phillips screwdriver: You’ll need a small Phillips screwdriver to open and close the MacBook Pro’s bottom case.
- External storage device: It’s crucial to have an external storage device, such as an external hard drive or a USB flash drive, to back up your important data before starting the installation process.
- MacOS installation media: If you’re planning to perform a clean installation of macOS on your new SSD, make sure to have the installation media, such as a USB flash drive or an external DVD drive with the macOS installer.
- Anti-static wrist strap: To prevent any damage from electrostatic discharge, it’s recommended to use an anti-static wrist strap while handling the internal components of your MacBook Pro.
- Microfiber cloth: A microfiber cloth will come in handy to clean the exterior of your MacBook Pro and remove any dust or fingerprints.
Ensure that you have all the tools and materials listed above before proceeding to the next step. This will help save time and minimize disruptions during the installation process. It’s always better to be well-prepared and have everything you need at your fingertips.
Once you have gathered all the necessary tools and materials, you’re ready to move on to the next step: backing up your data. This step is crucial to prevent any data loss during the installation process.
Step 2: Back up your data
Before proceeding with the installation of the new solid state drive (SSD), it is critical to back up all your data to avoid any potential loss or data corruption. Here’s how to back up your data:
- Use Time Machine: If you have been regularly using Apple’s built-in backup software, Time Machine, connect your external storage device to your MacBook Pro. Open System Preferences, click on “Time Machine,” and select “Back Up Now.” This will create a full backup of your system, including your files, applications, and settings.
- Manually transfer files: If you prefer not to use Time Machine or need to back up specific files or folders, you can manually transfer them to your external storage device. Simply locate the files or folders you want to back up and copy them to the external device. Make sure to organize the files in a way that makes it easy to restore them later.
- Verify the backup: After the backup process is complete, double-check and verify the backup files on your external storage device. Ensure that all your important files are successfully copied and accessible.
Backing up your data is a crucial step as it serves as a safety net in case anything goes wrong during the SSD installation process. It provides peace of mind knowing that your valuable files are protected.
Once you have successfully backed up your data, you can proceed to the next step: shutting down your MacBook Pro and disconnecting all power sources.
Step 3: Shut down your MacBook Pro and disconnect all power sources
Before you begin opening up your MacBook Pro and handling any internal components, it is essential to shut down your MacBook Pro properly and disconnect all power sources. Here’s how to do it:
- Save and close all open applications: Make sure to save any unsaved work and close all open applications. It’s important to have a clean state before shutting down your MacBook Pro.
- Disconnect from power: If your MacBook Pro is connected to the power adapter, unplug it from both the MacBook Pro and the wall outlet. This will ensure that there is no power running through the system.
- Remove any external peripherals: If you have any external peripherals connected to your MacBook Pro, such as USB devices or external displays, disconnect them. This will prevent any interference or accidental damage during the installation process.
- Shut down your MacBook Pro: To shut down your MacBook Pro, click on the Apple menu in the top left corner of the screen and select “Shut Down.” Wait for the system to completely shut down before proceeding.
It’s crucial to follow these steps to ensure your safety and prevent any damage to your MacBook Pro or its internal components. By shutting down your MacBook Pro and disconnecting all power sources, you eliminate the risk of electric shock and allow for a safe and uninterrupted installation process.
Once you have shut down your MacBook Pro and disconnected all power sources, you are ready to move on to the next step: removing the bottom case of your MacBook Pro.
Step 4: Remove the bottom case of your MacBook Pro
Now that you have shut down your MacBook Pro and disconnected all power sources, it’s time to remove the bottom case of your MacBook Pro. The bottom case gives you access to the internal components, including the existing hard drive or SSD. Here’s how to remove the bottom case:
- Place your MacBook Pro on a soft, clean surface: Find a suitable workspace and lay a soft cloth or towel on it. This will help protect the bottom of your MacBook Pro from scratches and provide a stable surface during the removal process.
- Flip over your MacBook Pro: Carefully turn your MacBook Pro so that the bottom is facing upwards. Make sure to handle it with care and avoid any sudden movements or impacts.
- Locate the screws: Look for the ten screws that secure the bottom case of your MacBook Pro. These screws are typically located around the edges of the case and may require a small Phillips screwdriver to remove them.
- Remove the screws: Using the small Phillips screwdriver, carefully unscrew and remove the ten screws securing the bottom case. Keep these screws in a safe place as you will need them when reassembling your MacBook Pro later.
- Gently lift off the bottom case: Once all the screws have been removed, gently lift off the bottom case of your MacBook Pro. Take your time and ensure that no cables or connectors are still attached.
Removing the bottom case gives you access to the internal components of your MacBook Pro and allows you to proceed with installing the new solid state drive. It’s important to handle the bottom case with care and avoid applying excessive force or pressure to prevent any damage.
With the bottom case successfully removed, you can now move on to the next step: locating and removing the existing hard drive or SSD.
Step 5: Locate and remove the existing hard drive or SSD
Now that you have successfully removed the bottom case of your MacBook Pro, it’s time to locate and remove the existing hard drive or SSD. This step is crucial as it prepares the way for the installation of the new solid state drive. Follow these steps to locate and remove the existing drive:
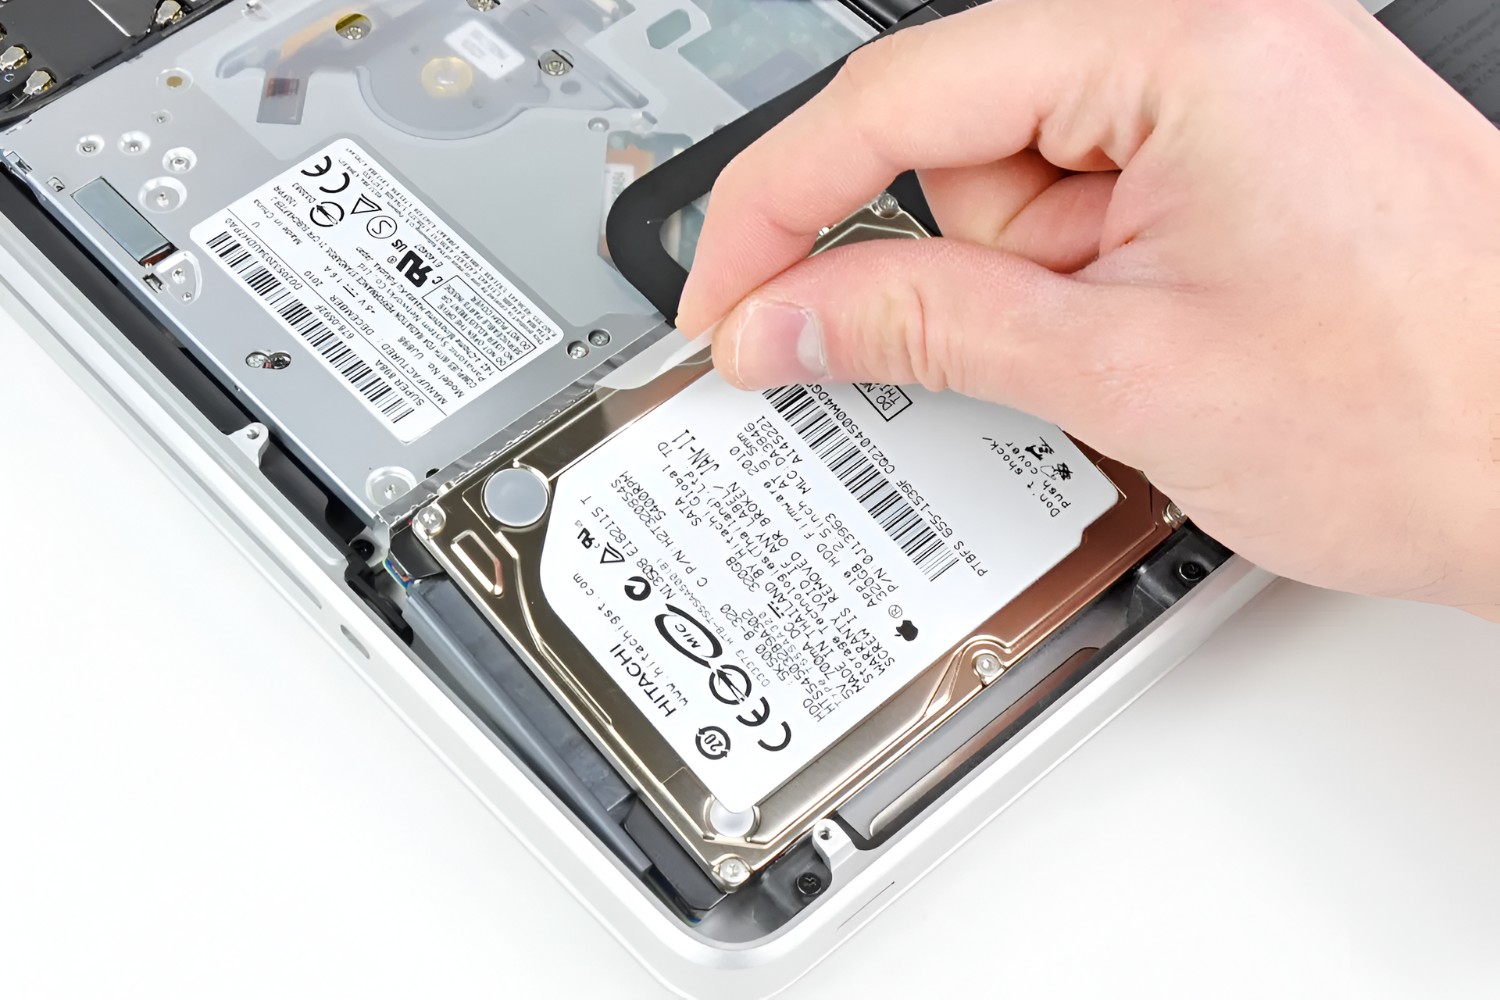
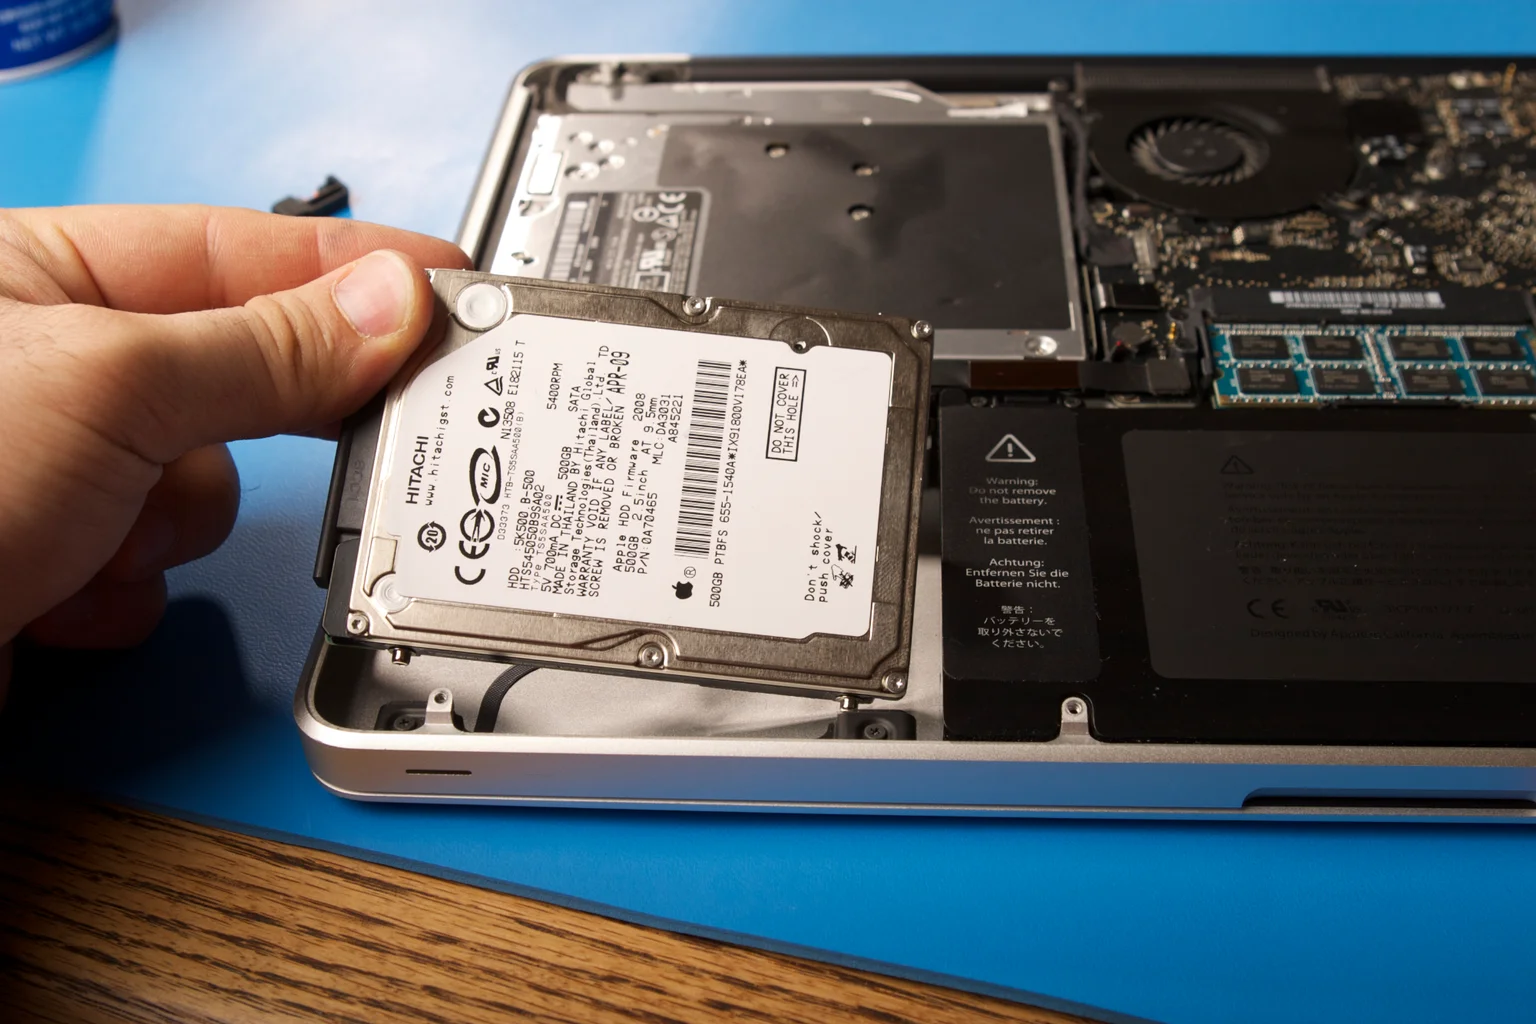
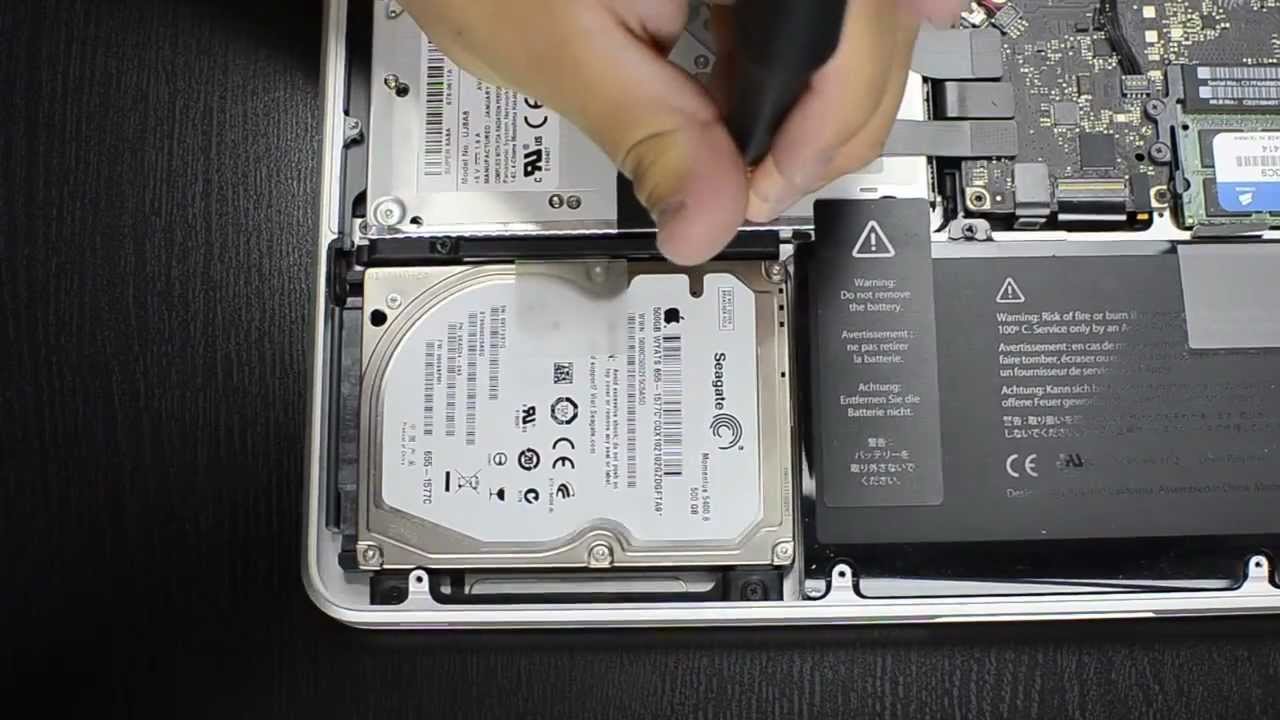
- Locate the hard drive or SSD: Look for the existing hard drive or SSD inside your MacBook Pro. It is typically located towards the center of the device and is secured with screws or brackets.
- Disconnect any cables or connectors: Carefully inspect the existing drive and identify any cables or connectors that are connected to it. Gently disconnect these cables one by one, making sure to note their positions for reassembly later.
- Remove the screws or brackets: Depending on the mounting mechanism, you may need to remove screws or brackets to free the existing drive. Use a suitable screwdriver or tool to carefully unscrew the screws or remove the brackets.
- Gently remove the existing drive: Once the screws or brackets are detached, gently lift the existing drive out of its slot. Handle it with care, making sure not to touch the circuitry or any sensitive components.
- Set the existing drive aside: After removing the existing drive, place it in a safe and static-free location. If the drive is still in good working condition, you may choose to keep it as a backup or repurpose it for other uses.
Locating and removing the existing drive is a critical step in the installation process. Take your time and be careful not to damage any components during the removal process. If you encounter any difficulties or are unsure about any steps, consider seeking assistance from a professional or consulting the MacBook Pro’s user manual.
With the existing drive successfully removed, you’re now ready to move on to the next step: preparing the new solid state drive for installation.
Step 6: Prepare the new solid state drive for installation
With the existing drive safely removed, it’s time to prepare the new solid state drive (SSD) for installation. Preparing the SSD involves a few essential steps to ensure seamless integration into your MacBook Pro. Here’s how to prepare the new SSD:
- Check the compatibility: Double-check that the new SSD is compatible with your MacBook Pro model. Refer to the manufacturer’s specifications or consult Apple’s official website for compatibility information.
- Verify the storage capacity: Ensure that the new SSD has the desired storage capacity for your needs. Consider your usage requirements, such as work files, media, and applications, and choose a suitable capacity accordingly.
- Take anti-static precautions: Protect the new SSD from electrostatic discharge by using an anti-static wrist strap or mat. Avoid touching the contacts or circuitry on the SSD to prevent any damage from static electricity.
- Handle the SSD with care: Just like any other delicate electronic component, handle the new SSD with care. Avoid dropping, bending, or mishandling it to prevent any physical damage to the drive.
- Remove protective covers: If the new SSD comes with any protective covers or packaging, remove them carefully before installation. Check for any protective films or stickers that need to be peeled off from the SSD’s contacts.
- Inspect the connectors: Examine the connectors on the new SSD and compare them to the connectors on the MacBook Pro. Ensure that they match and align properly for a seamless connection.
Preparing the new SSD is crucial to ensure a smooth installation process and to protect the integrity of the drive. By following the steps above, you can ensure compatibility, prevent damage, and prepare the SSD for a successful installation.
With the new SSD prepared, you are now ready to move on to the next step: installing the new solid state drive into your MacBook Pro.
Step 7: Install the new solid state drive into your MacBook Pro
Now that you have prepared the new solid state drive (SSD), it’s time to install it into your MacBook Pro. Installing the SSD is a crucial step in the process as it replaces the existing drive and allows you to benefit from improved performance and storage capacity. Here’s how to install the new SSD:
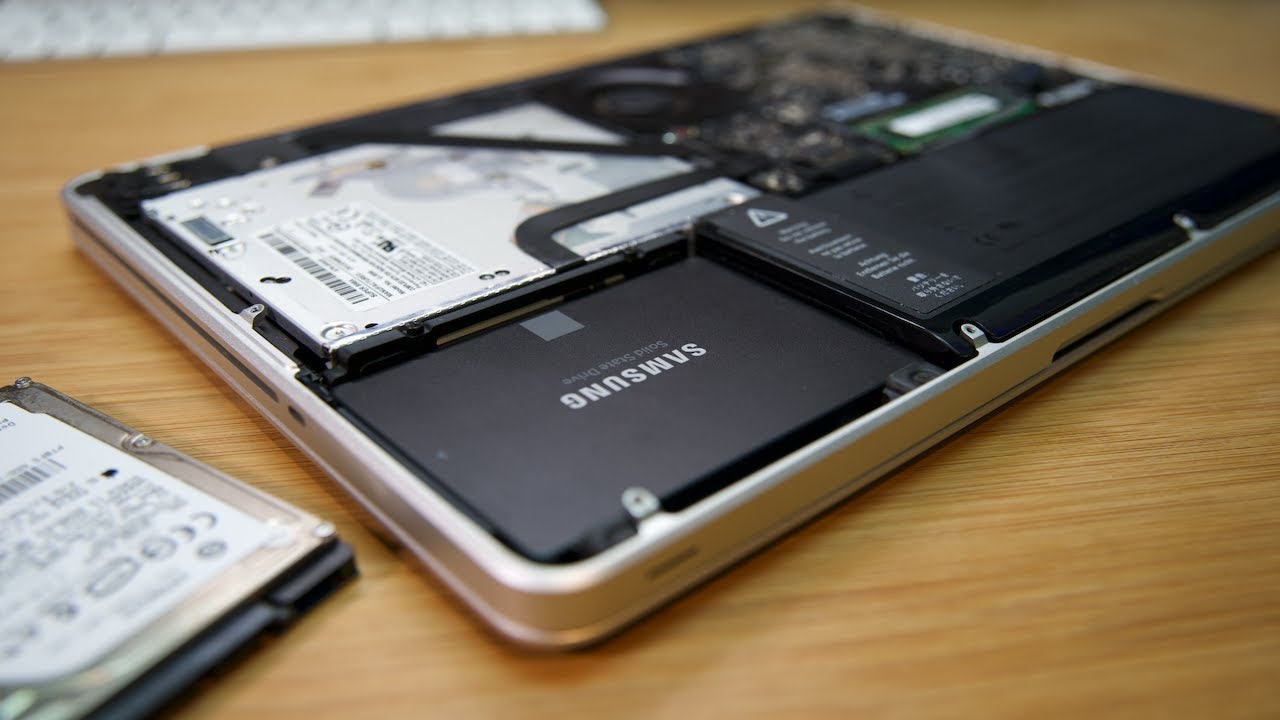
- Align the new SSD: Take the new SSD and align it with the slot where the previous drive was located. Make sure the connectors on the SSD match the connectors inside the MacBook Pro.
- Insert the SSD: Gently slide the new SSD into the slot, making sure it goes in smoothly and doesn’t force or tilt. Apply even pressure to ensure a secure connection.
- Secure the SSD: If there are any screws or brackets that were removed when uninstalling the previous drive, use them to secure the new SSD in place. Tightly but carefully attach them to prevent any movement or vibrations.
- Double-check the connection: Once the new SSD is secured, ensure that all connectors are properly aligned and firmly connected. Double-check to ensure there are no loose connections.
It’s important to handle the new SSD with care during installation. Avoid touching the circuitry or contacts, as oils from your fingers can potentially interfere with the drive’s performance. By following these steps, you can ensure a successful installation of the new SSD in your MacBook Pro.
With the new SSD securely installed in your MacBook Pro, you can now move on to the next step: replacing the bottom case of your MacBook Pro.
Step 8: Replace the bottom case of your MacBook Pro
Now that you have installed the new solid state drive (SSD) into your MacBook Pro, it’s time to replace the bottom case. This step will complete the physical installation process and ensure that all components are securely enclosed. Follow these steps to replace the bottom case:
- Align the bottom case: Take the bottom case and align it with the edges of your MacBook Pro. Make sure it fits snugly and aligns with the screw holes.
- Press down gently: With the bottom case properly aligned, press it down gently but firmly. Apply even pressure across the surface to ensure a flush fit.
- Secure the bottom case: Starting with the corners, screw the ten screws back into their respective positions. Use a small Phillips screwdriver to tighten the screws securely, but avoid over-tightening.
- Double-check the fit: Once all screws are tightened, double-check the fit of the bottom case. Ensure there are no gaps or misalignments that may affect the overall stability of your MacBook Pro.
Replacing the bottom case not only secures the internal components but also protects them from dust, moisture, and accidental damage. By following these steps, you can complete the installation process and ensure your MacBook Pro is fully enclosed and ready for use.
With the bottom case securely replaced, you can now move on to the next step: reconnecting the power sources and turning on your MacBook Pro.
Step 9: Reconnect the power sources and turn on your MacBook Pro
With the bottom case securely replaced, it’s time to reconnect the power sources and turn on your MacBook Pro. This step will allow you to power up your MacBook Pro and verify that the new solid state drive (SSD) is functioning properly. Follow these steps to reconnect the power sources and turn on your MacBook Pro:
- Locate the power adapter: Retrieve your MacBook Pro power adapter and ensure it is in good working condition.
- Connect the power adapter: Plug the power adapter into both the MacBook Pro and a power outlet. Make sure the connection is secure.
- Turn on your MacBook Pro: Press the power button on your MacBook Pro to start it up. You should see the Apple logo appear on the screen.
- Verify the boot process: Allow your MacBook Pro to boot up. The startup process may take slightly longer than usual if it’s the first time you’re using the new SSD.
- Check for the SSD: Once your MacBook Pro is booted up, click on the Apple menu in the top left corner and select “About This Mac.” Under the “Storage” tab, you should see the newly installed SSD listed.
Reconnecting the power sources and turning on your MacBook Pro is an exciting moment, as you get to see the results of your SSD installation. Take a moment to appreciate the improved performance and storage capacity that the new SSD brings to your MacBook Pro.
If you encounter any issues during the boot process or if the SSD does not appear under the “Storage” tab, double-check the connections and ensure that the SSD is properly installed. If problems persist, consider seeking technical assistance or consulting the support resources provided by the SSD manufacturer.
With your MacBook Pro powered on and the new SSD recognized, you’re ready to move on to the final step: formatting and initializing the new solid state drive.
Step 10: Format and initialize the new solid state drive
With the new solid state drive (SSD) installed and your MacBook Pro powered on, it’s time to format and initialize the SSD to make it ready for use. Formatting and initializing the SSD will prepare it for macOS installation or data migration from your backup. Follow these steps to format and initialize the new SSD:
- Open Disk Utility: Go to the “Applications” folder, then open the “Utilities” folder, and select “Disk Utility.”
- Select the new SSD: In Disk Utility, locate the newly installed SSD from the list of drives on the left side of the window.
- Erase the SSD: Click on the “Erase” button in the top toolbar. Choose a name for the SSD and select the desired format (usually APFS or Mac OS Extended). Verify that the scheme is set to “GUID Partition Map.”
- Confirm the erasure: Double-check the selected SSD and the chosen format. Click on the “Erase” button to confirm and initiate the erasure process. Note that this will delete any existing data on the SSD, so ensure you have backed up any important files before proceeding.
- Wait for the process to complete: Allow Disk Utility to complete the erasure and formatting process. The time required may depend on the size of the SSD.
- Verify the newly formatted SSD: Once the process is complete, verify that the SSD now appears as a newly formatted drive in Disk Utility, with the specified name and format.
By following these steps, you can successfully format and initialize the new SSD, ensuring it is ready to be used as the primary storage device for your MacBook Pro.
At this point, you can proceed with installing a fresh copy of macOS on the newly formatted SSD or restore your data from the backup you created earlier. Follow the appropriate steps to complete the setup process and get your MacBook Pro up and running with the new SSD.
Congratulations! You have successfully completed the installation of a new solid state drive on your MacBook Pro. Enjoy the enhanced performance, faster boot times, and improved storage capacity that the SSD brings to your MacBook Pro!
Conclusion
Congratulations! You have successfully installed a solid state drive (SSD) in your MacBook Pro. By following the step-by-step instructions outlined in this guide, you have upgraded your MacBook Pro with a faster, more reliable storage solution, improving overall performance and responsiveness. Let’s recap what you have accomplished:
- Step 1: You gathered all the necessary tools and materials required for the installation process.
- Step 2: You backed up your data to ensure its safety and prevent any loss during the installation.
- Step 3: You shut down your MacBook Pro and disconnected all power sources to ensure safety during the installation.
- Step 4: You successfully removed the bottom case of your MacBook Pro, providing access to the internal components.
- Step 5: You located and removed the existing hard drive or SSD, preparing for the installation of the new drive.
- Step 6: You prepared the new SSD for installation, ensuring compatibility and handling it with care.
- Step 7: You installed the new SSD into your MacBook Pro, securing it in place for optimal performance.
- Step 8: You replaced the bottom case to protect the internal components and ensure the MacBook Pro is fully enclosed.
- Step 9: You reconnected the power sources and turned on your MacBook Pro, verifying a successful installation.
- Step 10: You formatted and initialized the new SSD, making it ready for macOS installation or data migration.
By following these steps, you have completed the installation process and are now able to enjoy the benefits of an upgraded MacBook Pro with improved performance, faster boot times, and increased storage capacity. Whether you use your MacBook Pro for work, creativity, or entertainment, the SSD upgrade will greatly enhance your user experience.
Remember to keep your backup files and store them safely as an extra layer of protection for your valuable data. It’s also a good practice to periodically back up your MacBook Pro to ensure you don’t lose any important files in the future.
Thank you for choosing our guide to install a solid state drive on your MacBook Pro. We hope this guide has been helpful and empowered you to successfully upgrade your MacBook Pro. If you have any further questions or need additional assistance, don’t hesitate to reach out to us or consult a professional technician. Enjoy your upgraded MacBook Pro!