Introduction
Welcome to our step-by-step guide on how to change the SSD on your MacBook Pro. If you’re looking to boost your Mac’s storage capacity, upgrade the speed, or simply replace a faulty SSD, you’ve come to the right place. This tutorial will guide you through the process, ensuring that you can confidently change your SSD without any hassle.
Before we start, it’s important to note that this guide is specifically for MacBook Pro models with a removable SSD. If you’re unsure about your device’s compatibility, check the Apple support website or consult with a technician.
Changing the SSD on your MacBook Pro can bring significant improvements to your overall user experience. A faster and more efficient SSD can enhance the system’s performance, allowing for smoother multitasking, quicker data transfers, and shorter boot times.
To successfully replace the SSD on your MacBook Pro, you will need a few tools, including a precision screwdriver set, an anti-static wrist strap, and a compatible replacement SSD. Ensure that you have these tools on hand before you begin the process.
It’s worth noting that changing the SSD on your MacBook Pro may void your warranty. If your device is still covered by AppleCare or any other warranty, consider consulting with an authorized service provider or Apple support to prevent any potential warranty issues.
Now that you have the necessary information and tools, let’s dive into the step-by-step process of changing the SSD on your MacBook Pro. Make sure to follow each step carefully to ensure a successful SSD replacement.
Required Tools
Before you begin the SSD replacement process, it’s essential to gather all the necessary tools. Here are the tools you will need:
- Precision screwdriver set: A set of small precision screwdrivers will enable you to remove the screws securing the bottom case and the SSD.
- Anti-static wrist strap: An anti-static wrist strap helps protect your MacBook Pro from static electricity discharge, preventing any potential damage to the internal components.
- Compatible replacement SSD: Make sure you have a compatible replacement SSD that suits your MacBook Pro model. Check the specifications and ensure it meets your storage needs before purchasing.
- Microfiber cloth: A clean microfiber cloth will help protect your MacBook Pro from scratches and smudges during the process.
- Organizer tray: An organizer tray or small containers can be helpful to keep track of the small screws and components you remove during the process.
Having these tools ready and easily accessible will streamline the SSD replacement process and minimize the risk of misplacing or damaging any components. Ensure that you have a clean and well-lit workspace to work comfortably and avoid any unnecessary mishaps.
Remember to exercise caution while working with small screws and delicate components to avoid any accidental damage. If you’re unsure about any step in the process or encounter difficulties, it’s always wise to seek professional assistance or consult with the manufacturer’s documentation.
With the required tools at your disposal, you’re now ready to embark on the journey of replacing the SSD in your MacBook Pro. So, let’s move on to the first step: backing up your data.
Step 1: Back Up Your Data
Before you begin the process of changing the SSD on your MacBook Pro, it’s crucial to back up all your important data. This ensures that no valuable files or information are lost during the SSD replacement.
To back up your data, follow these steps:
- Connect an external storage device: Connect an external hard drive, USB flash drive, or use cloud storage services such as iCloud or Dropbox to store your data. Ensure that you have enough storage capacity to accommodate all your files.
- Open Time Machine: On your MacBook Pro, click on the Apple menu in the top-left corner of the screen and select “System Preferences.” Look for the Time Machine icon and click on it.
- Turn on Time Machine: In the Time Machine preferences, toggle the switch to turn on Time Machine. If prompted, select the external storage device you connected earlier as the backup disk.
- Start the backup: Once Time Machine is set up, click on the “Backup Now” button to initiate the backup process. Depending on the size of your data, this may take some time. Ensure that your MacBook Pro remains connected to the power source throughout the backup.
- Verify the backup: After the backup completes, double-check that all your important files have been successfully backed up. Open a few files from the backup drive to confirm their accessibility.
Remember, the backup process is crucial to prevent data loss during the SSD replacement. It’s always better to be safe than sorry, so take the time to ensure that your data is securely backed up before proceeding to the next steps.
Once your data is safely backed up, you can move on to the next step: turning off your MacBook Pro and disconnecting all cables.
Step 2: Turn Off Your MacBook Pro and Disconnect All Cables
Now that you have successfully backed up your data, it is time to turn off your MacBook Pro and disconnect all cables. This step ensures your safety and prevents any potential damage to the device or components during the SSD replacement process.
Follow these steps to turn off your MacBook Pro and disconnect all cables:
- Save your work and close all open applications: Before shutting down your MacBook Pro, make sure to save your work and close all open applications. This ensures that no data is lost or corrupted during the process.
- Shut down your MacBook Pro: Click on the Apple menu in the top-left corner of the screen and select “Shut Down” from the dropdown menu. Wait for your MacBook Pro to completely shut down before proceeding to the next step.
- Disconnect all cables and peripherals: Unplug any connected cables, such as the power adapter, USB devices, external displays, and any other peripherals. Ensure that your MacBook Pro is completely disconnected from any power source.
- Close the MacBook Pro lid: Close the lid of your MacBook Pro to protect the screen and keyboard from any accidental damage or debris during the SSD replacement.
It’s important to handle your MacBook Pro with care while disconnecting cables. Ensure that you grip the connector and not the cable itself to avoid any unnecessary strain or damage to the cables.
Once you have turned off your MacBook Pro and disconnected all cables, you are ready to move on to the next step: removing the bottom case of your MacBook Pro.
Step 3: Remove the Bottom Case
With your MacBook Pro turned off and all cables disconnected, it’s time to remove the bottom case. This will provide you with access to the internal components, including the SSD.
Follow these step-by-step instructions to remove the bottom case:
- Place your MacBook Pro on a flat surface: Find a clean and stable surface to work on. Ideally, use a soft cloth or an anti-static mat to protect your MacBook Pro from scratches or static discharge.
- Locate the screws: Examine the bottom of your MacBook Pro to locate the screws that hold the bottom case in place. These screws are usually located around the perimeter of the case.
- Use a precision screwdriver: Select the appropriate size of the precision screwdriver from your set and carefully unscrew the screws in a counterclockwise direction. Keep the screws organized in a container or an organizer tray to prevent misplacement.
- Gently remove the bottom case: Once all the screws are removed, gently lift the bottom case upwards. Be cautious of any small cables or connectors that may still be attached to the case.
- Set aside the bottom case: Put the bottom case aside in a safe place where it won’t get damaged or misplaced. You may consider using a soft cloth or an anti-static bag to keep it protected.
During the process, be gentle and take your time to avoid any unnecessary force or damage to the bottom case or the internal components. If you encounter any resistance while removing the case, double-check if any screws are still intact or if there are any connectors that need to be detached.
With the bottom case successfully removed, you are now ready to proceed to the next step: disconnecting the battery of your MacBook Pro.
Step 4: Disconnect the Battery
After removing the bottom case of your MacBook Pro, the next step is to disconnect the battery. Disconnecting the battery is a crucial safety measure to prevent any possible electrical issues or accidental damage during the SSD replacement process.
Follow these step-by-step instructions to disconnect the battery:
- Locate the battery connector: Look for the battery connector on the logic board. It is usually a small, rectangular connector with a cable attached to it.
- Using your fingers or a non-conductive spudger: Gently lift the battery connector upwards to detach it from the logic board. Make sure to grip the connector itself and not the cables to avoid any damage.
- Double-check the disconnection: Once the battery connector is detached, verify that there is no power running through the MacBook Pro by pressing the power button. If the MacBook Pro does not turn on, it confirms the successful disconnection of the battery.
It’s crucial to exercise caution while handling the battery connector and to ensure that you have a stable grip. Avoid pulling or twisting the cable excessively to prevent any damage to the connectors or cables.
If your MacBook Pro model has multiple battery connectors, repeat the above steps for each connector to fully disconnect the battery.
By disconnecting the battery, you eliminate any potential electrical hazards and ensure a safer working environment. With the battery successfully disconnected, you can proceed confidently to the next step: removing the old SSD from your MacBook Pro.
Step 5: Remove the Old SSD
Now that you have successfully disconnected the battery, it’s time to remove the old SSD from your MacBook Pro. Removing the old SSD will pave the way for installing the new SSD and upgrading your storage capacity or improving performance.
Follow these step-by-step instructions to remove the old SSD:
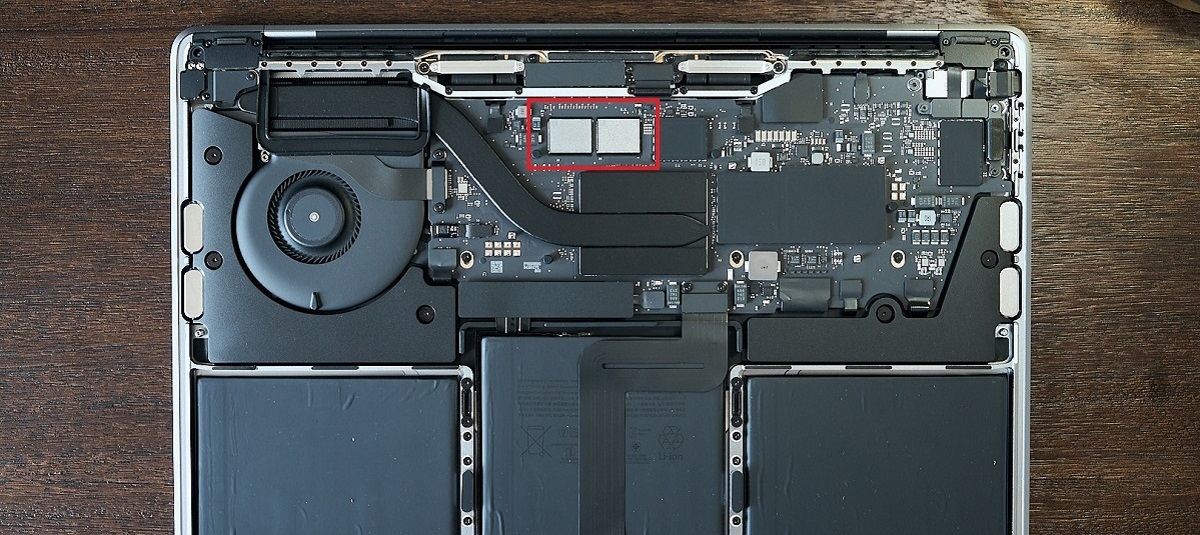
- Locate the SSD: Identify the SSD, which is a small rectangular circuit board, typically located near the center of the MacBook Pro’s logic board.
- Remove any brackets or adhesive strips: Depending on your MacBook Pro model, there may be brackets or adhesive strips securing the SSD in place. Carefully remove these using a screwdriver or tweezers, taking care not to damage any components.
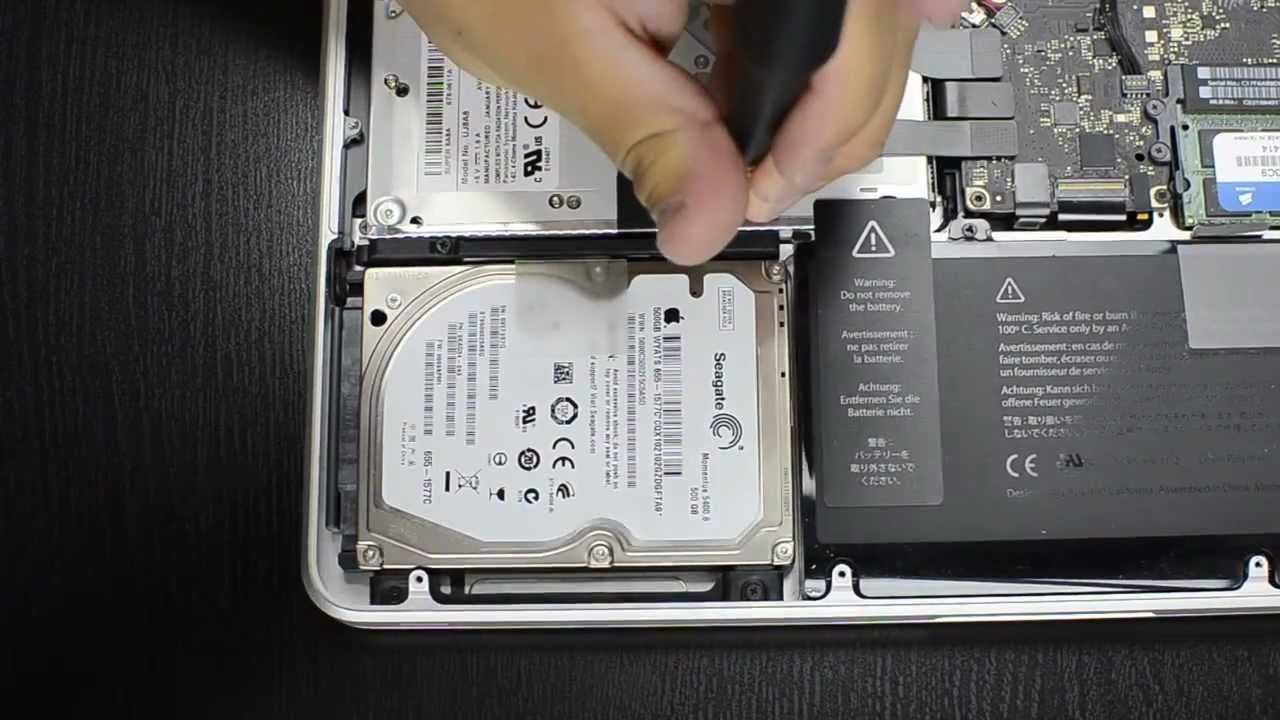
- Disconnect any cables attached to the SSD: Look for any cables connected to the SSD, such as data cables or power connectors. Gently detach these cables by pulling them straight out using your fingers or a non-conductive spudger.
- Remove the screws securing the SSD: Take note of the screws holding the SSD in place. Use a precision screwdriver to carefully unscrew them in a counterclockwise direction. Keep track of the screws to avoid misplacement.
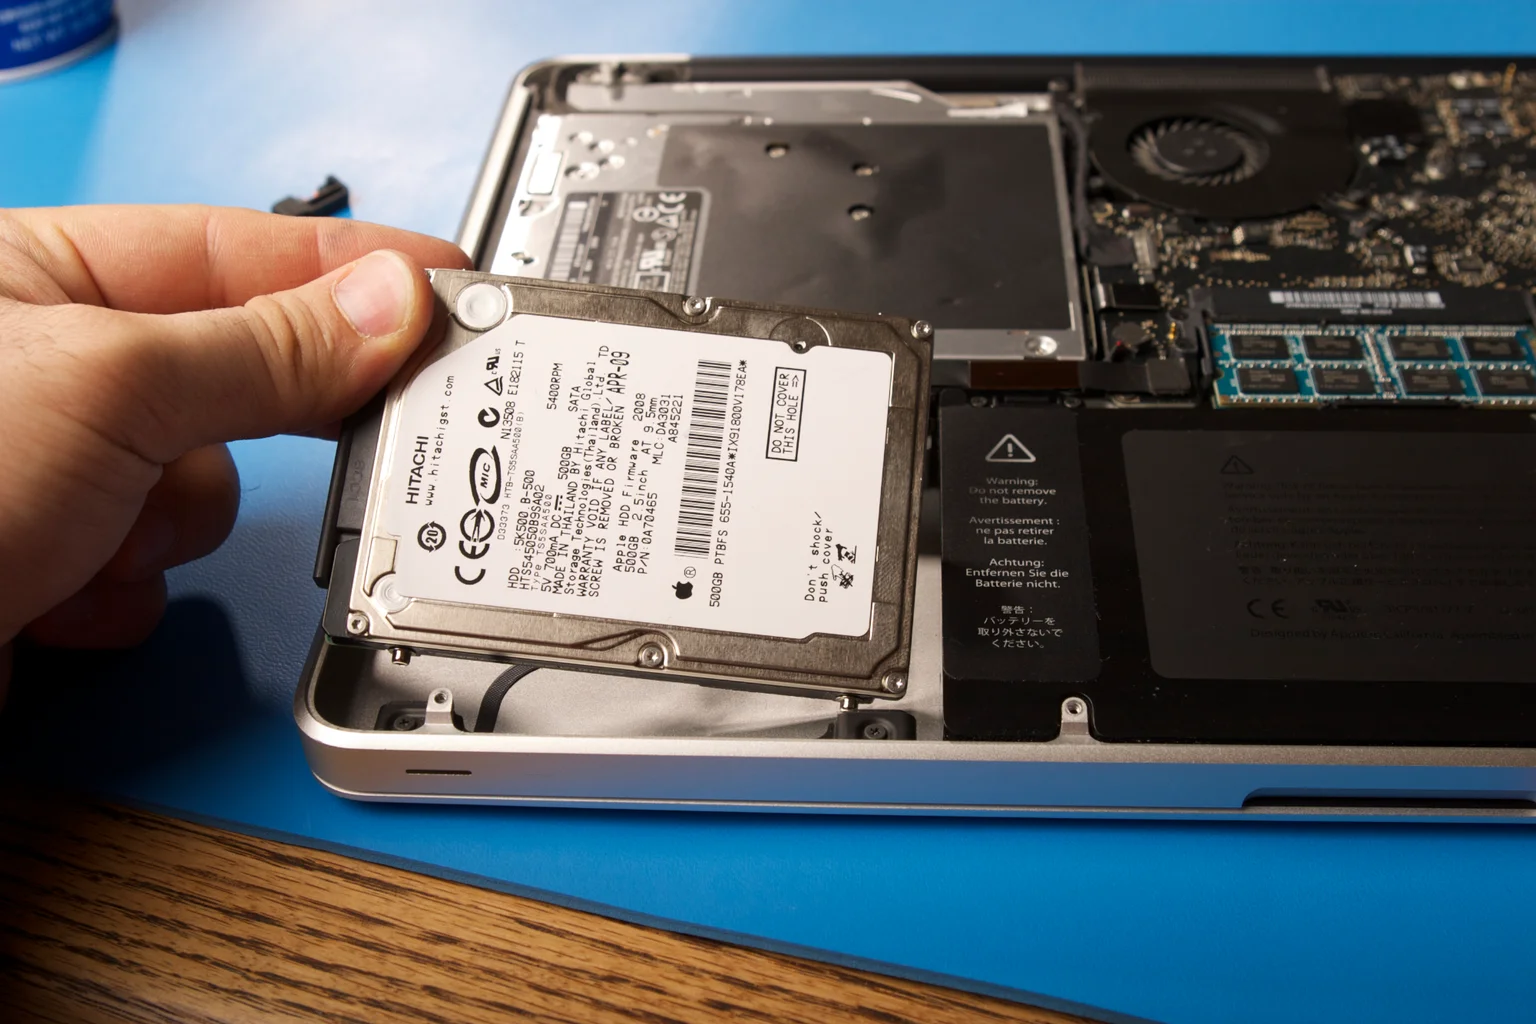
- Gently lift and remove the old SSD: Once the screws are removed, gently lift the old SSD upwards, making sure not to force it. Be mindful of any connectors or mounting points that may still be connected to the SSD.
During the process, it’s crucial to handle the SSD with care, as it is a delicate component. Avoid touching the gold connectors on the bottom of the SSD and ensure that you grip it securely to avoid dropping or damaging it.
Once you have successfully removed the old SSD, set it aside in a safe place. Remember to keep it protected from static electricity, dust, and other potential hazards.
With the old SSD out of the way, you are now ready to proceed to the next step: installing the new SSD in your MacBook Pro.
Step 6: Install the New SSD
With the old SSD successfully removed, it’s time to install the new SSD in your MacBook Pro. Installing the new SSD will allow you to upgrade your storage capacity or improve the performance of your device. Follow these step-by-step instructions to install the new SSD:
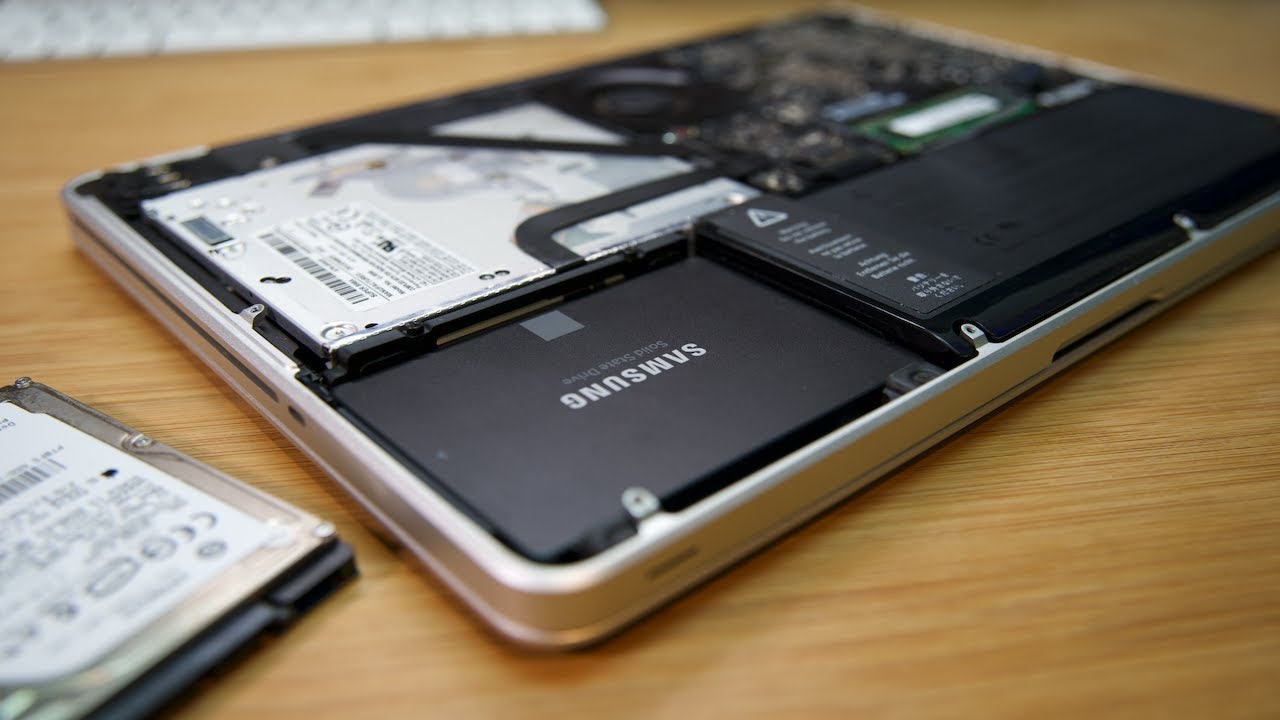
- Prepare the new SSD: Take the new SSD out of its packaging and ensure that it is compatible with your MacBook Pro model. Verify that the connectors and dimensions match those of the previous SSD.
- Align the new SSD: Carefully align the new SSD with the slot where the previous SSD was located. Ensure that the golden connectors on the bottom of the SSD are facing down and that the screw holes align with the mounting points.
- Secure the new SSD with screws: Use the screws from the old SSD or the ones provided with the replacement SSD to secure it in place. Gently tighten the screws in a clockwise direction, ensuring they are snug but not overly tightened.
- Connect any cables to the new SSD: Attach any cables or connectors that were disconnected from the old SSD to the corresponding slots on the new SSD. Make sure to match the connectors and push them in firmly but gently.
- Replace any brackets or adhesive strips: If your MacBook Pro model requires brackets or adhesive strips to secure the SSD, now is the time to place them back in their original positions. Follow any manufacturer-provided instructions or guidelines.
It’s essential to handle the new SSD with care, avoiding any contact with the golden connectors and taking precautions against static electricity. Ensure that the new SSD is securely and correctly installed before proceeding to the next step.
Congratulations! You have successfully installed the new SSD in your MacBook Pro. The next step is to reassemble your MacBook Pro by putting the bottom case back in place.
Step 7: Reassemble Your MacBook Pro
Now that you have installed the new SSD in your MacBook Pro, it’s time to reassemble the device by putting the bottom case back in place. Reassembling your MacBook Pro will ensure that all components are properly secured and protected.
Follow these step-by-step instructions to reassemble your MacBook Pro:
- Retrieve the bottom case: Grab the bottom case that you set aside earlier and ensure that it is clean and free from any dust or debris.
- Align the bottom case: Carefully align the bottom case with the edges of your MacBook Pro, ensuring that it fits snugly into place. Be mindful of any cables or connectors that may need to pass through the case.
- Reattach and tighten the screws: Starting from one corner, insert and tighten the screws that secure the bottom case. Work your way around the perimeter, ensuring that the screws are tightened securely but not excessively.
When tightening the screws, it’s important to exercise caution and avoid overtightening, as it can lead to damage or misalignment of the components. Ensure that the screws are snug and the bottom case is securely fastened without any gaps.
Once you have reassembled your MacBook Pro, take a moment to double-check that everything is in place and the bottom case is properly attached. Inspect the device for any loose cables or components that may have been missed during the reassembly process.
Congratulations! You have successfully reassembled your MacBook Pro. The final step is to turn on your MacBook Pro and restore your data onto the new SSD.
Step 8: Turn On Your MacBook Pro and Restore Your Data
With your MacBook Pro fully reassembled, it’s time to turn it on and restore your data onto the new SSD. This step will ensure that all your files, apps, and settings are transferred seamlessly to the upgraded storage.
Follow these step-by-step instructions to turn on your MacBook Pro and restore your data:
- Connect your MacBook Pro to a power source: Plug in the power adapter and connect your MacBook Pro to a power source to ensure uninterrupted power during the restoration process.
- Press the power button: Locate the power button on your MacBook Pro’s keyboard and press it to turn on the device.
- Follow the on-screen instructions: Your MacBook Pro will boot up and guide you through the initial setup process. Follow the on-screen instructions to select your language, set up your Wi-Fi, and customize your preferences.
- Select the backup source: When prompted to restore your data, select the backup source where you stored your files, such as an external hard drive or iCloud. Follow the instructions to access your backup and initiate the data restoration process.
- Wait for the restoration to complete: The restoration process may take some time, depending on the size of your backup. Ensure that your MacBook Pro remains connected to the power source and be patient as your data is transferred to the new SSD.
- Sign in and verify your restored data: Once the restoration process is complete, sign in to your MacBook Pro using your Apple ID and password. Double-check that your files, apps, and settings have been successfully restored onto the new SSD.
During the restoration process, it’s important to have a stable internet connection if you are restoring data from cloud services like iCloud. Additionally, keep your MacBook Pro connected to the power source to prevent any interruptions that could lead to data corruption or incomplete restoration.
Upon successful restoration of your data, take a moment to explore your MacBook Pro and ensure that everything is functioning correctly. Enjoy the improved storage capacity or enhanced performance provided by your new SSD!
Should you encounter any issues during the restoration process or experience any discrepancies in your data, consider reaching out to Apple Support or consulting with a professional technician for assistance.
Conclusion
Congratulations! You have successfully learned how to change the SSD on your MacBook Pro. By following the step-by-step guide, you were able to back up your data, disconnect all cables, remove the bottom case, disconnect the battery, remove the old SSD, install the new SSD, reassemble your MacBook Pro, turn it on, and restore your data. Now, you can enjoy the benefits of increased storage capacity or improved performance.
Changing the SSD on your MacBook Pro can be a worthwhile upgrade, providing you with a faster and more efficient computing experience. Whether you needed more space for your files or desired a speed boost for demanding applications, this process has allowed you to customize your device according to your needs.
Remember, it is crucial to ensure that you have the necessary tools, take precautionary measures, and exercise care throughout the process. This will protect your MacBook Pro from damage and help ensure a successful SSD replacement.
If you encounter any difficulties or uncertainties during the SSD replacement process, do not hesitate to seek professional assistance or consult with the manufacturer’s documentation or support guides. It’s always better to seek guidance rather than risking potential damage to your device.
We hope that this guide has been helpful and that you are now enjoying the benefits of your new SSD. As technology evolves, remember to stay informed about the latest advancements and upgrades that can further enhance your MacBook Pro’s performance and storage capabilities.
Thank you for following this comprehensive guide, and we wish you many successful adventures with your upgraded MacBook Pro!