Introduction
Welcome to this guide on how to find the right Solid State Drive (SSD) for your MacBook. If you’re looking to upgrade your MacBook’s storage for faster performance and more space, an SSD is an excellent choice. SSDs offer faster read and write speeds compared to traditional hard drives, which can significantly improve the overall performance of your MacBook.
However, finding the right SSD for your MacBook can be a bit overwhelming with the wide range of options available in the market. In this guide, we will walk you through the step-by-step process of finding the perfect SSD for your MacBook and ensuring compatibility.
Before we dive into the steps, it’s important to note that the process of finding an SSD for a MacBook can vary slightly depending on the model and year of your device. So, always double-check the compatibility of the SSD with your specific MacBook model to avoid any compatibility issues.
Now, without further ado, let’s get started with our step-by-step guide on how to find the right SSD for your MacBook.
Step 1: Check Your MacBook Model
The first step in finding the right SSD for your MacBook is to determine the exact model of your device. Apple releases new MacBook models on a regular basis, and the specifications and compatibility of SSDs can vary between these different models.
To check your MacBook model, follow these steps:
- Click on the Apple logo in the top-left corner of your screen.
- Select “About This Mac” from the dropdown menu.
- A new window will appear, displaying information about your MacBook.
- Note down the model name and year of your MacBook for future reference.
Once you have identified your MacBook model, you can proceed to the next step to determine the compatibility of different SSD options.
Keep in mind that some older MacBook models may have limitations on the maximum storage capacity or speed supported by their internal storage interface. Therefore, it’s essential to know your MacBook’s specifications to choose the right SSD that fits your needs.
Now that you have identified your MacBook model, you are ready to move on to the next step: determining the compatibility of SSDs with your specific MacBook model. Remember, this step is crucial to ensure that the SSD you choose will work seamlessly with your MacBook.
Step 2: Determine Compatibility
After identifying your MacBook model, it’s time to determine the compatibility of different SSD options with your specific device. Apple has used various storage interfaces over the years, so it’s crucial to choose an SSD that is compatible with your MacBook’s interface.
One way to determine compatibility is to check the official Apple website or consult Apple’s support documentation for your MacBook model. Apple usually provides information about the supported storage interfaces and their specifications for each MacBook model.
Another option is to visit the website of the SSD manufacturer you are considering and look for compatibility information. Many SSD manufacturers provide compatibility lists or compatibility checkers on their websites, where you can enter your MacBook model details to find compatible SSD options.
Additionally, you can search for online forums or communities where MacBook users discuss their experiences with different SSDs. These platforms can be a valuable source of information as fellow MacBook users often share their compatibility experiences and recommendations.
When determining compatibility, consider the following factors:
- Storage Interface: Identify the type of storage interface used in your MacBook, such as SATA, NVMe, or PCIe.
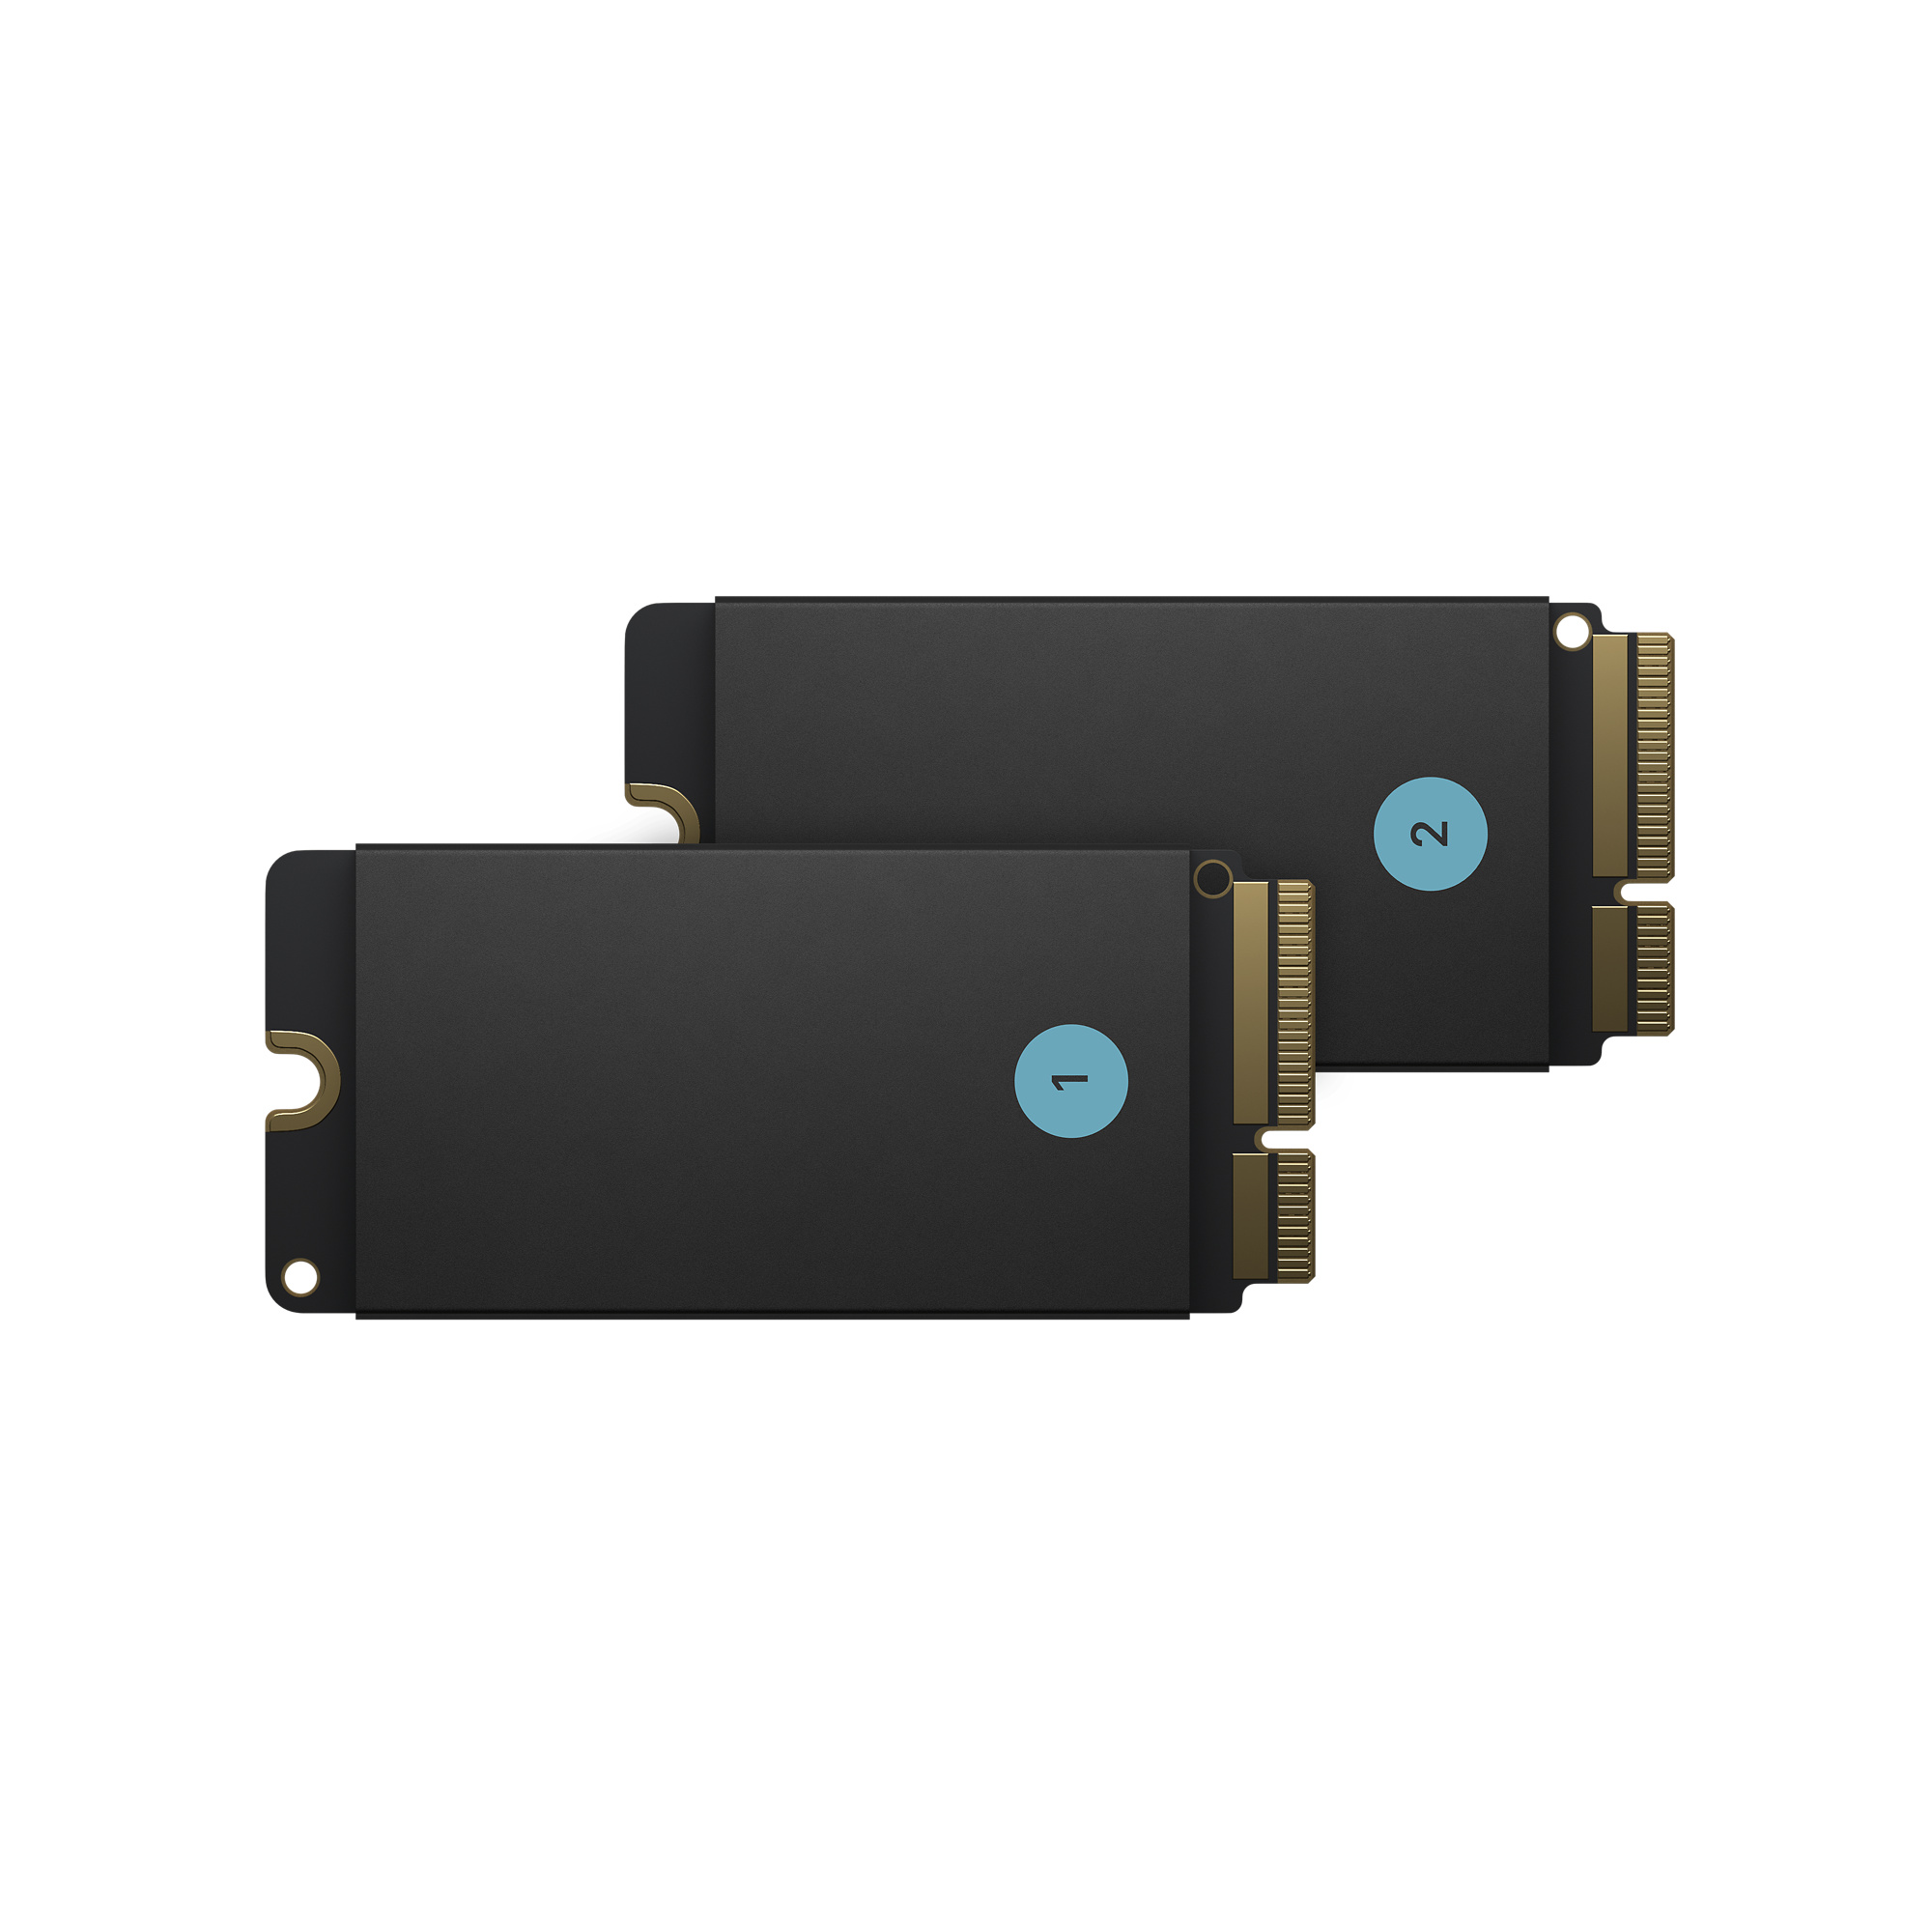
- Form Factor: Determine the physical form factor (size) of the SSD that can fit into your MacBook, such as 2.5-inch, M.2, or proprietary Apple SSDs.
- Storage Capacity: Determine the maximum storage capacity supported by your MacBook model.
- Speed: Consider the read and write speeds of the SSD, especially if you require high-performance storage for demanding tasks.
By taking these factors into account, you can narrow down your options and ensure that you choose an SSD that is compatible with your MacBook model.
Now that you have determined the compatibility requirements for your MacBook, it’s time to move on to the next step: researching available SSDs that meet your compatibility criteria.
Step 3: Research Available SSDs
Now that you have determined the compatibility requirements for your MacBook, it’s time to research the available SSD options that meet your criteria. With numerous SSD brands and models available in the market, it’s important to consider factors such as performance, reliability, and price when making your decision.
Here are some key points to consider when researching available SSDs:
- Brand Reputation: Look for well-established and reputable SSD brands that have a good track record in terms of performance and reliability. Reading reviews from trusted sources and customer feedback can help you gauge the quality of a specific SSD model.
- Performance: Consider the read and write speeds of the SSDs you are interested in. Higher speeds generally result in faster data transfer and improved overall system performance.
- Capacity Options: Check the available storage capacities for each SSD model. Determine your storage needs and choose an SSD that provides sufficient capacity for your files and applications.
- Reliability and Endurance: Look for SSDs that are known for their reliability and endurance. Consider factors such as the MTBF (mean time between failures) and TBW (terabytes written) ratings provided by manufacturers.
- Price: Consider your budget and compare prices among different SSD models. While it’s tempting to go for the cheapest option, it’s important to find a balance between price and quality.
- Warranty: Check the warranty period offered by the SSD manufacturer. A longer warranty period can provide peace of mind in case of any potential issues.
Take your time to research and compare different SSD models that meet your compatibility requirements. Look for expert recommendations, user reviews, and performance benchmarks to make an informed decision.
It’s also worth mentioning that you can consider upgrading to a higher capacity SSD than your current storage. This will allow you to have extra space for future needs and potentially take advantage of higher performance features that come with larger capacity SSDs.
Once you have narrowed down your SSD options and made your selection, it’s time to move on to the next step: purchasing the SSD that suits your MacBook.
Step 4: Purchase the SSD
After thorough research, you have identified the SSD that meets your compatibility requirements and fits your budget. Now it’s time to proceed with the purchase. Here are a few tips to guide you through the process:
- Check Authorized Retailers: Start by checking authorized retailers for the specific SSD brand and model you have chosen. Visit the official website of the manufacturer to find a list of authorized retailers or check online marketplaces known for selling genuine products.
- Compare Prices: Compare prices from different retailers to ensure you’re getting the best deal. Keep in mind that while price is important, it’s equally crucial to purchase from a reputable seller to avoid counterfeit or low-quality products.
- Consider Bundle Deals: Some retailers offer bundle deals that include additional accessories, such as mounting brackets or cables, which can be useful during the installation process. Consider these options if they provide added value.
- Read Reviews and Ratings: Before making the final purchase, read reviews and ratings from other customers who have bought the same SSD. This can give you valuable insights into the reliability and performance of the product.
- Check Warranty: Confirm the warranty details offered by the retailer or the manufacturer. Ensure that you understand their warranty terms and conditions, which will be helpful in case you encounter any issues with the SSD later on.
- Place the Order: Once you have compared prices, read reviews, and checked the warranty details, go ahead and place your order. Make sure to provide the correct shipping address and payment information for a smooth purchasing process.
Keep in mind that reputable SSD manufacturers usually provide excellent customer support, so don’t hesitate to reach out to them if you have any questions or concerns before making your purchase.
Once you have successfully purchased the SSD, you’re now one step closer to upgrading your MacBook. The next step is to prepare your MacBook for the installation, which we will cover in the following section.
Step 5: Backup Your Data
Before you proceed with the installation of the new SSD, it is crucial to back up all your important data from your MacBook. This step ensures that you have a copy of your files and applications in case anything goes wrong during the installation process. Here’s how to backup your data:
- Use Time Machine: If you have been regularly using Time Machine, Apple’s built-in backup feature, you’re in luck. Connect an external hard drive to your MacBook and let Time Machine automatically back up your data. This will create a full system backup, including all your files, applications, and settings.
- Manually Copy Files: If you prefer to manually back up your data, you can do so by transferring your important files to an external storage device. Create a folder for easy organization and copy all your important documents, photos, videos, and any other files that are important to you.
- Export Email and Bookmarks: Don’t forget to export your email accounts, contacts, and bookmarks if you use applications like Mail and Safari. This will allow you to easily import them back into your new SSD after the installation.
- Ensure App Licenses: If you have any software applications installed on your MacBook that require licenses or activation codes, make sure to gather this information before the installation. This will prevent any issues when reinstalling your applications on the new SSD.
Remember to double-check your backup to ensure that all your important files have been successfully transferred. It’s always better to be safe than sorry when it comes to safeguarding your data.
By backing up your data, you can proceed with the installation process confidently, knowing that your files are securely stored and can be easily restored on the new SSD.
Once your data is backed up, it’s time to prepare for the installation process, which we will cover in the next step.
Step 6: Prepare for Installation
With your data safely backed up, it’s time to prepare your MacBook for the installation of the new SSD. This step involves gathering the necessary tools and ensuring a clean and organized workspace. Here’s what you need to do:
- Gather the Tools: Depending on your MacBook model, you may need specific tools to open your MacBook and perform the installation. Common tools include a screwdriver set with various screwdriver heads and a spudger or pry tool to safely remove the MacBook casing. Check online resources or the manufacturer’s instructions to determine the exact tools needed for your MacBook model.
- Clean Your Workspace: When working with delicate electronics like a MacBook, it’s important to have a clean and clutter-free workspace. Clear away any unnecessary items and ensure you have a flat, stable surface to work on. This will help prevent any accidental damage or interference during the installation process.
- Ground Yourself: Static electricity can potentially damage sensitive components in your MacBook, so it’s important to ground yourself before touching any internal parts. You can do this by wearing an antistatic wristband or by touching a grounded metal object, such as a metal table or the metal casing of a plugged-in appliance.
- Read the Instructions: Familiarize yourself with the installation instructions provided by the SSD manufacturer. Different MacBook models may have specific guidelines or additional steps to follow. Take your time to understand the process before proceeding.
- Prepare the New SSD: If your new SSD requires any installation preparation, such as updating the firmware or formatting, follow the manufacturer’s instructions to complete these tasks. This will ensure that your new SSD is ready for installation and optimal performance.
By gathering the necessary tools, cleaning your workspace, grounding yourself, and familiarizing yourself with the instructions, you are setting yourself up for a successful and smooth installation process.
Once you have prepared your MacBook and the new SSD, it’s time to open your MacBook and remove the old hard drive, which we will cover in the next step.
Step 7: Open Your MacBook
With everything prepared, it’s time to open your MacBook to gain access to the internal components and begin the process of replacing the old hard drive with the new SSD. Follow these steps to open your MacBook:
- Turn Off Your MacBook: Before you start, ensure that your MacBook is turned off completely. Disconnect any power sources and peripherals.
- Ground Yourself: Just as you did in the preparation step, ground yourself by wearing an antistatic wristband or touching a grounded metal object to discharge static electricity and prevent damage to sensitive components.
- Locate the Screws: MacBook models have different configurations, but in general, you will find screws around the perimeter of the bottom case. Use a screwdriver with the appropriate head to remove these screws. Keep them in a safe place as you’ll need them to secure the casing later.
- Remove the Bottom Case: Gently lift the bottom case of your MacBook, starting from the edge nearest to you. Take caution not to force it open or damage any internal components. Once the case is removed, set it aside in a safe and clean location.
At this stage, you should have successfully opened your MacBook and have access to its internal components. It’s important to handle all parts carefully during this process to avoid any accidental damage.
Now that your MacBook is open, you can proceed with the next step: removing the old hard drive from your MacBook.
Step 8: Remove the Old Hard Drive
Now that you have successfully opened your MacBook, it’s time to remove the old hard drive and make way for the new SSD. Follow these steps to safely remove the old hard drive:
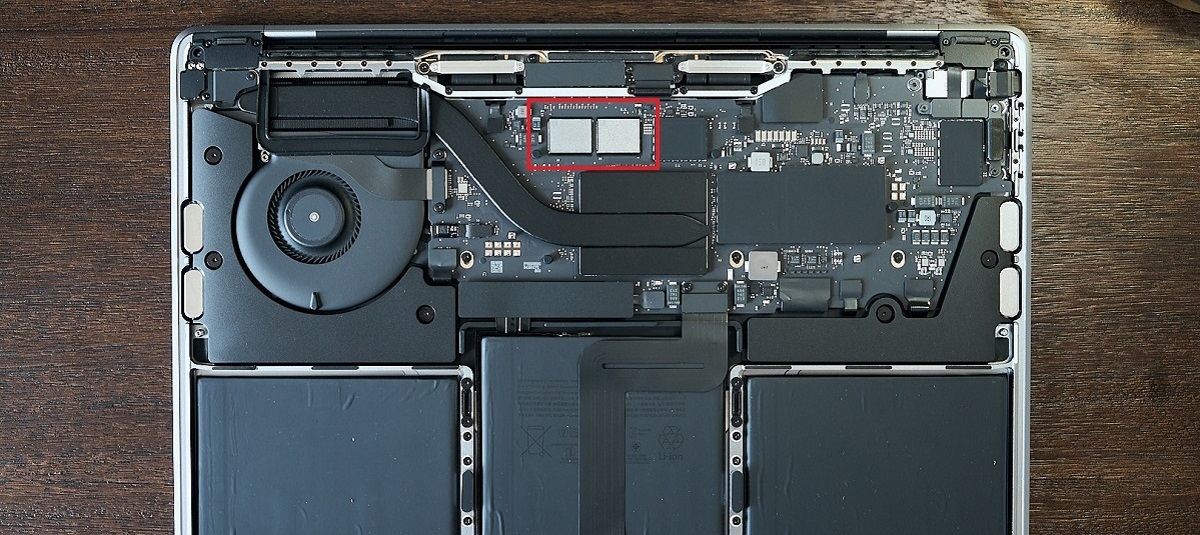
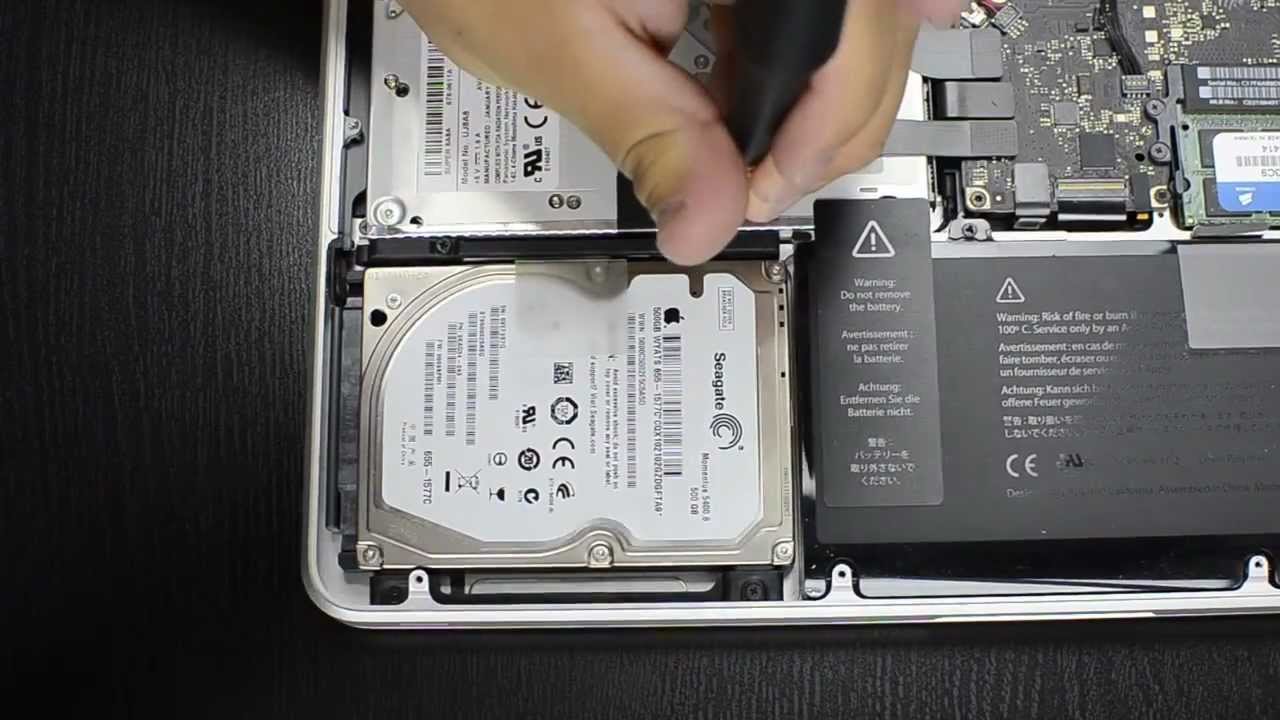
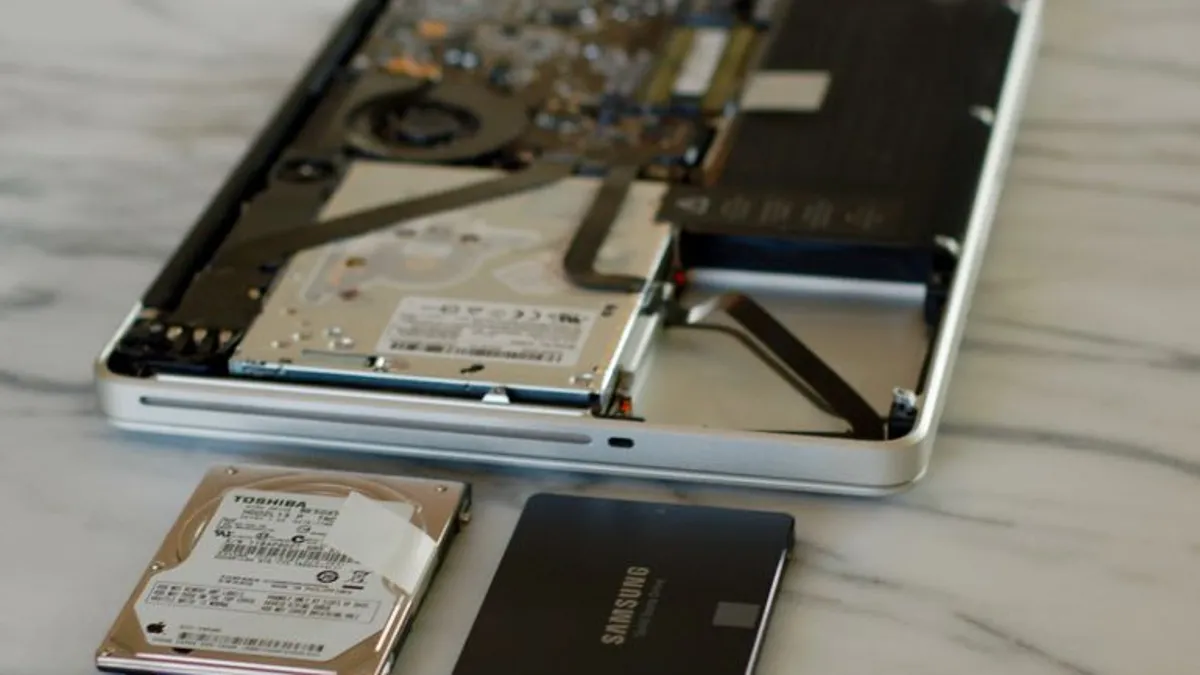
- Locate the Hard Drive: Once inside your MacBook, locate the old hard drive. It is usually a rectangular-shaped component connected to the motherboard with a cable.
- Disconnect the Cable: Carefully unplug the cable that connects the old hard drive to the motherboard. Gently wiggle the connector back and forth while pulling it away from the socket.
- Remove Mounting Screws: Look for the screws or brackets that secure the old hard drive in place. Use a screwdriver to remove these screws and set them aside safely. Note the positions of the screws as different models may require specific screw placements.
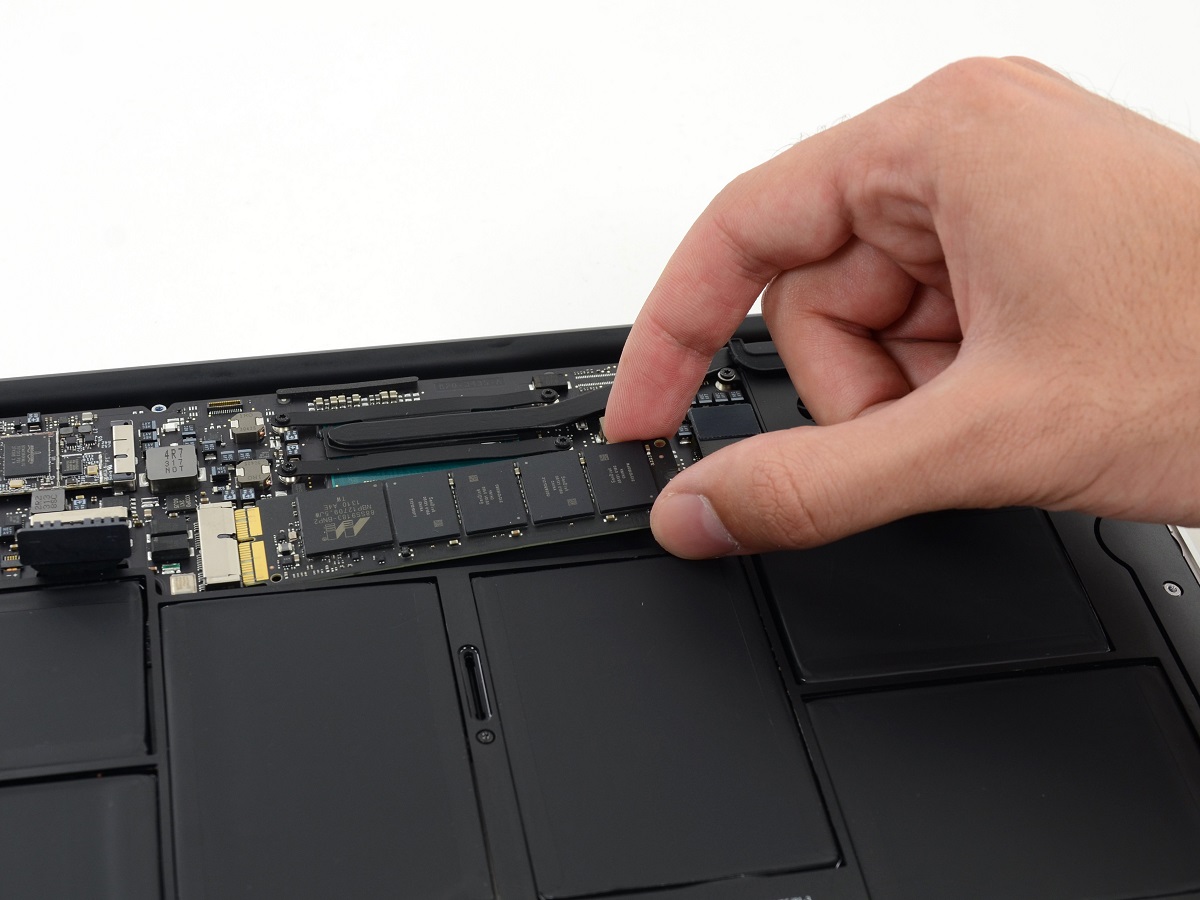
- Take Out the Old Hard Drive: Once the mounting screws are removed, gently slide the old hard drive out of its slot. Be mindful of the surrounding components and any other cables that might be in the way.
Throughout this process, it’s important to handle the old hard drive with care to avoid any damage or static discharge. Additionally, keep the removed screws and brackets in a secure place to ensure they are not misplaced during the installation of the new SSD.
With the old hard drive successfully removed, you’re now ready to install the new SSD into your MacBook. This will be covered in the next step.
Step 9: Install the New SSD
With the old hard drive removed, it’s time to install the new SSD into your MacBook. Follow these steps to ensure a successful installation:
- Prepare the New SSD: If your new SSD requires any preparation steps, such as updating the firmware or formatting, make sure to complete those tasks before proceeding with the installation.
- Align the New SSD: Carefully align the new SSD with the slot previously occupied by the old hard drive. Ensure that the connector on the SSD is facing the correct direction for a proper connection.
- Secure the New SSD: Use the mounting screws or brackets that were removed from the old hard drive to secure the new SSD in place. Tighten the screws gently, making sure not to overtighten as it may damage the SSD or the MacBook’s internal components.
- Connect the Cable: Attach the connector from the SSD to the corresponding socket on the motherboard. Make sure the connection is secure and properly seated. Do not force the connection; it should fit easily without excessive pressure.
It’s essential to handle the new SSD with care and avoid touching the connectors or electronic components. Static electricity can damage the SSD, so be mindful of grounding yourself before handling it.
Once you have securely installed the new SSD and connected it to the motherboard, you’re ready to move on to the next step: closing your MacBook.
Step 10: Close Your MacBook
Now that you have successfully installed the new SSD, it’s time to close your MacBook and complete the upgrade process. Follow these steps to securely close your MacBook:
- Double-Check Connections: Before closing your MacBook, double-check that all cables and connectors are properly seated and securely connected. This includes the cable connecting the new SSD to the motherboard.
- Reattach the Bottom Case: Carefully align the bottom case with the edges of your MacBook. Gently press it down until it snaps into place. Start from the edge nearest to you and work your way around the perimeter, ensuring that the case locks securely.
- Tighten Screws: With the bottom case in place, reinsert and tighten all the screws you removed during the opening process. Make sure each screw is snug but not overtightened to avoid damaging the casing or internal components.
- Power On and Test: Once the bottom case is secured, connect the power source and peripherals to your MacBook. Power it on to ensure that the new SSD is recognized and functioning correctly. If everything is working properly, you should see your MacBook boot up without any issues.
It’s important to be gentle when closing your MacBook to avoid misaligning the case or causing any damage to the internal components. Take your time and ensure everything is properly secured before moving on to the testing phase.
Congratulations! You have successfully closed your MacBook with the new SSD installed. Take a moment to enjoy the improved performance and increased storage capacity.
Remember, you can now start restoring your backed-up data onto the new SSD and reinstalling your applications. Enjoy your upgraded MacBook experience!
Conclusion
Congratulations on successfully upgrading the storage of your MacBook by installing a new SSD! By following the step-by-step guide outlined in this article, you were able to find the right SSD that is compatible with your MacBook model and carry out the installation process with confidence.
Throughout the process, you learned how to check your MacBook model, determine compatibility requirements, research available SSD options, make the purchase, backup your data, prepare for installation, open your MacBook, remove the old hard drive, install the new SSD, and finally, close your MacBook.
It’s worth noting that upgrading your MacBook’s storage to an SSD can have a significant impact on the performance and overall user experience. The faster read and write speeds of the SSD contribute to faster boot times, quicker application launches, improved multitasking, and faster file transfers.
Remember, proper preparation and careful handling during the installation process are essential to avoid causing any damage to your MacBook or the new SSD. Take your time, follow the instructions diligently, and refer to manufacturer guides or online resources if needed.
Now that you have successfully upgraded your MacBook’s storage, take a moment to appreciate the improved performance and increased storage capacity that your new SSD provides. Enjoy the seamless and efficient experience as you work, create, and explore on your newly upgraded MacBook!