Introduction
Upgrading your MacBook Pro with a solid-state drive (SSD) can significantly boost its performance and speed, giving it a new lease of life. By replacing the traditional hard drive with an SSD, you can experience faster boot times, quicker application launches, and overall improved system responsiveness.
In this detailed guide, we will walk you through the step-by-step process of installing an SSD in a MacBook Pro. Whether you have an older model or the latest model, the installation process remains the same. With the right tools and a little patience, you can easily upgrade your MacBook Pro and enjoy the benefits of a faster and more efficient machine.
Before we dive into the installation process, it’s important to note that upgrading the internal components of your MacBook Pro may void your warranty. If your MacBook Pro is still covered under warranty, it’s best to check with Apple or an authorized service provider before proceeding with the SSD installation.
This guide assumes that you already have some basic knowledge of the inner workings of a computer and that you are comfortable handling small electronic components. If you are unsure about any step or feel uncomfortable, it’s always a good idea to seek professional assistance or consult the official MacBook Pro user manual.
Now that the groundwork is laid, let’s move on to the first step – gathering the necessary tools and equipment for the SSD installation process.
Step 1: Gather the necessary tools and equipment
Before you begin the installation process, it’s important to gather all the tools and equipment you’ll need to ensure a smooth and successful SSD installation. Here’s a list of the essential items:
- SSD: Choose a compatible SSD that meets the specifications for your MacBook Pro model. You can find this information in the official Apple documentation.
- Screwdrivers: Depending on your MacBook Pro model, you may need a Phillips or a Torx screwdriver. Make sure you have the right size to remove the screws.
- External Drive: You’ll also need an external drive to back up your data before proceeding with the installation. This ensures that you don’t lose any important files or documents during the process.
- Static Protection: To protect your MacBook Pro and the delicate electronic components from static electricity, consider using an anti-static wrist strap or mat.
- Clean Workspace: Find a clean, well-lit workspace with enough room to work on your MacBook Pro comfortably. Make sure it’s a static-free environment to prevent any damage to the internal components.
- Cleaning Cloth: Having a soft microfiber cloth on hand will help you clean any dust or smudges that may accumulate during the installation.
By gathering these essential tools and equipment before you start, you’ll be fully prepared and equipped for the SSD installation process.
Step 2: Ensure data backup
Before proceeding with the SSD installation in your MacBook Pro, it’s crucial to back up all your important data. This step ensures that you don’t lose any files or documents during the process.
There are several ways to back up your data, and you can choose the method that suits you best. Here are a few options:
- Time Machine: If you have an external hard drive or a Time Capsule, you can use Apple’s built-in Time Machine feature to back up your data. Follow the instructions in the official Apple documentation or the user manual to set up Time Machine and initiate the backup.
- Cloud Storage: Another option is to use cloud storage services like iCloud, Google Drive, or Dropbox. These services allow you to store your files securely on remote servers, accessible from any device with an internet connection. Simply upload your important files to the cloud storage service of your choice and ensure everything is synced before the SSD installation.
- External Hard Drive: If you have an external hard drive, you can manually copy and paste your important files and folders onto it. Ensure that all your crucial data is backed up before proceeding with the installation.
By backing up your data, you can have peace of mind knowing that your files are safe and can easily be restored on the new SSD. It’s always better to be safe than sorry, so take the time to complete this step before moving forward.
Step 3: Shut down the MacBook Pro
Once you have backed up all your important data, it’s time to shut down your MacBook Pro before starting the SSD installation process. Follow these simple steps to shut down your device:
- Save your work: Make sure to save any open documents, close all applications, and complete any ongoing tasks before proceeding.
- Click on the Apple logo: Located on the top left corner of your screen, click on the Apple logo. A drop-down menu will appear.
- Select “Shut Down”: In the drop-down menu, hover over the “Shut Down” option and click on it.
- Confirm the shut down: A confirmation window will appear, asking you to confirm the shut down. Click “Shut Down” to proceed.
- Wait for the MacBook Pro to power off: Allow your MacBook Pro a few moments to shut down completely. You can verify this by checking that the screen has gone black and all indicator lights have turned off.
Ensuring that your MacBook Pro is properly shut down reduces the risk of any damage during the installation process. Remember to give your device enough time to power off completely before proceeding to the next step.
Step 4: Remove the bottom case
With your MacBook Pro powered off, it’s time to remove the bottom case to gain access to the internal components. Follow these steps to remove the bottom case:
- Gather the required tools: Depending on your MacBook Pro model, you may need a Phillips or Torx screwdriver.
- Place your MacBook Pro on a soft, clean surface: Lay it on a cloth or soft mat to prevent scratches and ensure stability during the process.
- Locate and remove the screws: Look for the screws on the bottom case. They are usually located along the edges and may be different in number depending on the model.
- Keep track of the screw locations: As you remove the screws, take note of their positions. It’s a good practice to use a magnetic mat or organizer to keep them organized.
- Carefully lift and remove the bottom case: Gently lift the bottom case and slide it off. Be cautious not to force it or damage any connectors.
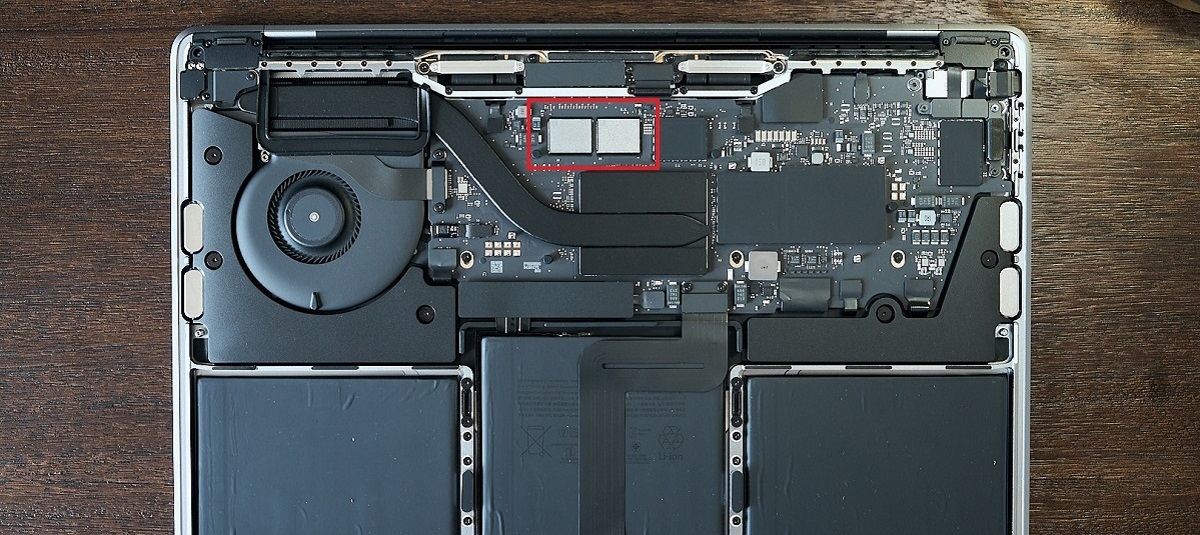
- Inspect the inside: Now that the bottom case is removed, you can see the internal components of your MacBook Pro, including the battery, existing hard drive, and other modules.
By removing the bottom case, you have successfully gained access to the internal components of your MacBook Pro. Take a moment to inspect the inside and familiarize yourself with the layout before proceeding to the next step.
Step 5: Disconnect the battery cable
Before replacing the existing hard drive with the SSD, it’s important to disconnect the battery cable to prevent any potential electrical mishaps. Follow these steps to safely disconnect the battery cable:
- Locate the battery cable: Look for the battery cable connector on the logic board. It is usually marked with a battery icon next to it.
- Use caution: Before proceeding, it’s crucial to exercise caution while handling the battery cable. Make sure your hands are clean and dry.
- Unplug the battery connector: Gently grasp the plastic tab and carefully pull the battery connector straight up from its socket. Avoid pulling on the wires to prevent any damage.
- Confirm disconnection: After removing the battery connector, double-check that it is fully unplugged from the logic board.
- Wait for a few minutes: It’s recommended to wait for a few minutes to allow any residual charge in the MacBook Pro to dissipate.
By disconnecting the battery cable, you ensure that the MacBook Pro is completely powered off and there is no electrical current running through the device. This step is essential for your safety and to avoid any potential damage to the internal components during the SSD installation process.
Step 6: Remove the existing hard drive
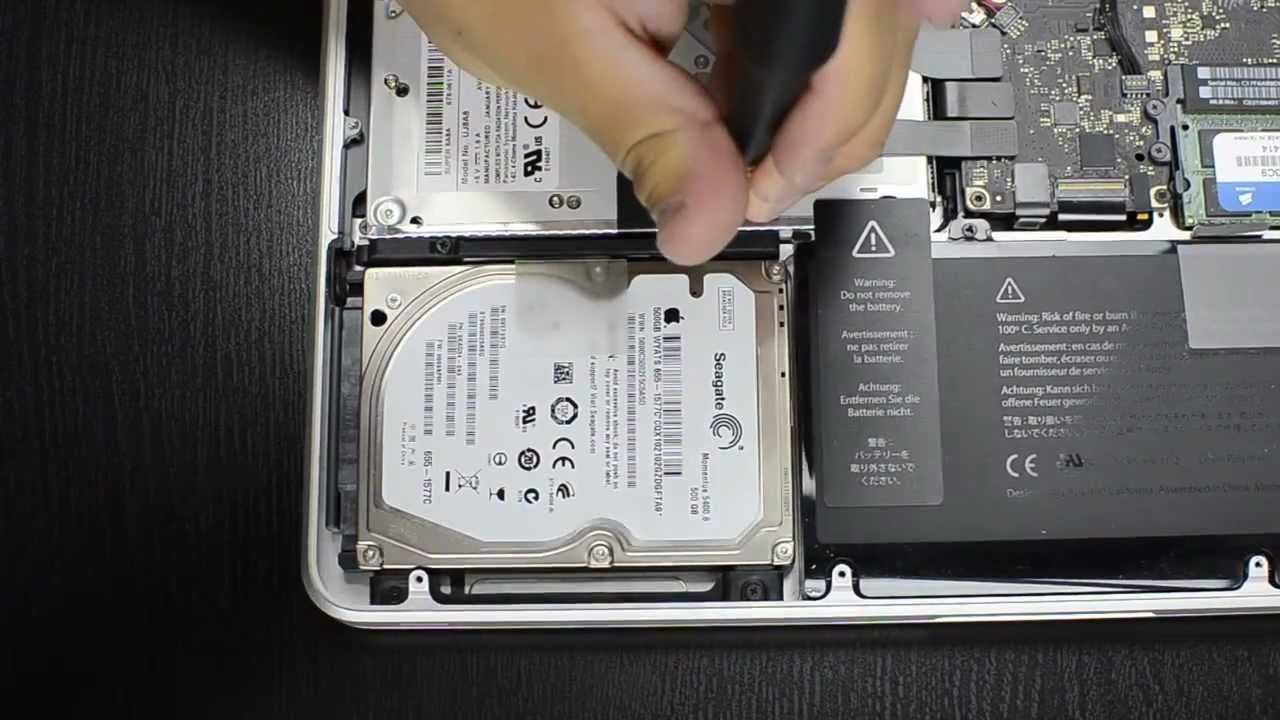
With the battery cable disconnected, it’s now time to remove the existing hard drive from your MacBook Pro. Follow these steps to complete this process:
- Identify the hard drive: Locate the existing hard drive inside your MacBook Pro. It is typically positioned near the center or side of the device.
- Disconnect any cables: Check for any cables or connectors attached to the hard drive. Gently remove them by pulling straight away from the hard drive.
- Remove the hard drive bracket: Depending on your MacBook Pro model, there may be a bracket securing the hard drive in place. Unscrew the bracket using the appropriate screwdriver and set it aside.
- Slide the hard drive out: Carefully slide the hard drive out of its slot in the MacBook Pro. Take note of its orientation so that you can properly align the SSD during installation.
- Handle the hard drive with care: When handling the hard drive, avoid touching any circuitry or exposed components. Place it in an anti-static bag or on a soft, static-free surface.
By removing the existing hard drive, you have successfully cleared the way for the installation of the SSD. Take a moment to inspect the hard drive slot and prepare for the next step – installing the SSD.
Step 7: Install the SSD
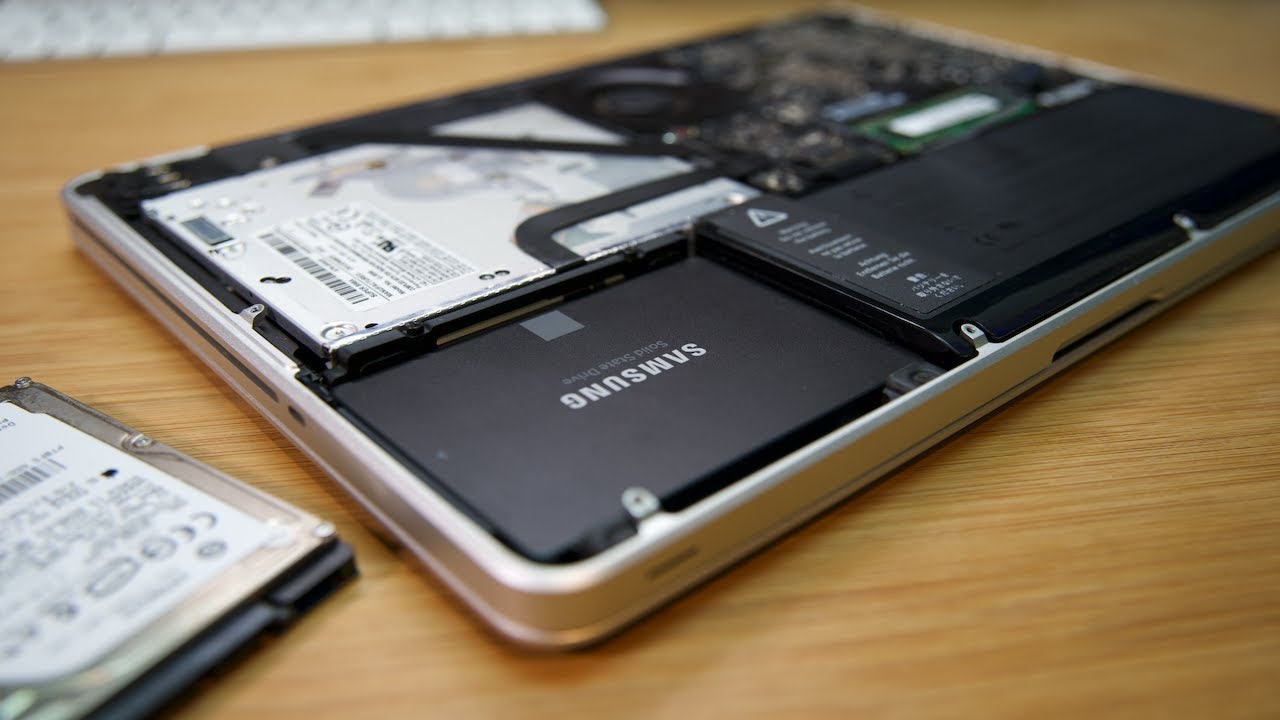
With the existing hard drive removed, it’s time to install the new SSD in your MacBook Pro. Follow these steps to ensure a smooth installation process:
- Align the SSD: Take the new SSD and align it properly with the slot where the old hard drive was located. Make sure the connectors are facing the correct direction.
- Slide the SSD into place: Gently slide the SSD into the slot, ensuring that it fits snugly and securely.
- Reattach any cables: If there are any cables or connectors associated with the SSD, carefully reattach them by pushing them straight into their respective slots.
- Secure the SSD: If there is a bracket or screws provided with your SSD, use them to secure the SSD in place. Follow the manufacturer’s instructions for proper installation.
It’s important to handle the SSD with care and avoid touching any exposed circuitry or sensitive components. Take your time to align and secure the SSD properly to ensure a successful installation.
By installing the SSD, you have completed a significant step in upgrading your MacBook Pro. Now it’s time to move on to the next step – replacing the bottom case.
Step 8: Replace the bottom case
Now that the SSD is installed, it’s time to put the MacBook Pro back together by replacing the bottom case. Follow these steps to complete the process:
- Align the bottom case: Position the bottom case over the MacBook Pro, ensuring that all the screw holes are properly aligned.
- Gently press down: Apply gentle pressure and press down on the bottom case to ensure it is properly seated.
- Secure the screws: Using the appropriate screwdriver, carefully tighten the screws back into their respective holes. Start by securing the screws in a diagonal pattern, gradually working your way around.
- Double-check the alignment: Ensure that the bottom case is aligned properly and flush with the MacBook Pro. It should be securely fastened without any gaps or misalignments.
Take your time while replacing the bottom case to ensure that it is properly fitted. Tightening the screws evenly and maintaining alignment is essential for a professional-looking finish.
By replacing the bottom case, you have successfully completed the physical installation of the SSD in your MacBook Pro. The final steps involve powering on your device and initializing the new SSD.
Step 9: Power on and initialize the new SSD
With the bottom case securely in place, it’s time to power on your MacBook Pro and initialize the new SSD. Follow these steps to get your device up and running:
- Connect the power adapter: Plug in the power adapter to your MacBook Pro to ensure it has a constant power source during the initialization process.
- Press the power button: Locate the power button on your MacBook Pro and press it to turn on the device.
- Wait for the startup chime: If your MacBook Pro has a startup chime, wait until you hear it. This indicates that the device is booting up.
- Follow the on-screen prompts: Once your MacBook Pro has booted up, you may be prompted to set up the new SSD. Follow the on-screen prompts to complete the initialization process.
- Restore your data: If you backed up your data before the installation, you can now restore your files and documents onto the new SSD. Use the method you chose in Step 2 (Time Machine, cloud storage, or external hard drive) to restore your data.
During the initialization process, you may need to format the new SSD and install the operating system. Follow the instructions provided by your MacBook Pro or refer to the official Apple documentation for detailed guidance.
Congratulations! With the new SSD installed, properly initialized, and your data restored, your MacBook Pro is now ready to deliver improved performance, speed, and efficiency.
Conclusion
Upgrading your MacBook Pro with a solid-state drive (SSD) can be a game-changer in terms of improving performance, speed, and overall user experience. By following the step-by-step process outlined in this guide, you have successfully installed an SSD in your MacBook Pro.
From gathering the necessary tools and equipment to backing up your data, removing the existing hard drive, installing the new SSD, and replacing the bottom case, each step was crucial in ensuring a smooth and successful installation process.
By upgrading to an SSD, you can enjoy faster boot times, quicker application launches, snappy performance, and improved overall responsiveness. Your MacBook Pro will feel like a whole new machine.
Remember, before starting the installation process, it’s important to check your warranty status and consult with Apple or an authorized service provider to avoid any warranty issues. Additionally, always handle the internal components of your MacBook Pro with care and caution to prevent any damage.
We hope that this guide has provided you with the necessary information and guidance to confidently install an SSD in your MacBook Pro. Now, power on your newly upgraded device, initialize the new SSD, and enjoy the enhanced performance and productivity that comes with it.
Thank you for following this guide, and best of luck with your upgraded MacBook Pro!