Introduction
Welcome to the world of surround sound systems, where the audio comes alive and immerses you in a truly cinematic experience. Whether you’re a movie enthusiast, a gaming aficionado, or a music lover, a surround sound system can revolutionize the way you enjoy your entertainment. In this article, we’ll delve into the world of surround sound systems, guiding you through the essential components, tips for setup, and troubleshooting common issues.
Surround sound systems are designed to reproduce audio that surrounds the listener, creating a three-dimensional sound environment. With multiple speakers strategically placed around your room, you’ll feel like you’re right in the middle of the action, with sounds coming from all directions. The result is a more immersive and realistic listening experience, bringing movies, music, and games to life.
When it comes to getting started with a surround sound system, there are a few key aspects to consider. First and foremost, you need to choose the right room for your setup. The size, shape, and acoustics of the room can greatly impact the audio quality and overall experience. We’ll explore this topic in further detail later in the article.
Next, you’ll need to think about the audio sources for your surround sound system. These can include your TV, Blu-ray player, gaming console, streaming devices, or even a dedicated audio receiver. Having a variety of sources can enhance your entertainment options and ensure you can enjoy surround sound in all your favorite media.
The heart of any surround sound system is the speakers. Choosing the right speakers and positioning them correctly is crucial for an optimal audio experience. We’ll discuss different types of speakers, such as front speakers, center channel speakers, surround speakers, and subwoofers, as well as their ideal placement in your room.
Another key component of a surround sound system is the receiver and amplification. The receiver acts as the control center, decoding the audio signals from your sources and distributing them to the various speakers. Amplifiers, on the other hand, provide the necessary power to drive the speakers. We’ll explore the features to consider when selecting a receiver and amplification setup.
Once you have all the necessary components, you’ll need to connect them properly. Understanding the different cables and connections, such as HDMI, optical, and speaker wire, is essential to ensure a seamless and high-quality audio setup. We’ll provide step-by-step instructions to guide you through the connection process.
Setting up a surround sound system also involves calibration to optimize the sound output in your specific room. This can include adjusting speaker levels, configuring speaker distances, and fine-tuning the sound settings. We’ll share useful tips and tools to help you achieve the best possible audio performance.
Finally, we’ll discuss common issues that may arise when using a surround sound system and provide troubleshooting suggestions to resolve them. From sound distortion to connectivity problems, we’ll offer tips and tricks to overcome these challenges.
Now that you have a brief overview of what to expect in this article, let’s dive deeper into the world of surround sound systems and discover how you can create an incredible audio experience at home.
Understanding Surround Sound Systems
In order to fully appreciate the capabilities and benefits of a surround sound system, it’s important to understand how it works. At its core, surround sound is a technology that creates a multi-channel audio experience, enabling you to hear sounds coming from different directions. This creates a sense of depth and immersion, elevating your entertainment to a whole new level.
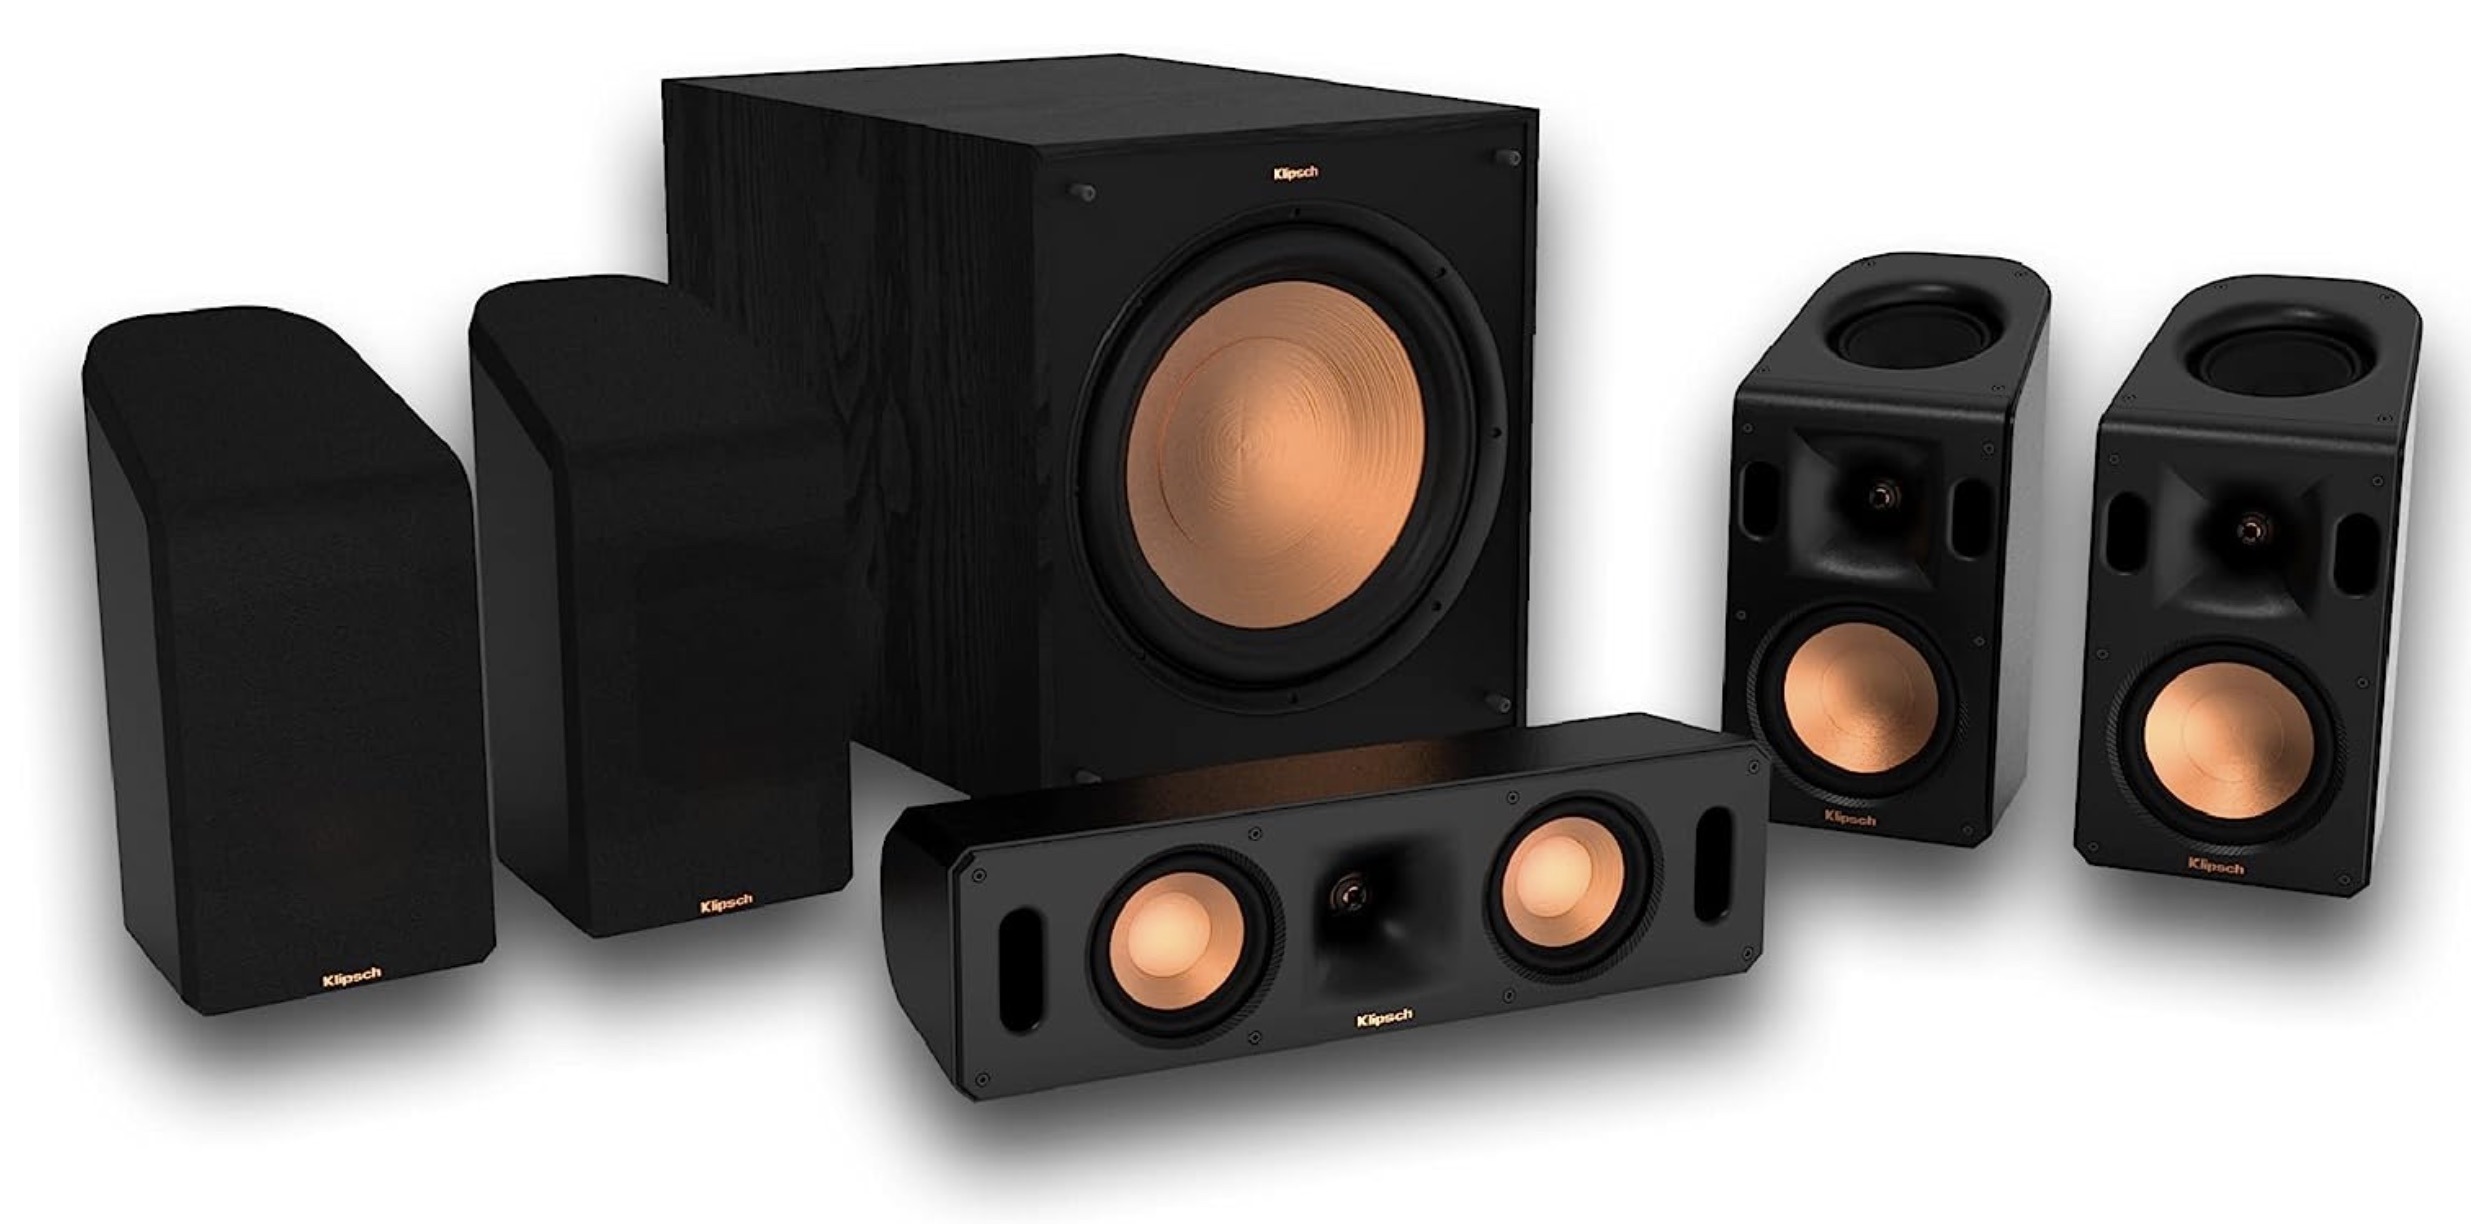
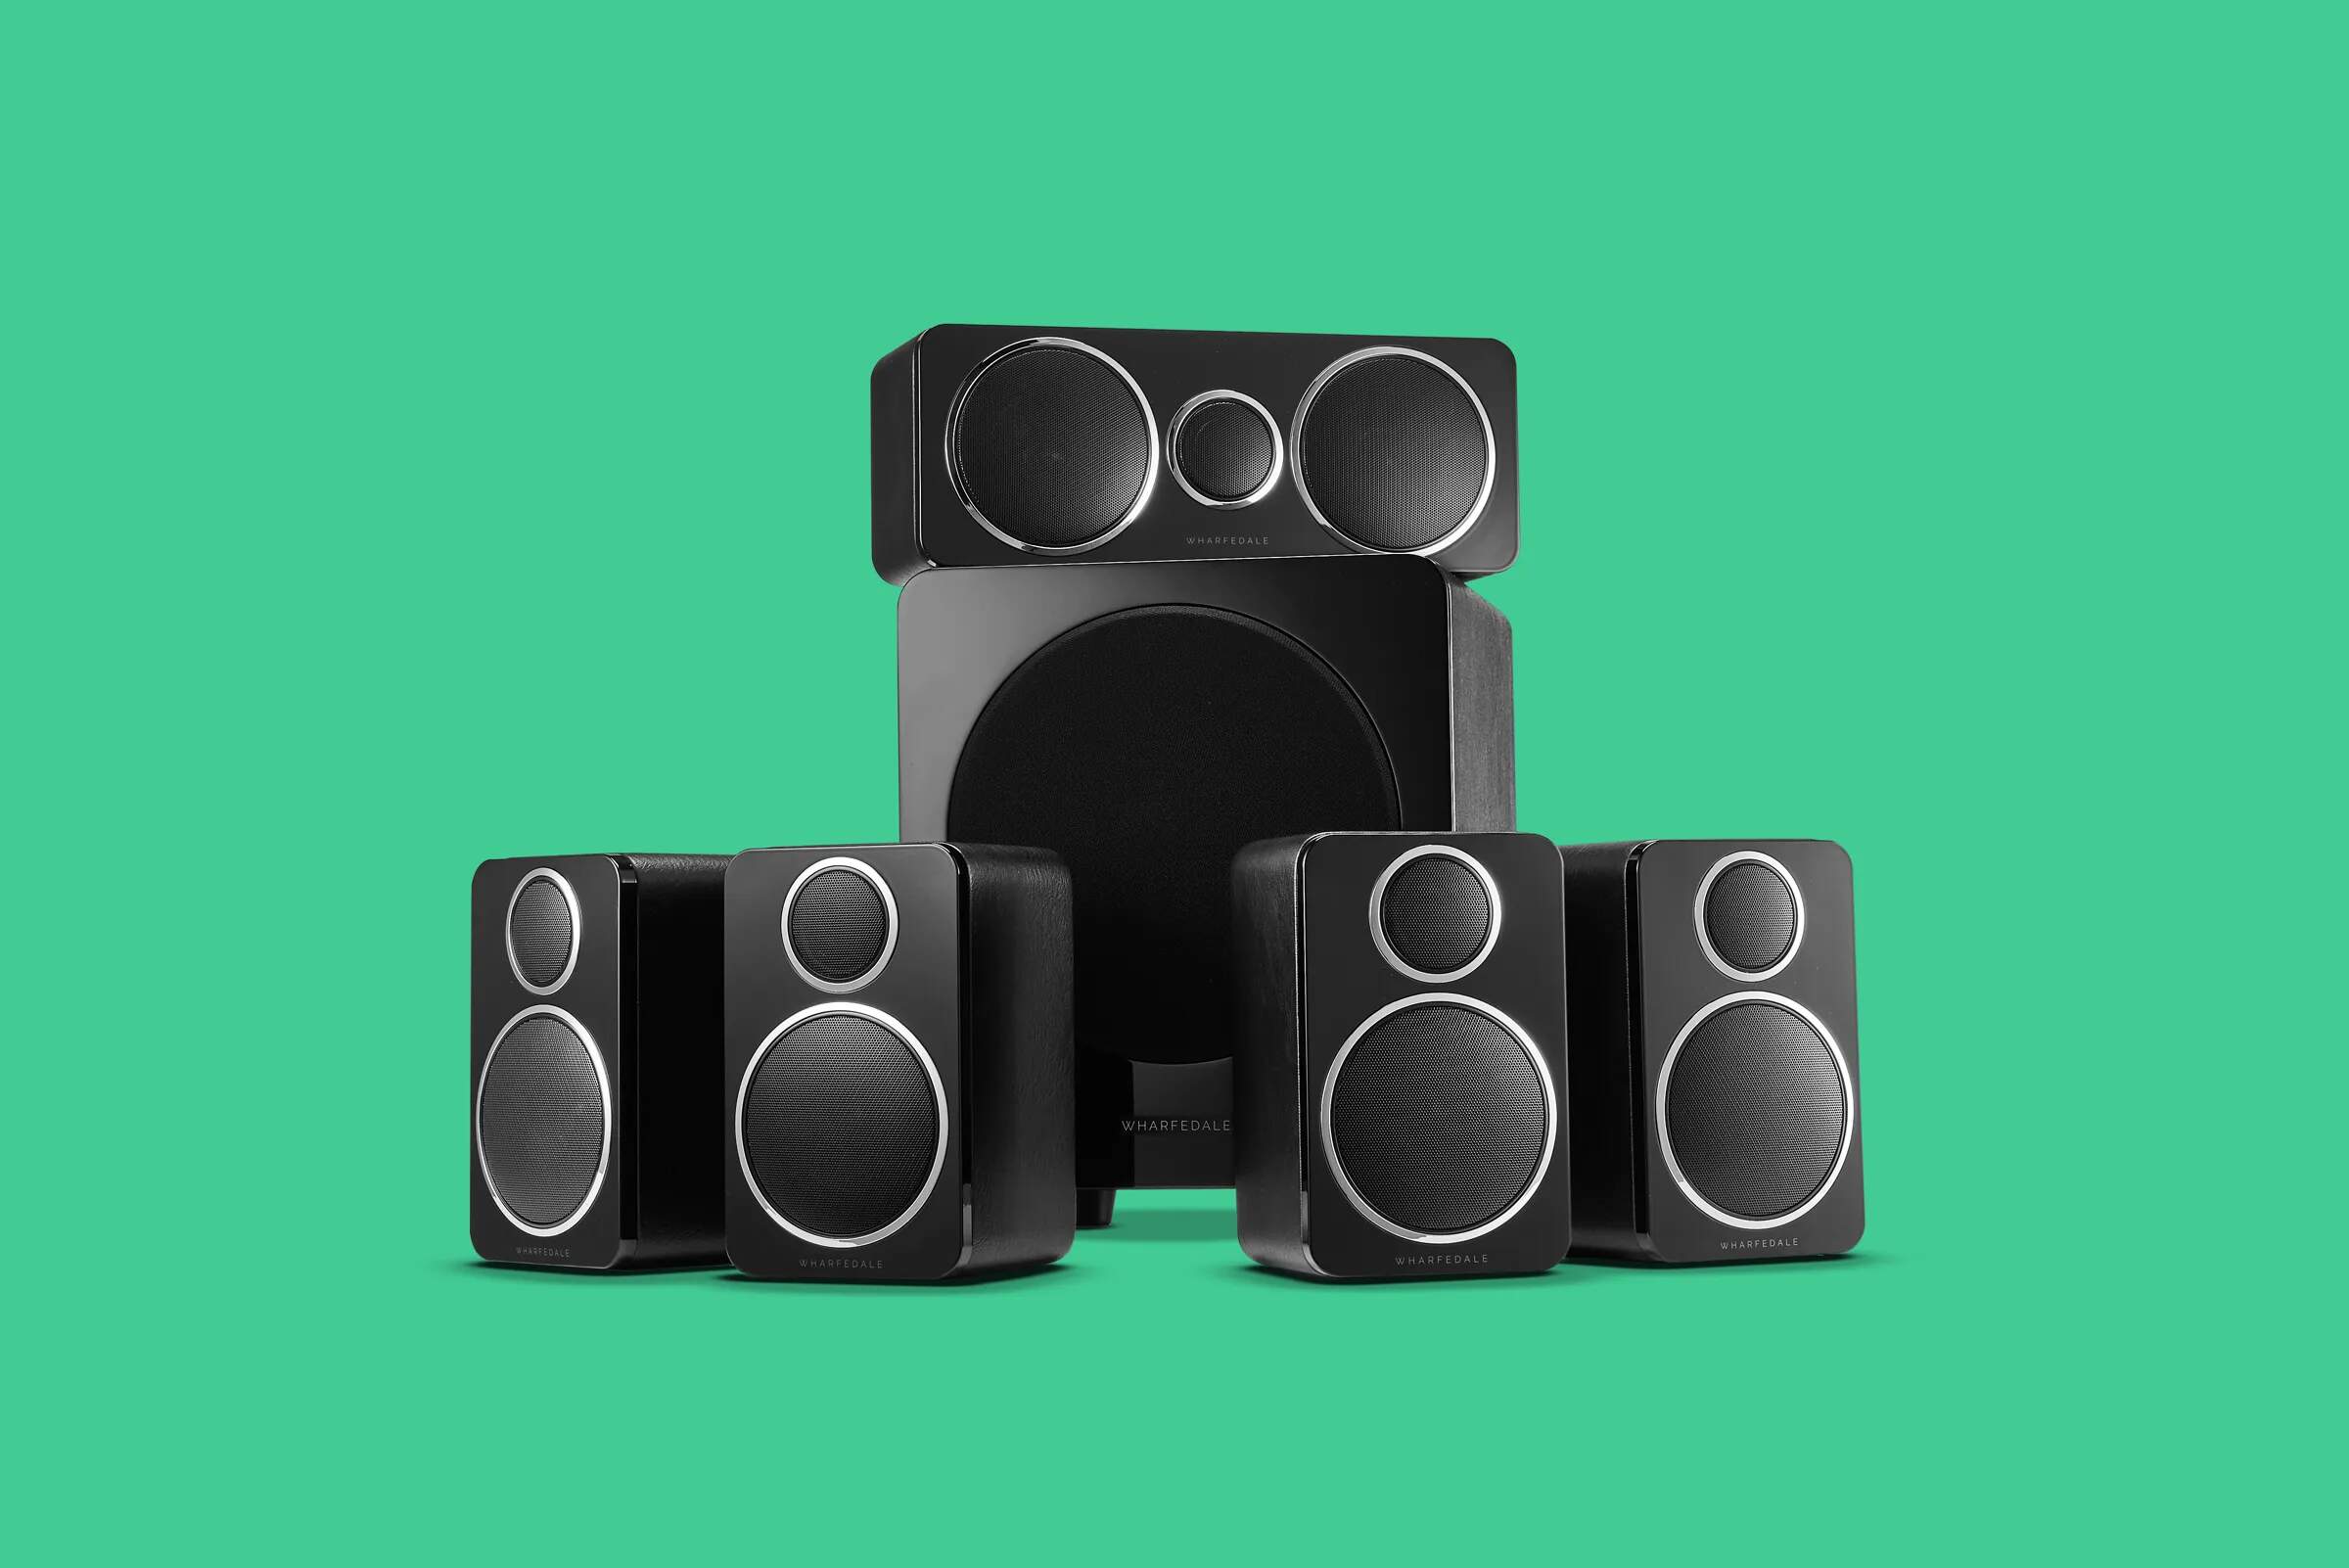
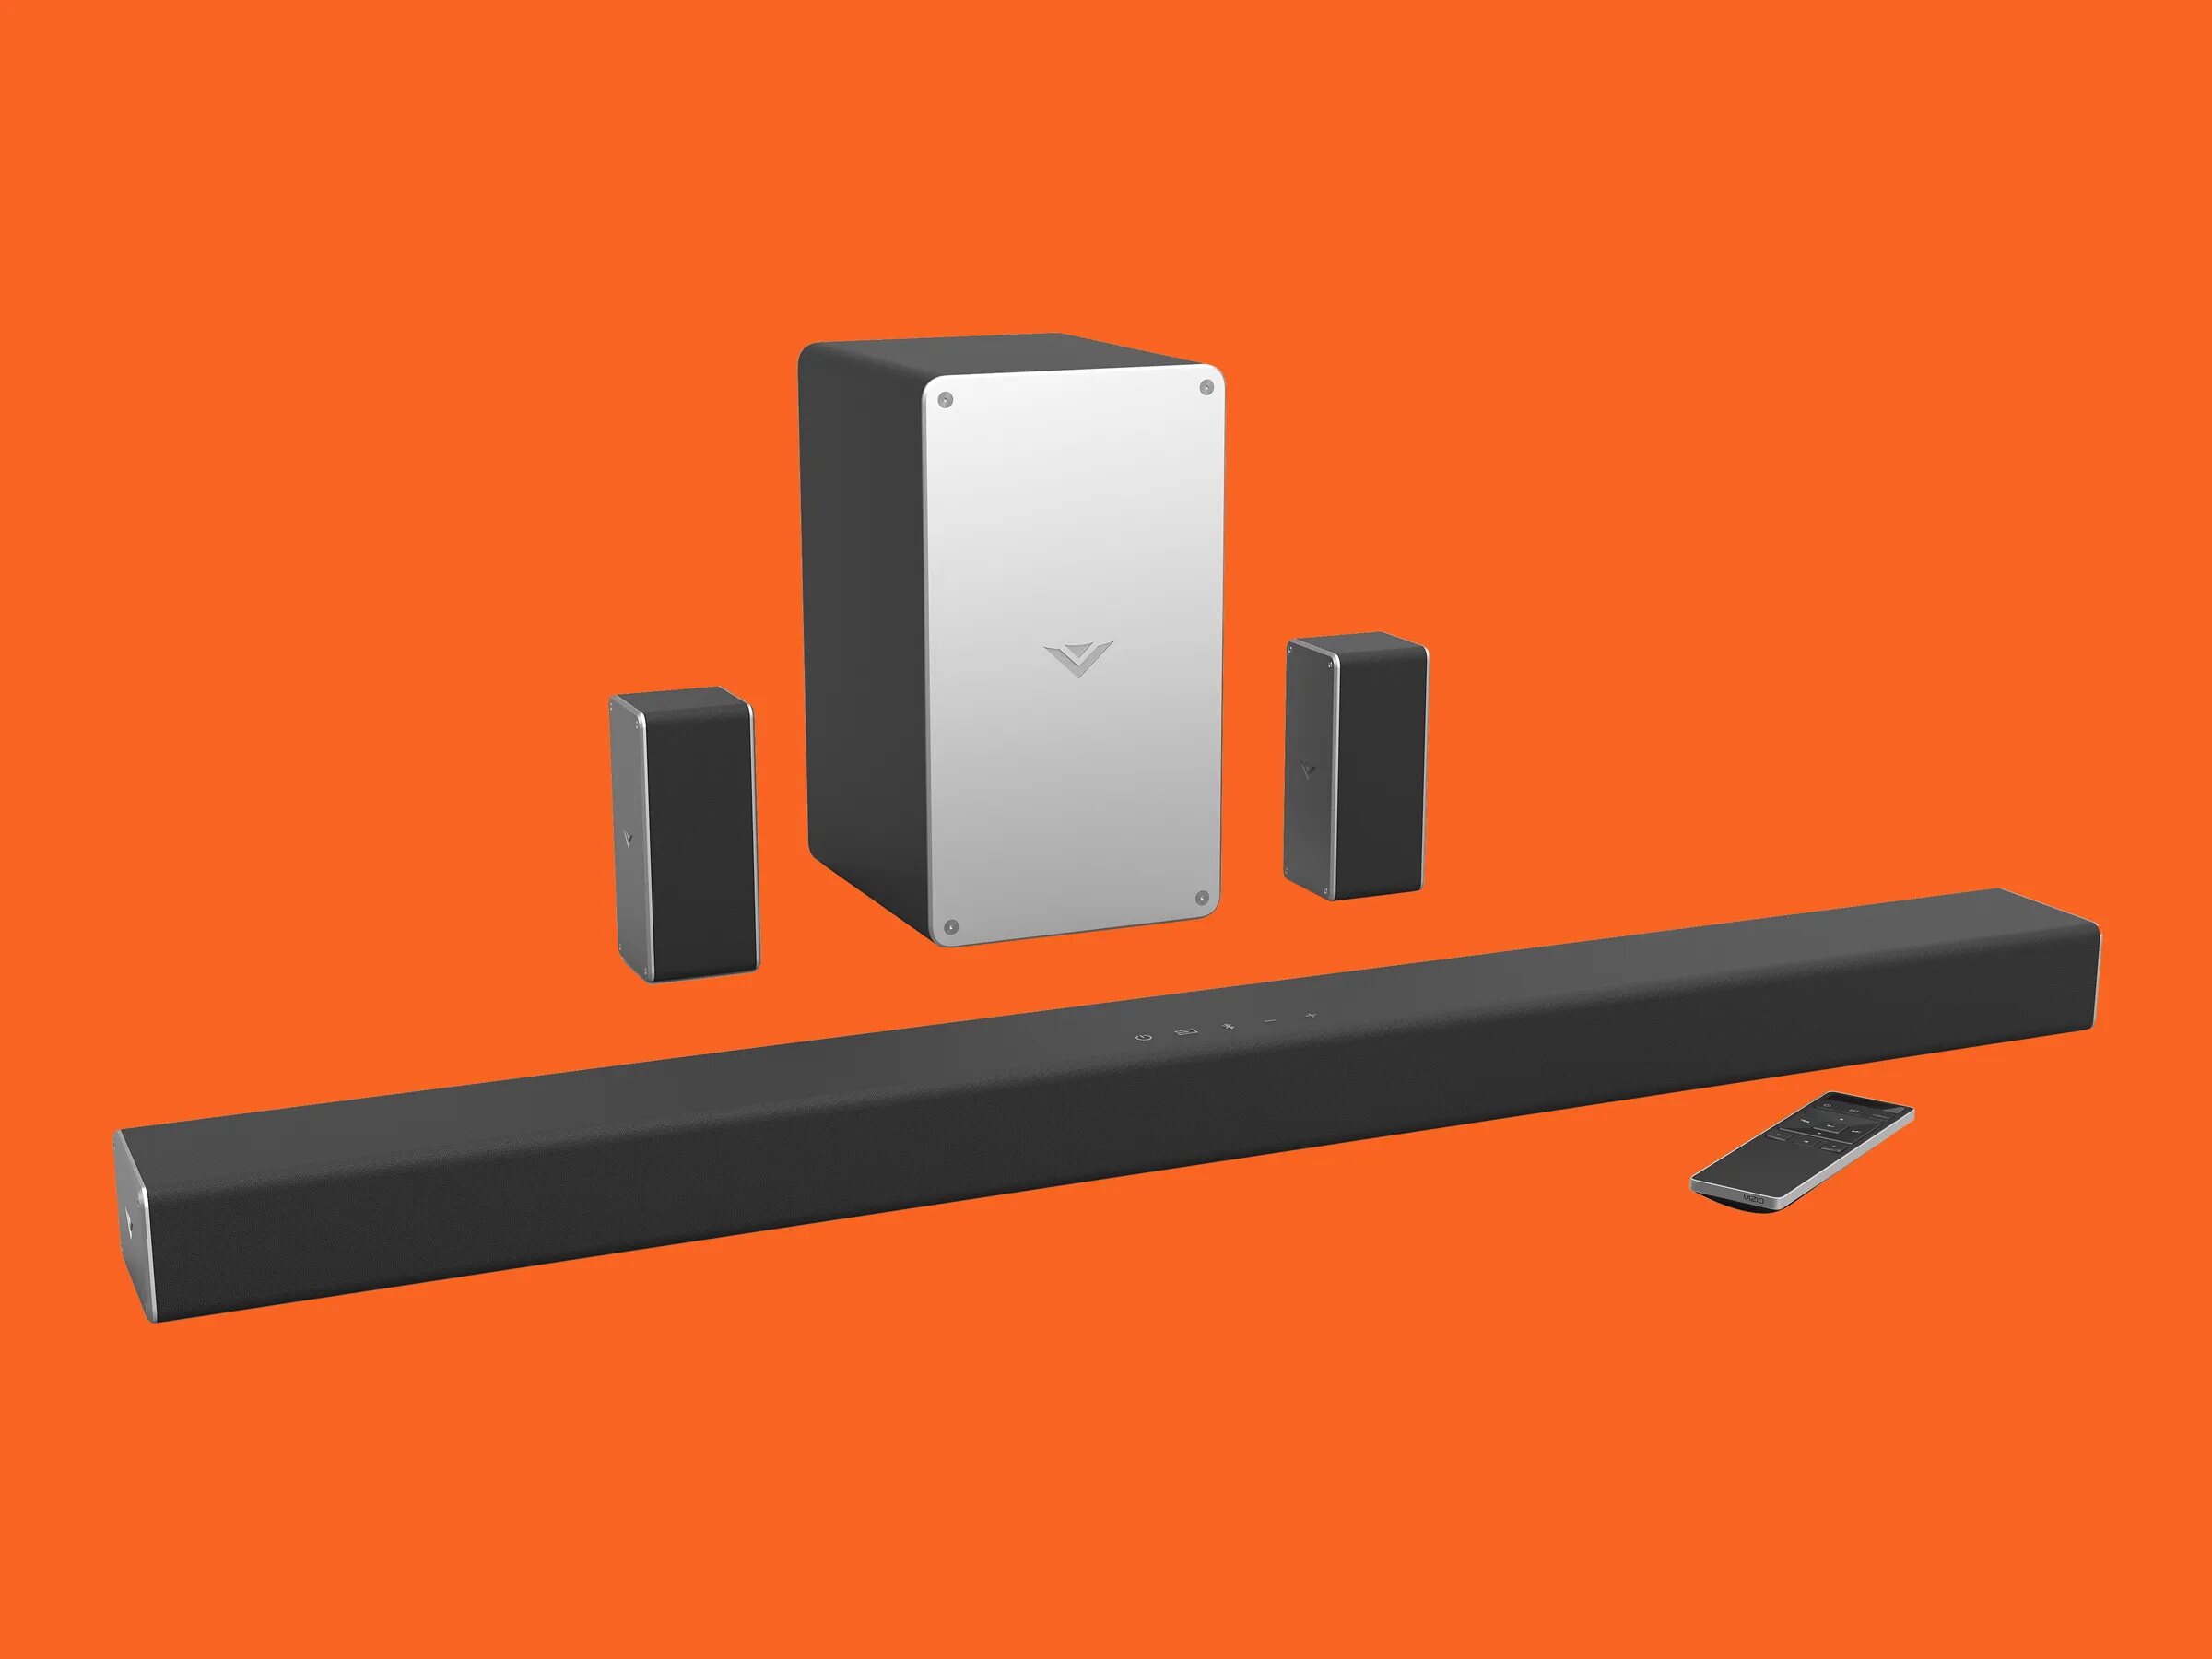
Surround sound systems typically consist of multiple speakers strategically placed around the room. The most common setup is a 5.1 configuration, which includes a center speaker, two front speakers, two surround speakers, and a subwoofer. More advanced setups like 7.1, 9.2, or even Dolby Atmos can include additional speakers for an even more immersive experience. Each of these speakers is responsible for delivering audio from specific channels, ensuring that sounds are accurately reproduced from the intended directions.
In terms of audio channels, the most widely used format is the 5.1 channel system. This configuration includes six channels: front left, front center, front right, surround left, surround right, and the low-frequency effects channel (LFE), which is dedicated to the subwoofer. The front speakers handle most of the audio, providing clear dialogue and sound effects, while the surround speakers create a sense of spaciousness and ambience. The subwoofer adds depth and power to low-frequency sounds, such as explosions, rumbles, and bass-heavy music.
Another popular format is Dolby Atmos, which takes surround sound to the next level by adding height channels. With Dolby Atmos, sounds can be positioned in three-dimensional space, creating a more realistic and immersive audio experience. This format requires additional speakers located above or below the listener to reproduce the height channels, resulting in a more encompassing and lifelike soundstage.
When it comes to choosing a surround sound system, consider your room size and layout. A larger room may benefit from a larger speaker setup, while a smaller room may be better suited for a compact system. Additionally, the acoustic properties of the room can influence the audio quality, so it’s essential to take into account any potential reflections or obstructions that could impact the sound performance.
Understanding the basic concepts of surround sound systems will empower you to make informed decisions when selecting the right setup for your needs. Whether you opt for a traditional 5.1 configuration or experiment with more advanced formats like Dolby Atmos, the goal is to create an immersive audio experience that brings your entertainment to life.
Choosing the Right Room
When setting up a surround sound system, selecting the right room is crucial to achieving optimal audio performance. The size, shape, and layout of the room can greatly impact the sound quality and overall experience. Here are some factors to consider when choosing a room for your surround sound system.
Room Size: The size of the room plays a significant role in determining the effectiveness of your surround sound setup. Larger rooms provide more space for sound waves to disperse, resulting in a more spacious and immersive audio experience. However, smaller rooms can still yield impressive results with the right speakers and placement. Take measurements of the room’s dimensions to ensure that it can accommodate the size of speakers and provide adequate space for listening positions.
Acoustic Properties: Consider the acoustic properties of the room, such as the amount of sound reflection and reverberation. Hard surfaces, like bare walls or tiled floors, can cause sound waves to bounce and create unwanted echoes. To mitigate this, you can use acoustic treatments such as curtains, carpets, and sound-absorbing panels to improve the sound quality and reduce reflections.
Furniture and Obstructions: Take note of the furniture and other objects in the room that may obstruct the sound waves. Large, bulky furniture can block or reflect the sound, affecting its distribution and overall impact. It’s important to position the speakers and seating areas in such a way that obstacles are minimized, allowing the sound to propagate freely around the room.
Seating Positions: Consider the seating positions within the room. Ideally, the seats should be arranged in the center of the room so that the surround sound effect is evenly distributed. Placing the seats too close to the walls or too far away from the speakers can affect the balance and spatial immersion of the audio.
Wiring and Power Outlets: Take into account the positioning of power outlets and wiring within the room. You’ll need access to power outlets for your speakers, subwoofer, receiver, and other components. Additionally, ensure that there are enough wall outlets or floor access points for running speaker wires and cables without causing tripping hazards or compromising aesthetic appeal.
Keep in mind that while it’s ideal to choose a room that meets all the criteria, you can still achieve good audio performance with some adjustments and optimization. Experiment with speaker placement, acoustic treatments, and seating arrangements to find the best configuration for your specific room.
By carefully considering the size, acoustics, obstructions, seating positions, and wiring options in your chosen room, you can create an environment that maximizes the immersive potential of your surround sound system. With the right room, your audio experience will be elevated to new heights, allowing you to truly feel as if you’re part of the action.
Audio Sources for Surround Sound Systems
When setting up your surround sound system, it’s essential to consider the audio sources that you’ll be connecting to your system. Having a variety of audio sources allows you to enjoy a wide range of content in immersive surround sound. Here are some common audio sources for surround sound systems:
Television (TV): Your television is likely to be the primary audio source for your surround sound system. Whether you’re watching movies, TV shows, or streaming content, connecting your TV to your surround sound system allows you to enjoy immersive sound effects and clear dialogue. Most modern TVs come equipped with HDMI ARC (Audio Return Channel) or optical outputs that can transmit audio to your surround sound system.
Blu-ray/DVD Players: If you’re a movie enthusiast, a Blu-ray or DVD player is a must-have audio source for your surround sound system. These players allow you to watch movies in high-definition and surround sound formats, providing an immersive cinematic experience. Connect your player to your surround sound system using HDMI or optical cables to ensure optimal audio quality.
Gaming Consoles: Gaming consoles, such as PlayStation, Xbox, or Nintendo Switch, can deliver captivating audio experiences. Many modern games feature immersive sound design, and connecting your console to a surround sound system enhances the gaming experience by immersing you in the game’s audio environment. HDMI connections are the most common and preferred choice for connecting gaming consoles to surround sound systems.
Streaming Devices: Streaming devices like Roku, Apple TV, or Amazon Fire Stick are popular for streaming movies, TV shows, and music from various online platforms. These devices typically offer support for surround sound formats such as Dolby Digital or Dolby Atmos. Connect your streaming device to your surround sound system using HDMI or optical cables to enjoy immersive audio while streaming your favorite content.
Music Players: If you enjoy listening to music, consider connecting your music player to your surround sound system. Whether it’s a CD player, MP3 player, or streaming music from your smartphone or tablet, accessing your music library through your surround sound system allows you to enjoy high-quality sound reproduction and experience your favorite songs in a whole new way.
It’s important to ensure that your audio sources are compatible with your surround sound system. Check the audio output capabilities of your devices and make sure they support the necessary audio formats, such as Dolby Digital or DTS. HDMI connections are generally recommended for the best audio quality, as they can carry both high-definition video and multi-channel audio signals.
By connecting a variety of audio sources to your surround sound system, you’ll have the flexibility to enjoy a wide range of content in immersive and realistic audio. Whether you’re watching movies, playing games, or listening to music, surround sound will enhance your entertainment experience and bring it to life.
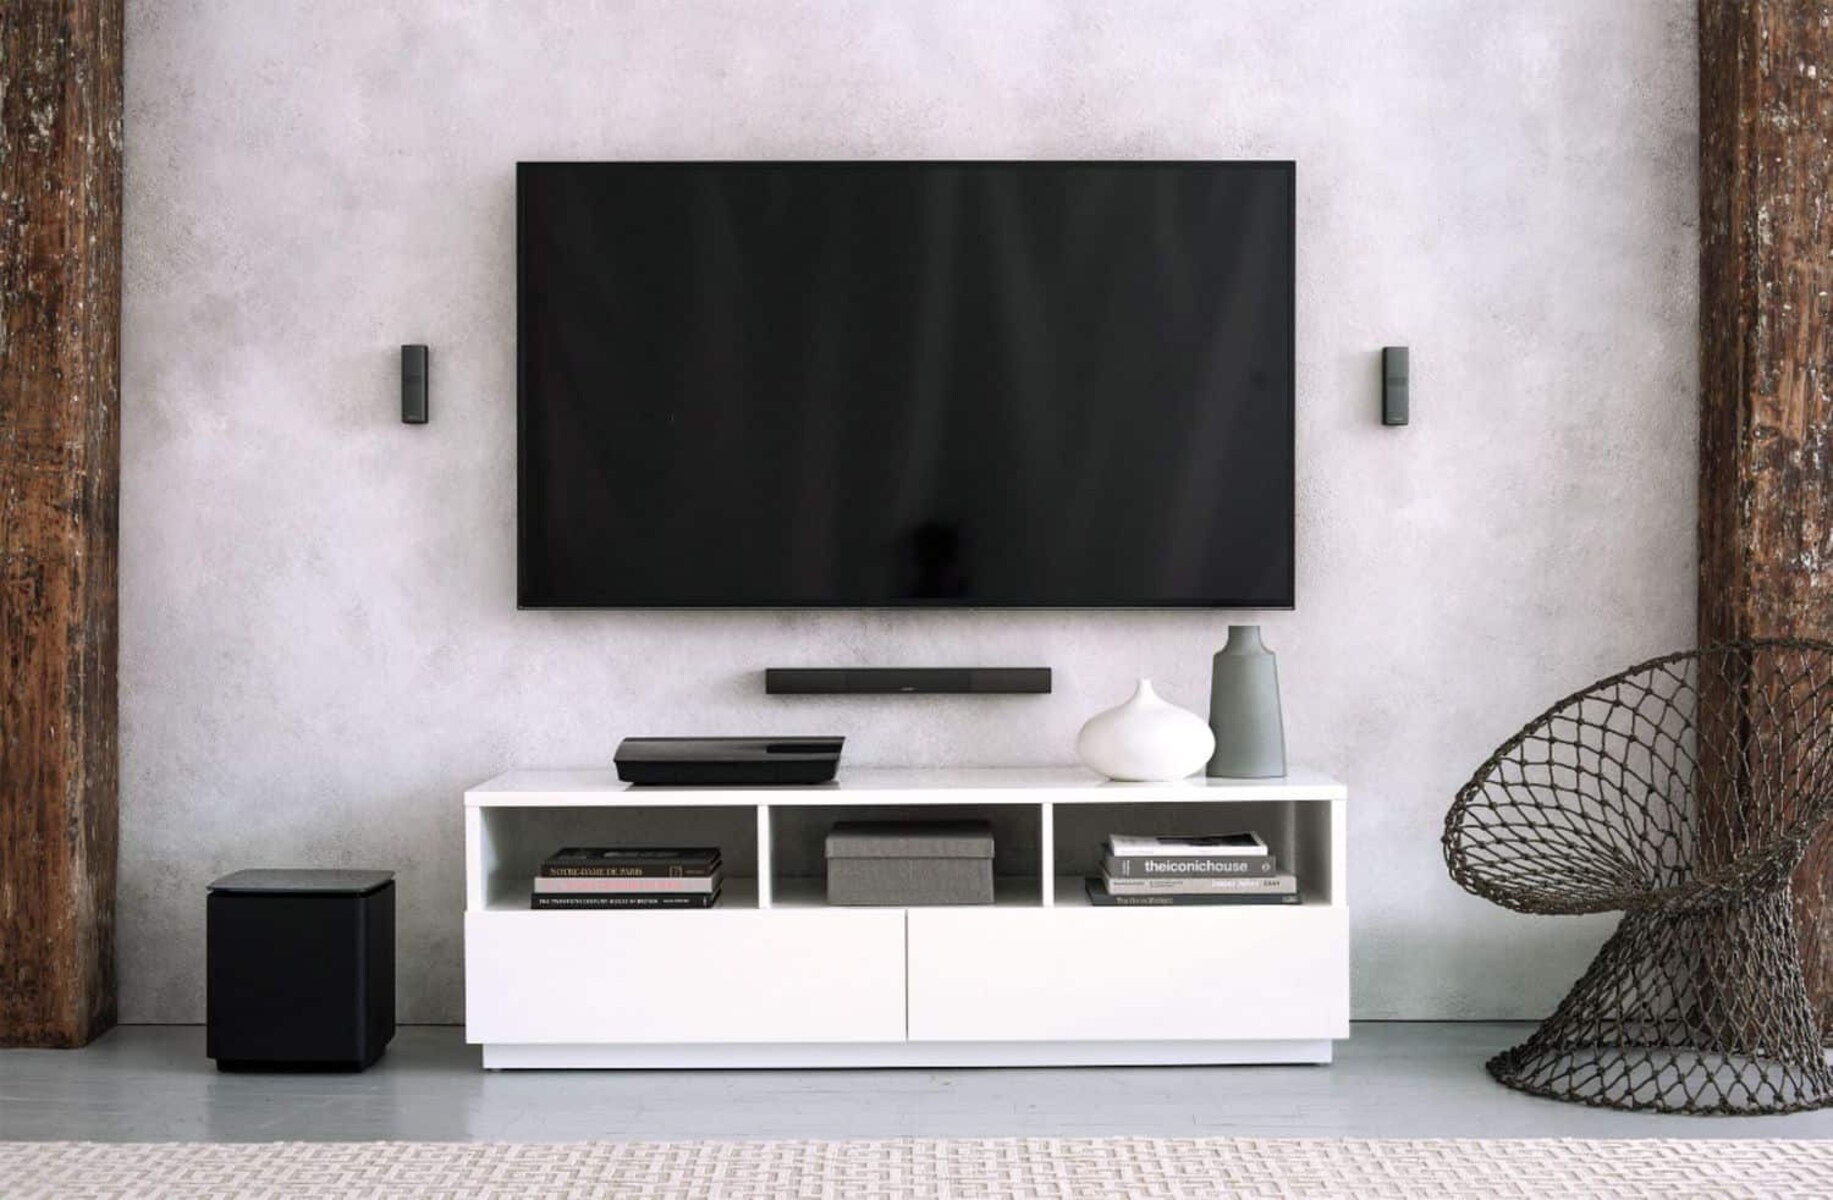
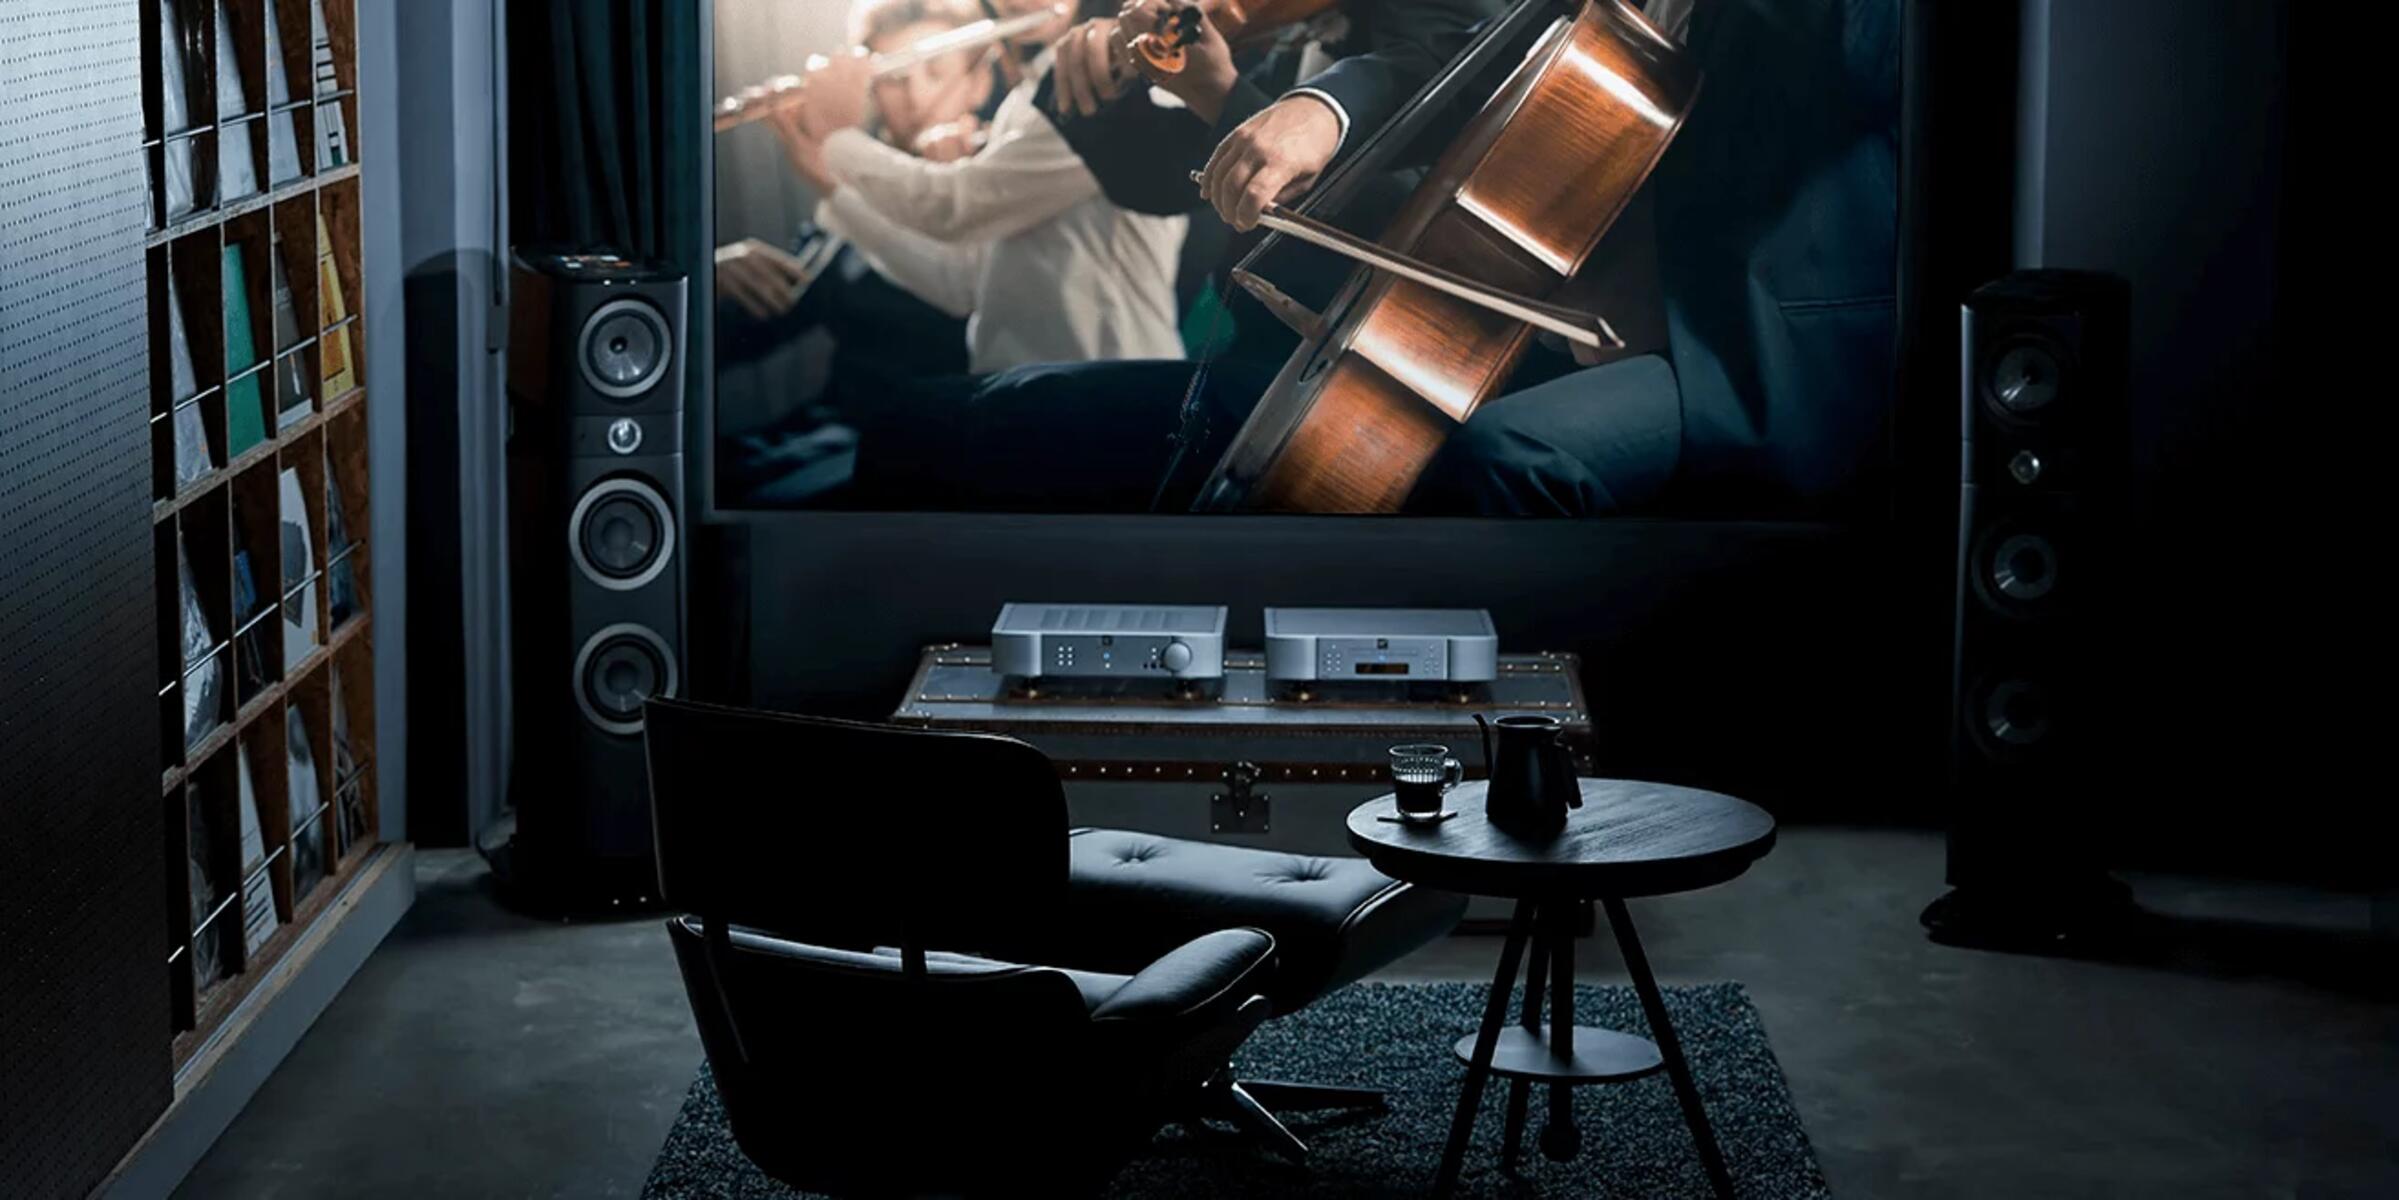
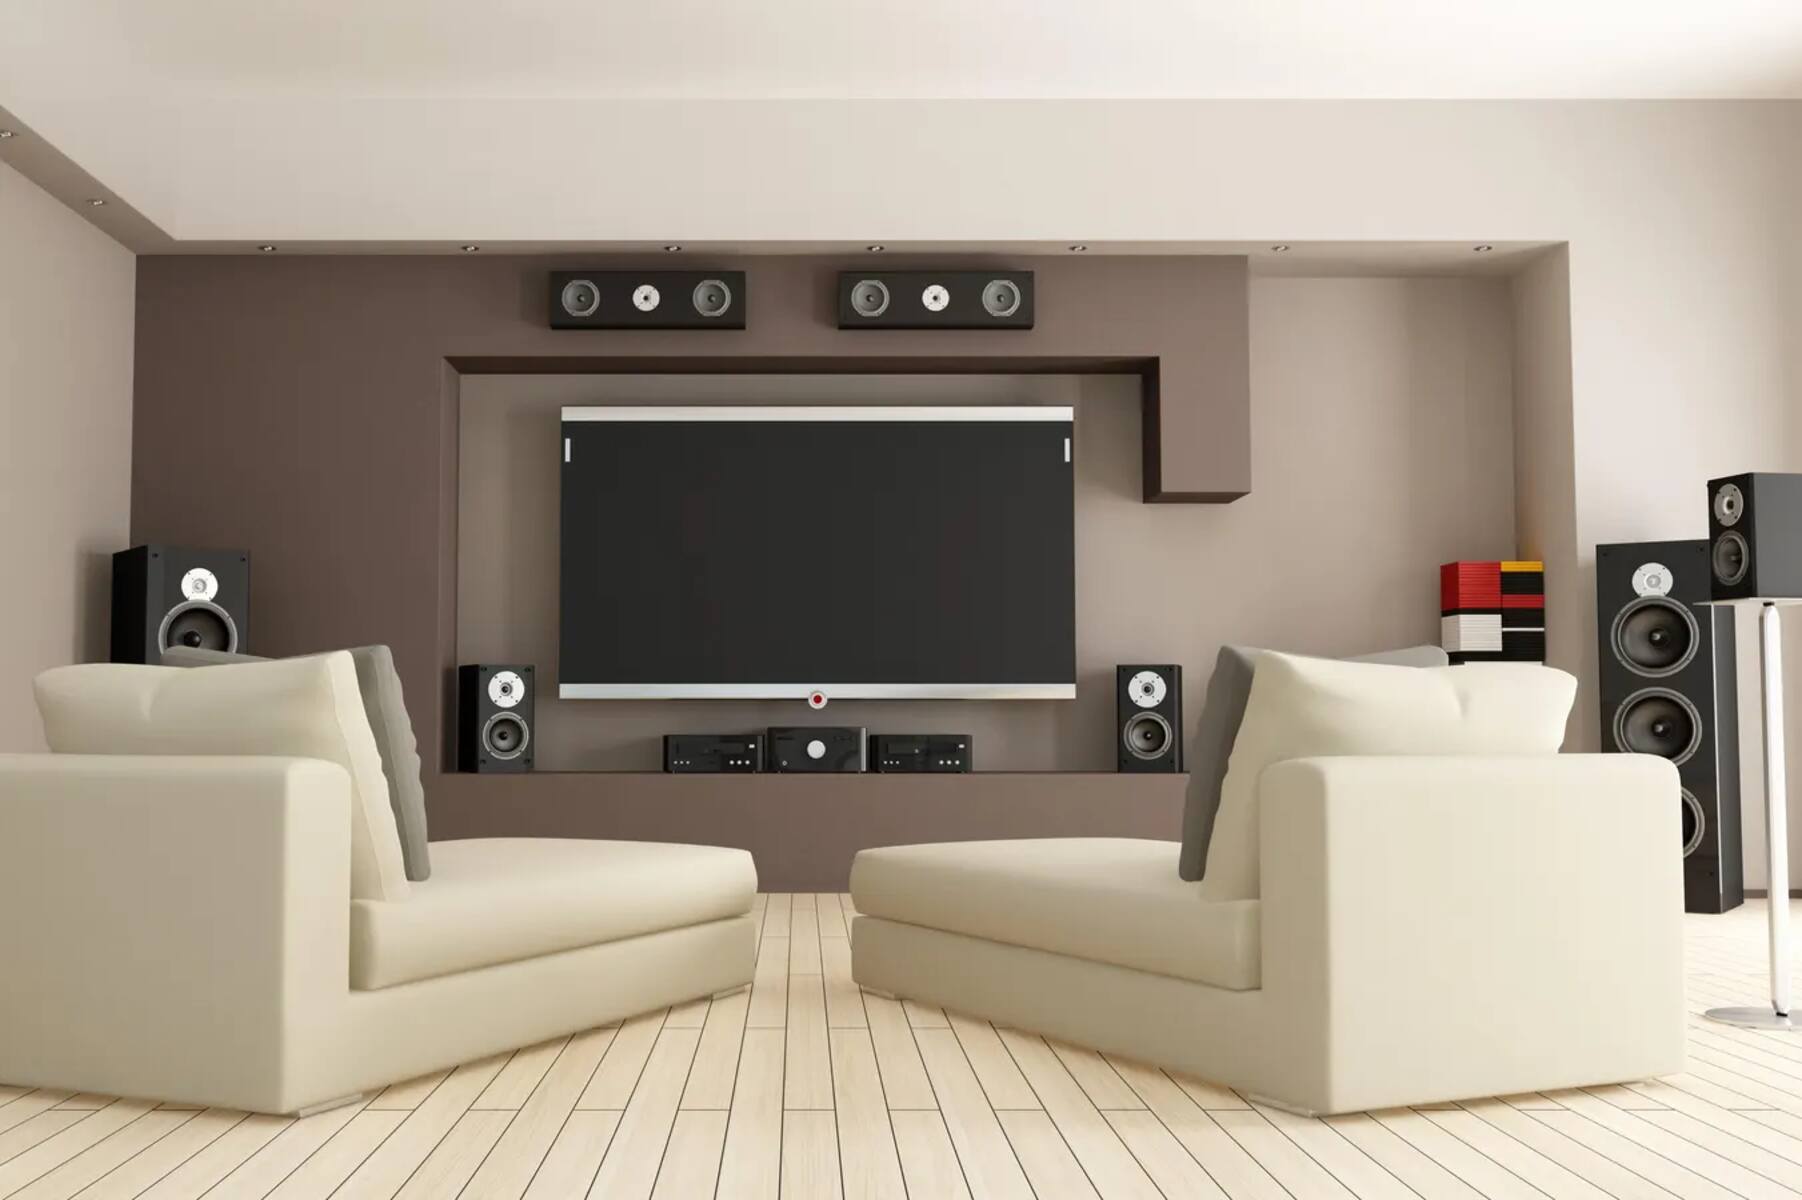
Speakers and Placement
The speakers are the heart and soul of your surround sound system, responsible for delivering immersive and accurate audio. Choosing the right speakers and positioning them correctly is essential for creating a captivating listening experience. Here’s a guide to understanding the different types of speakers and their ideal placement.
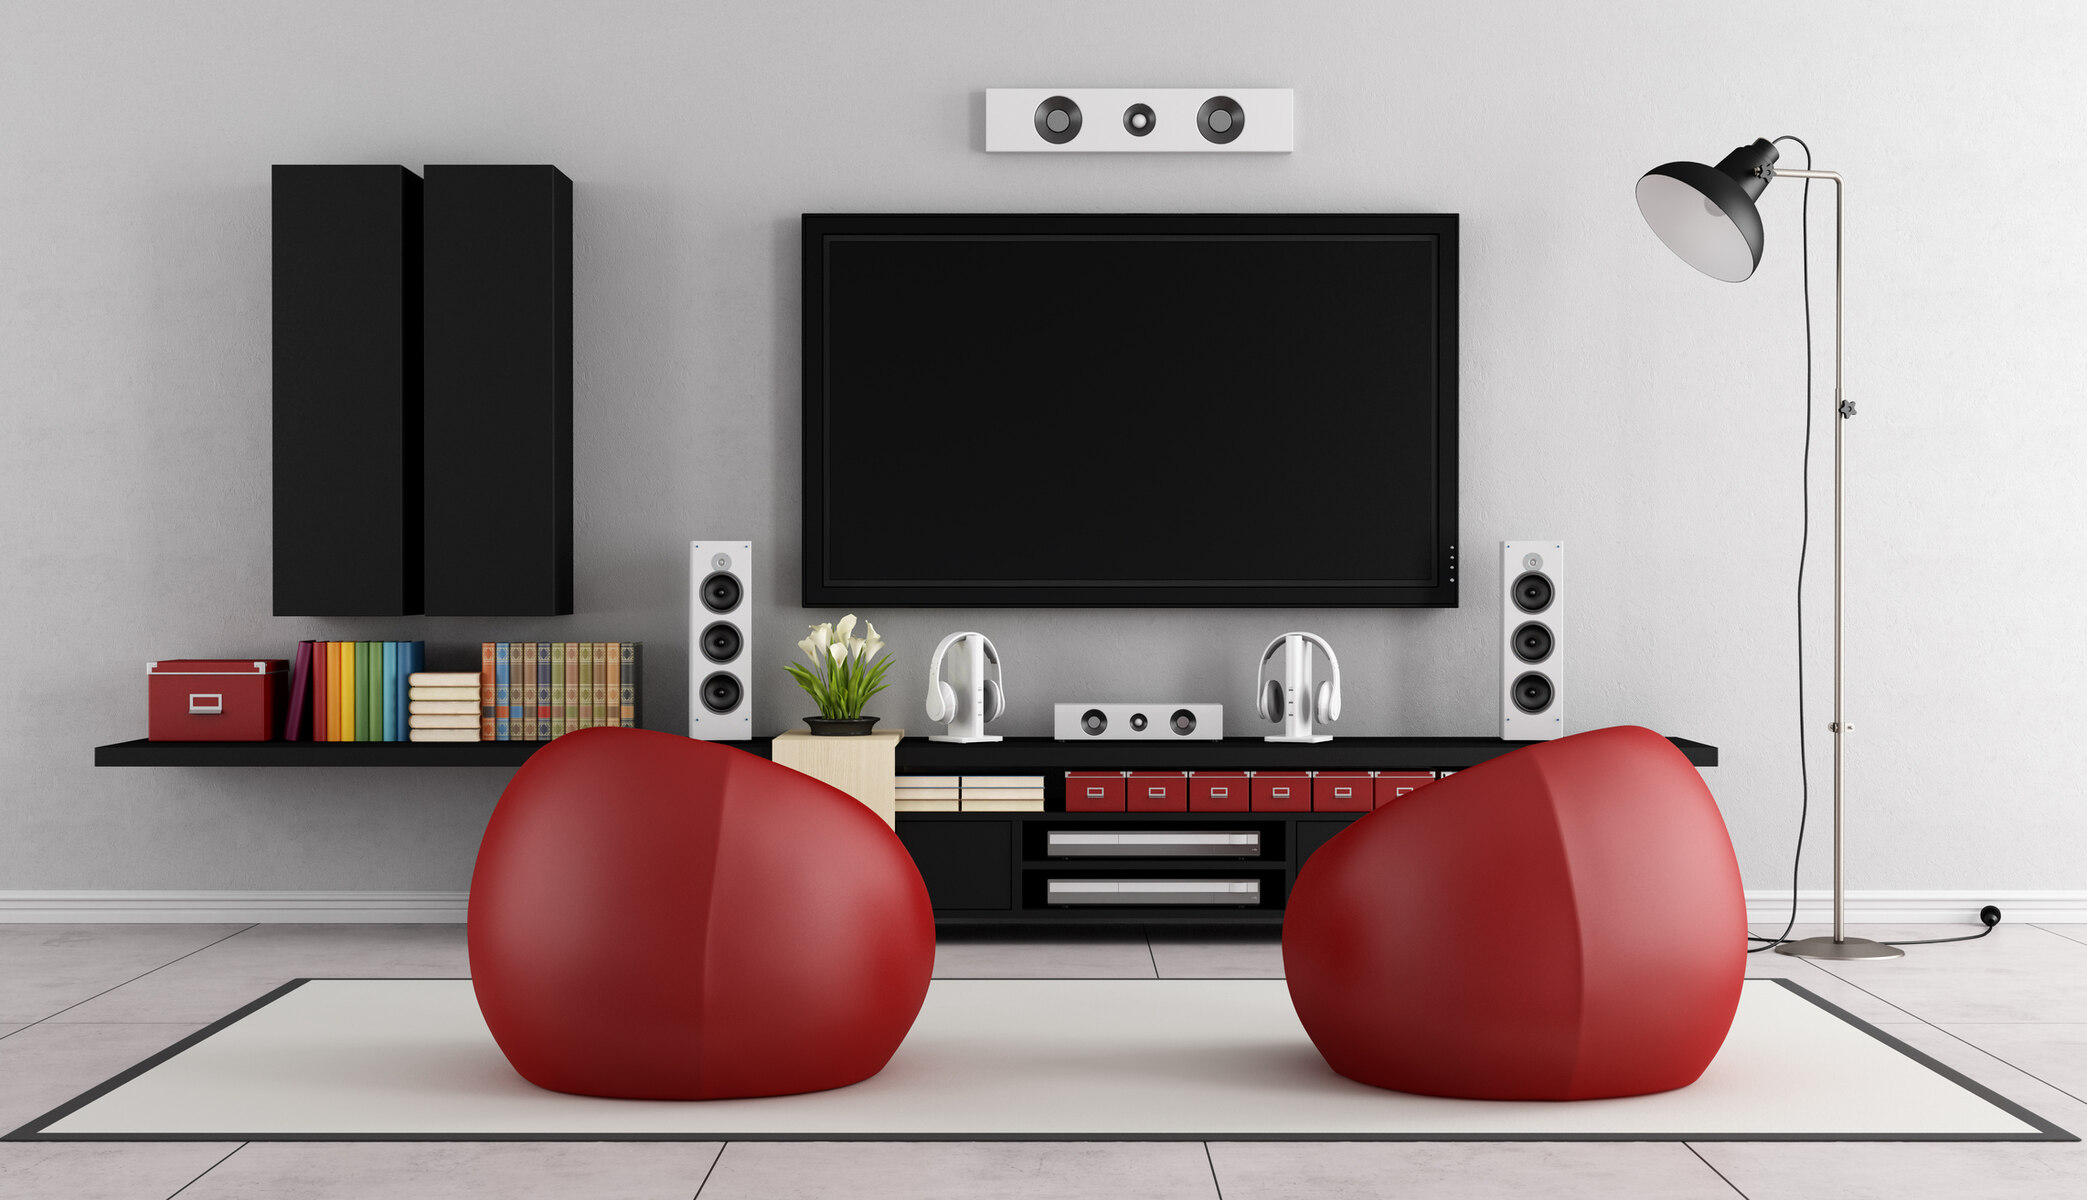
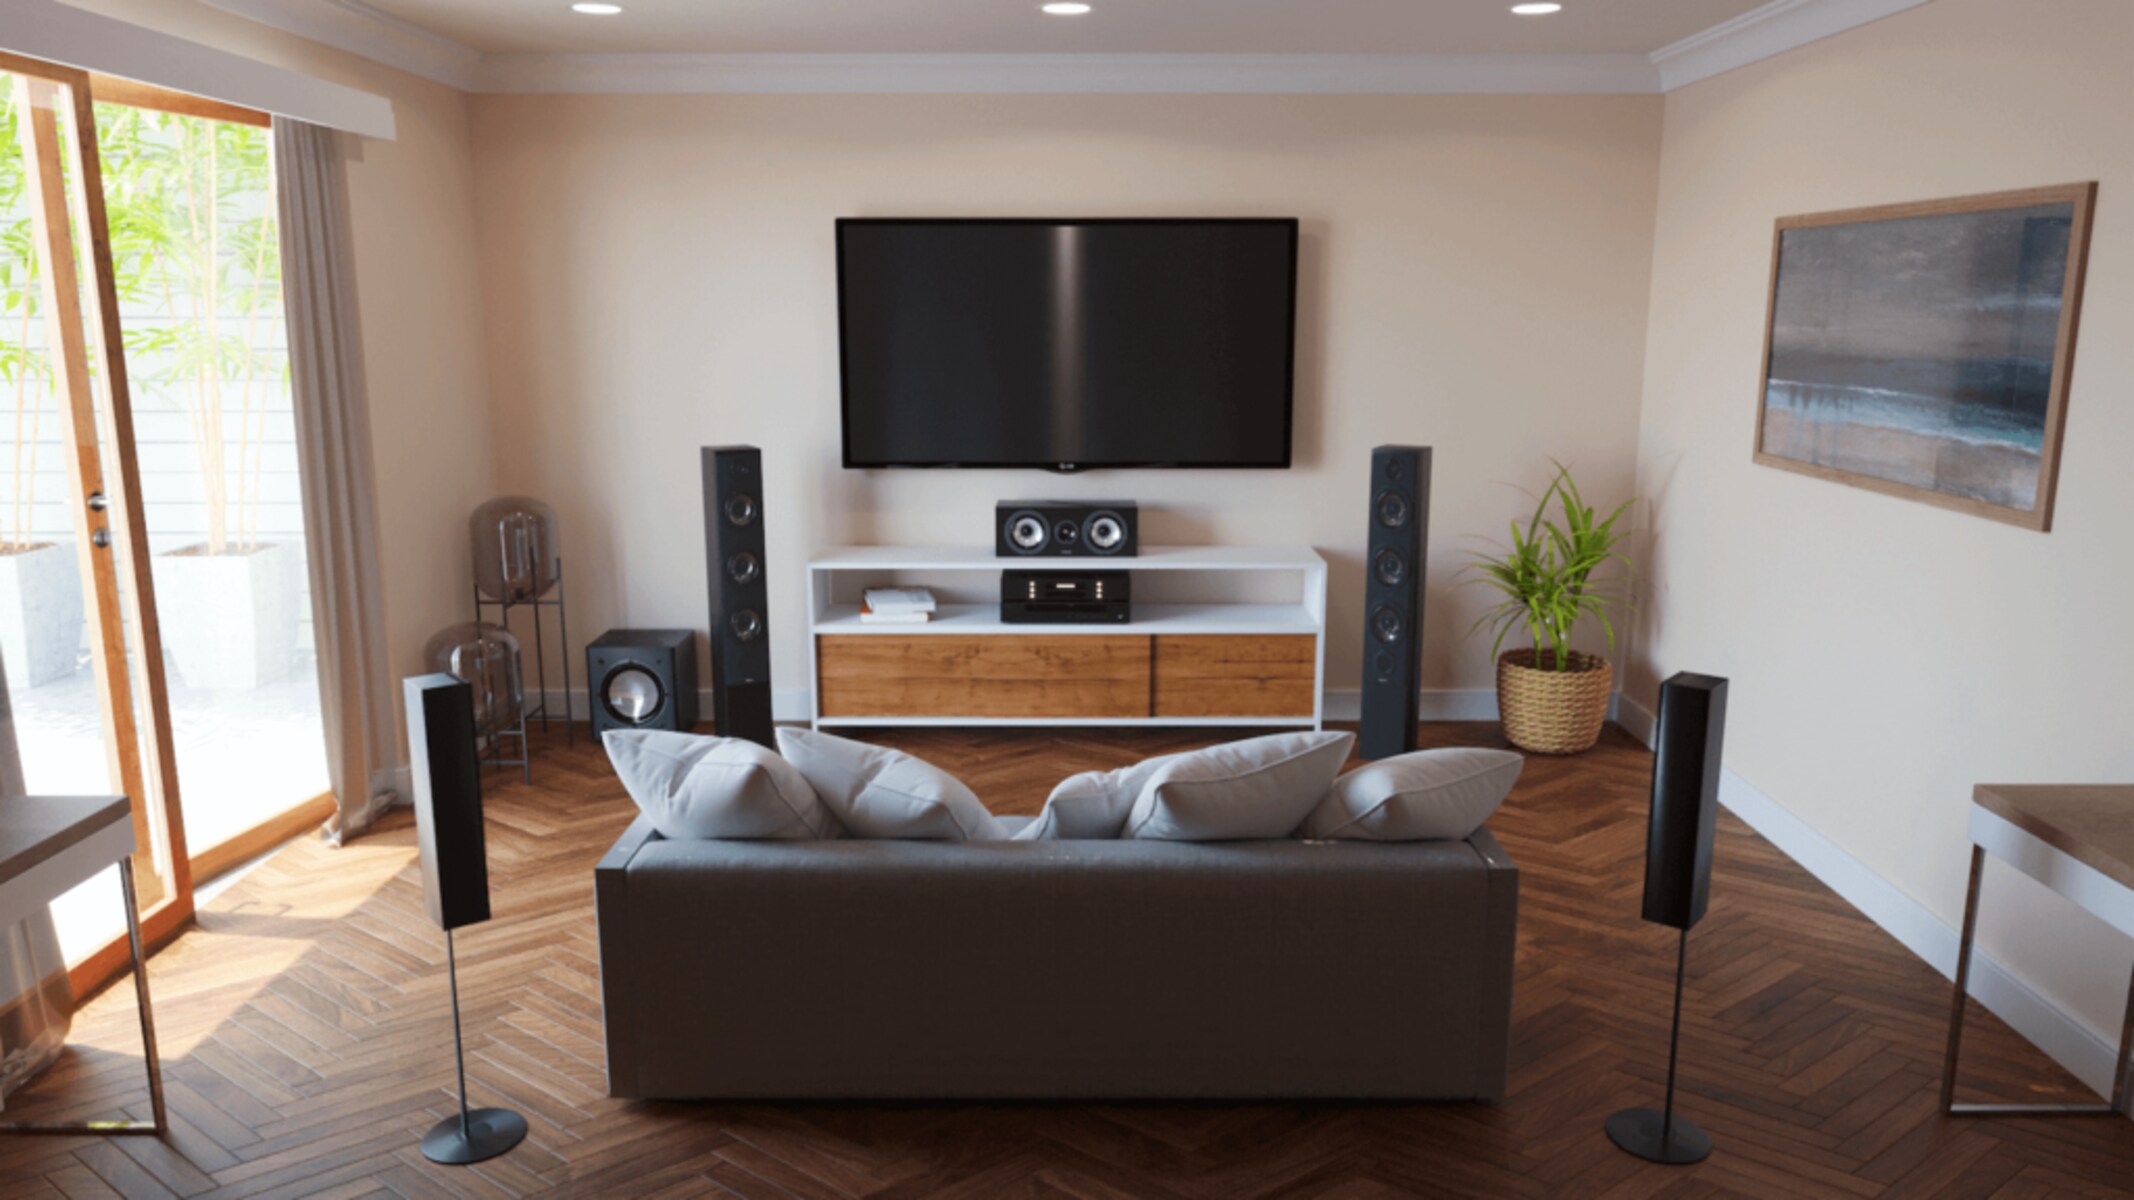
Front Speakers: The front speakers, often referred to as the left and right channels, are responsible for handling most of the audio, including dialogue, music, and sound effects. These speakers should be positioned on either side of the television or screen, ideally at ear level when seated. Properly aligned front speakers create a solid soundstage and help anchor the audio in the front of the room.
Center Channel Speaker: The center channel speaker is dedicated to reproducing dialogue and other center-panned audio. It should be placed either above or below the television or screen, aligned with the front left and right speakers. Positioning the center speaker at the same height as the front speakers ensures clear and accurate sound localization, enhancing dialogue intelligibility.
Surround Speakers: The surround speakers create a sense of spaciousness and ambiance by reproducing sounds that are meant to come from the sides or behind the listener. Ideally, they should be positioned to the sides or slightly behind the listening area, at ear level or slightly above. This placement helps create an immersive audio experience and enhances the overall surround sound effect.
Subwoofer: The subwoofer is responsible for reproducing low-frequency sounds, adding depth and impact to explosions, rumbling effects, and bass-heavy music. It can be placed anywhere in the room, as low-frequency sounds are non-directional and can propagate evenly throughout the space. Experiment with placement options to achieve the best balance between bass response and room acoustics.
When positioning your speakers, consider the room layout and furniture placement. Aim to create an equilateral triangle between the front speakers and the primary listening position, with the center speaker at the midpoint. This configuration helps achieve a balanced and cohesive audio experience.
Additionally, take into account any potential obstructions or reflection points that may affect the sound quality. Avoid placing speakers too close to walls or corners, as this can result in boomy or uneven bass response. Use speaker stands or wall mounts to position the speakers at the recommended height and angle for optimal sound dispersion.
Speaker placement can significantly impact the overall audio quality and immersion of your surround sound system. Take the time to experiment with speaker positions, fine-tuning their placement and angling to achieve the best possible soundstage and imaging.
Remember that every room is different, and factors such as room size, furniture, and acoustics can influence the speaker placement. Trust your ears and make adjustments until you find the sweet spot that creates a captivating and enveloping audio experience.
Receiver and Amplification
The receiver and amplification components are essential for the functioning and performance of your surround sound system. They act as the control center and power source, respectively, ensuring that audio signals are properly decoded and amplified. Let’s explore the key aspects of choosing a receiver and amplification setup for your surround sound system.
Receiver: The receiver is the central hub of your surround sound system. It receives audio signals from your audio sources, decodes them, and distributes them to the appropriate speakers. When selecting a receiver, consider the following:
- Audio Formats: Ensure that the receiver supports the audio formats you plan to use, such as Dolby Digital, DTS, or Dolby Atmos. This ensures compatibility for future upgrades and ensures optimal playback of audio content.
- Number of Channels: The number of channels supported by the receiver corresponds to the number of speakers in your surround sound system. For example, a 5.1 system requires a receiver that supports at least 5 channels and a subwoofer output. Consider your desired speaker configuration when choosing a receiver.
- Connectivity Options: Look for a receiver with a variety of connectivity options, such as HDMI, optical, and analog inputs. This allows you to connect multiple audio sources simultaneously and ensures flexibility for future expansion.
- Power Output: Consider the power output of the receiver to ensure it is sufficient to drive your speakers. Higher wattage outputs provide more headroom for dynamic and impactful sound reproduction.
- Features: Additional features such as Bluetooth connectivity, Wi-Fi capability, built-in streaming apps, and room calibration systems can enhance the overall functionality and convenience of your receiver.
Amplification: Amplifiers play a crucial role in driving the speakers in your surround sound system. They provide the necessary power to reproduce sound accurately and at high volumes. Invest in amplifiers that match the power requirements of your speakers and have low distortion ratings. This ensures clean and distortion-free audio playback.
Most receivers come with built-in amplifiers, which eliminate the need for a separate amplifier unit. The power output of the built-in amplifiers should be sufficient to drive your speakers effectively. However, if you have high-power speakers or prefer more control over your amplification, consider using external amplifiers for improved performance.
Proper receiver and amplification setup ensures that your surround sound system can deliver the full potential of your speakers, providing a detailed and immersive audio experience. Choose a receiver that meets your specific requirements and pairs it with amplifiers that can handle the power demands of your speakers.
Take your time to research and compare different receiver and amplifier models, considering factors such as audio formats, connectivity options, power output, and available features. By investing in a reliable and high-quality receiver and amplification setup, you can enjoy the full impact of your surround sound system and immerse yourself in an audio experience that truly captivates.
Connecting Your Surround Sound System
Properly connecting your surround sound system is essential to ensure that all components work together seamlessly and deliver the best audio experience possible. Follow these steps to connect your surround sound system:
Step 1: Gather the Necessary Cables: Ensure you have the correct cables for connecting your audio sources, speakers, and receiver. Common cables include HDMI cables, optical cables, and speaker wires. Check the user manuals for your devices to determine the recommended cable types.
Step 2: Position Your Devices: Determine the optimal placement for your devices, including your TV, audio sources, receiver, and speakers. Consider cable lengths and connectivity options when positioning your devices. Place your speakers according to the recommended speaker placement guidelines mentioned earlier.
Step 3: Connect Your Audio Sources: Use the appropriate cables to connect your audio sources, such as your TV, Blu-ray player, gaming console, or streaming device, to the corresponding inputs on your receiver. HDMI cables are typically recommended for the best audio and video quality. If using an optical cable, connect the optical output of the source device to the optical input on the receiver.
Step 4: Connect the Speakers: Connect each speaker to the corresponding speaker output terminals on the receiver. Ensure that the positive (+) and negative (-) terminals on the receiver match the corresponding markings on the speaker wires. Properly secure the connections to prevent loose or intermittent audio.
Step 5: Connect the Subwoofer: If using a powered subwoofer, connect it to the dedicated subwoofer output on the receiver using an RCA cable. If using a passive subwoofer, connect it to the subwoofer or front speaker terminals on your receiver, following the specific instructions provided by the subwoofer manufacturer.
Step 6: Power On and Configure: Power on all your devices, starting with the audio sources, then the receiver, and finally the TV. Access the receiver’s setup menu to configure the speaker settings, audio preferences, and any room calibration features. Follow the on-screen instructions or consult the receiver’s manual for guidance on setting up these options.
Step 7: Test and Fine-tune: Play audio content and test each speaker to ensure that sound is coming from the correct channels and that all speakers are functioning properly. Use test tones or audio calibration tools provided by the receiver to fine-tune the speaker levels and distances for an optimal listening experience.
Remember to consult the user manuals provided with your devices for specific instructions and troubleshooting tips. Following these steps will help you establish the necessary connections and set up your surround sound system for optimal audio performance.
Take your time to organize and hide the cables for a clean and tidy setup. Use cable management options such as cable ties, conduits, or cable raceways to keep the cables organized and out of sight, creating a clutter-free environment.
By properly connecting your surround sound system, you can enjoy a seamless and immersive audio experience that enhances your favorite movies, games, and music.
Calibration and Setup
Once you have physically connected all the components of your surround sound system, it’s time to calibrate and fine-tune the settings to optimize the audio performance. Calibration ensures that the speakers are correctly balanced, the sound levels are adjusted, and the surround sound effect is properly configured. Follow these steps to calibrate and set up your surround sound system:
Step 1: Access the Receiver’s Setup Menu: Use the remote control or front panel on the receiver to access the setup menu. This menu allows you to adjust various audio settings and perform the necessary calibration.
Step 2: Speaker Configuration: In the setup menu, select the option to configure your speakers. Verify that the receiver recognizes the correct number of speakers and their respective positions (front, center, surround). Make adjustments if necessary.
Step 3: Manual Speaker Level Adjustments: Some receivers offer the option to manually adjust the output level of each speaker. Use a sound level meter, available as a smartphone app or dedicated device, to measure and level-match each speaker. This ensures that all speakers are at equal volume when playing test tones.
Step 4: Automatic Room Calibration: Many receivers feature built-in automatic room calibration systems. These systems use a supplied microphone to analyze the room’s acoustics, speaker distances, and frequency response. Follow the on-screen instructions to run the calibration process and allow the system to make adjustments based on the analyzed data.
Step 5: Subwoofer Configuration: If your receiver has a subwoofer setup menu, adjust the crossover frequency and level settings for the subwoofer. This ensures that bass frequencies are properly directed to the subwoofer and seamlessly blend with the other speakers.
Step 6: Test and Fine-tune: Play various types of audio content, such as movies, music, or test tones, to ensure that the sound is balanced and coming from the correct speakers. Make further adjustments to speaker levels, crossover settings, or equalizer settings if necessary. Trust your ears and make adjustments to your personal taste.
Step 7: Save Settings: Once you are satisfied with the calibration and settings, save the changes in the receiver’s setup menu. This ensures that your preferred settings are stored and applied each time you power on the system.
It’s worth noting that every room is unique, and the calibration process may need to be performed periodically, especially if you rearrange furniture or make other changes to the room’s acoustics. Regularly re-calibrating your surround sound system will help maintain optimal audio performance.
Don’t hesitate to consult the user manual of your particular receiver model for specific instructions and guidance on its calibration and setup features. Additionally, online forums and resources can provide helpful information and tips from other users who have experience with your specific receiver model.
By properly calibrating and fine-tuning your surround sound system, you can ensure that it delivers the best audio experience possible, tailored to your specific room and preferences. Enjoy the immersive sound and let your surround sound system transport you to a whole new level of entertainment.
Troubleshooting Common Issues
While surround sound systems can provide an incredible audio experience, occasionally, you may encounter some common issues. Understanding how to troubleshoot these issues can help you quickly resolve them and get back to enjoying your surround sound setup. Here are some common issues and troubleshooting tips:
No Sound or Low Volume: If you’re not getting any sound or the volume is unusually low, check the following:
- Ensure that all the cables are securely connected to their respective inputs and outputs.
- Verify that the receiver is set to the correct audio input and that the correct audio format is selected.
- Inspect the speaker wire connections and ensure they are properly inserted and tightened.
- Confirm that the volume levels on the receiver and audio sources are appropriately adjusted.
- Ensure that the speaker wire connections are securely inserted into their corresponding terminals on the receiver and speakers.
- Check the speaker levels in the receiver’s setup menu and adjust them manually, if necessary.
- Confirm that the speaker positioning and placement follow the recommended guidelines for optimal sound distribution.
- Ensure that the audio source and video display are connected directly to the receiver to avoid any signal processing delays.
- Check the receiver’s settings for any audio delay or lip-sync adjustment options and make necessary adjustments.
- Ensure that the speaker wires are not damaged or frayed. Replace any faulty wires as necessary.
- Check the receiver’s audio settings and disable any unnecessary audio processing or sound enhancement features.
- Inspect the speaker connections for loose or damaged connections. Reconnect or replace any faulty connections if needed.
- Check that all cables are intact and securely connected. Replace any damaged or worn-out cables.
- Ensure that there is no interference from other wireless devices near your surround sound system, such as Wi-Fi routers or cordless phones. Try repositioning or isolating these devices.
- Reset the receiver and any connected devices to eliminate any temporary software glitches.
- Check the batteries in the remote and replace them if necessary.
- Ensure that there are no obstructions between the remote control and the receiver. Remove any objects blocking the line of sight.
- Try reprogramming or resetting the remote control according to the manufacturer’s instructions.
Imbalanced Audio: If the audio balance between the speakers seems off, follow these steps:
Audio Lag or Delay: If you notice a delay between the audio and video, try the following:
Static, Distortion, or Noisy Sound: To address sound quality issues, consider the following:
Intermittent Connection or Dropout: If the audio occasionally cuts out or experiences dropouts, try these steps:
Remote Control Issues: If the remote control does not work properly, consider these solutions:
If the above troubleshooting tips do not resolve the issues you are experiencing, consult the user manuals for your specific components or seek assistance from the manufacturer’s customer support or online forums for further guidance.
Remember, troubleshooting surround sound system issues requires patience and attention to detail. By following these steps and applying the necessary solutions, you can quickly resolve common problems and enjoy a flawless audio experience once again.
Conclusion
Congratulations! You have learned about the essential aspects of setting up and optimizing a surround sound system. By understanding the components, considering room selection, connecting the devices correctly, calibrating the system, and troubleshooting common issues, you are now well-equipped to create an immersive audio experience that will enhance your movies, music, and gaming.
Remember to carefully choose the right room for your setup, considering its size, acoustics, and any potential obstructions. Selecting the right audio sources, such as your TV, Blu-ray player, gaming console, or streaming devices, will ensure a diverse range of immersive content. Proper speaker placement, from the front speakers to the center channel and surround speakers, along with an optimized subwoofer, will enhance the surround sound effect.
Connecting your surround sound system with the right cables and configuring your receiver and amplification setup properly are essential for seamless audio delivery. Calibration and fine-tuning play a crucial role in achieving the best audio performance, ensuring balanced sound levels and accurate speaker placement.
Although common issues may arise, armed with troubleshooting techniques, you can quickly identify and resolve these problems, ensuring a smooth and uninterrupted audio experience.
Now, it’s time for you to put your knowledge into action and start enjoying the immersive world of surround sound. Grab your favorite movie, sit back, and let the sound envelop you, creating an unforgettable cinematic experience right in the comfort of your own home.