Introduction
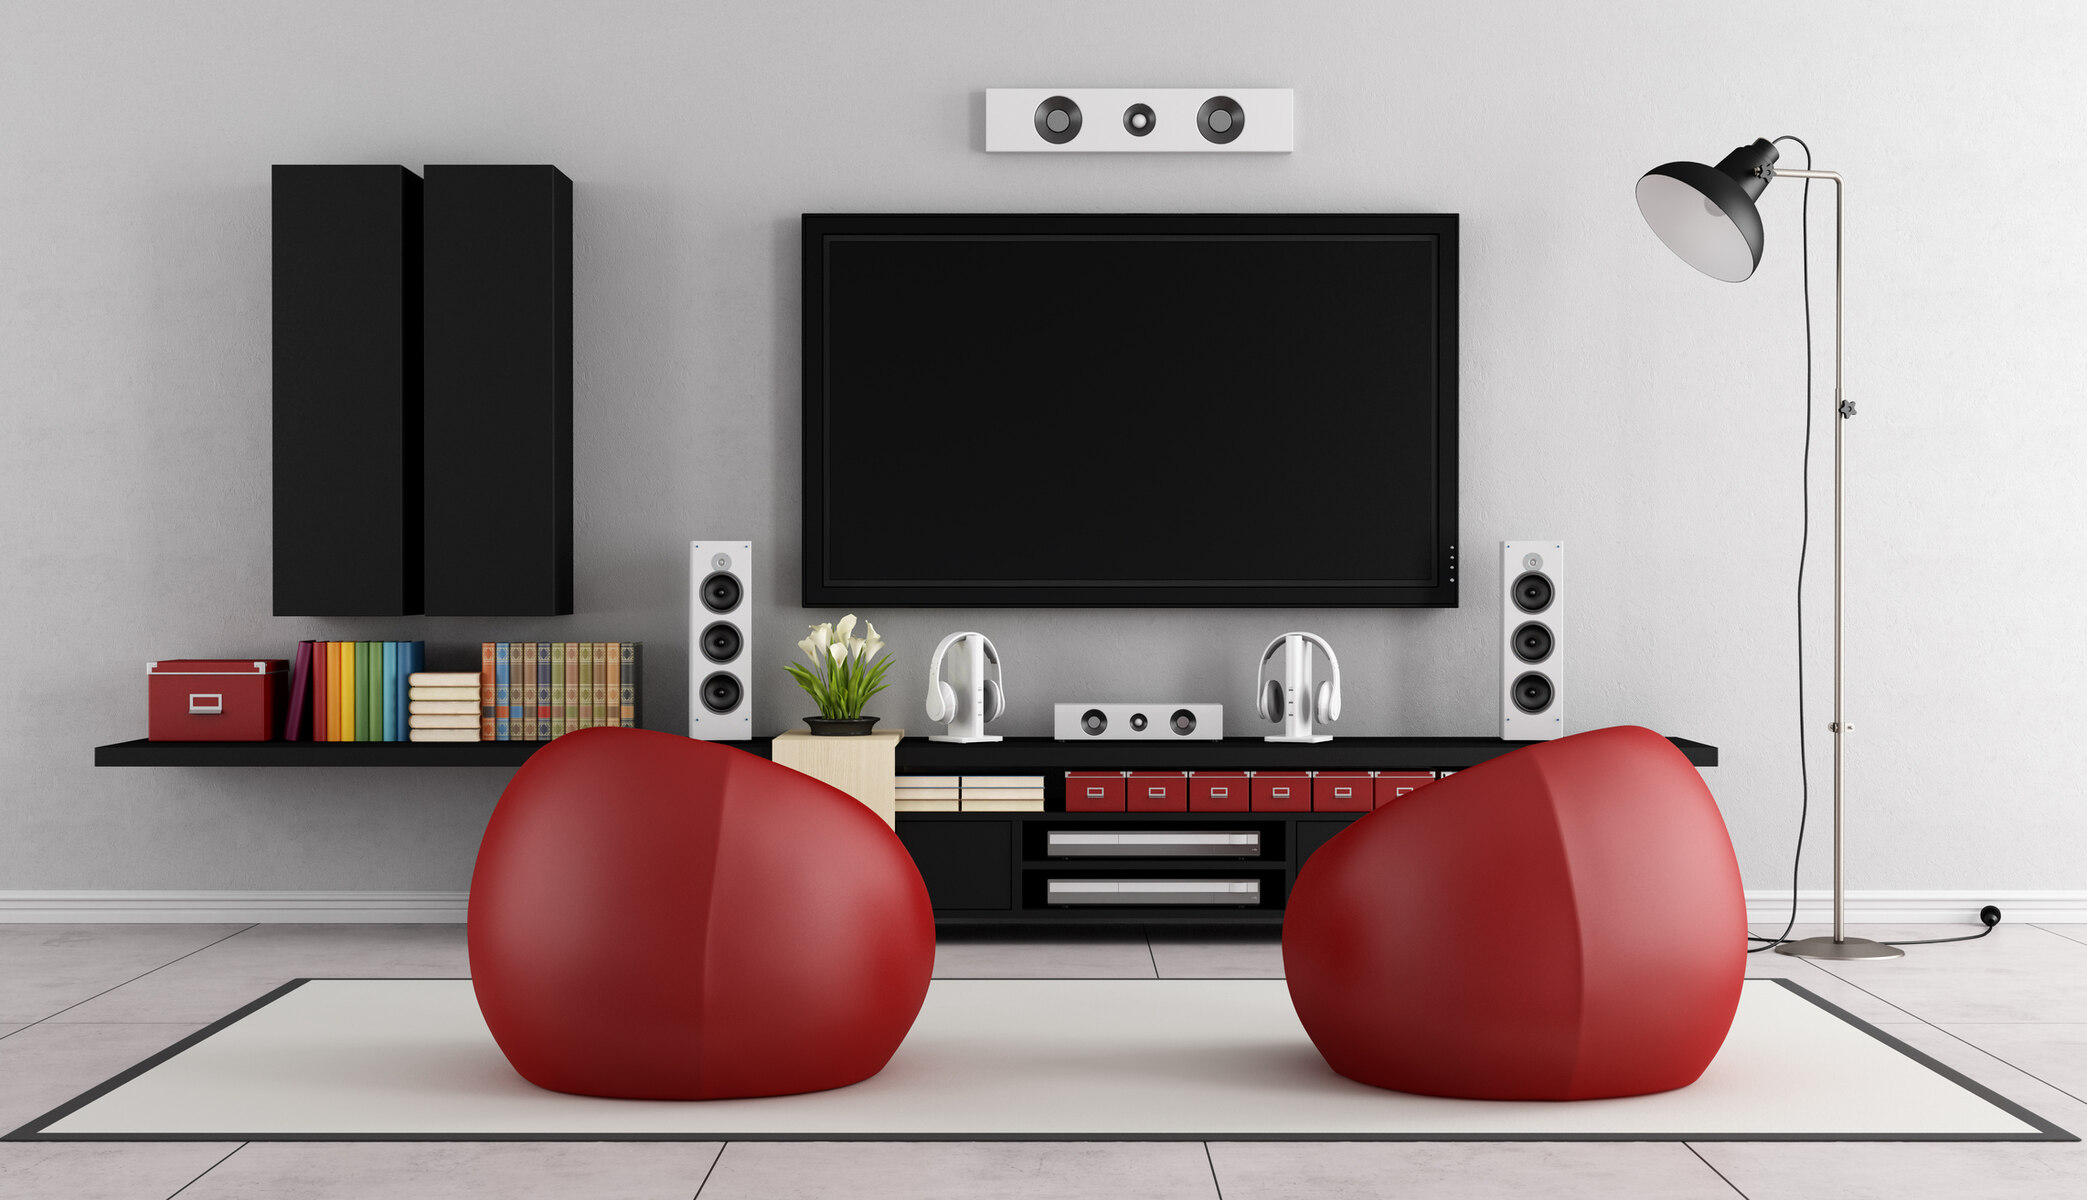
When it comes to enjoying a truly immersive entertainment experience in the comfort of your own home, hooking up your Sanyo TV to your Panasonic surround sound system can make all the difference. By connecting these two devices, you can elevate your audiovisual experience to new heights, bringing the cinema-like sound quality and crystal-clear images to your living room.
Whether you’re hosting a movie night with friends or simply want to enjoy your favorite TV shows with enhanced audio, this step-by-step guide will walk you through the process of connecting your Sanyo TV to your Panasonic surround sound system.
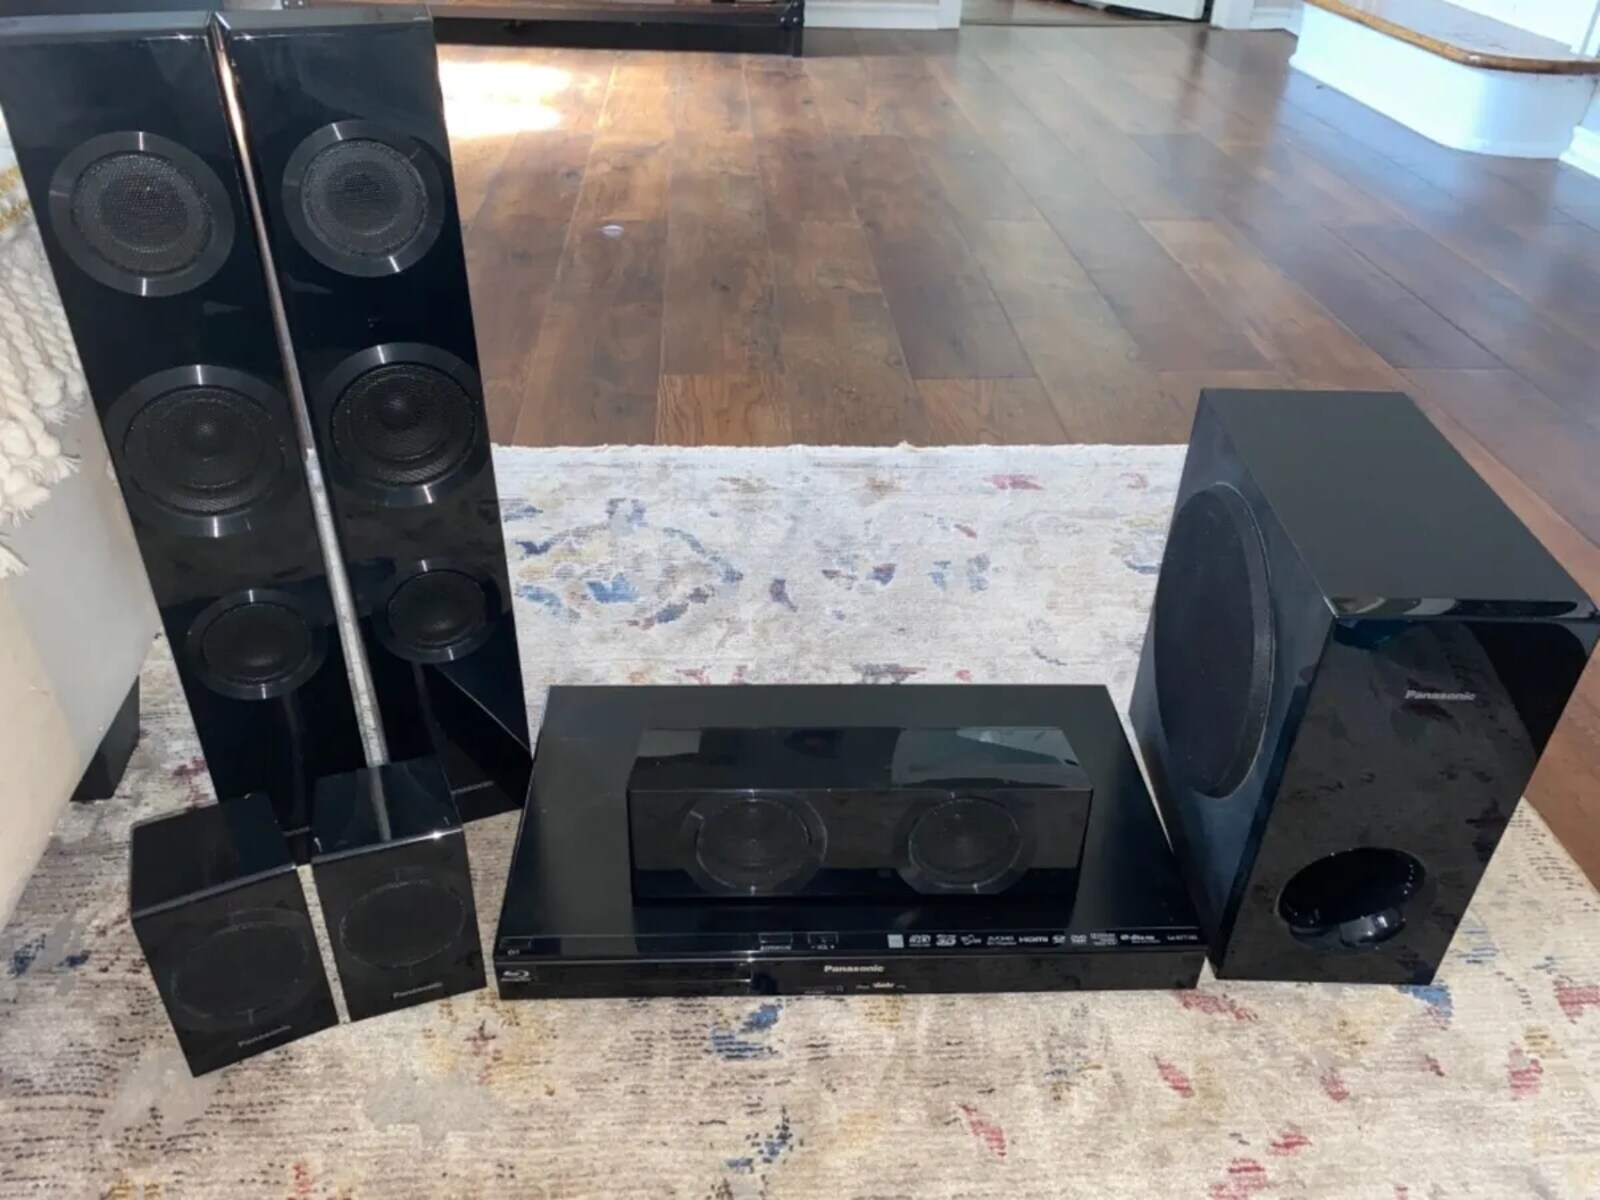
Before we dive into the details, it’s important to gather the necessary cables and equipment. You’ll need an HDMI cable and/or an optical audio cable, depending on the available ports on your devices. Make sure to check the back of your TV and surround sound system to identify the appropriate ports for connection.
Once you have all the required cables, you’re ready to proceed with the connection process. In the following steps, we’ll explore two different methods for connecting your Sanyo TV to your Panasonic surround sound system: using HDMI and using an optical audio cable. Each method has its advantages, so choose the one that works best for your setup.
Let’s get started and transform your TV viewing experience by connecting your Sanyo TV to your Panasonic surround sound system!
Step 1: Gather the necessary cables and equipment
Before you begin connecting your Sanyo TV to your Panasonic surround sound system, it’s important to gather all the necessary cables and equipment. Here’s what you’ll need:
- HDMI cable: This cable allows for high-definition audio and video transmission. Make sure the cable is long enough to reach from your TV to your surround sound system.
- Optical audio cable: If your TV or surround sound system doesn’t have HDMI ports, you’ll need an optical audio cable for audio transmission. Again, ensure that the cable length is sufficient.
- TV remote control: You’ll need your TV remote control to access the audio output settings on your TV.
- Surround sound system remote control: You’ll use your surround sound system remote control to adjust audio settings and configure the input source.
- User manuals: It’s always a good idea to have the user manuals for your TV and surround sound system handy as they provide detailed instructions specific to your models.
Once you have all the necessary cables and equipment gathered, you’re ready to move on to the next steps. Remember to check the back panel of your TV and surround sound system to locate the appropriate ports for connection. Different models may have different port configurations, so consult your user manuals if needed.
Now that you have everything prepared, let’s proceed to the next step and connect your Sanyo TV to your Panasonic surround sound system for a truly immersive audiovisual experience!
Step 2: Connect the TV to the surround sound system using HDMI
The HDMI (High-Definition Multimedia Interface) connection is a popular choice for connecting audio and video devices. If your Sanyo TV and Panasonic surround sound system have HDMI ports, this method will ensure high-quality audio and video transmission. Follow these steps to connect your TV to the surround sound system using HDMI:
- Locate the HDMI output port on your TV. It is usually labeled as “HDMI Out” or “ARC” (Audio Return Channel). Connect one end of the HDMI cable to this port.
- Next, find the HDMI input or ARC input on your surround sound system. Most systems have several HDMI inputs, so choose one of them and insert the other end of the HDMI cable into it.
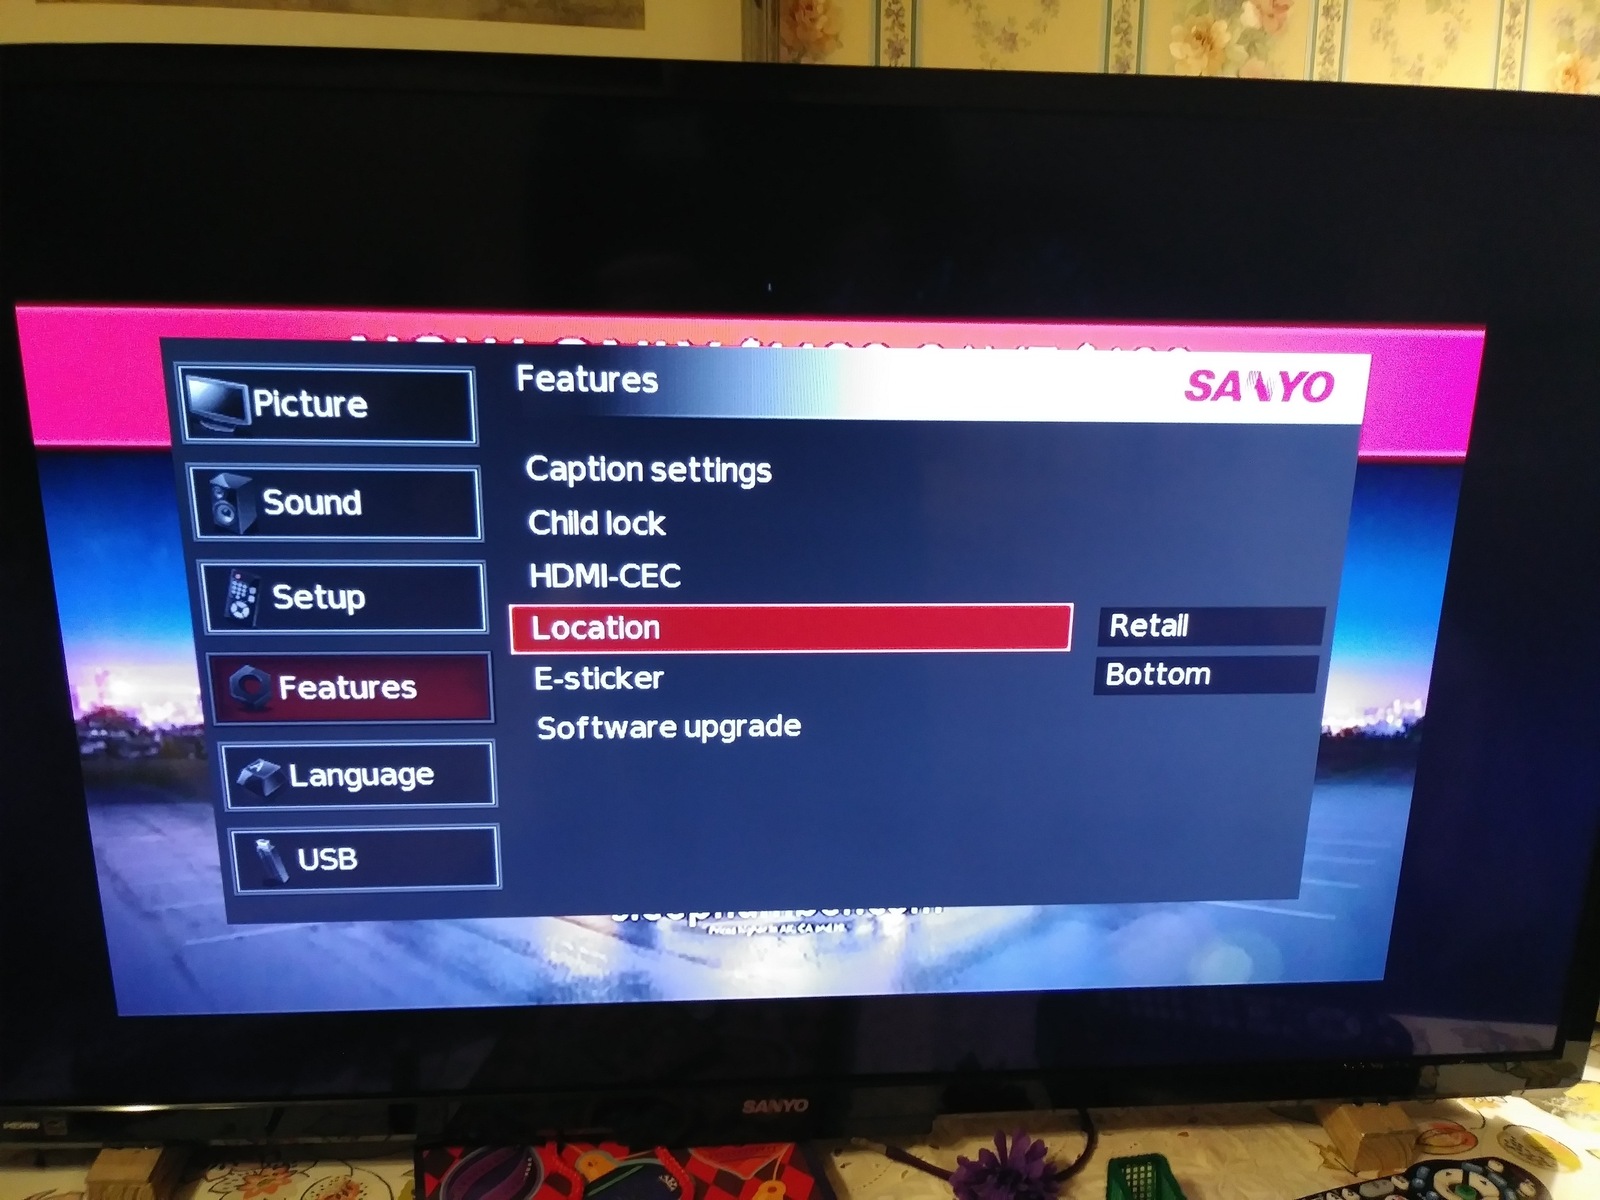
- Use your TV remote control to navigate to the settings menu. Look for an option related to audio output or sound settings. Select the HDMI or ARC output as the audio output source.
- Turn on your TV and surround sound system, and make sure both devices are set to the correct HDMI input. This can be done using the input/source button on your TV remote or the remote control for your surround sound system.
- Test the connection by playing audio or video content on your TV. The sound should now be coming through your Panasonic surround sound system, providing a more immersive audio experience.
It’s important to note that some older TV models may not support ARC functionality. In that case, you can connect your TV to the surround sound system’s HDMI input using a regular HDMI cable. However, you will also need to connect an additional audio cable, such as an optical audio cable, to transmit the audio signal.
With your Sanyo TV now connected to your Panasonic surround sound system using HDMI, you can enjoy enhanced audio and visual quality. If you encounter any issues during the setup process, refer to your user manuals or consult the manufacturer’s support resources for further assistance.
Step 3: Set the audio output on the TV
After connecting your Sanyo TV to your Panasonic surround sound system using HDMI, it’s important to configure the audio output settings on your TV to ensure that the sound is correctly transmitted to the surround sound system. Follow these steps to set the audio output on your TV:
- Using your TV remote control, navigate to the settings menu. Look for an option related to audio or sound settings.
- Within the audio settings, locate the audio output options. Depending on your TV model, this may be labeled as “Audio Output,” “Sound Output,” or something similar.
- Select the HDMI or ARC output as the audio output source. This will ensure that the sound is routed through the HDMI cable to your Panasonic surround sound system.
- Check if there are any additional audio settings available, such as volume leveling or surround sound options. Adjust these settings according to your personal preference.
- Save the changes and exit the settings menu.
By correctly setting the audio output on your Sanyo TV, you are ensuring that the audio signal is being transmitted to your Panasonic surround sound system through the HDMI connection. This will result in a seamless audio experience that complements the high-quality video displayed on your TV.
Once you have completed these steps, you can test the audio setup by playing audio or video content on your TV. The sound should now be coming through your surround sound system, providing you with immersive and enhanced audio quality.
If you encounter any issues while setting the audio output on your TV, consult the user manual for your TV or reach out to the manufacturer’s support for further guidance. With the audio output properly configured, you’re one step closer to enjoying a home theater experience in the comfort of your own living room!
Step 4: Connect the TV to the surround sound system using an optical audio cable
If your Sanyo TV or Panasonic surround sound system does not have HDMI ports or if you prefer using an alternative method, you can connect the TV to the surround sound system using an optical audio cable. Follow these steps:
- Locate the optical audio output port on your TV. It is usually labeled as “Optical Out” or “Digital Audio Out.” Connect one end of the optical audio cable to this port.
- Next, find the optical audio input port on your surround sound system. It is typically labeled as “Optical In” or “Digital Audio In.” Insert the other end of the optical audio cable into this port.
- Ensure that both your TV and surround sound system are powered off before making these connections.
- Power on your TV and surround sound system, and select the appropriate input source on your surround sound system using its remote control.
- Access the TV’s settings menu using the remote control and navigate to the audio settings.
- Within the audio settings, locate the audio output options and select “Optical” as the output source. This will enable the TV to route the audio through the optical audio cable to the surround sound system.
- Make any additional adjustments to the audio settings, such as volume leveling or audio modes, according to your preferences.
- Save the changes and exit the settings menu.
Once you have completed these steps, the audio from your Sanyo TV will now be transmitted to your Panasonic surround sound system through the optical audio cable. This connection method allows for high-quality digital audio transmission, resulting in a rich and immersive sound experience.
Remember to test the audio setup by playing audio or video content on your TV. The sound should now be coming through your surround sound system. If you encounter any issues during the setup process, consult your TV and surround sound system’s user manuals or contact the manufacturer’s support for further assistance.
With the TV connected to the surround sound system using an optical audio cable, you are one step closer to enjoying a captivating audio performance that complements the stunning visuals on your Sanyo TV.
Step 5: Set the audio output on the TV (alternative method)
If you have connected your Sanyo TV to the Panasonic surround sound system using an optical audio cable as an alternative method, it’s crucial to configure the audio output settings on your TV. Follow these steps:
- On your TV’s remote control, navigate to the settings menu and look for the audio or sound settings.
- Find the audio output options within the audio settings. Depending on your model, it may be labeled as “Audio Output,” “Sound Output,” or something similar.
- Select “Optical” as the audio output source. This setting ensures that the audio signal is routed through the optical audio cable to your Panasonic surround sound system.
- Check for any additional audio settings available, such as volume leveling or surround sound modes, and adjust them according to your preferences.
- Save the changes and exit the settings menu.
By properly setting the audio output on your Sanyo TV, you ensure that the audio signal is accurately transmitted to your Panasonic surround sound system through the optical audio cable. This guarantees a seamless audio experience that complements the high-quality visuals displayed on your TV.
After completing these steps, you can test the audio setup by playing audio or video content on your TV. The sound should now be coming through your surround sound system, providing you with an immersive and enhanced audio experience.
If you encounter any difficulties while setting the audio output on your TV, refer to the user manual for your TV or reach out to the manufacturer’s support for further assistance. With the audio output correctly configured, you’re now ready to enjoy a cinematic audio performance in the comfort of your own home.
Step 6: Test the audio connections
After connecting your Sanyo TV to your Panasonic surround sound system and configuring the audio settings, it’s essential to test the audio connections to ensure everything is working properly. Follow these steps to test the audio connections:
- Turn on your Sanyo TV and Panasonic surround sound system.
- Play a piece of audio or video content on your TV, such as a movie or a music video.
- Listen carefully to the audio output. If the audio is coming from your surround sound system and the sound quality is clear and immersive, it means the audio connections have been successfully set up.
- If you notice any issues, such as no audio or distorted sound, first check the cable connections. Ensure that the HDMI or optical audio cable is securely connected to both the TV and the surround sound system.
- If the cable connections are secure and the issue persists, try adjusting the audio settings on both the TV and the surround sound system. Check the audio output source, volume levels, and any other relevant settings.
- If necessary, refer to the user manuals of your TV and surround sound system for troubleshooting tips or contact the manufacturer’s support for further assistance.
By testing the audio connections, you can confirm that the audio is being transmitted from your Sanyo TV to your Panasonic surround sound system as intended. You should be able to enjoy a captivating and immersive audio experience that enhances your overall viewing pleasure.
If any issues arise during the testing process, be patient and methodical in troubleshooting. With a little effort and attention to detail, you can resolve any audio connection problems and enjoy optimal performance from your TV and surround sound system.
Once you have verified the audio connections and ensured that everything is working smoothly, you’re ready to sit back, relax, and enjoy a truly immersive audiovisual experience in your own home!
Step 7: Adjust audio settings on the surround sound system
After testing the audio connections between your Sanyo TV and Panasonic surround sound system, it’s time to fine-tune the audio settings on your surround sound system for the best audio experience. Follow these steps to adjust the audio settings:
- Use the remote control for your Panasonic surround sound system to access the audio settings menu.
- Explore the available audio options such as sound modes, equalizer settings, and surround sound effects. These settings can vary depending on your specific surround sound system model.
- Experiment with different sound modes to find the one that suits your preferences, whether it’s a movie mode for immersive surround sound, a music mode for enhanced audio clarity, or a custom mode that allows you to adjust individual audio parameters.
- Adjust the equalizer settings, if available, to fine-tune the audio frequencies to your liking. This can help enhance the bass, treble, and overall audio balance according to your preferences.
- Explore the surround sound effects options to add depth and realism to your audio experience. These effects simulate a multi-channel audio setup, delivering an encompassing soundstage that makes you feel like you’re in the middle of the action.
- Make gradual adjustments to each setting, testing them as you go along to determine the optimal audio configuration for your preferences and the content you’re watching or listening to.
- Remember to save any changes you make in the audio settings menu before exiting.
By adjusting the audio settings on your Panasonic surround sound system, you can further enhance the audio quality and tailor it to your liking. The ability to fine-tune the sound modes, equalizer settings, and surround sound effects allows you to create a personalized audio experience that complements your viewing preferences.
Take the time to experiment with different settings and trust your ears to find the audio configuration that delivers the best sound for your favorite movies, TV shows, and music.
If you encounter any difficulties or have questions about specific audio settings on your surround sound system, consult the user manual for detailed instructions or reach out to the manufacturer’s support for further assistance.
Once you have adjusted the audio settings to your satisfaction, sit back, relax, and enjoy a truly immersive and cinematic audio experience that complements the stunning visuals on your Sanyo TV.
Conclusion
Connecting your Sanyo TV to your Panasonic surround sound system can greatly enhance your home entertainment experience. Whether you’re watching movies, TV shows, or listening to music, the combination of high-quality visuals and immersive sound can transport you to a whole new level of entertainment enjoyment.
In this guide, we’ve walked you through the step-by-step process of connecting your Sanyo TV to your Panasonic surround sound system. From gathering the necessary cables and equipment to adjusting audio settings on both your TV and surround sound system, you now have the knowledge to create a seamless audiovisual setup that brings your favorite content to life.
Depending on your preferences and the available ports on your devices, you can choose between connecting via HDMI or using an optical audio cable. Both methods have their advantages, so select the one that works best for your setup.
Remember to test the audio connections after setting up and adjust the audio settings on your surround sound system to find the perfect sound quality that suits your personal preference and the type of content you’re enjoying.
If you encounter any difficulties along the way, consult the user manuals for your TV and surround sound system or seek assistance from the manufacturer’s support team.
Now that you’ve successfully connected your Sanyo TV to your Panasonic surround sound system, you can sit back, relax, and immerse yourself in the captivating audiovisual experience that rivals a cinema setting.
Enjoy your favorite movies, TV shows, and music with crystal-clear sound and cinematic depth, right in the comfort of your own home. Happy viewing!