Introduction
Welcome to this guide on how to change HDMI settings on a Sanyo TV. HDMI, which stands for High-Definition Multimedia Interface, is a widely used technology that allows for high-quality audio and video transmission between devices. Whether you want to switch HDMI input sources, adjust picture settings, configure audio options, or customize display preferences, this article will provide you with step-by-step instructions on how to do so on your Sanyo TV.
The HDMI ports on your Sanyo TV are essential for connecting various devices, such as gaming consoles, Blu-ray players, set-top boxes, and streaming devices. By understanding how to navigate and modify the HDMI settings on your TV, you can optimize your viewing experience and ensure that your devices are properly connected.
Throughout this guide, we will explore the different options available in the HDMI settings menu on your Sanyo TV. Whether you’re a tech enthusiast or a casual TV user, you’ll find the instructions easy to follow and the information helpful. So, let’s dive in and learn how to change HDMI settings on your Sanyo TV!
HDMI Basics
Before we delve into the specifics of changing HDMI settings on a Sanyo TV, let’s start with a brief overview of HDMI and its functionalities. HDMI is a digital interface that allows for the transmission of high-definition audio and video signals between devices.
HDMI cables are capable of carrying both audio and video signals, eliminating the need for separate cables. This ensures a clutter-free setup and simplifies the connection process. HDMI supports uncompressed audio formats, including Dolby TrueHD and DTS-HD Master Audio, offering a superior audio experience.
One of the significant advantages of HDMI is its ability to transmit high-quality video signals, including those in 4K Ultra HD and HDR (High Dynamic Range) formats. This ensures vibrant colors, sharp details, and enhanced contrast, providing a lifelike visual experience.
HDMI also supports a feature called Consumer Electronics Control (CEC), which allows you to control multiple HDMI-connected devices using a single remote control. With CEC, you can power on/off devices, adjust volume levels, and switch inputs seamlessly.
Another essential aspect of HDMI is its compatibility with various devices. HDMI ports are commonly found on televisions, gaming consoles, Blu-ray players, soundbars, and other audiovisual equipment. This universality makes it easy to connect and enjoy content from different sources.
It’s worth noting that HDMI has evolved over the years. The latest version, HDMI 2.1, offers increased bandwidth, enabling support for higher resolutions, faster refresh rates, and advanced features like Variable Refresh Rate (VRR) and Auto Low Latency Mode (ALLM). However, for this guide, we’ll focus on the general HDMI settings and features available on most Sanyo TVs.
Now that we have covered the basics of HDMI, let’s move on to the next section, where we will explore how to access the HDMI settings on your Sanyo TV.
Accessing HDMI Settings on Sanyo TV
To change the HDMI settings on your Sanyo TV, you’ll first need to access the settings menu. Here’s how you can do it:
- Turn on your Sanyo TV and ensure that the device you want to connect via HDMI is powered on as well.
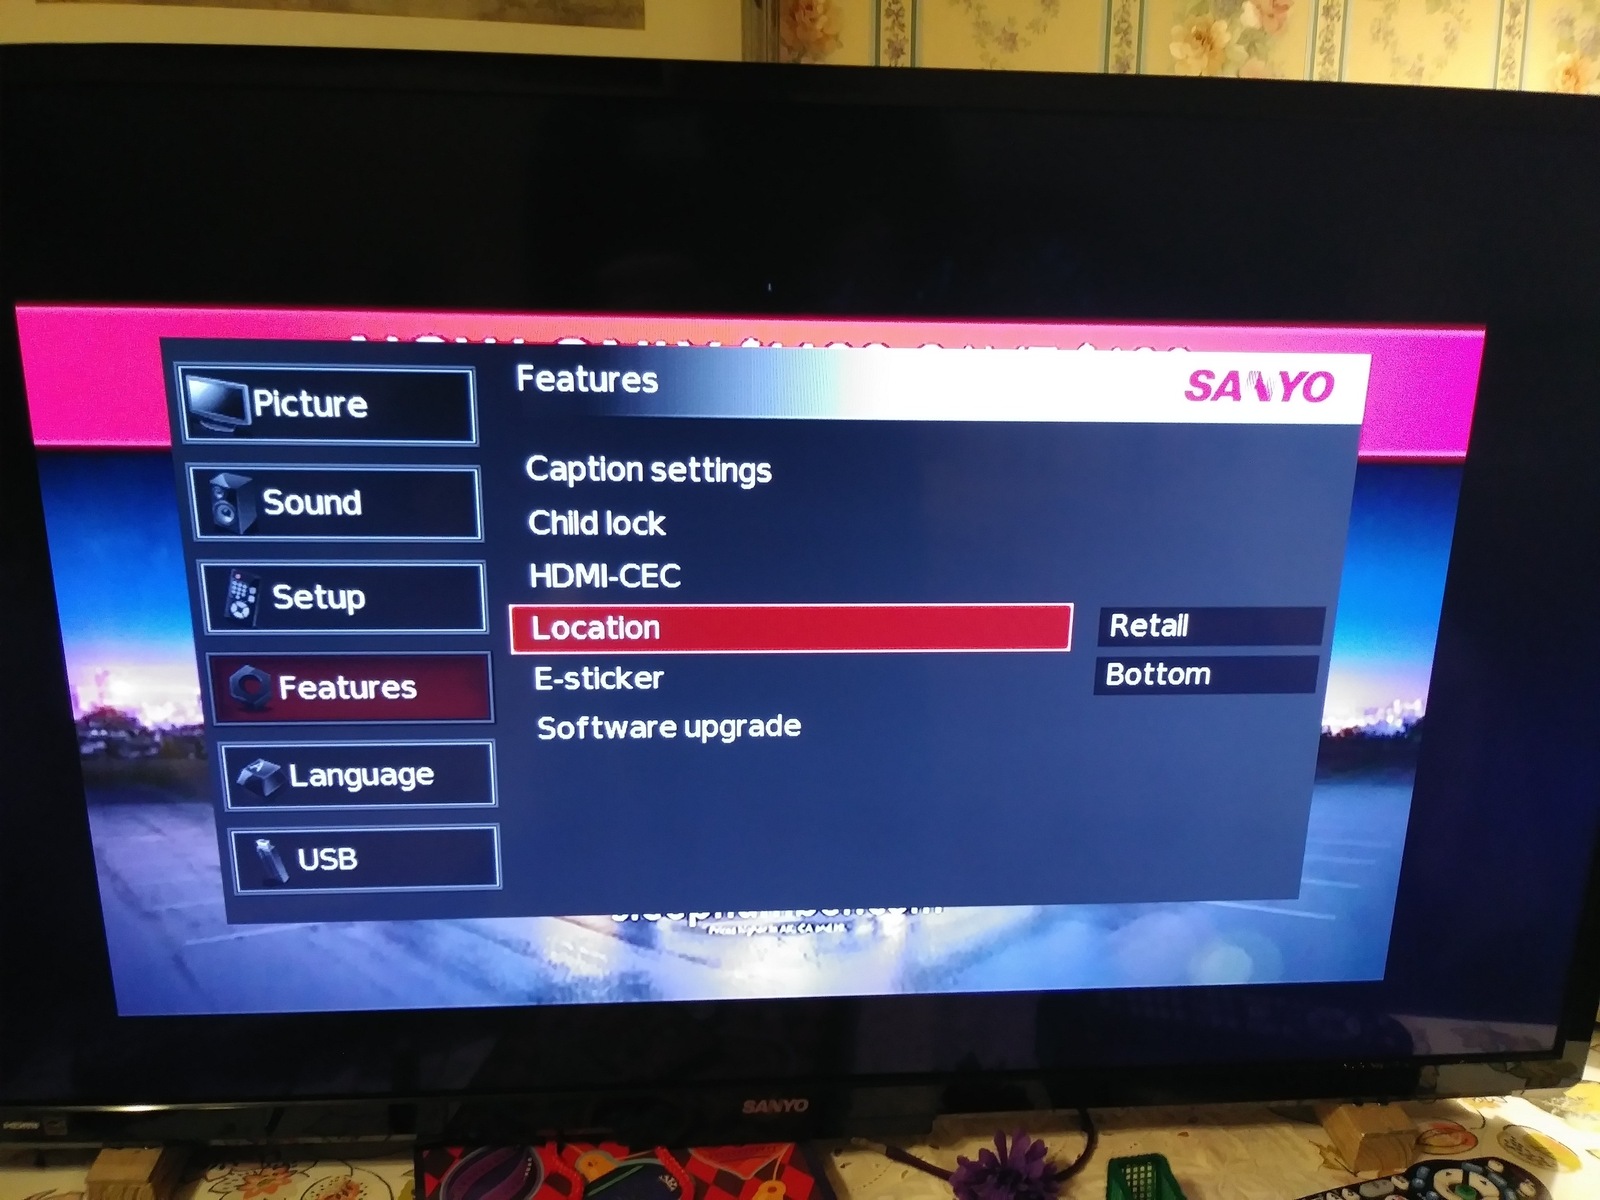
- Using your TV remote control, press the “Menu” button to bring up the main menu on your screen.
- Navigate through the menu options using the arrow keys on your remote until you find the “Settings” or “Setup” option.
- Press the “Enter” or “OK” button on your remote to access the settings menu.
- Within the settings menu, look for an option labeled “Input” or “Input Settings.” Select it and press “Enter.”
- You should now see a list of available input sources, including the HDMI ports on your TV. Select the HDMI port you want to configure and press “Enter” to access the HDMI settings.
Once you have successfully accessed the HDMI settings, you can proceed to make the desired changes based on your preferences and the specific requirements of your connected devices.
It’s important to note that the exact steps and terminology may vary slightly depending on the model and firmware version of your Sanyo TV. If you’re unable to locate the HDMI settings through the menu, consult your TV’s user manual for more detailed instructions.
In the next sections, we will explore the various HDMI settings that you can modify on your Sanyo TV, ranging from changing the input source to adjusting picture and audio settings, as well as customizing display options. Let’s continue to the following sections for more information.
Changing HDMI Input Source
Changing the HDMI input source on your Sanyo TV allows you to switch between different devices connected via HDMI. Whether you want to watch a movie on your Blu-ray player or play games on your gaming console, here’s how you can change the HDMI input source:
- Ensure that all your devices are powered on.
- Using your Sanyo TV remote control, press the “Input” or “Source” button. This button is typically located towards the top or side of the remote.
- A list of available input sources will appear on your screen. Each HDMI port on your TV will be represented as a separate input source.
- Using the arrow keys on your remote, navigate to the HDMI input source you wish to select.
- Once you’ve highlighted the desired HDMI input source, press the “Enter” or “OK” button on your remote to confirm your selection.
Your Sanyo TV will now switch to the chosen HDMI input source, and you’ll be able to enjoy the content from your selected device.
It’s important to note that some Sanyo TVs may have additional features, such as renaming or labeling the HDMI input sources for easier identification. If available, you can access these options within the HDMI settings menu and customize the input source names accordingly.
By easily changing the HDMI input source, you can seamlessly switch between devices connected to your Sanyo TV and enjoy a variety of content without the hassle of constantly plugging and unplugging cables.
In the next section, we will explore how to adjust the HDMI picture settings on your Sanyo TV to optimize the visual quality of your HDMI-connected devices.
Adjusting HDMI Picture Settings
When using HDMI connections on your Sanyo TV, it’s important to ensure that the picture settings are appropriately adjusted to enhance your viewing experience. Here’s how you can adjust the HDMI picture settings:
- Access the HDMI settings menu on your Sanyo TV following the instructions mentioned earlier.
- Look for a subsection or option called “Picture” or “Picture Settings” within the HDMI settings menu. Select it and press “Enter”.
- Within the picture settings, you’ll find various options to adjust the picture quality, including brightness, contrast, color, and sharpness.
- Using the arrow keys on your remote control, navigate to the desired setting that you want to adjust.
- Once you’ve highlighted the setting, you can increase or decrease the value using the arrow keys or the plus (+) and minus (-) buttons on your remote.
- Make adjustments to the different picture settings according to your preference and the requirements of your connected HDMI device.
- Preview the changes by selecting the “Apply” or “Save” option within the picture settings menu.
While adjusting the HDMI picture settings, it’s essential to strike a balance to achieve optimal picture quality. You can experiment with the settings and make incremental changes until you find the desired visual balance.
Additionally, some Sanyo TVs may offer preset picture modes, such as “Standard,” “Cinema,” or “Vivid.” These modes are preconfigured with specific picture settings suitable for different types of content. You can choose the appropriate picture mode based on your viewing preferences and the type of content you’re watching.
Remember, the ideal picture settings can vary depending on factors such as the lighting conditions in your room and personal preference. Feel free to fine-tune the picture settings as needed to achieve the best viewing experience for your HDMI-connected devices.
In the next section, we will explore how to configure the HDMI audio settings on your Sanyo TV to ensure the best sound quality.
Configuring HDMI Audio Settings
Configuring the HDMI audio settings on your Sanyo TV is crucial to ensure that you experience the best audio quality when using HDMI devices. Here’s how you can configure the HDMI audio settings:
- Access the HDMI settings menu on your Sanyo TV, as described earlier.
- Look for a section called “Audio” or “Audio Settings” within the HDMI settings menu. Select it and press “Enter”.
- Within the audio settings, you’ll find various options to adjust the audio output, including volume, equalizer, and audio modes.
- Using the arrow keys on your remote control, navigate to the desired audio setting that you want to adjust.
- Once you’ve highlighted the setting, you can increase or decrease the value or select the desired audio mode using the arrow keys or the plus (+) and minus (-) buttons on your remote.
- Make adjustments to the different audio settings according to your preference and the requirements of your connected HDMI device.
- Preview the audio changes by playing content from your HDMI device and listening for any improvements.
While configuring the HDMI audio settings, you may also have the option to select different audio formats, such as stereo, surround sound, or Dolby Digital. Choose the appropriate format based on your audio setup and the capabilities of your HDMI-connected device.
If you have external audio equipment, such as a soundbar or a home theater system, connected to your TV via HDMI, you may need to configure the audio settings on those devices as well to ensure proper sound output.
Remember to test the audio settings with different types of content to ensure compatibility and optimal audio performance. Adjustments may be necessary depending on the source and format of the audio content being played through the HDMI connection.
In the next section, we will explore how to customize HDMI display options on your Sanyo TV to suit your preferences and viewing environment.
Customizing HDMI Display Options
Customizing the HDMI display options on your Sanyo TV allows you to tailor the visual aspects of your HDMI-connected devices to your liking. Here’s how you can customize the HDMI display options:
- Access the HDMI settings menu on your Sanyo TV as mentioned earlier.
- Look for a section called “Display” or “Display Settings” within the HDMI settings menu. Select it and press “Enter”.
- Within the display settings, you’ll find various options to customize the visual aspects, including display mode, aspect ratio, screen positioning, and overscan settings.
- Using the arrow keys on your remote control, navigate to the desired display setting that you want to customize.
- Once you’ve highlighted the setting, you can make adjustments based on your preference and the requirements of your HDMI device.
- For example, you can select the appropriate display mode (such as “Standard” or “Cinema”) to optimize the picture quality. Adjust the aspect ratio to match the content you’re viewing, or fine-tune the screen positioning to eliminate any cropping or black bars.
- Preview the display changes by viewing content from your HDMI device and assessing the visual enhancements.
Additionally, if your Sanyo TV supports advanced display features like HDR (High Dynamic Range) or motion smoothing, you may find options to enable or adjust these features within the HDMI display settings. Explore these options based on your preference and the capabilities of your HDMI device.
Remember, the display settings can be subjective and depend on factors such as personal preference, room lighting conditions, and the type of content being viewed. Experiment with different settings to find the configuration that suits your needs and provides the best visual experience.
In case you encounter any issues with your HDMI connection, the next section will provide troubleshooting tips to help resolve common problems.
Troubleshooting HDMI Connection Issues
While HDMI connections are generally reliable, you may encounter occasional issues that can affect the audio or video transmission. Here are some troubleshooting steps you can take to resolve common HDMI connection issues on your Sanyo TV:
- Ensure that all cables are securely plugged into their respective HDMI ports. Sometimes, loose connections can cause signal problems.
- Check the HDMI cable for any visible damage or frayed ends. If you notice any issues, replace the cable with a new one.
- Verify that the HDMI input on your Sanyo TV is selected correctly. Use your TV remote to cycle through the available HDMI inputs and ensure you’re on the correct one.
- Restart all devices involved in the HDMI connection, including your TV and the HDMI source device. Unplug them from power for a few seconds and then plug them back in.
- Try using a different HDMI port on your TV. There may be an issue with a specific HDMI input, and switching to another port can help identify the problem.
- If you’re using an HDMI switch or an AV receiver, make sure they are powered on and have the appropriate HDMI settings configured.
- Check if the HDMI settings on your Sanyo TV are correctly set. Ensure that the audio and video formats are compatible with your connected HDMI device.
- Update the firmware of your Sanyo TV. Manufacturers often release firmware updates that include fixes for HDMI-related issues. Visit the Sanyo support website for the latest firmware version for your specific TV model.
- If none of the above steps resolve the problem, try connecting the HDMI device to a different TV or monitor to determine if the issue lies with the device or your Sanyo TV.
If you continue to experience HDMI connection issues after troubleshooting, it may be necessary to contact Sanyo customer support or seek assistance from a professional technician for further assistance.
By following these troubleshooting steps, you can effectively address common HDMI connection issues and ensure smooth audio and video transmission between your Sanyo TV and HDMI devices.
Conclusion
Changing HDMI settings on your Sanyo TV is essential for optimizing your viewing experience and ensuring seamless connectivity with HDMI devices. By accessing the HDMI settings menu, you can easily switch between input sources, adjust picture settings, configure audio options, and customize display preferences to suit your needs.
In this guide, we explored the basics of HDMI and its functionalities, including the transmission of high-definition audio and video signals. We learned how to access the HDMI settings menu on a Sanyo TV, change HDMI input sources, adjust picture settings to enhance visual quality, configure audio settings for better sound performance, and customize display options to match personal preferences.
Addtionally, we provided troubleshooting tips to resolve common HDMI connection issues, ensuring a reliable and uninterrupted viewing experience.
Remember to consult your specific Sanyo TV model’s user manual for more detailed instructions, as the steps and options may vary slightly. Always experiment and fine-tune settings to achieve the best audio and visual results based on your preferences and the capabilities of your HDMI device.
We hope this guide has been helpful in assisting you with changing HDMI settings on your Sanyo TV. Enjoy your enhanced viewing experience and make the most out of your HDMI-connected devices!