Introduction
Welcome to the world of High-Definition Multimedia Interface, or HDMI for short, where we can enjoy crystal-clear video and high-quality audio signals. HDMI has become the standard connection method for TVs, monitors, projectors, and other multimedia devices. However, if you’ve experienced the frustrating issue of HDMI cutting out, you’re not alone.
HDMI cutting out refers to the sudden loss of video or audio signal transmitted through the HDMI cable, resulting in an interruption in your viewing or listening experience. This can be incredibly frustrating, especially when you’re in the middle of watching your favorite movie or playing a video game.
In this article, we will explore the common causes of HDMI cutting out and provide troubleshooting steps to help you resolve this issue. Understanding the potential causes can help you pinpoint the problem and find the appropriate solution.
We will cover potential cable issues, power issues, compatibility issues, and overheating issues that can lead to HDMI cutting out. By going through each of these aspects, you will have a comprehensive understanding of the problem and be better equipped to tackle it head-on.
It’s important to note that HDMI cutting out can occur with both HDMI cables and HDMI ports on your devices. By following the troubleshooting steps provided, you’ll be able to identify whether the issue lies with the cable, the device, or a combination of both.
So, if you’re tired of dealing with HDMI cutouts and want to regain uninterrupted access to your favorite movies, TV shows, and games, read on. We’ve got you covered with the necessary information and troubleshooting steps to help you overcome this frustrating issue.
What is HDMI?
HDMI, which stands for High-Definition Multimedia Interface, is a standardized digital connection technology used for transmitting high-quality audio and video signals between various multimedia devices. Introduced in 2003, HDMI has become the de facto standard for connecting devices such as televisions, monitors, projectors, DVD players, and gaming consoles.
One of the key advantages of HDMI is its ability to transmit both high-definition video and multichannel audio signals through a single cable. This eliminates the need for separate connections for audio and video, simplifying the setup and reducing cable clutter.
HDMI cables are designed to support a wide range of video resolutions and audio formats, including Standard Definition (SD), High Definition (HD), 4K Ultra HD, and even 8K resolutions. Additionally, HDMI supports various audio formats such as Dolby TrueHD, DTS-HD Master Audio, and more, delivering immersive surround sound to enhance your viewing experience.
HDMI also supports additional features like Consumer Electronics Control (CEC), which allows control of multiple devices through a single remote, and Audio Return Channel (ARC), which enables the transmission of audio from the TV back to an AV receiver or soundbar without the need for a separate audio connection.
Over the years, HDMI has undergone several upgrades to support new technologies and features. The most recent version, HDMI 2.1, offers significantly higher bandwidth, allowing for higher frame rates, increased resolutions, and advanced gaming features like Variable Refresh Rate (VRR), Quick Frame Transport (QFT), and Auto Low Latency Mode (ALLM).
To connect devices using HDMI, you simply plug one end of the HDMI cable into the HDMI port on your device, such as a TV or gaming console, and the other end into the HDMI port on another device or an HDMI compatible display. The cable will transmit both audio and video signals, resulting in a seamless and high-quality viewing or gaming experience.
Overall, HDMI has revolutionized the multimedia industry by providing a standardized, high-quality, and convenient connection method for transmitting audio and video signals. Whether you’re watching movies, playing games, or giving presentations, HDMI ensures you can enjoy the full potential of your multimedia devices with just a single cable connection.
Common Causes of HDMI Cutting Out
HDMI cutting out can occur due to several factors, ranging from cable issues to compatibility problems. Understanding the common causes can help you troubleshoot and resolve the issue effectively. Let’s explore some of the most frequent culprits behind HDMI cutouts:
1. Cable Issues: One of the primary causes of HDMI cutting out is faulty or damaged cables. Over time, cables can experience wear and tear, resulting in a loss of connection. Loose connections or bent pins inside the cable can also disrupt the signal transmission. It’s essential to ensure the HDMI cable is securely connected and free from any visible damage.
2. Power Issues: Insufficient power supply or voltage fluctuations can lead to HDMI cutouts. Some devices require a stable power source to maintain a steady HDMI signal. Power surges or a power supply that cannot meet the device’s requirements can cause intermittent signal interruptions. To resolve this, ensure your device is connected to a reliable power source or consider using a surge protector.
3. Compatibility Issues: Incompatibility between devices can result in HDMI cutting out. Different devices may support different HDMI standards or have different firmware versions, leading to a lack of synchronization between them. It’s important to check if your devices are compatible and up to date with the latest firmware updates to ensure smooth HDMI signal transmission.
4. Overheating Issues: Overheating can cause HDMI cutouts, especially in devices that generate a significant amount of heat, like gaming consoles or AV receivers. High temperatures can affect the internal components and lead to signal disruptions. Ensure proper ventilation and cooling for your devices to prevent overheating and maintain a stable HDMI connection.
5. Environmental Factors: External factors like electromagnetic interference (EMI) or radio frequency interference (RFI) can interfere with HDMI signals. Nearby electrical devices, Wi-Fi routers, or wireless transmitters can emit signals that disrupt the HDMI connection. Keep your devices away from potential sources of interference to minimize signal interruptions.
By identifying these common causes, you can take the necessary steps to troubleshoot and resolve HDMI cutting out issues. The next section will provide troubleshooting steps to help you tackle this problem effectively and restore uninterrupted HDMI signal transmission.
Cable Issues
Cable issues are one of the common culprits behind HDMI cutting out. Over time, HDMI cables can become damaged or develop faults, resulting in a loss of signal transmission. Here are some cable-related issues that can cause HDMI cutouts:
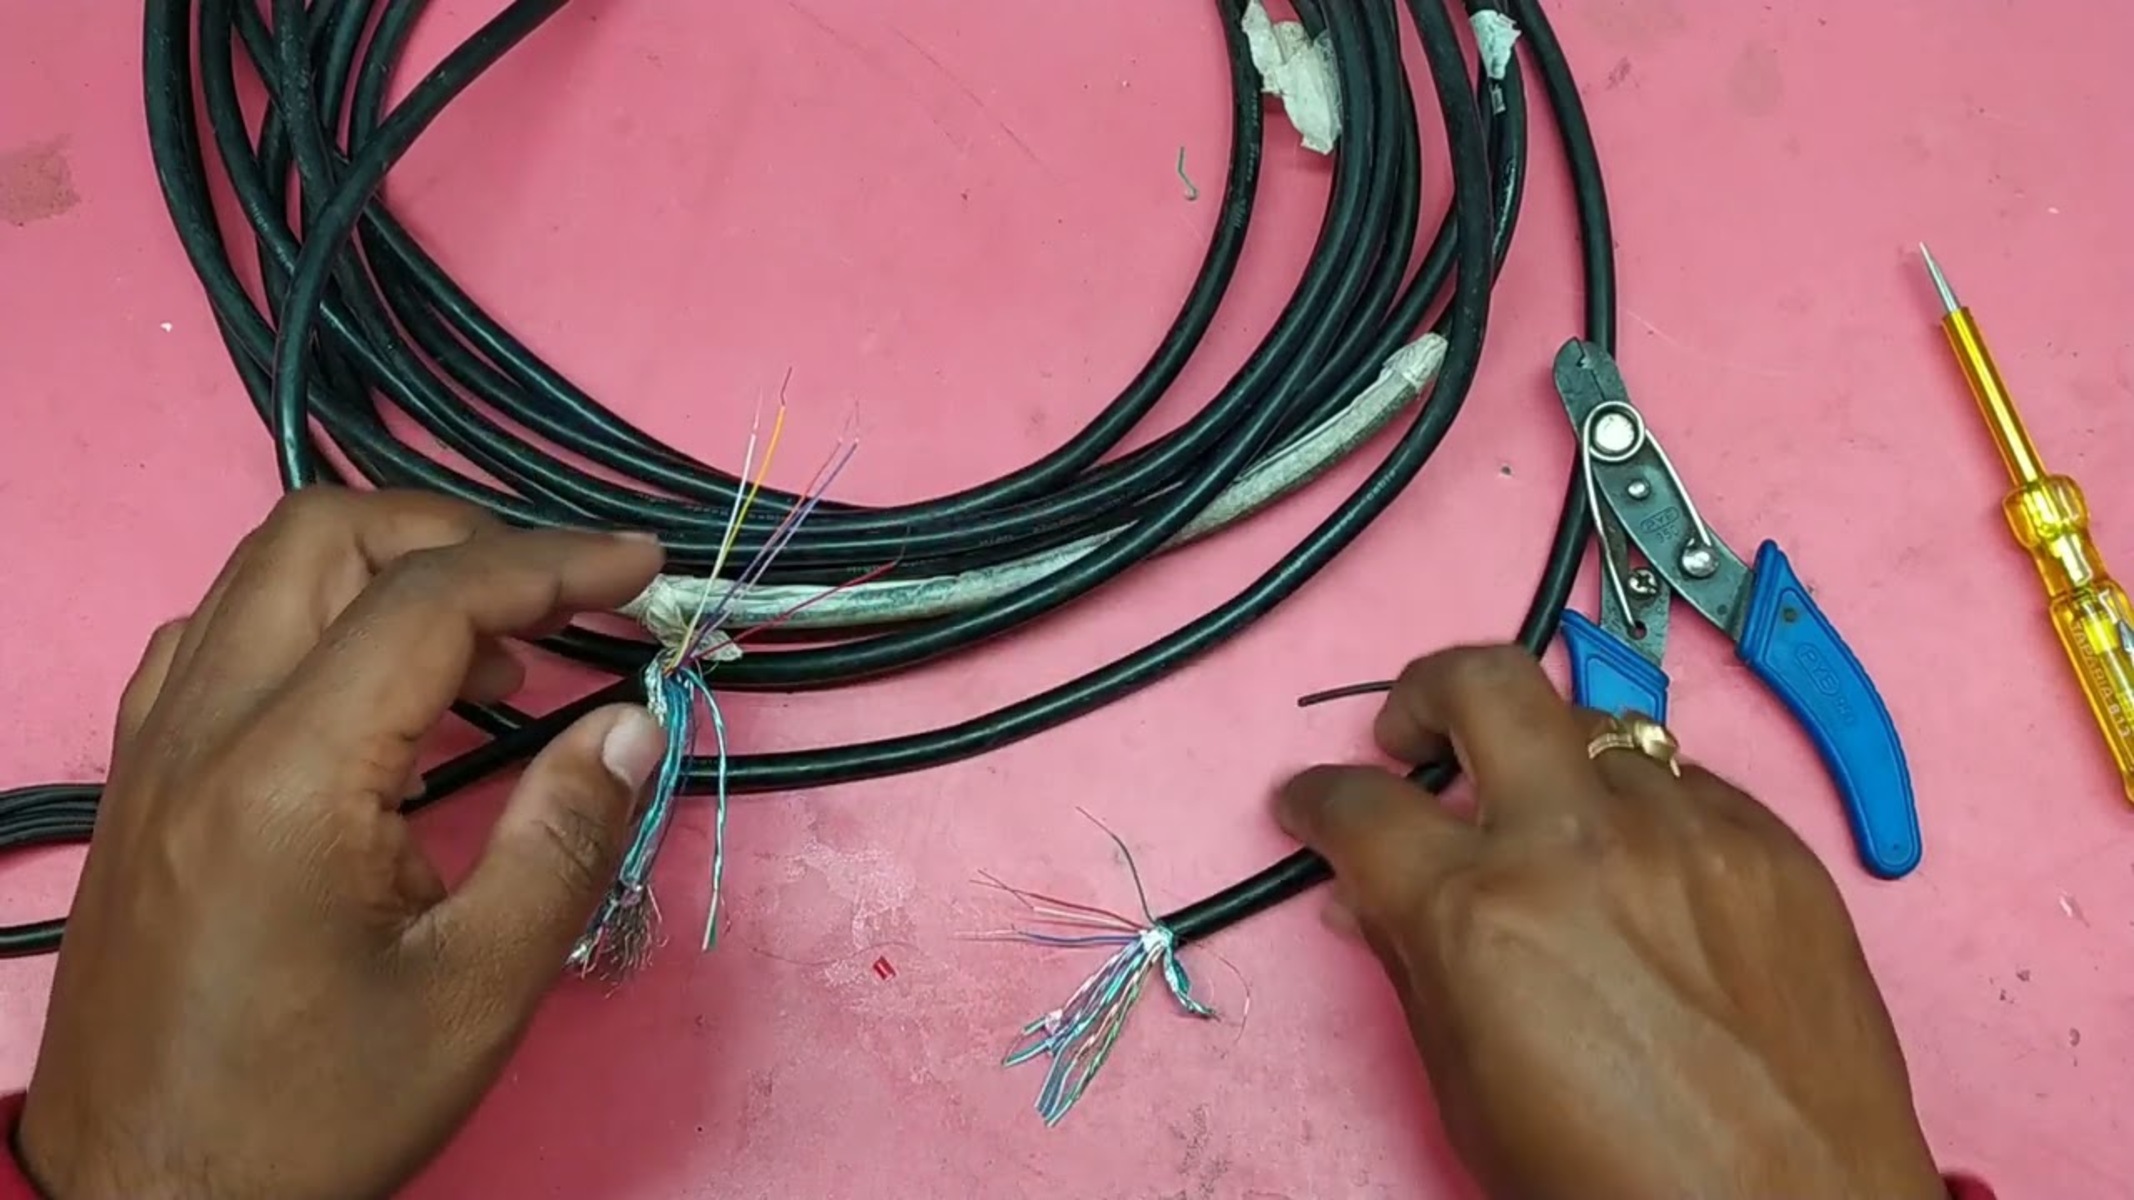
1. Physical Damage: HDMI cables are prone to wear and tear, especially if they are frequently moved or bent at sharp angles. The cable’s insulation or internal wires may get frayed or damaged, leading to intermittent signal interruptions. Inspect the cable for any visible signs of damage, such as exposed wires or a bent connector. In such cases, replacing the cable with a new one is recommended.
2. Loose Connections: Loose connections between the HDMI cable and the device’s HDMI port can cause signal dropouts. Make sure that the cable is securely inserted into the HDMI ports on both ends. Sometimes, the HDMI connector may not fit snugly due to a misaligned port or a loose grip. Gently wiggle the cable while it’s connected to ensure a proper connection.
3. High-Speed HDMI Cables: Older HDMI cables may not support the high-speed requirements of modern devices. If you’re experiencing frequent HDMI cutouts, ensure that you’re using a high-speed HDMI cable that is rated for the resolution and features of your devices. High-speed cables have enhanced bandwidth capabilities and are designed to handle higher data transfer rates, reducing the likelihood of signal interruptions.
4. Cable Length: The length of the HDMI cable can impact signal quality and integrity. Longer cables are prone to signal degradation due to increased resistance and interference. If you’re using a long HDMI cable, ensure that it meets the necessary specifications for signal transmission at that length. Consider using an active HDMI cable or an HDMI extender to maintain signal strength over longer distances.
5. HDMI Cable Version: HDMI cables come in different versions, such as HDMI 1.4, HDMI 2.0, and HDMI 2.1. Older HDMI cables may not support the latest features and resolutions of newer devices. If you’re using a cable that is not compatible with your device, it can cause HDMI cutouts. Check the HDMI version requirements of your devices and use a cable that matches or exceeds those specifications.
It’s important to note that not all HDMI issues are cable-related. Other factors like device compatibility, power supply, or overheating can also contribute to HDMI cutouts. By ruling out cable issues through inspection and testing, you can narrow down the potential causes and focus on troubleshooting other aspects.
Power Issues
Power-related problems can often result in HDMI cutouts and interruptions in signal transmission. Insufficient power supply, voltage fluctuations, or improper grounding can all contribute to power-related HDMI issues. Here are some power-related causes to consider when troubleshooting HDMI cutouts:
1. Insufficient Power Supply: Some devices, particularly those with high power requirements, may not receive enough power from the source. This can lead to intermittent signal dropouts or even complete loss of HDMI connectivity. Ensure that your device is connected to a stable and adequate power source. Using a power strip or surge protector with built-in power regulation capabilities can help prevent power-related HDMI issues.
2. Power Surges and Fluctuations: Sudden spikes or drops in the power supply can affect the stability of HDMI signal transmission. Power surges, voltage fluctuations, or sudden power outages can disrupt the HDMI connection, causing temporary or permanent cutouts. Consider using a surge protector or a voltage regulator to protect your devices from power fluctuations.
3. Inadequate Grounding: Improper grounding can also contribute to power-related HDMI cutouts. Grounding issues can cause electrical interference, affecting the quality and consistency of the HDMI signal. Ensure that your devices are grounded properly and that the power outlets they are connected to have a stable ground connection.
4. Power Supply Compatibility: Some devices may require a specific power supply or wattage to function optimally. If you’re using an incompatible power supply or if the provided power adapter is not delivering the required voltage and current output, it can lead to HDMI cutouts. Check the device’s specifications and make sure to use the recommended power supply to ensure stable HDMI connectivity.
5. Power Source Interference: The proximity of power sources to HDMI cables or devices can introduce electromagnetic interference (EMI). EMI can disrupt the HDMI signal, resulting in cutouts or degraded video and audio quality. Keep HDMI cables away from power cables, power transformers, or strong electromagnetic fields to minimize interference.
By addressing power-related issues and ensuring a stable and adequate power supply, you can minimize the chances of experiencing HDMI cutouts due to power-related problems. If power issues are ruled out, it’s important to continue troubleshooting other potential causes, such as cable issues, compatibility issues, or overheating, to identify the root cause and resolve the HDMI cutouts effectively.
Compatibility Issues
Compatibility issues between devices can often lead to HDMI cutouts, disrupting the smooth transmission of audio and video signals. Incompatibility can arise from differences in HDMI standards, firmware versions, or device settings. Here are some common compatibility-related causes to consider when troubleshooting HDMI cutouts:
1. HDMI Standard Mismatch: Different HDMI versions, such as HDMI 1.4, HDMI 2.0, or HDMI 2.1, may have varying capabilities and feature sets. If your devices are using different HDMI standards, it can result in compatibility issues and intermittent signal dropouts. Ensure that your devices are compatible with each other in terms of HDMI standard requirements.
2. Firmware Updates: Manufacturers occasionally release firmware updates to enhance device performance and address compatibility issues. Outdated firmware on either the source device or the receiving device could lead to HDMI cutouts. Check for firmware updates for all HDMI devices involved and ensure they are running the latest firmware version available.
3. HDCP (High-bandwidth Digital Content Protection): HDCP is an encryption protocol used to protect copyrighted content sent over HDMI connections. Incompatibility with HDCP can cause HDMI cutouts, especially when trying to play protected content. Ensure that both the source device (e.g., Blu-ray player) and the receiving device (e.g., TV or AV receiver) are HDCP compliant. If one device is not HDCP compatible, it may result in a loss of signal or a downgrade in video quality.
4. Device Settings: Misconfigured settings on either the source device or the receiving device can result in HDMI compatibility issues. For example, incorrect output resolution settings or unsupported color formats can cause intermittent signal dropouts. Double-check the video and audio output settings on both devices and ensure they are properly configured to match the capabilities of the connected HDMI devices.
5. Signal Handshake Issues: HDMI devices establish a “handshake” to negotiate and establish a secure connection. Sometimes, a weak or failed handshake between devices can cause HDMI cutouts. Try power cycling both the source and receiving devices (e.g., turning them off and on again) to re-establish a proper handshake and restore the HDMI signal.
By resolving compatibility issues, you can ensure that your HDMI devices work harmoniously and minimize the occurrence of HDMI cutouts. Checking HDMI standards, updating firmware, adjusting settings, and establishing a reliable signal handshake are all crucial steps to troubleshoot and overcome compatibility-related HDMI issues.
Overheating Issues
Overheating is another common factor that can cause HDMI cutouts. Electronics generate heat during operation, and if devices are not adequately cooled, it can lead to signal disruptions and intermittent HDMI connectivity issues. Here are some common causes of HDMI cutouts related to overheating:
1. Poor Ventilation: Insufficient airflow around devices can lead to excessive heat buildup. When devices are placed in closed cabinets or tightly packed spaces, the heat generated during operation cannot dissipate effectively, causing overheating. Ensure that your devices have proper ventilation and are not obstructed by objects or placed in confined spaces.
2. Dust and Debris: Accumulation of dust and debris on device vents and cooling fans can hinder proper heat dissipation. Over time, this can lead to overheating issues and subsequent HDMI cutouts. Regularly clean the device vents and fans to prevent dust buildup and ensure optimal airflow for heat dissipation.
3. Blocked Cooling Vents: If the cooling vents of your devices are blocked or covered, it can prevent the heat from escaping, resulting in overheating. Check that cooling vents are not obstructed by objects like books, papers, or other devices. Ensure that devices are placed on surfaces that facilitate proper airflow and heat dissipation.
4. Extended Usage: Prolonged and intense usage of devices can generate more heat, increasing the chances of overheating. For instance, gaming consoles or AV receivers running for long periods or operating in high-performance modes can generate significant heat. Take breaks during extended usage sessions to allow devices to cool down and prevent overheating-related issues.
5. Internal Component Issues: Faulty or failing internal components like cooling fans, heat sinks, or thermal pads can contribute to overheating problems. If cooling mechanisms within devices are not functioning properly, it can result in excess heat buildup and subsequent HDMI cutouts. In such cases, professional repair or replacement of internal components may be necessary.
By ensuring proper ventilation, keeping devices clean, and monitoring usage time, you can minimize the risk of overheating and reduce the occurrence of HDMI cutouts. If overheating persists despite these precautions, it’s advisable to consult the device manufacturer or seek professional assistance to diagnose and address the underlying cause of the overheating issue.
Troubleshooting Steps
When experiencing HDMI cutouts, it’s essential to follow a systematic approach to troubleshoot and resolve the issue. Here are some troubleshooting steps you can take to identify and address the underlying causes of HDMI cutouts:
1. Updating Drivers and Firmware: Ensure that all HDMI-connected devices, including the source device (e.g., gaming console, Blu-ray player) and the receiving device (e.g., TV, AV receiver), have the latest drivers and firmware installed. Check the manufacturer’s website for available updates and follow the instructions to update the devices accordingly. Outdated firmware can lead to compatibility issues and result in HDMI cutouts.
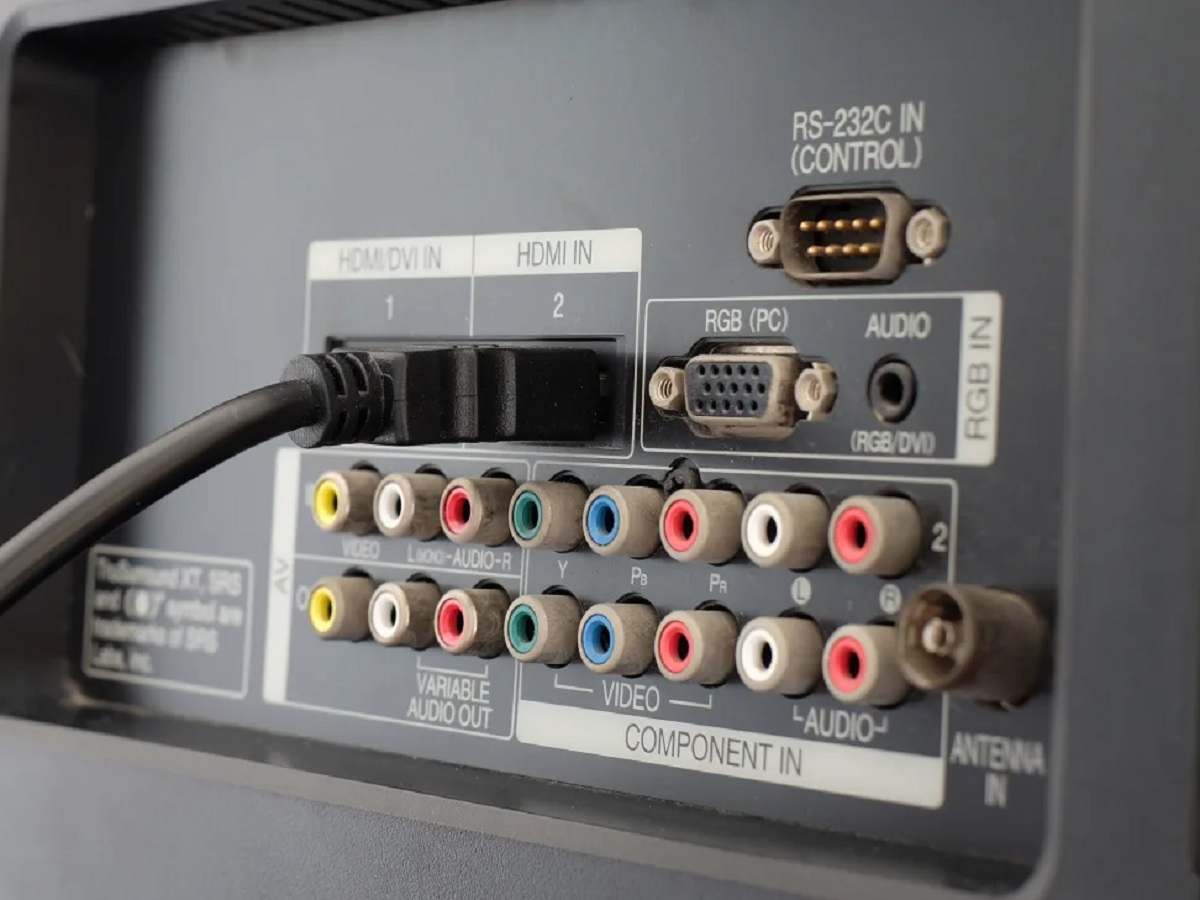
2. Checking Cable Connections: Verify that all HDMI cables are securely connected to the appropriate HDMI ports on both the source and receiving devices. Ensure that there are no loose connections or bent pins inside the cable connectors. Gently wiggle the cables to ensure a firm connection.
3. Trying a Different HDMI Port: If possible, try connecting the HDMI cable to a different HDMI port on the receiving device. Sometimes, HDMI ports can become damaged or develop faults, causing signal interruptions. Testing different ports can help determine if the issue lies with a specific port or the device itself.
4. Resetting the Display Settings: On the receiving device, such as a TV or monitor, reset the display settings to their default configuration. This can help eliminate any incorrect settings that may be causing HDMI cutouts. Refer to the device’s user manual or manufacturer’s website for instructions on how to reset the display settings.
5. Checking Power Supply: Ensure that devices are connected to a stable and adequate power source. Verify that power cables are securely plugged in and that the power supply can meet the power requirements of the connected devices. Using a surge protector or voltage regulator can help mitigate power-related issues.
6. Testing with a Different HDMI Cable: If possible, try using a different HDMI cable to rule out any cable-related issues. Borrow a known working cable from another source device or purchase a new cable to test if the problem persists with a different cable.
7. Minimizing Interference: Move devices away from potential sources of electromagnetic interference (EMI), such as other electrical devices, Wi-Fi routers, or wireless transmitters. EMI can disrupt the HDMI signal and cause cutouts.
8. Contacting Manufacturer Support: If the issue persists after attempting the troubleshooting steps above, it may be necessary to contact the manufacturer’s support team for further assistance. They can provide specific guidance based on the devices involved and offer additional troubleshooting steps or recommend repair options if required.
By following these troubleshooting steps, you can narrow down the potential causes of HDMI cutouts and work towards resolving the issue. Stay patient and methodical, as identifying the root cause may require trying multiple steps. With perseverance, you’ll be able to restore uninterrupted HDMI signal transmission and enjoy a seamless multimedia experience.
Updating Drivers and Firmware
One of the essential troubleshooting steps to address HDMI cutouts is updating drivers and firmware on your HDMI-connected devices. Outdated drivers or firmware can lead to compatibility issues and result in intermittent signal dropouts. Here’s how you can update drivers and firmware to ensure smooth HDMI signal transmission:
1. Check Manufacturer’s Website: Visit the websites of the manufacturers for both the source device (e.g., gaming console, Blu-ray player) and the receiving device (e.g., TV, AV receiver). Look for the “Support” or “Downloads” section, where you can find available driver and firmware updates for your specific model.
2. Identify the Model and Version: Take note of the model number and current firmware version of your devices. This information is typically found in the device settings or in the user manual. You may need to navigate through the device’s menu options or consult the manufacturer’s support documentation to locate this information.
3. Download the Latest Updates: On the manufacturer’s support page, search for the latest drivers and firmware updates for your specific model. Download the updates to your computer and make sure to select the correct version to match your device’s model and firmware version.
4. Follow Installation Instructions: Once the updates are downloaded, follow the manufacturer’s instructions to install them on your devices. This process may vary depending on the device and the update file format. In most cases, you will need to connect a USB drive to your computer, transfer the update file to the USB drive, and then connect the USB drive to the device for the update installation.
5. Perform the Update: Power on the device and access the settings menu. Locate the “Software Update” or “Firmware Update” option and follow the prompts to initiate the update. Be patient during the update process, as it may take some time to complete. Avoid interrupting the update or powering off the device to prevent any potential issues.
6. Verify Successful Update: After the update is complete, verify that the new driver and firmware versions are installed correctly. Check the device’s settings or consult the manufacturer’s information to confirm the updated versions. Some devices may display a notification or confirmation message upon successful installation.
By keeping your device drivers and firmware up to date, you ensure that they are equipped with the latest bug fixes, performance improvements, and compatibility enhancements. This can significantly reduce the likelihood of HDMI cutouts caused by outdated software. Regularly check for updates from the manufacturers and consider enabling automatic update notifications if available to stay up to date with the latest releases.
If HDMI cutouts persist even after updating the drivers and firmware, continue with the other troubleshooting steps to identify and resolve any additional underlying causes.
Checking Cable Connections
When experiencing HDMI cutouts, one of the first troubleshooting steps you should take is to check the cable connections. Loose or faulty connections can result in signal disruptions and intermittent HDMI connectivity. Here’s how you can verify and ensure proper cable connections:
1. Securely Insert the HDMI Cable: Ensure that the HDMI cable is fully inserted into the HDMI ports on both the source device (e.g., gaming console, Blu-ray player) and the receiving device (e.g., TV, AV receiver). Apply gentle pressure to push the connector into the port until it is snug and there is no visible gap.
2. Check for Bent Pins or Damage: Inspect the HDMI cable connectors for any bent or damaged pins. Bent pins can prevent proper signal transmission and cause HDMI cutouts. If you identify any bent pins, use a small, non-conductive tool (like a toothpick) to carefully straighten them. Be cautious not to apply too much force, as this can further damage the pins.
3. Swap Cables: If possible, try using a different HDMI cable to rule out any cable-related issues. Swap out the existing cable with a known working one from another HDMI device or borrow one from a friend. If the HDMI cutouts cease with the new cable, it indicates that the previous cable was faulty, and you may need to replace it.
4. Wiggle Test: While the HDMI cable is connected, gently wiggle it at both ends. Watch for any brief interruptions or flickering on the display screen. If the picture or sound cuts out momentarily during the wiggling, it could indicate a loose connection. Try reseating the cable, ensuring a secure fit to eliminate the possibility of a loose connection.
5. Consider Cable Length: HDMI signals can weaken over longer cable distances, especially if the cables are of lower quality or length exceeds recommended specifications. If you’re using an excessively long HDMI cable, consider replacing it with a shorter cable or using an HDMI signal booster or repeater to maintain signal integrity.
6. Use Certified HDMI Cables: Ensure that you are using certified HDMI cables from reputable manufacturers. Certified cables undergo testing to meet quality and performance standards, ensuring optimal signal transmission. Look for the “HDMI Certified” logo or check the manufacturer’s website for certification information.
By thoroughly inspecting and securing cable connections, you can mitigate HDMI cutouts caused by loose or faulty cables. If cable-related issues are ruled out, continue troubleshooting with the other recommended steps to identify and resolve any additional causes of HDMI cutouts.
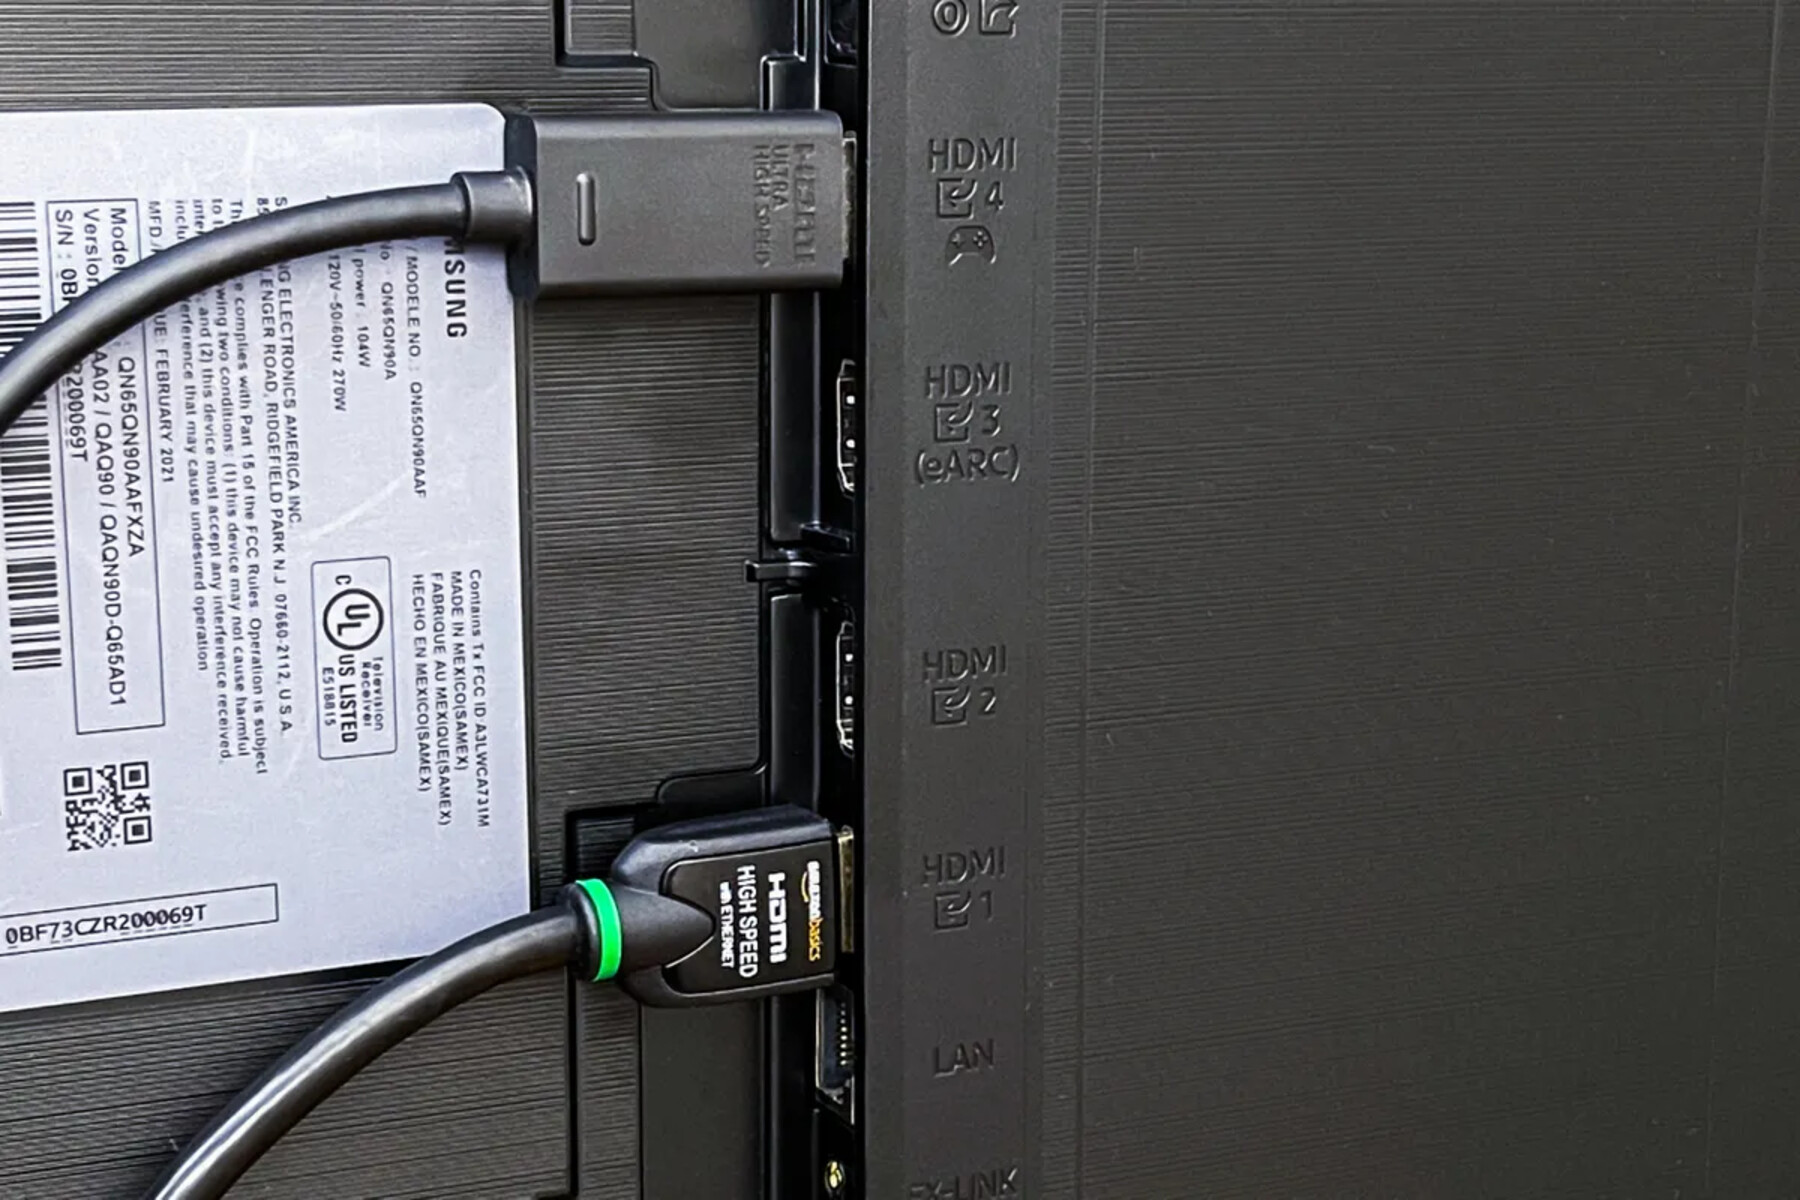
Trying a Different HDMI Port
If you’re experiencing HDMI cutouts, it’s worth trying a different HDMI port on your receiving device (e.g., TV, AV receiver). Sometimes, HDMI ports can develop faults or have compatibility issues, leading to intermittent signal disruptions. Here’s how you can determine if the problem lies with a specific HDMI port:
1. Identify Available HDMI Ports: Take note of all the available HDMI ports on your receiving device. This information can usually be found in the device’s user manual or by visually inspecting the device.
2. Disconnect the HDMI Cable: Carefully unplug the HDMI cable from the current HDMI port on the receiving device. Ensure that the cable is disconnected from both the source device (e.g., gaming console, Blu-ray player) and the receiving device.
3. Select a Different HDMI Port: Plug the HDMI cable into a different HDMI port on the receiving device. Choose a port that is available and not currently in use.
4. Test for HDMI Connectivity: Power on both the source device and the receiving device. Switch the input source on the receiving device to the HDMI port you connected the cable to. Verify if the HDMI connection is stable and if the HDMI cutouts persist.
5. Observe for Signal Interruptions: Keep an eye on the display or listen for any audio disruptions while using the new HDMI port. If the HDMI signal remains stable without any cutouts, it suggests that the previous HDMI port may have been faulty or incompatible.
6. Check Additional Factors: Before concluding that the previous HDMI port is the source of the issue, ensure that other factors such as power supply, cable issues, or compatibility have been ruled out. Test the new HDMI port with different sources and cables to determine if the stability remains consistent.
7. Seek Professional Assistance: If you discover that a specific HDMI port consistently experiences cutouts across different sources and cables, it may indicate a hardware issue with the receiving device. In such cases, it is advised to contact the manufacturer’s support for further assistance or consult a professional for repair or replacement options.
By trying a different HDMI port on your receiving device, you can determine whether the issue is specific to the previous HDMI port or if it persists across different ports. This troubleshooting step helps identify the root cause of the HDMI cutouts and guides you towards a suitable solution.
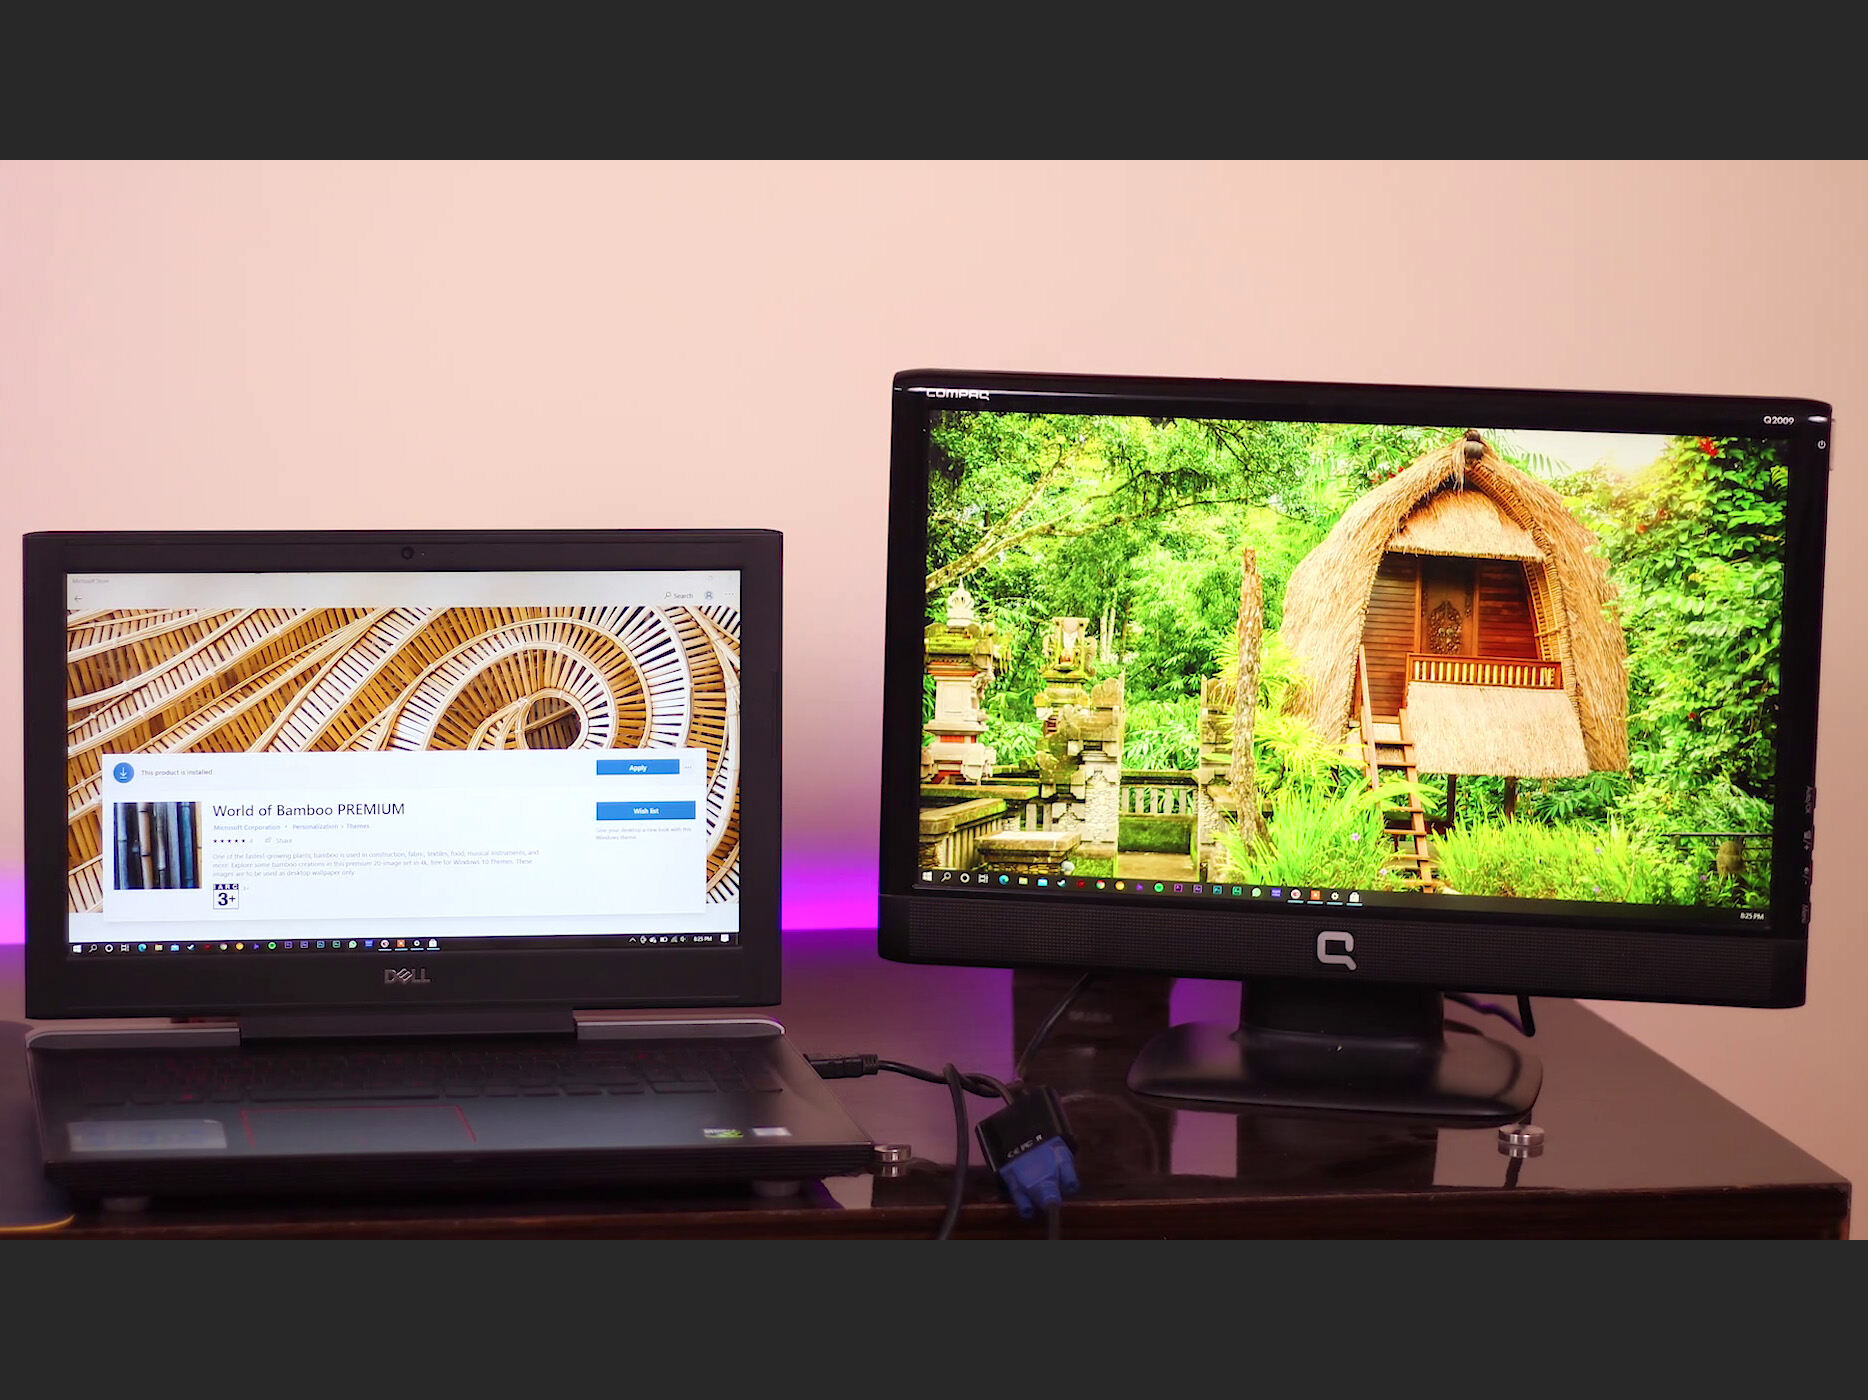
Resetting the Display Settings
Resetting the display settings on your receiving device (e.g., TV, monitor) is a useful troubleshooting step that can help resolve HDMI cutouts. Incorrect display settings can cause signal disruptions and intermittent HDMI connectivity. Here’s how you can reset the display settings to their default configuration:
1. Navigate to Display Settings: On your receiving device, access the settings menu. The precise location of the display settings may vary depending on the make and model of your device. Look for options related to “Picture,” “Display,” or “Settings.”
2. Locate the Reset or Default Option: Within the display settings menu, search for the option to reset or restore the display settings to their default values. This option may be labeled as “Reset,” “Restore Defaults,” or something similar. Refer to the device’s user manual or the manufacturer’s website for specific instructions if needed.
3. Confirm the Reset: Select the reset or default option and confirm your selection when prompted. Depending on the device, you may be asked to enter a passcode or provide confirmation before proceeding with the reset. Be aware that resetting the display settings will revert all settings, including picture mode, brightness, contrast, and color settings, back to their factory defaults.
4. Allow the Device to Restart: After confirming the reset, the receiving device may undergo a restart process. During this time, it may power off and on automatically. Be patient and allow the device to complete the reset process before accessing the display settings again.
5. Verify Normal HDMI Operation: Once the device has restarted, reconnect the HDMI cable between the source device (e.g., gaming console, Blu-ray player) and the receiving device. Switch to the correct HDMI input on the receiving device and observe for any HDMI cutouts. Confirm that the HDMI connectivity remains stable and the signal is uninterrupted.
6. Adjust Display Settings (Optional): If necessary, adjust the display settings according to your preferences after the reset. This includes modifying picture mode, backlight intensity, color balance, and any other settings to achieve the desired visual experience. Follow the device’s user manual or manufacturer’s instructions for guidance on adjusting the display settings.
Resetting the display settings to their default configuration can eliminate any incorrect settings that may have been causing HDMI cutouts. By going back to the factory defaults, you create a clean slate for the display settings, allowing for a fresh start and potentially resolving any compatibility or configuration issues that were present. If HDMI cutouts persist after the reset, continue with the other troubleshooting steps to identify and resolve any additional causes.
Conclusion
HDMI cutouts can be frustrating and disruptive to your audiovisual experience. Fortunately, by understanding the common causes and following the troubleshooting steps outlined in this article, you can effectively resolve HDMI cutout issues. We have explored various factors that can lead to HDMI cutouts, including cable issues, power problems, compatibility conflicts, overheating, and more.
By checking cable connections, updating drivers and firmware, trying different HDMI ports, resetting display settings, and addressing other potential causes, you can pinpoint and resolve the underlying issues. Identifying and addressing these issues will ensure stable and uninterrupted HDMI signal transmission.
Remember to use certified HDMI cables and ensure proper ventilation for your devices to minimize cable-related and overheating issues. Keep your devices up to date with the latest drivers and firmware to avoid compatibility conflicts. Additionally, always double-check the settings and power supply to rule out any simple oversights.
If you have exhausted all the troubleshooting steps and the HDMI cutouts persist, reaching out to the manufacturer’s support or seeking professional assistance might be necessary. Their expertise can help identify and resolve more complex hardware-related issues.
By following these guidelines and taking the necessary steps to address HDMI cutouts, you can enjoy uninterrupted audio and video signals and get back to enjoying your favorite movies, shows, and games. With a bit of patience and persistence, troubleshooting HDMI cutouts can lead to a better overall viewing experience.