What is HDMI?
HDMI, which stands for High-Definition Multimedia Interface, is a widely used audio and video interface that allows the transfer of high-quality digital audio and video signals between devices. It is the standard choice for connecting devices like laptops, Blu-ray players, gaming consoles, and televisions, providing a seamless and high-definition multimedia experience.
HDMI cables transmit both video and audio signals through a single cable, eliminating the need for separate audio cables. This makes it convenient and easy to connect devices and create a clutter-free setup. HDMI also supports various video resolutions, including Full HD (1080p) and even 4K Ultra HD, delivering crystal-clear visuals and vibrant colors.
One of the key benefits of HDMI is its ability to support high-bandwidth digital content protection (HDCP). This technology ensures that copyrighted content, such as Blu-ray movies or streaming services, can be securely transmitted and displayed on compatible devices, preventing unauthorized copying or piracy.
HDMI has evolved over the years to include different versions, with each version offering improved features and capabilities. The latest HDMI version, HDMI 2.1, supports higher video resolutions, faster refresh rates, and enhanced audio formats like Dolby Atmos. However, most devices still use the widely supported HDMI 2.0 standard, which is more than sufficient for most home theater setups.
Overall, HDMI has become the go-to standard for connecting various multimedia devices, providing a seamless and high-quality audio and video experience. Whether you’re streaming your favorite shows, playing video games, or giving a presentation, having HDMI compatibility ensures that you can easily connect your laptop to a monitor or other display devices.
Why Connect a Laptop to a Monitor?
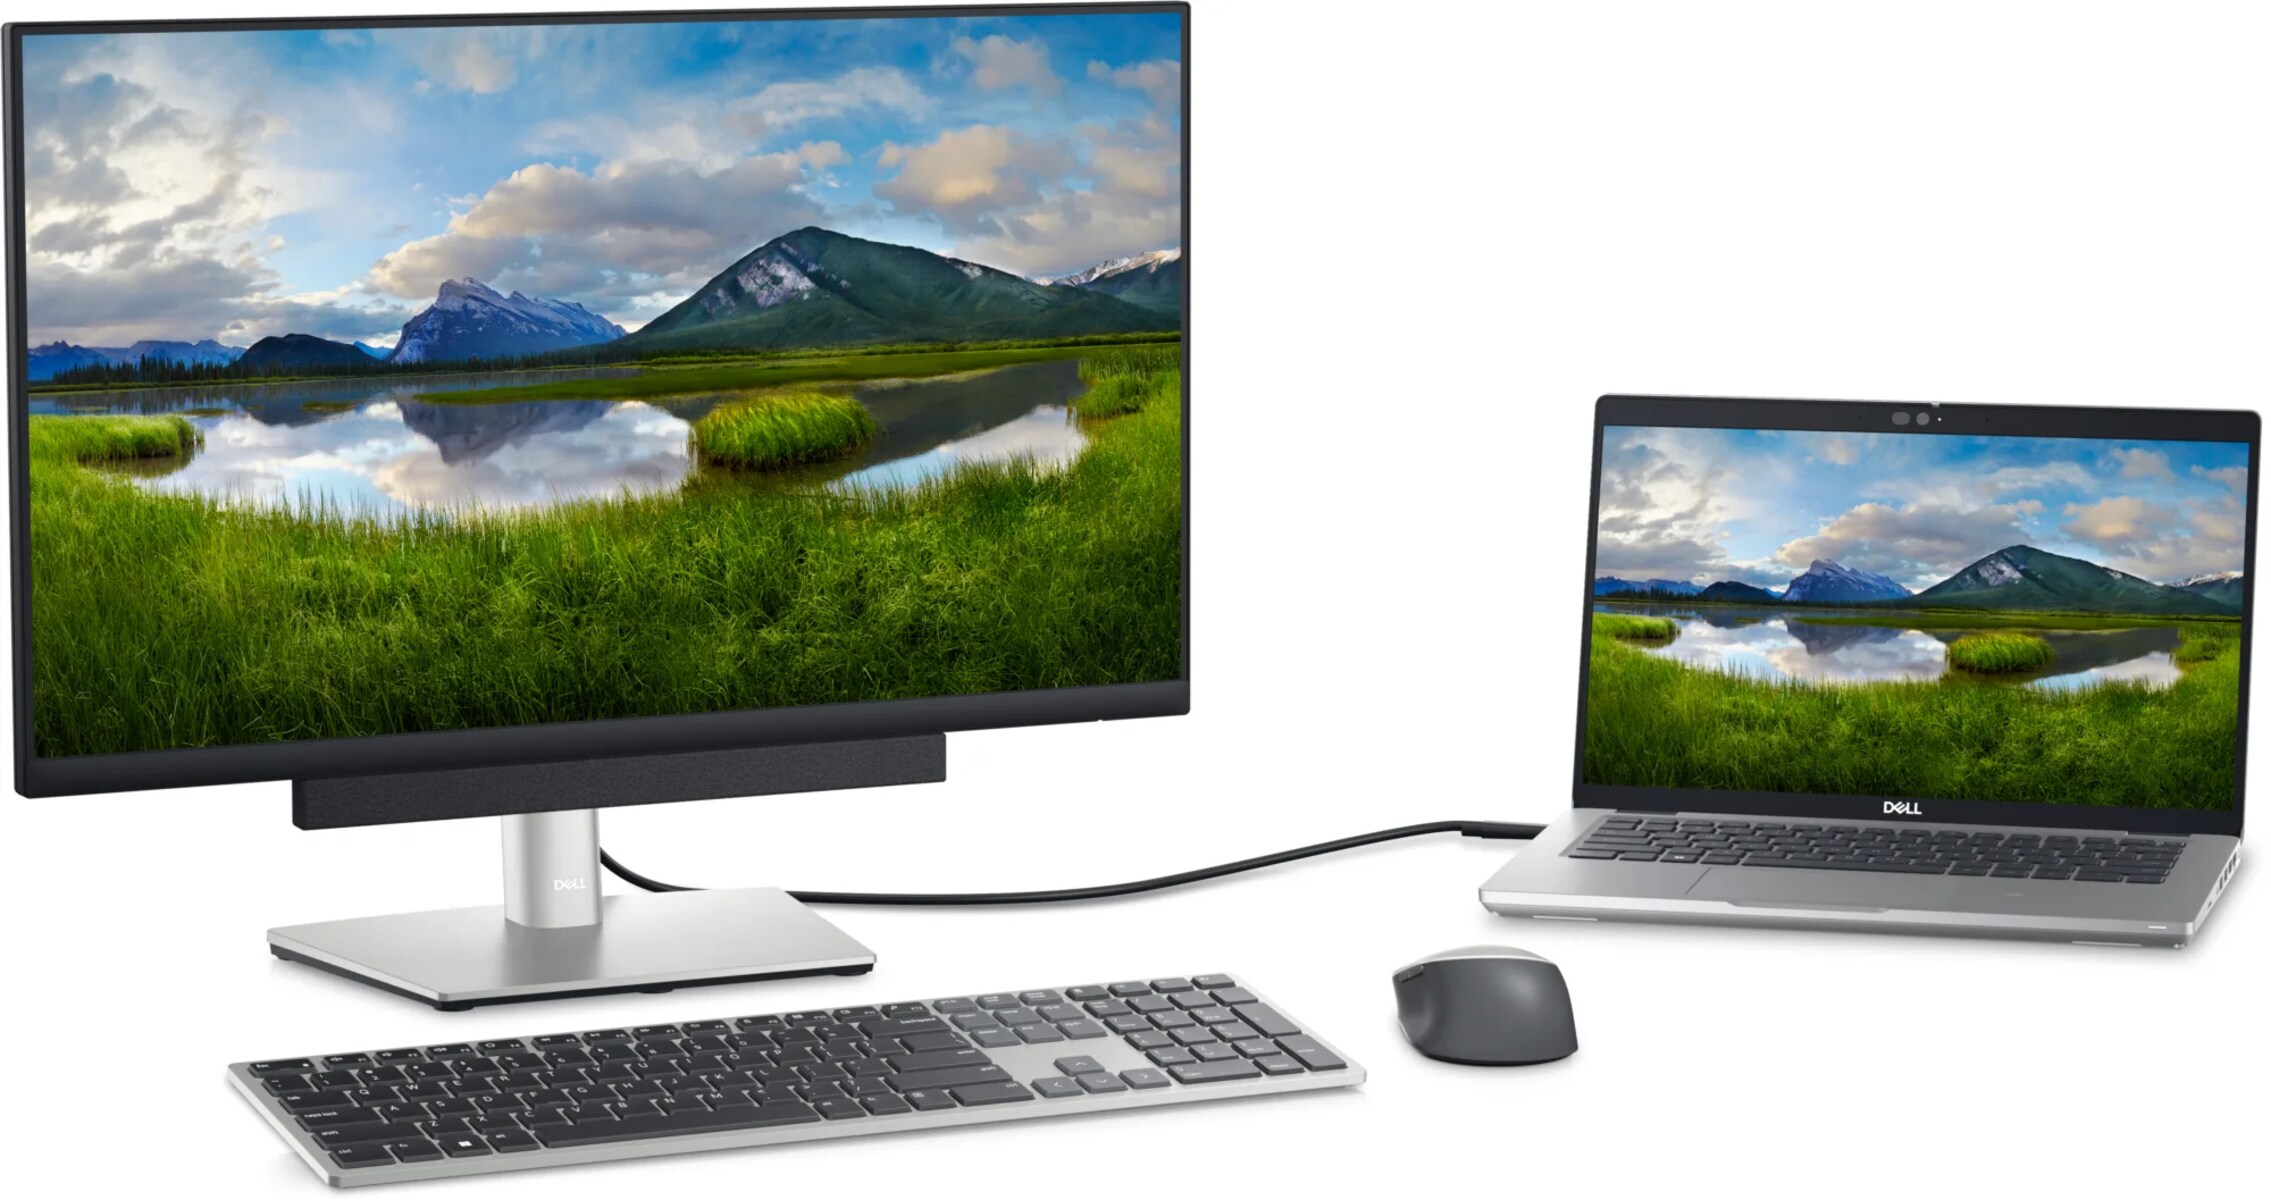
Connecting a laptop to a monitor can offer numerous advantages and enhance your overall computing experience. Here are a few reasons why you may consider connecting your laptop to a monitor:
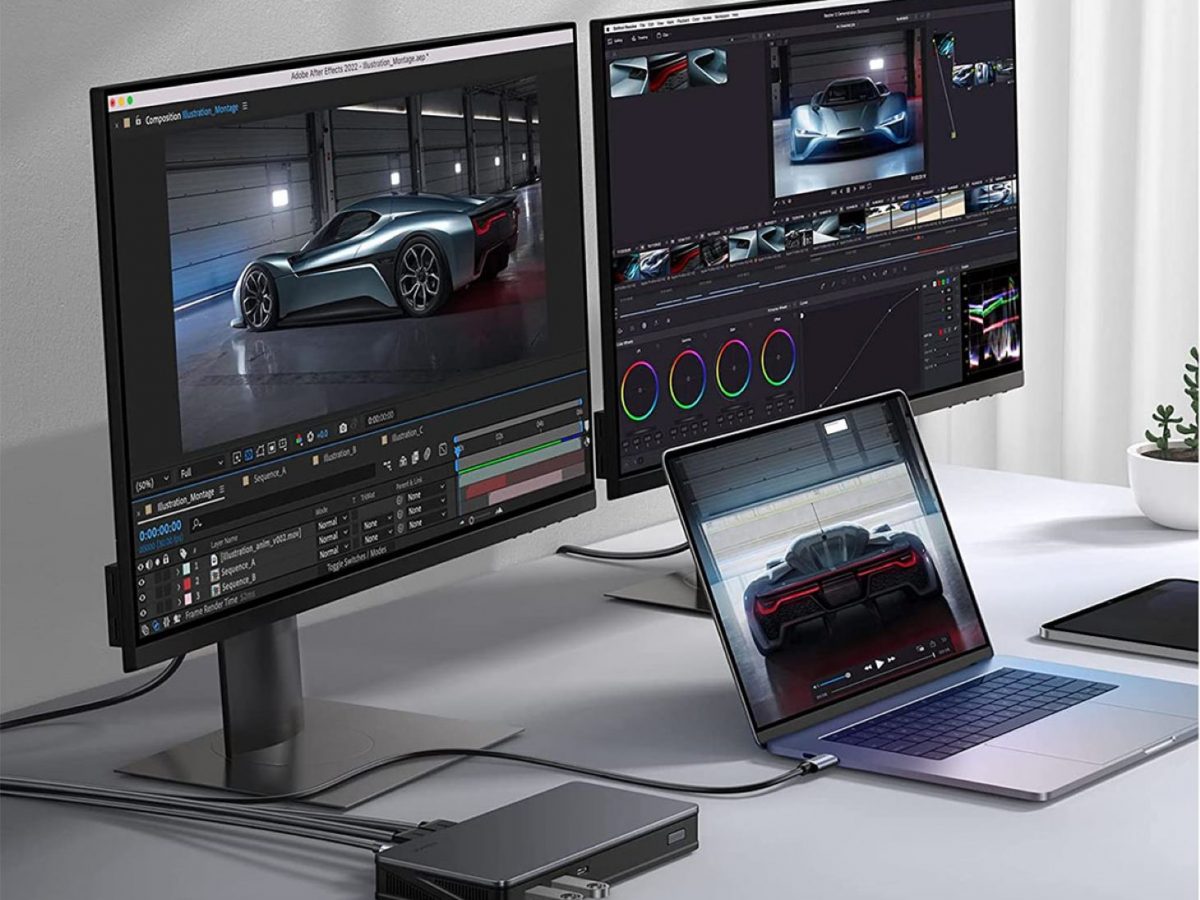
1. Increased Screen Size: Laptops typically have smaller screens, which can be limiting when working on tasks that require more screen real estate, such as graphic design, video editing, or multitasking. By connecting a monitor, you can enjoy a larger display area, allowing for improved productivity and better visual immersion.
2. Improved Visuals: Laptops often come with lower-resolution displays or smaller screens, which may not do justice to high-definition or multimedia content. By connecting a monitor with a higher resolution or better color accuracy, you can experience sharper images, richer colors, and more detailed visuals, making it ideal for activities like watching movies, editing photos, or playing games.
3. Enhanced Productivity: With a larger monitor, you can have multiple windows or applications open simultaneously, making it easier to multitask and switch between various tasks. This can be particularly helpful for professionals who need to work with multiple documents, spreadsheets, or software tools simultaneously.
4. Ergonomic Benefits: The built-in keyboard and trackpad on laptops may not provide the most comfortable or ergonomic typing experience. By connecting your laptop to a separate monitor, you can pair it with an external keyboard, mouse, and even an adjustable monitor stand, allowing you to position the display at eye level and create a more comfortable and ergonomic workstation.
5. Extended Desktop: When connected to a monitor, your laptop can function in dual-screen mode, providing you with extended desktop space. This can be beneficial for tasks that require multiple applications or documents to be open simultaneously, such as coding, graphic design, or video editing.
6. Presentations and Collaboration: If you frequently give presentations or collaborate with others, connecting your laptop to a projector or a larger monitor can ensure that everyone in the room can clearly see the content being shared. This is especially useful in conference rooms, classrooms, or during client meetings.
In summary, connecting your laptop to a monitor offers a range of benefits, including larger screen size, improved visuals, increased productivity, ergonomic advantages, extended desktop functionality, and enhanced presentation capabilities. So, whether you’re a professional seeking a more efficient workstation, a multimedia enthusiast craving better visual experiences, or someone who wants to boost productivity, connecting your laptop to a monitor can be a game-changer for your computing setup.
Check if Your Laptop Supports HDMI Output
Before attempting to connect your laptop to a monitor using HDMI, it’s important to ensure that your laptop has HDMI output capabilities. Here are a few steps to check if your laptop supports HDMI:
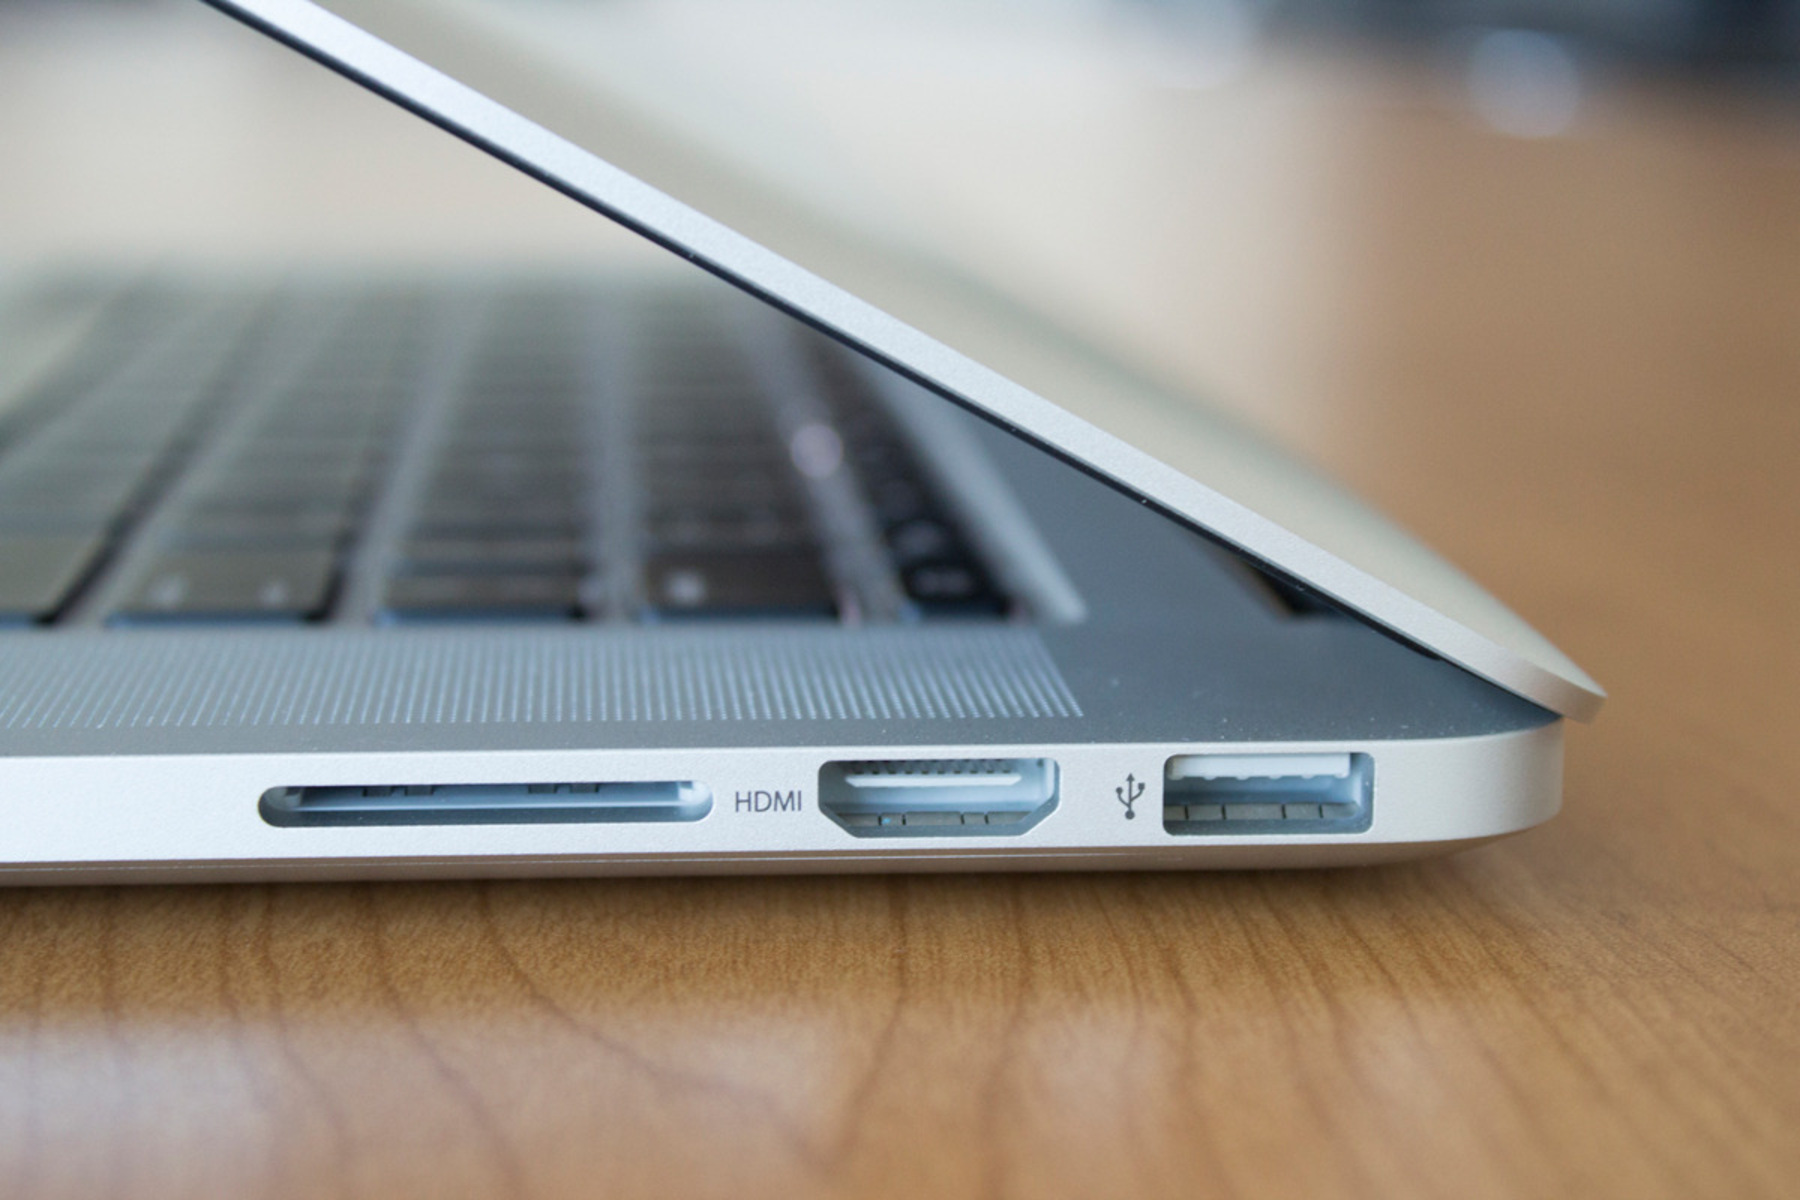
1. Look for an HDMI Port: Take a look at the sides or back of your laptop for an HDMI port. It is usually a rectangular port with several pins inside. It may be labeled as “HDMI” or have the HDMI logo next to it. If you see an HDMI port, your laptop has HDMI output.
2. Check the Laptop’s Specifications: If you are not able to locate an HDMI port, you can refer to your laptop’s user manual or visit the manufacturer’s website to check the specifications. Look for information regarding video output options or ports available on your specific laptop model. If HDMI output is listed, you can proceed with connecting your laptop to a monitor using an HDMI cable.
3. Consult the Laptop’s Graphics Card: In some cases, laptops may not have a dedicated HDMI port, but they may still have HDMI output capabilities through their graphics card. Check the specifications of your laptop’s graphics card to see if it includes HDMI output. You can find this information in the device manager or by visiting the graphics card manufacturer’s website.
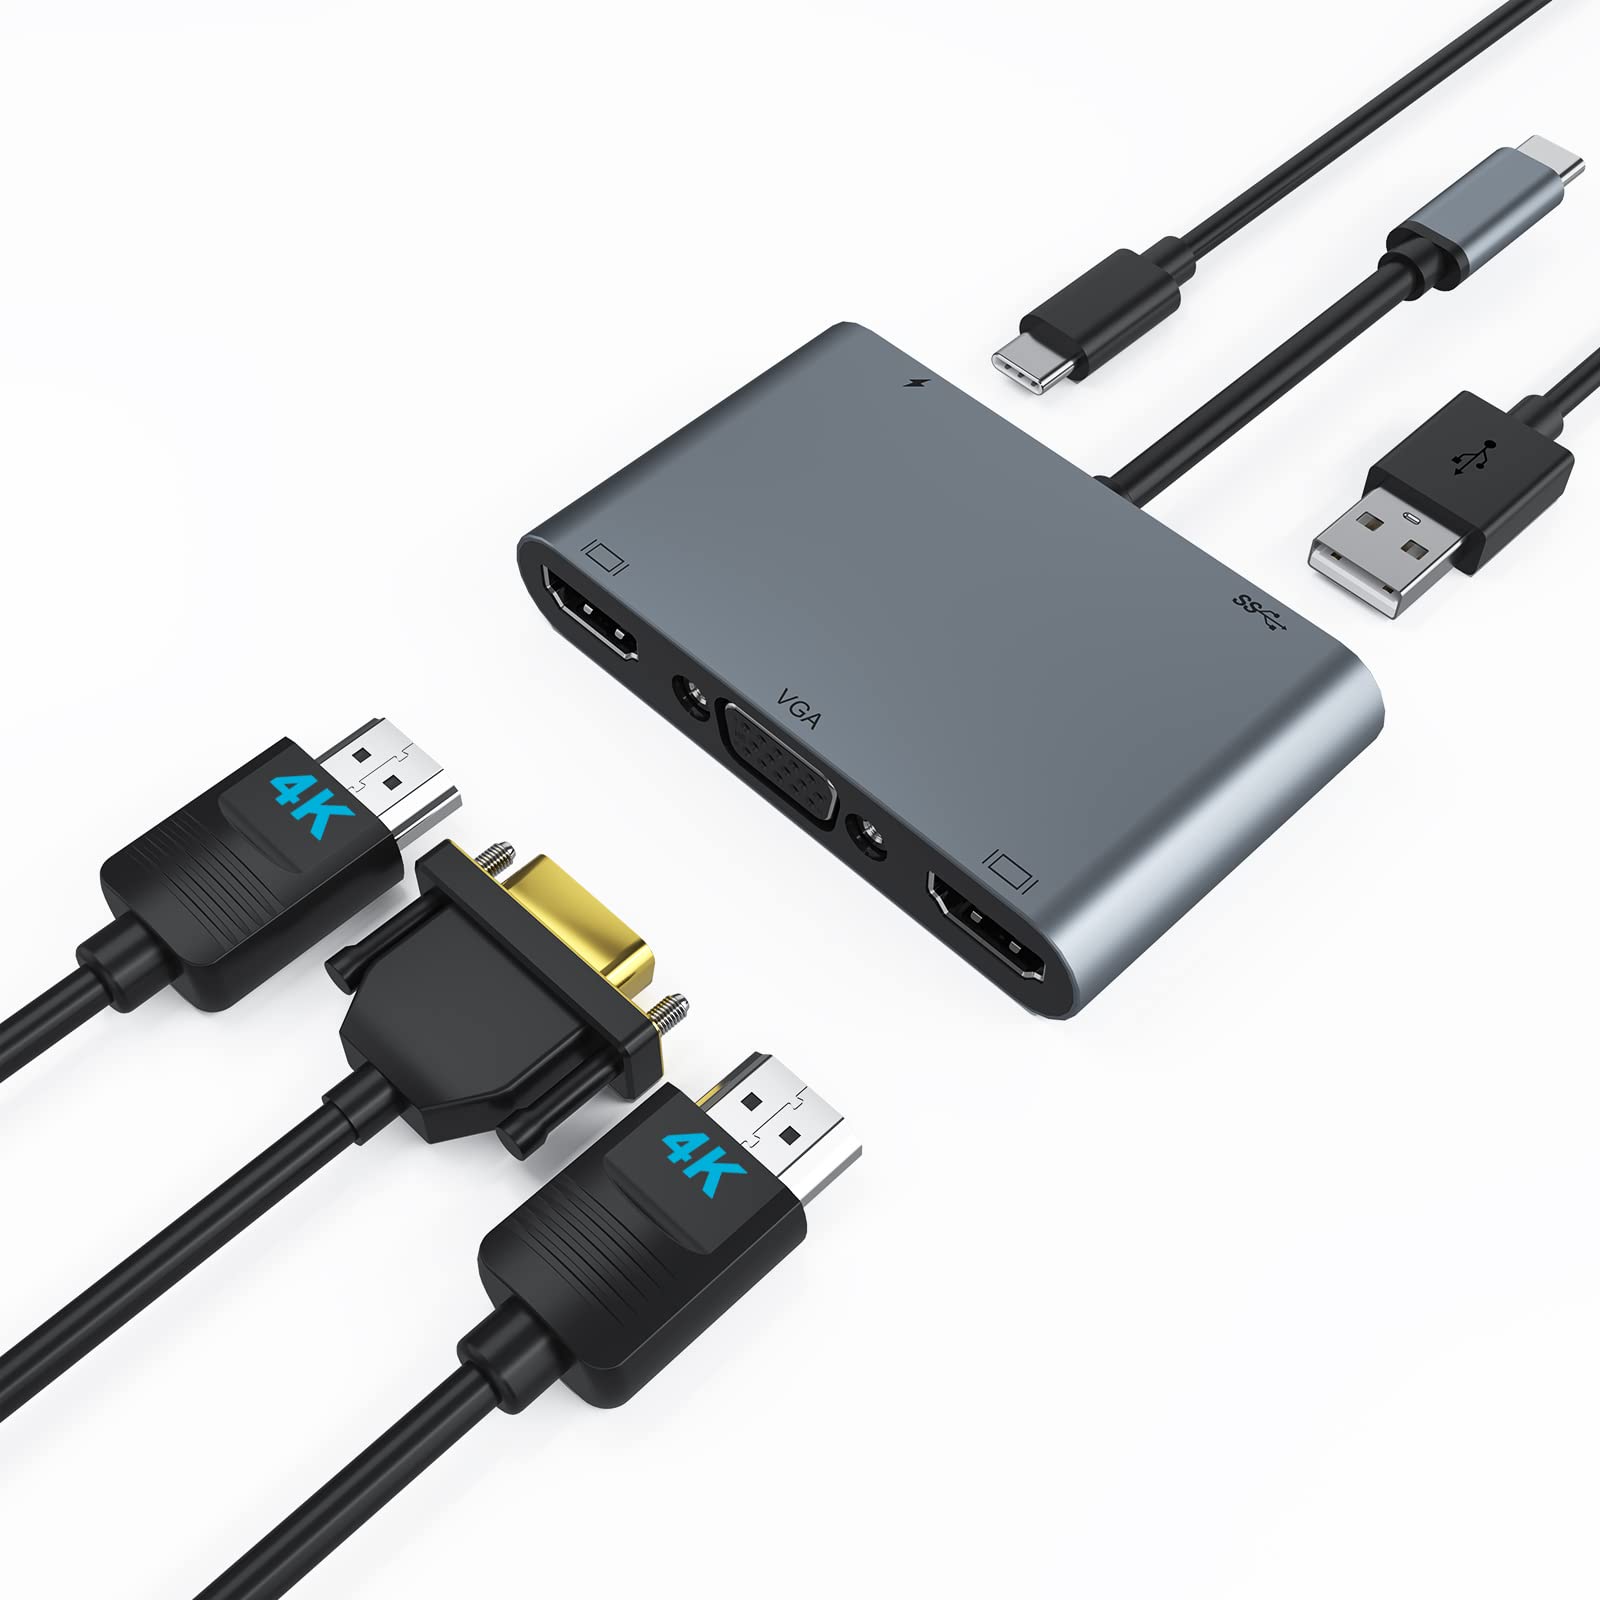
4. Use an Adapter: If your laptop does not have an HDMI port or HDMI output capability, you may still be able to connect it to a monitor using an adapter. Certain laptops may have other video output ports, such as DisplayPort or USB-C, which can be converted to HDMI using the appropriate adapter. Check the available ports on your laptop and explore adapter options that are compatible with your specific laptop model.
5. Seek Professional Assistance: If you are unsure about your laptop’s HDMI output capabilities or are having trouble identifying the available ports, it can be helpful to consult with a computer technician or contact the laptop manufacturer’s customer support for further guidance. They can provide you with accurate information specific to your laptop model.
By following these steps, you can determine if your laptop supports HDMI output, ensuring that you can successfully connect it to a monitor using an HDMI cable or appropriate adapter. If your laptop does not have HDMI output, don’t worry. There may still be alternative ways to connect your laptop to an external monitor, such as using VGA, DVI, or DisplayPort connections.
Acquiring the Necessary Cables and Adapters
Once you have confirmed that your laptop supports HDMI output, the next step is to acquire the necessary cables and adapters to connect your laptop to a monitor. Here are some considerations:
1. HDMI Cable: The most important component for connecting your laptop to a monitor is an HDMI cable. Make sure you have a high-quality HDMI cable that is long enough to reach from your laptop to the monitor. HDMI cables come in different versions, such as HDMI 1.4 or HDMI 2.0. It is generally recommended to use an HDMI 2.0 cable, as it supports higher resolutions and refresh rates.
2. Adapter (If Required): Depending on the available ports on your laptop and the input ports on the monitor, you may need an adapter to convert from one type of connection to HDMI. For example, if your laptop has a DisplayPort or USB-C port, you will need a DisplayPort to HDMI adapter or a USB-C to HDMI adapter, respectively. Ensure that the adapter you choose is compatible with your laptop’s specific port and the monitor’s input requirements.
3. Cable Length: Consider the distance between your laptop and the monitor when selecting the cable length. It is recommended to choose a cable length that allows for flexibility and a neat setup. Avoid excessively long cables as they may lead to signal degradation.
4. Quality and Compatibility: When purchasing cables and adapters, opt for high-quality products from reputable brands. This helps ensure a reliable connection and optimal performance. Verify that the cables and adapters are compatible with the HDMI standards supported by both your laptop and the monitor.
5. Consider Additional Features: Some HDMI cables come with additional features such as support for Ethernet connectivity or audio return channel. While these features may not be essential for basic laptop-to-monitor connections, they can be beneficial if you plan to use the HDMI cable for other purposes, such as streaming media or connecting to a home theater system.
6. Check Existing Cables: Before purchasing new cables or adapters, inspect any cables you already have, such as HDMI or display cables. If you already have the necessary cables or adapters, there is no need to make an additional purchase, provided they are compatible with your laptop and monitor.
Remember to read customer reviews and do some research to ensure that the cables and adapters you select are reliable and of good quality. Once you have acquired the necessary cables and adapters, you are ready to proceed with connecting your laptop to a monitor using HDMI.
Connect the HDMI Cable to the Laptop and Monitor
Now that you have gathered the necessary cables and adapters, it’s time to connect your laptop to a monitor using HDMI. Follow these steps to establish the connection:
1. Power Off: Before connecting the HDMI cable, ensure that both your laptop and the monitor are powered off. This prevents any potential damage to the devices or disruption to the connection.
2. Locate HDMI Ports: Identify the HDMI port on your laptop and the corresponding HDMI input port on the monitor. These ports are usually labeled “HDMI” and may have the HDMI logo printed next to them. In some cases, you may need to remove protective covers or caps from the ports.
3. Connect the HDMI Cable: Take one end of the HDMI cable and insert it firmly into the HDMI output port on your laptop. Ensure that the cable is inserted fully to establish a secure connection. Then, take the other end of the cable and plug it into the HDMI input port on the monitor. Again, make sure the connection is secure.
4. Power On: Once the HDMI cable is securely connected to both the laptop and the monitor, power on both devices. It is essential to follow the manufacturer’s instructions for properly turning on each device.
5. Source Selection: On your monitor, use the physical buttons or remote control to navigate to the input/source settings. Select the HDMI input option that corresponds to the port to which you connected your laptop. This will ensure that the monitor is receiving the video signal from your laptop.
6. Check Display Settings: On your laptop, go to the display settings. Depending on your operating system, this can typically be accessed through the control panel or system preferences. Ensure that the display settings are properly configured to extend, duplicate, or use the external monitor as your primary display, depending on your preference.
7. Adjust Resolution (if needed): If the screen resolution on the monitor does not match the desired settings, go to the display settings on your laptop and adjust the resolution to your desired specifications. This ensures that the content appears appropriately on the external monitor.
8. Test and Calibrate: To ensure that the connection is working correctly, try playing a video or opening a document on your laptop. Check if the content is displayed on the monitor as expected. If needed, you may need to calibrate the display settings further to achieve the best visual experience. Refer to the monitor’s user manual for instructions on calibration.
With the HDMI cable successfully connected and the display settings properly configured, you should now have your laptop connected to the monitor. Enjoy the benefits of a larger screen, improved visuals, and enhanced productivity!
Configure the Display Settings on Your Laptop
After connecting your laptop to a monitor using HDMI, it is important to configure the display settings to ensure optimal performance and usability. Follow these steps to adjust the display settings on your laptop:
1. Open Display Settings: Depending on your operating system, access the display settings by right-clicking on the desktop and selecting “Display settings” or through the Control Panel/System Preferences.
2. Identify External Monitor: In the display settings window, you should see two screens labeled as your laptop’s built-in display and the external monitor. The external monitor may be identified by its model name or as “Display 2,” “HDMI,” or similar.
3. Choose Display Mode: Select the display mode based on your preference and workflow:
- Extend: This mode allows you to use the external monitor as an extension of your laptop’s display. It provides additional screen space, ideal for multitasking or working with multiple applications side by side.
- Duplicate: This mode mirrors your laptop’s display onto the external monitor, showing the same content on both screens. It is useful for presentations or when you want to share the same information with others.
- External Monitor Only: This mode disables your laptop’s built-in display and uses only the external monitor as the primary display. It is advantageous when you prefer to work solely on the larger screen.
4. Adjust Screen Resolution: Select the desired screen resolution for the external monitor. Choose a resolution that matches the monitor’s native resolution for optimal clarity and sharpness. If needed, experiment with different resolutions to find the one that suits your preference.
5. Arrange Display Layout: If you’re using the “Extend” display mode, arrange the positioning of the screens to match their physical placement. Drag and drop the screens within the display settings window to align them accordingly. This helps to ensure a seamless transition between screens when moving the cursor or windows.
6. Customize Additional Settings: Explore additional display settings to personalize your experience. This may include adjusting the orientation (portrait or landscape), screen brightness, contrast, or color settings to match your preference or environmental conditions.
7. Apply and Save Changes: After making the necessary adjustments, click the “Apply” button to save the display settings. In some cases, you may need to confirm the changes or wait for the displays to refresh.
8. Test and Optimize: To ensure that the display settings are properly configured, test various applications, websites, or multimedia content on the external monitor. Check for any abnormalities, such as overscan or underscan issues, and fine-tune the settings accordingly. Refer to the monitor’s user manual or the manufacturer’s website for specific calibration instructions.
By configuring the display settings on your laptop, you can maximize the benefits of connecting it to a monitor using HDMI. Whether you use it for work, entertainment, or collaboration, a properly configured display will enhance your overall computing experience and productivity.
Troubleshooting Common Issues
While connecting your laptop to a monitor using HDMI is generally a straightforward process, you may encounter some common issues along the way. Here are some troubleshooting tips for resolving these issues:
1. No Signal on External Monitor: If your monitor displays a “No Signal” message, ensure that the HDMI cable is securely connected to both the laptop and the monitor. Try unplugging and re-plugging the cable. If the issue persists, try using a different HDMI cable or connecting to a different HDMI port on the monitor.
2. Incorrect or Distorted Display: If the display on the external monitor appears distorted, blurry, or doesn’t match the native resolution, go to the display settings on your laptop and adjust the screen resolution to match the recommended resolution for the monitor. If needed, update your graphics card drivers to ensure compatibility and performance.
3. No Sound on External Monitor: If you’re not getting audio through the monitor, check the sound settings on your laptop. Go to the sound settings and ensure that the audio output is set to the HDMI port or the monitor speakers. If the issue persists, try restarting your laptop or updating your audio drivers.
4. Laptop Freezes or Crashes: If your laptop freezes or crashes after connecting to the monitor, it could be due to incompatible or outdated graphics card drivers. Update your graphics card drivers to the latest version from the manufacturer’s website. Additionally, make sure your laptop meets the system requirements for using an external monitor.
5. Flickering or Noisy Display: If the display on the external monitor flickers, has lines, or appears noisy, try adjusting the refresh rate in the display settings. Decrease the refresh rate to see if it improves the display quality. Alternatively, try using a different HDMI cable or connecting to a different HDMI port on the monitor.
6. Overscan or Underscan: Overscan or underscan issues may cause parts of the screen to be cut off or have black borders. To adjust this, look for an Overscan or Underscan setting in your laptop’s display settings. Fine-tune these settings until the entire display of the monitor is visible without any cut-off edges or unnecessary borders.
7. Adapter Compatibility Issues: If you are using an adapter to connect your laptop to the monitor, ensure that it is compatible with both your laptop’s video output port and the monitor’s input requirements. Incompatible adapters may result in non-functional or distorted displays. Consult the manufacturer’s documentation or seek professional assistance to ensure compatibility.
8. External Monitor Not Detected: If your laptop doesn’t detect the external monitor, confirm that the HDMI cable is securely connected and that the monitor is powered on. Try restarting your laptop while the monitor is connected. If these steps don’t work, check if your laptop’s graphics card supports multiple displays or if there are any configuration settings that need adjustment.
If you encounter other issues not mentioned here, consult the user manuals for your laptop and monitor, search for online support forums, or contact technical support for assistance. Remember to provide specific details and error messages when seeking help to expedite the troubleshooting process.
Conclusion
Connecting your laptop to a monitor using HDMI can greatly enhance your computing experience, offering a larger screen, improved visuals, and increased productivity. By following the steps outlined in this guide, you can successfully connect your laptop to a monitor and configure the display settings to suit your needs.
First, ensure that your laptop supports HDMI output by checking for an HDMI port or reviewing the specifications of your laptop model. Next, acquire the necessary cables and adapters, such as an HDMI cable or appropriate converters, to establish the connection between your laptop and the monitor.
After physically connecting the HDMI cable, configure the display settings on your laptop to determine the display mode, screen resolution, and arrange the layout if using the extended display mode. Tweaking additional settings, such as screen orientation or brightness, can further personalize your setup.
If you encounter any issues during the process, refer to the troubleshooting guide provided for common solutions. Ensure that all cables and connections are secure, update drivers if needed, and adjust settings to optimize the display quality and audio output.
By taking advantage of the benefits offered by a larger external monitor, you can enjoy improved visual experiences, enhanced productivity, and more comfortable workspaces. Whether you require a larger display for work, multimedia content, or collaborative purposes, connecting your laptop to a monitor using HDMI can provide the flexibility and convenience you need.
Now, armed with the knowledge and guidance from this article, you can confidently connect your laptop to a monitor using HDMI and make the most out of your computing setup. Enjoy the expanded workspace, rich visuals, and increased efficiency that come with this connection method!