Introduction
Mirroring your MacBook screen to your TV can be incredibly useful for a variety of purposes, whether you want to share a presentation, stream videos, or simply enjoy a larger display for your laptop. One of the most common methods to achieve this is by connecting your MacBook to your TV using an HDMI cable. This allows you to replicate your MacBook’s screen onto your TV, giving you a seamless and immersive viewing experience.
In this article, we will guide you through the process of mirroring your MacBook to your TV using an HDMI cable. We will walk you through the necessary steps, explain the requirements, and provide troubleshooting tips to ensure a successful connection.
Please note that the steps outlined in this article may vary slightly depending on the specific MacBook model and TV you are using. Nevertheless, the general process remains the same, and we will highlight any variations along the way. So, let’s dive in and get started on mirroring your MacBook to your TV!
Requirements for mirroring MacBook to TV with HDMI
Before you begin the process of mirroring your MacBook to your TV using an HDMI cable, there are a few requirements that you need to keep in mind:
- HDMI cable: You will need an HDMI cable to establish a connection between your MacBook and TV. Ensure that you have a compatible HDMI cable that is long enough to span the distance between the two devices.
- HDMI port: Both your MacBook and TV should have an HDMI port. Most modern MacBooks have a built-in HDMI port, while on some models, you may need an HDMI adapter.
- TV: Make sure your TV has an HDMI input port. This is usually labeled as “HDMI” and may be located on the back or the side of the TV. Check your TV’s user manual if you’re uncertain about the availability and location of the HDMI port.
- MacBook and TV compatibility: Ensure that your MacBook and TV are compatible with each other. While MacBooks generally support HDMI connections, it is essential to check the specifications of your specific MacBook model to confirm the compatibility.
- Display settings: On your MacBook, ensure that the display settings are configured correctly to allow for mirroring. We will walk you through the steps to adjust these settings in the following sections.
By ensuring that you have all the necessary requirements in place, you can proceed confidently with the process of mirroring your MacBook to your TV using an HDMI cable. Now that we have covered the requirements, let’s move on to the step-by-step instructions for connecting and mirroring the MacBook screen to your TV.
Step 1: Connect the HDMI cable to your MacBook and TV
The first step in mirroring your MacBook to your TV using an HDMI cable is to establish a physical connection between the two devices. Follow these simple steps:
- Ensure that both your MacBook and TV are turned off.
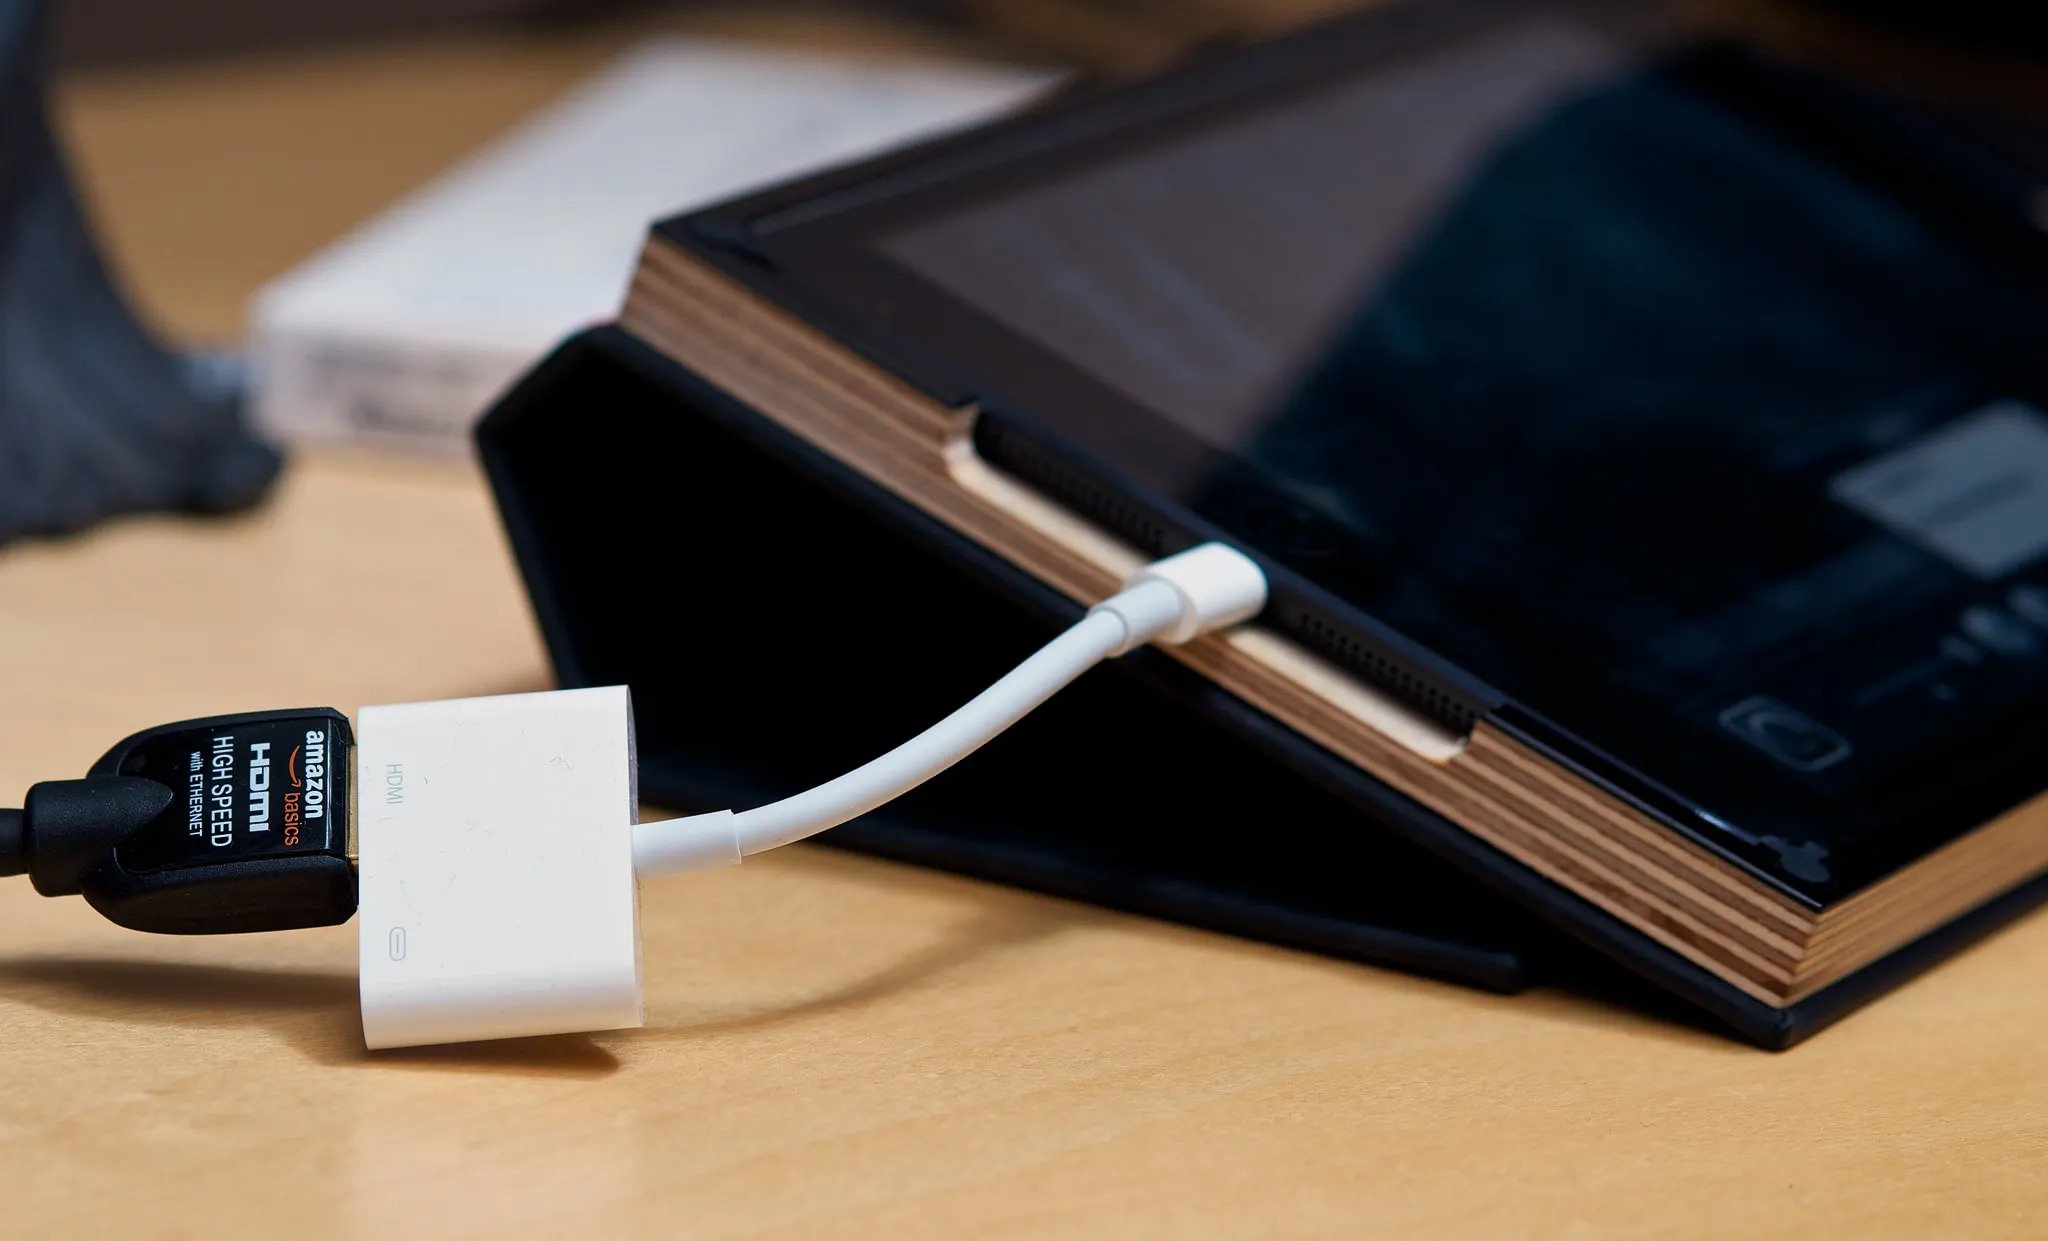
- Locate the HDMI port on your MacBook. Depending on the model, it may be a dedicated HDMI port or a USB-C port that requires an HDMI adapter. If you’re using an adapter, connect the HDMI cable to the adapter first.
- Take one end of the HDMI cable and insert it into the HDMI port on your MacBook. If you’re using an adapter, plug the adapter into the MacBook’s appropriate port, and then insert the HDMI cable into the adapter.
- Next, locate the HDMI input port on your TV. It is typically located on the back or side of the TV. Make sure to identify the correct HDMI input port if your TV has multiple ones.
- Connect the other end of the HDMI cable to the HDMI input port on your TV. Ensure that the cable is securely inserted and properly aligned.
Once the HDMI cable is connected to both your MacBook and TV, you have completed the first step in the mirroring process. In the next section, we will guide you through the process of adjusting the display settings on your MacBook.
Step 2: Adjust the display settings on your MacBook
After connecting the HDMI cable between your MacBook and TV, it’s time to adjust the display settings on your MacBook to enable mirroring. Follow these steps to make the necessary adjustments:
- Turn on your MacBook and TV.
- On your MacBook, click on the Apple menu located on the top-left corner of the screen.
- From the drop-down menu, select “System Preferences”.
- In the System Preferences window, click on the “Displays” icon.
- Go to the “Arrangement” tab.
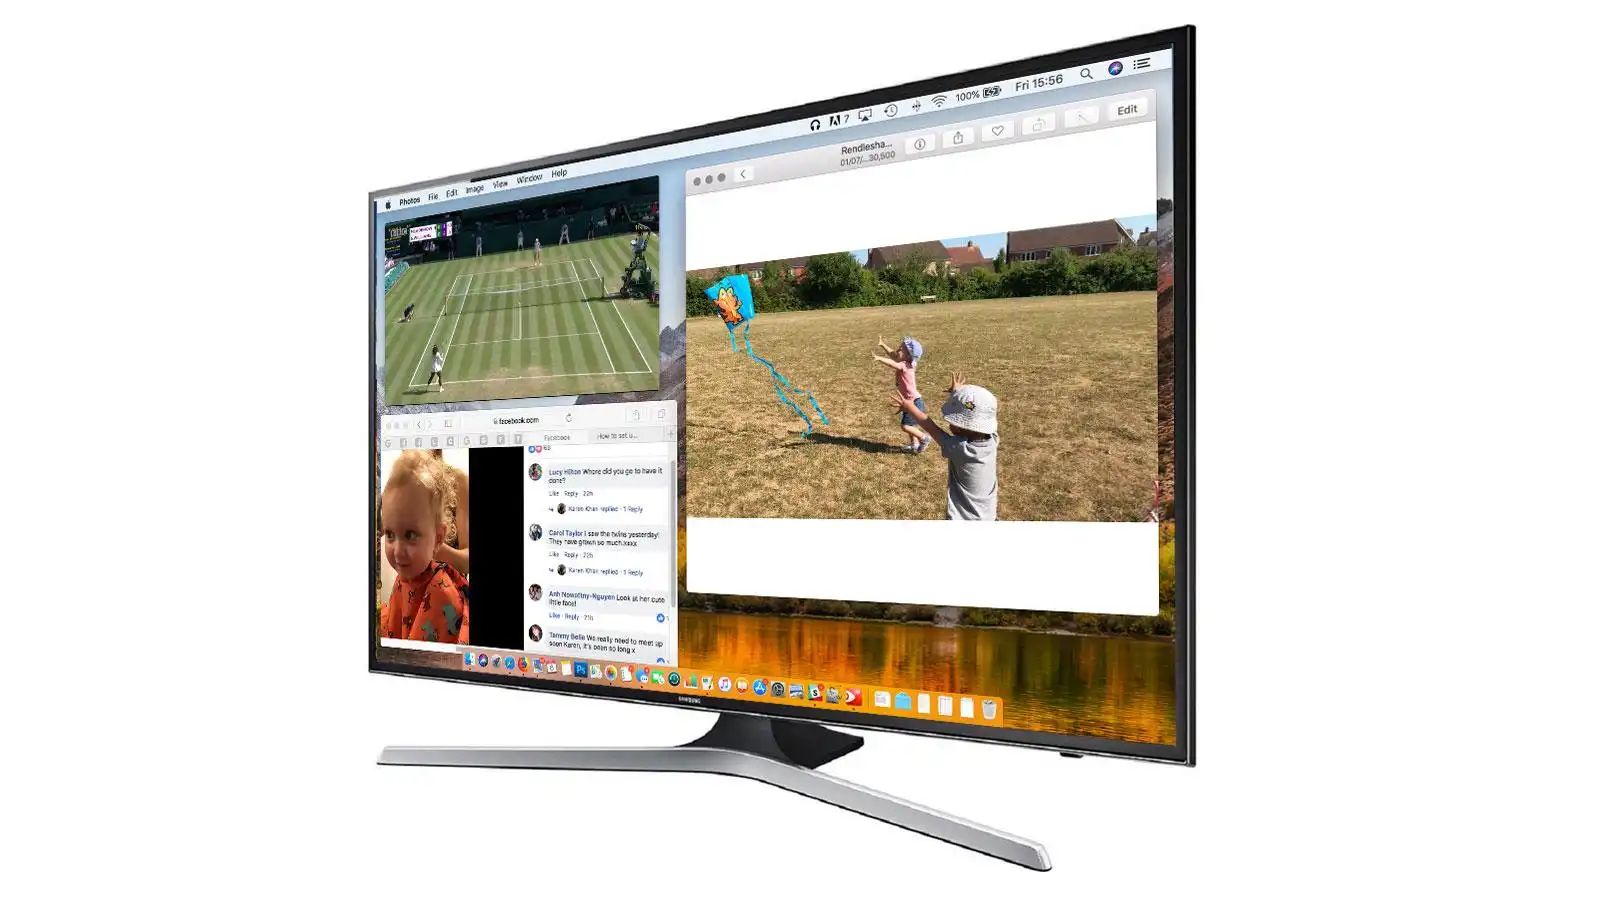
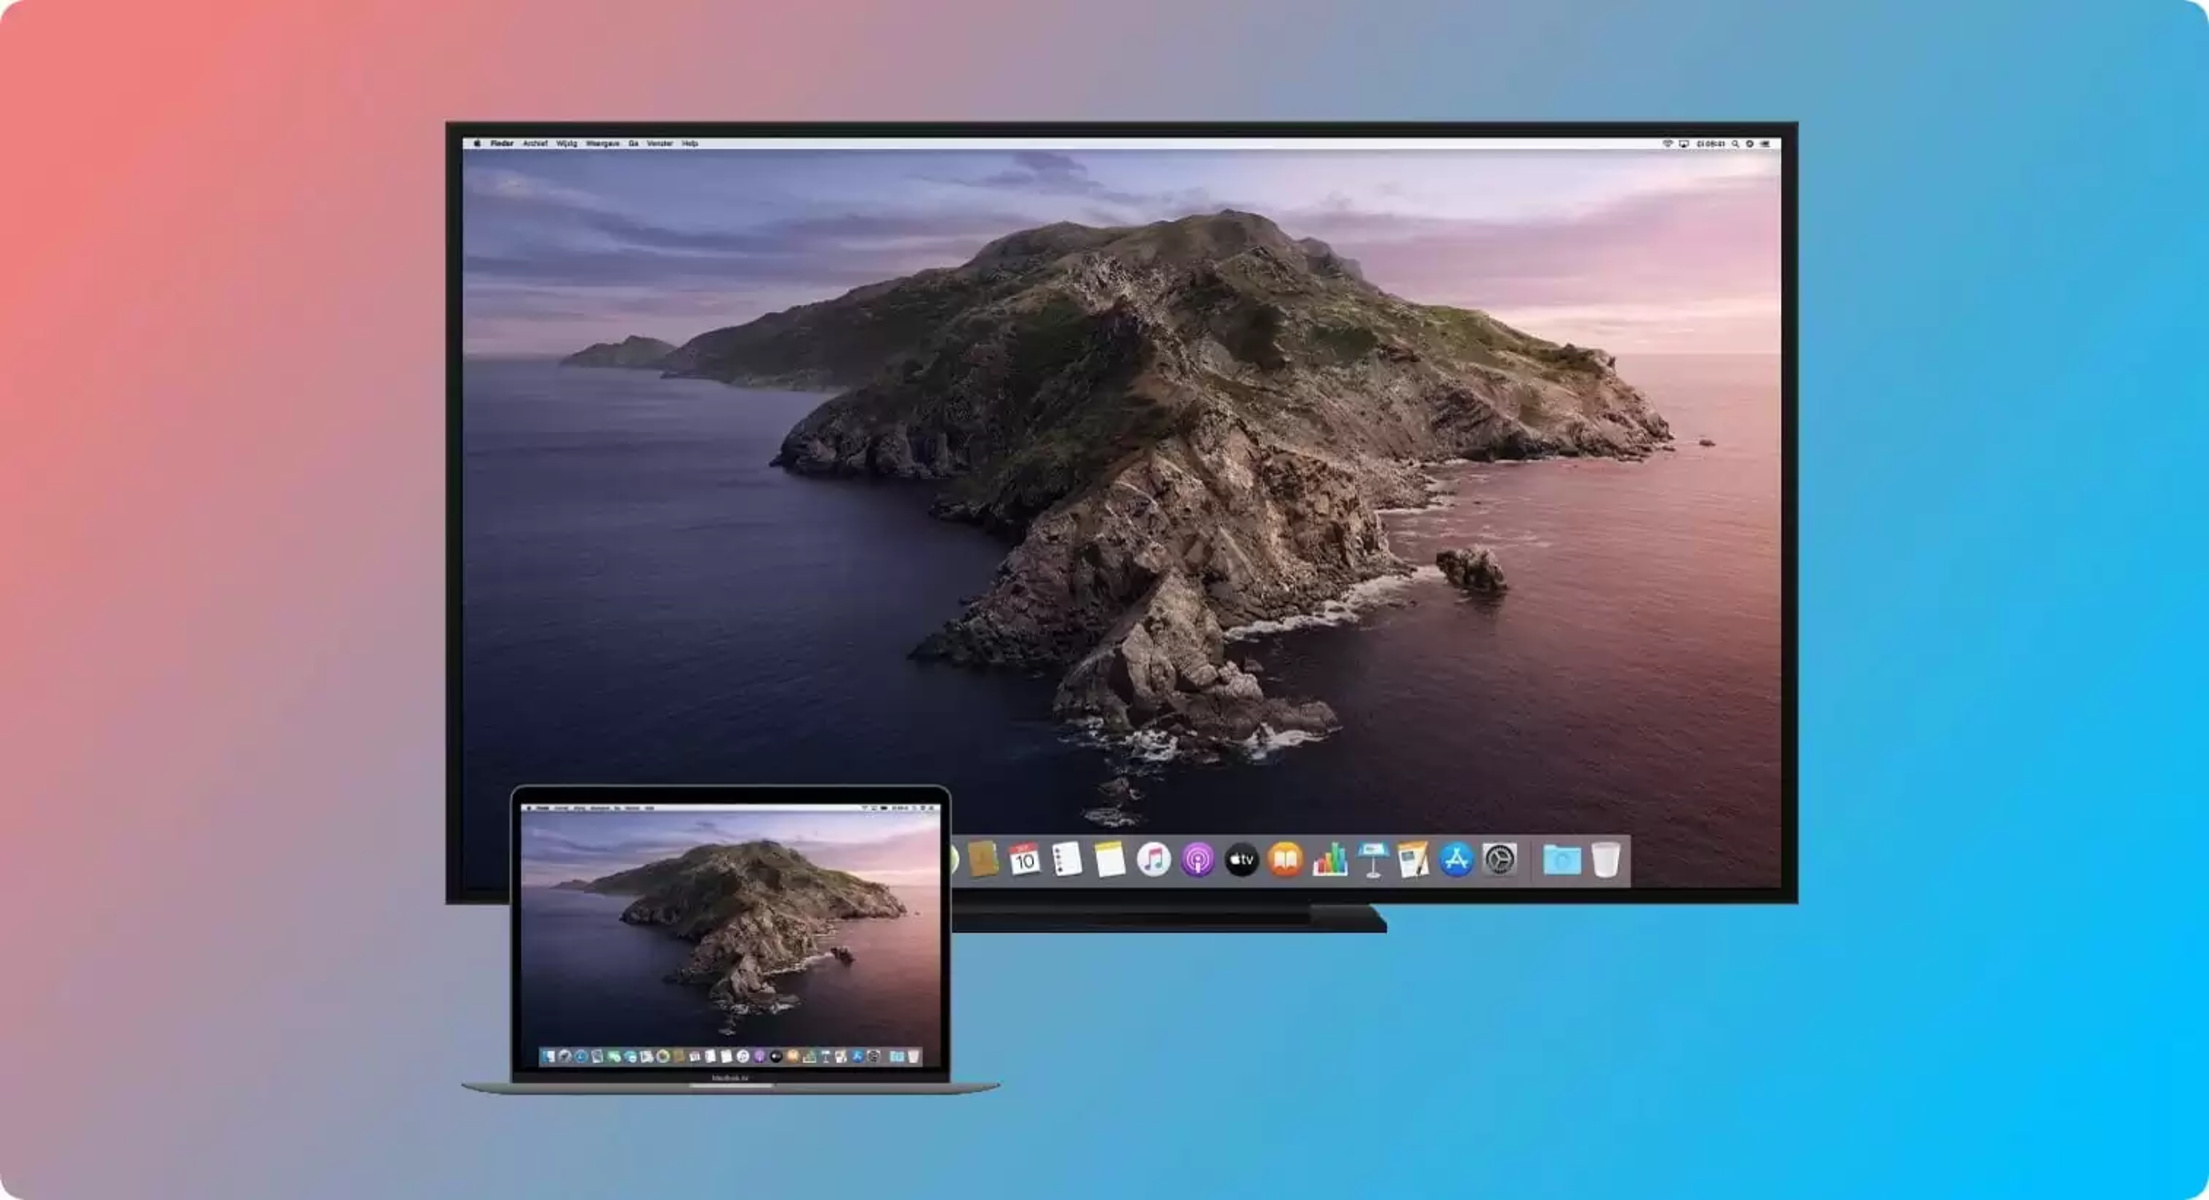
- Tick the box that says “Mirror Displays” to enable mirroring. This will ensure that the exact content appearing on your MacBook screen is replicated on your TV.
- Verify that the resolution and other display settings are compatible with your TV. You can change the resolution by selecting the appropriate option from the “Scaled” section.
- Once you’ve made the desired adjustments, close the System Preferences window. Your MacBook is now ready to mirror its screen onto the TV.
With the display settings on your MacBook adjusted, you have completed the second step in the process. In the next section, we will guide you through configuring the display settings on your TV to ensure successful mirroring.
Step 3: Configure the display settings on your TV
Once you have connected your MacBook to your TV and adjusted the display settings on your MacBook, it’s time to configure the display settings on your TV to ensure proper mirroring. Follow these steps:
- Using your TV remote, turn on your TV if it’s not already on.
- On your TV remote, navigate to the input source selection menu. This can usually be done by pressing the “Input”, “Source”, or “Mode” button.
- Using the arrow buttons on your TV remote, select the HDMI input source that corresponds to the HDMI port into which you connected your MacBook.
- Once the HDMI input source is selected, your TV screen should display the mirrored output from your MacBook. If not, continue to the next step.
- Access the TV’s display settings menu. The exact method for accessing this menu may vary depending on your TV’s brand and model. Look for options such as “Picture”, “Display”, or “Settings”.
- Check the display settings on your TV and ensure that they are optimized for the best viewing experience. Adjust settings such as brightness, contrast, and aspect ratio according to your personal preferences.
- If your TV offers additional display options, such as color settings or sharpness, you can fine-tune them to further enhance the visual experience.
Once you have configured the display settings on your TV, your MacBook and TV should be properly synchronized for mirroring. In the next section, we will guide you through the final steps to mirror your MacBook screen onto your TV.
Step 4: Mirror the MacBook screen to the TV
Now that you have successfully connected and configured your MacBook and TV, it’s time to mirror your MacBook screen onto the TV. Follow these steps to complete the process:
- Ensure that both your MacBook and TV are powered on and properly connected.
- On your MacBook, navigate to the menu bar located at the top of the screen.
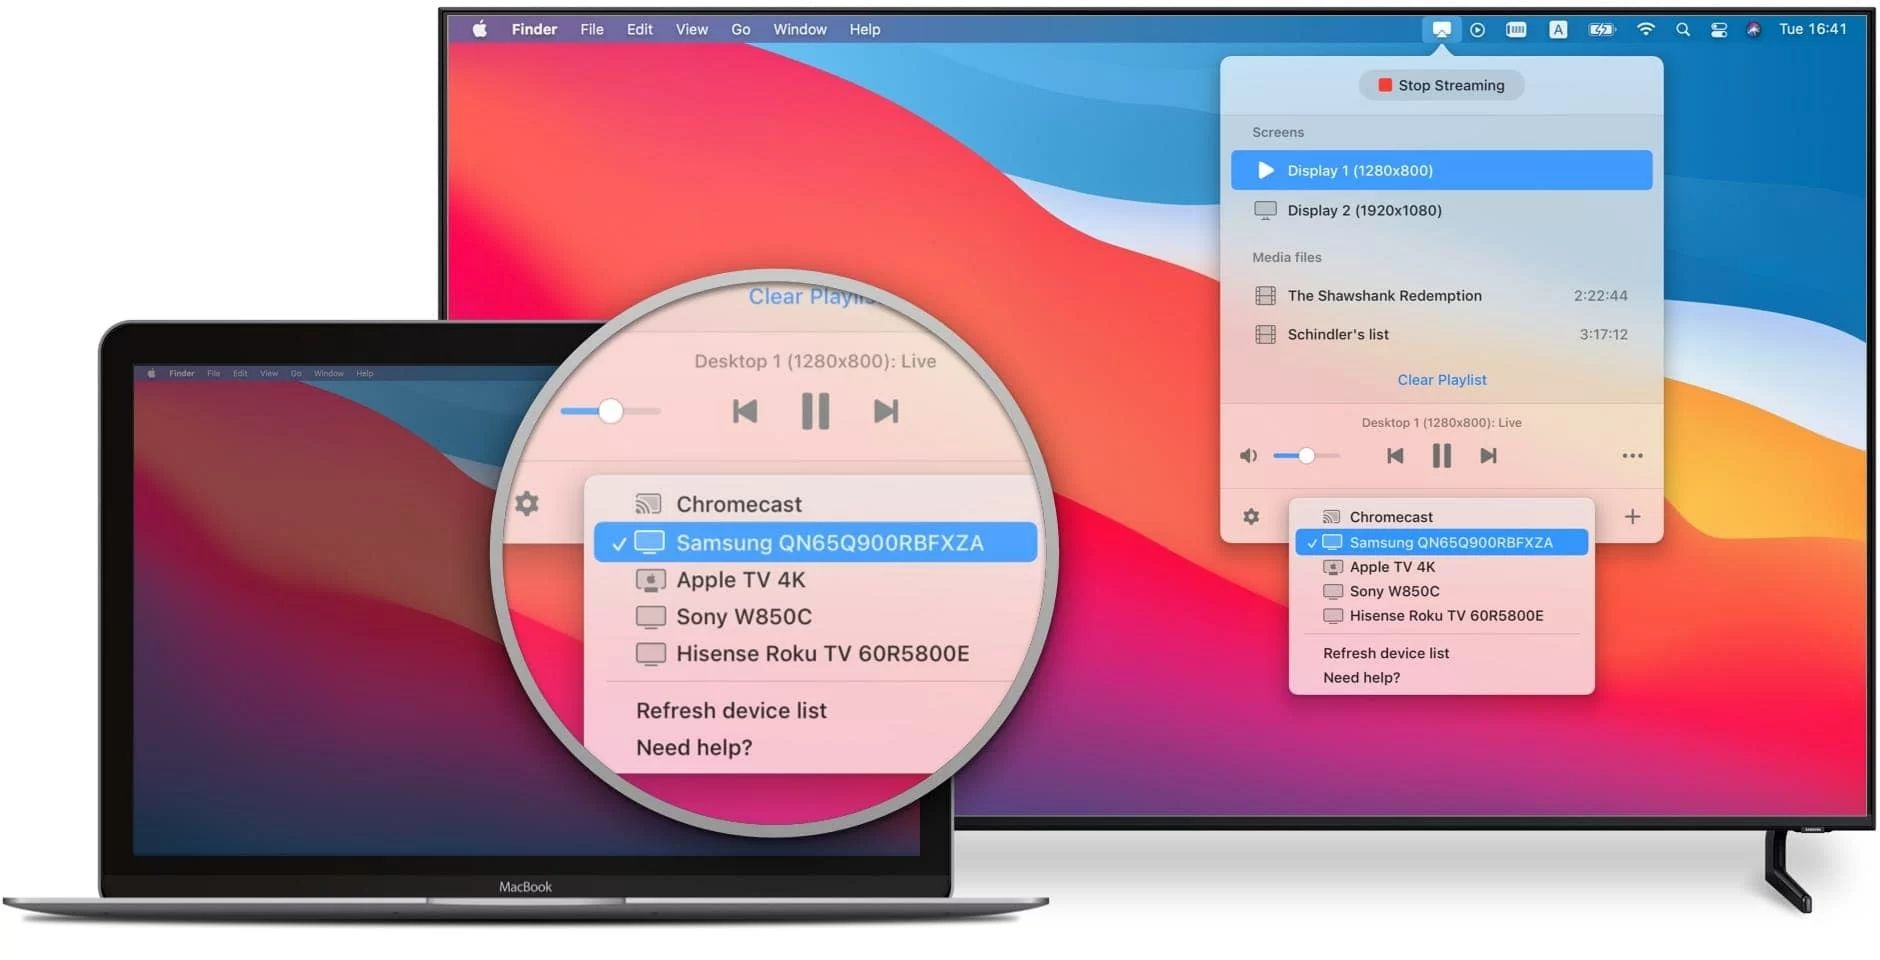
- Click on the “AirPlay” icon or look for the display icon, which resembles a rectangle with a triangle at the bottom.
- A menu will appear showing available display options. Select your TV from the list of available devices.
- After selecting your TV, your MacBook screen should now be mirrored on the TV. Depending on your MacBook model, you may have additional options, such as extending the display instead of mirroring it.
- Once the mirroring is enabled, you can navigate and use your MacBook as usual, and the content will be mirrored in real-time on your TV screen.
- To stop mirroring, simply click on the “AirPlay” or display icon again and select “Turn Off AirPlay” or a similar option.
- When you’re done, you can safely disconnect the HDMI cable from both your MacBook and TV.
By following these steps, you can easily mirror your MacBook screen to your TV using an HDMI cable. Enjoy the benefits of a larger display and share your content with ease. If you encounter any issues or face challenges during the process, refer to the troubleshooting tips in the next section.
Troubleshooting Tips for MacBook to TV HDMI Connection
While connecting and mirroring your MacBook to your TV using an HDMI cable is a straightforward process, you may encounter some issues along the way. Here are some troubleshooting tips to help you resolve common problems:
- Check cable connections: Ensure that the HDMI cable is securely connected to both your MacBook and TV. Sometimes a loose connection can result in a lack of display or poor image quality.
- Restart devices: Turn off both your MacBook and TV, and then turn them back on again. This simple step can help resolve minor glitches and refresh the connection between the devices.
- Update software: Keep your MacBook’s software up to date by installing the latest updates from Apple. Updates often include bug fixes and improvements that can resolve compatibility issues.
- Try a different HDMI port: If your TV has multiple HDMI ports, try connecting your MacBook to a different port to check if the issue lies with a particular port.
- Use a different HDMI cable: If you have access to another HDMI cable, try using it to rule out any potential cable-related issues. Sometimes a faulty cable can be the cause of connection problems.
- Check TV settings: Make sure the correct HDMI input source is selected on your TV. Additionally, review the TV’s display settings to ensure they are compatible with your MacBook’s settings.
- Reset display preferences: On your MacBook, you can try resetting the display preferences by going to “System Preferences” > “Displays” > “Display” tab > “Default for display”. This can help resolve any incorrect or conflicting settings.
- Restart AirPlay: If you’re using the AirPlay feature to mirror your MacBook, you can try restarting the AirPlay connection. Turn it off on both your MacBook and TV, then turn it back on and attempt the mirroring process again.
If you continue to experience issues despite trying these troubleshooting tips, it may be helpful to consult the support documentation of your MacBook model or the manufacturer of your TV for further assistance. Remember, patience and persistence are key when resolving technical issues.
Conclusion
Connecting and mirroring your MacBook screen to your TV using an HDMI cable is a simple and effective way to enjoy a larger display and share content with others. By following the step-by-step instructions outlined in this guide, you can easily set up the connection and mirror your MacBook screen onto your TV.
Remember to ensure that you have the necessary requirements, such as an HDMI cable, compatible ports on both your MacBook and TV, and the correct display settings for mirroring. Troubleshooting tips can also be helpful if you encounter any issues during the process.
Once your MacBook and TV are properly connected and configured, you can enjoy a seamless mirroring experience. Whether you’re giving a presentation, watching a movie, or sharing photos with friends and family, the larger screen provided by your TV can enhance your viewing and sharing experience.
Keep in mind that while this guide provides a general overview, the specific steps and settings may vary depending on the MacBook model and TV brand you are using. It’s always a good idea to refer to the user manuals or online support resources for your specific devices for additional guidance.
Now that you understand how to mirror your MacBook to your TV with an HDMI cable, it’s time to connect your devices, adjust the settings, and start enjoying the benefits of a larger and more immersive display. Happy mirroring!