Introduction
Connecting a soundbar to your Sanyo TV can greatly enhance your audio experience and take your entertainment to the next level. Whether you enjoy watching movies, listening to music, or playing video games, a soundbar can provide immersive sound quality that surpasses the built-in TV speakers. It allows you to enjoy crisp dialogue, deep bass, and surround sound effects, transforming your living room into a mini home theater.
However, navigating the world of audio connections can be a bit daunting, especially if you’re not familiar with the technical jargon. But fear not! In this guide, we’ll walk you through the steps of connecting a soundbar to your Sanyo TV, ensuring that you can enjoy superior sound in no time.
Before we dive into the step-by-step instructions, it’s important to note that the compatibility between your Sanyo TV and the soundbar is crucial. Make sure to check the specifications of your TV and the compatibility requirements of the soundbar to ensure they can be connected seamlessly.
Now, let’s gather the necessary equipment and get started with the connection process!
Step 1: Check the Compatibility
Before you begin connecting your soundbar to your Sanyo TV, it’s essential to ensure compatibility between the two devices. This will help you avoid any unnecessary frustrations or compatibility issues down the line.
Firstly, check the audio output options on your Sanyo TV. Most Sanyo TVs offer various audio output options, such as HDMI, optical, or RCA. Determine which audio outputs are available on your TV so that you can choose the appropriate connection method for your soundbar.
Next, check the audio input options on your soundbar. Soundbars typically have multiple audio input ports, such as HDMI ARC (Audio Return Channel), optical, or RCA. Confirm that your soundbar has compatible audio input options with your TV’s audio output options.
In addition to audio compatibility, it’s also important to consider the power requirements of your soundbar. Some soundbars have built-in amplifiers and require a power source, while others can be powered through the TV’s USB port. Ensure that your soundbar’s power requirements align with the available power sources on your TV.
If you’re unsure about the compatibility between your Sanyo TV and the soundbar, refer to the user manuals or consult the manufacturer’s website for detailed specifications. Additionally, you can reach out to customer support for assistance in determining compatibility.
Once you have confirmed the compatibility between your Sanyo TV and the soundbar, you are ready to gather the necessary equipment and proceed to the next step. Remember that ensuring compatibility is vital for a successful soundbar connection.
Step 2: Gather the Necessary Equipment
Before you can connect your soundbar to your Sanyo TV, it’s important to make sure you have all the necessary equipment on hand. Gathering the right tools and cables will ensure a smooth and hassle-free setup process.
Here’s a checklist of the essential equipment you’ll need:
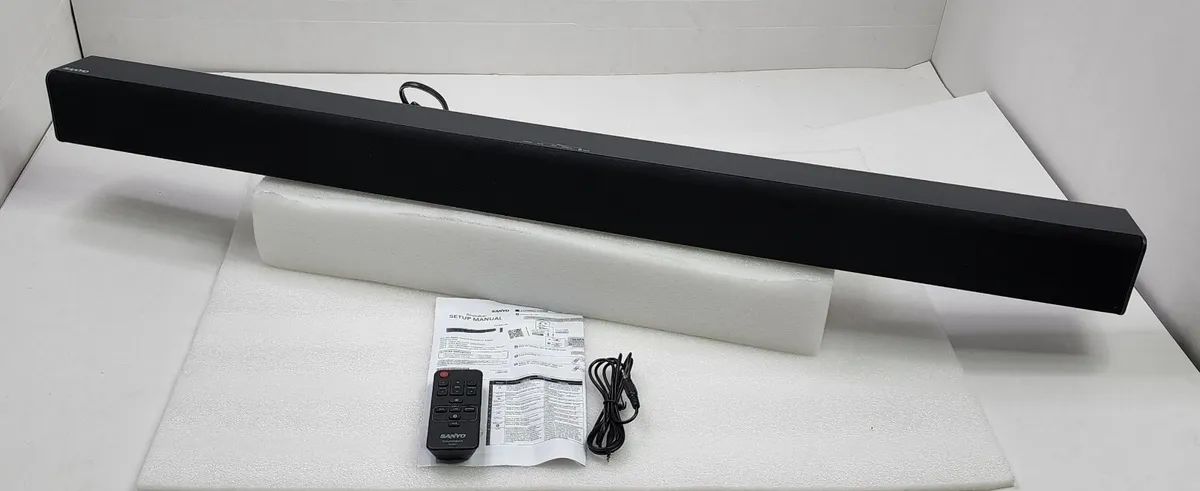
- Soundbar: Make sure you have the soundbar itself. Ensure that it is in good working condition and has all the necessary cables and accessories.
- HDMI Cable: If you plan to connect your soundbar to your TV using HDMI ARC (Audio Return Channel), you will need a high-quality HDMI cable. It’s recommended to use an HDMI cable labeled as “High-Speed HDMI” or “Premium High-Speed HDMI” to support the highest audio and video quality.
- Optical Cable: If you prefer to use the optical audio connection, you will need an optical cable. Look for a digital optical audio cable that is long enough to reach from your TV to the soundbar.
- RCA Cables: If your TV and soundbar do not have HDMI ARC or optical audio ports, you can use RCA cables as an alternative. RCA cables consist of red and white connectors for stereo audio signals.
- Power Cables: Check if your soundbar requires a separate power cable or if it can be powered through the TV’s USB port. Make sure you have the appropriate power cables available.
- User Manuals: Keep the user manuals for both the TV and soundbar handy. They will provide valuable information on specific setup instructions and troubleshooting tips.
By having all the necessary equipment ready, you’ll be well-prepared to connect your soundbar to your Sanyo TV using the method that best suits your needs. With the equipment gathered, it’s time to move on to the next step and choose the appropriate connection method.
Step 3: Choose the Connection Method
Now that you have gathered all the necessary equipment, it’s time to decide on the best connection method for your soundbar and Sanyo TV. The connection method you choose will depend on the available ports on both devices and your personal preferences.
Here are the three common methods for connecting a soundbar to a Sanyo TV:
- HDMI ARC (Audio Return Channel): If both your soundbar and TV have HDMI ARC ports, this is the preferred and most convenient method. HDMI ARC allows you to send audio signals from the TV to the soundbar and control the soundbar’s volume using your TV’s remote. Connect one end of the HDMI cable to the HDMI ARC port on the TV and the other end to the HDMI ARC port on the soundbar.
- Optical Audio: If your TV and soundbar have optical audio ports, this method is a reliable alternative. Connect one end of the optical cable to the optical audio output port on the TV and the other end to the optical audio input port on the soundbar. Make sure to remove any protective caps from the cable ends before connecting.
- RCA Cables: If your TV and soundbar do not have HDMI ARC or optical audio ports, you can use RCA cables to establish the connection. Connect the red and white RCA connectors to the corresponding audio output ports on the TV, and then connect the other end to the audio input ports on the soundbar.
Consider the available ports on both your soundbar and TV and choose the connection method that works best for your setup. HDMI ARC provides the added convenience of audio control through the TV’s remote, while optical audio and RCA cables offer reliable, high-quality audio connections.
Once you have determined the connection method, proceed to the next step to physically connect your soundbar to your Sanyo TV using the chosen method.
Step 4: Connect the Soundbar Using HDMI ARC
If you have chosen to connect your soundbar to your Sanyo TV using HDMI ARC (Audio Return Channel), follow these steps to establish the connection:
- Locate the HDMI ARC port on your Sanyo TV. It is usually labeled as “HDMI ARC” or “Audio Return Channel”.
- Connect one end of the HDMI cable to the HDMI ARC port on your TV.
- Now, locate the HDMI ARC port on your soundbar. This port is also labeled as “HDMI ARC” or “Audio Return Channel”.
- Connect the other end of the HDMI cable to the HDMI ARC port on your soundbar.
- Power on both your TV and soundbar.
- Using your TV’s remote control, navigate to the settings menu and find the audio output settings.
- Select the option for audio output through the soundbar or external speakers.
- Adjust the volume on your soundbar and test the audio to ensure it is working correctly.
By connecting your soundbar to your Sanyo TV using HDMI ARC, you can enjoy the convenience of controlling the soundbar’s volume directly from your TV’s remote. This method allows the audio to flow from the TV to the soundbar, providing superior sound quality for your entertainment needs.
In case you encounter any issues with the HDMI ARC connection, double-check that both your TV and soundbar are compatible and support HDMI ARC. Furthermore, refer to the user manuals for troubleshooting guidance specific to your devices.
Now that the HDMI ARC connection has been established successfully, you can move on to the next step to explore an alternative connection method using an optical cable.
Step 5: Connect the Soundbar Using Optical Cable
If you have opted to connect your soundbar to your Sanyo TV using an optical cable, follow these steps to establish the connection:
- Locate the optical audio output port on your Sanyo TV.
- Take one end of the optical cable and insert it into the optical audio output port on your TV.
- Ensure that the cable is securely inserted into the port, and tighten any locking mechanisms if present.
- Now, locate the optical audio input port on your soundbar.
- Take the other end of the optical cable and insert it into the optical audio input port on your soundbar.
- Once again, ensure that the cable is securely inserted into the port and tightened if necessary.
- Power on both your TV and soundbar.
- Access the TV’s settings menu using the remote control.
- Find the audio output settings and select the option for audio output through the soundbar or external speakers.
- Adjust the volume on your soundbar and test the audio to ensure it is functioning correctly.
By connecting your soundbar to your Sanyo TV using an optical cable, you can enjoy high-quality sound transmission. The optical connection allows for the transfer of digital audio signals, ensuring optimal audio performance for your entertainment.
If you encounter any issues with the optical cable connection, ensure that the connections are secure and that the cable is not damaged. Also, refer to the user manuals for troubleshooting tips and specific instructions for your TV and soundbar.
Now that your soundbar is connected using an optical cable, you can move on to the next step to explore an alternative connection method using RCA cables.
Step 6: Connect the Soundbar Using RCA Cables
If you have chosen to connect your soundbar to your Sanyo TV using RCA cables, follow these steps to establish the connection:
- Locate the audio output ports on your Sanyo TV. These are typically labeled as “Audio Out” or “Line Out” and consist of red and white connectors.
- Take one end of the RCA cables and insert the red connector into the red audio output port on your TV. Insert the white connector into the white audio output port.
- Make sure the cables are securely connected and tightened if needed.
- Now, locate the audio input ports on your soundbar. These are also labeled as “Audio In” or “Line In” and consist of red and white connectors.
- Take the other end of the RCA cables and insert the red connector into the red audio input port on your soundbar. Insert the white connector into the white audio input port.
- Ensure that the cables are securely connected and tightened as necessary.
- Power on both your TV and soundbar.
- Access the TV’s settings menu using the remote control.
- Find the audio output settings and choose the option for audio output through the soundbar or external speakers.
- Adjust the volume on your soundbar and test the audio to verify that it is working properly.
By connecting your soundbar to your Sanyo TV using RCA cables, you can still achieve a reliable and satisfactory audio connection. While RCA cables do not provide the same level of audio quality as HDMI ARC or optical cables, they are a simple and effective option if those connections are not available on your devices.
If you encounter any issues with the RCA cable connection, ensure that the connections are secure and that the cables are not damaged. Check the settings on your TV and soundbar to make sure they are configured correctly for external audio output.
With your soundbar connected using RCA cables, you are now ready to proceed to the next step and set the TV audio output to external speakers.
Step 7: Set the TV Audio Output to External Speakers
After connecting your soundbar to your Sanyo TV using the chosen method, you need to ensure that the TV’s audio output is properly configured to route the sound to the external speakers, which in this case is your soundbar. Follow these steps to set the TV audio output:
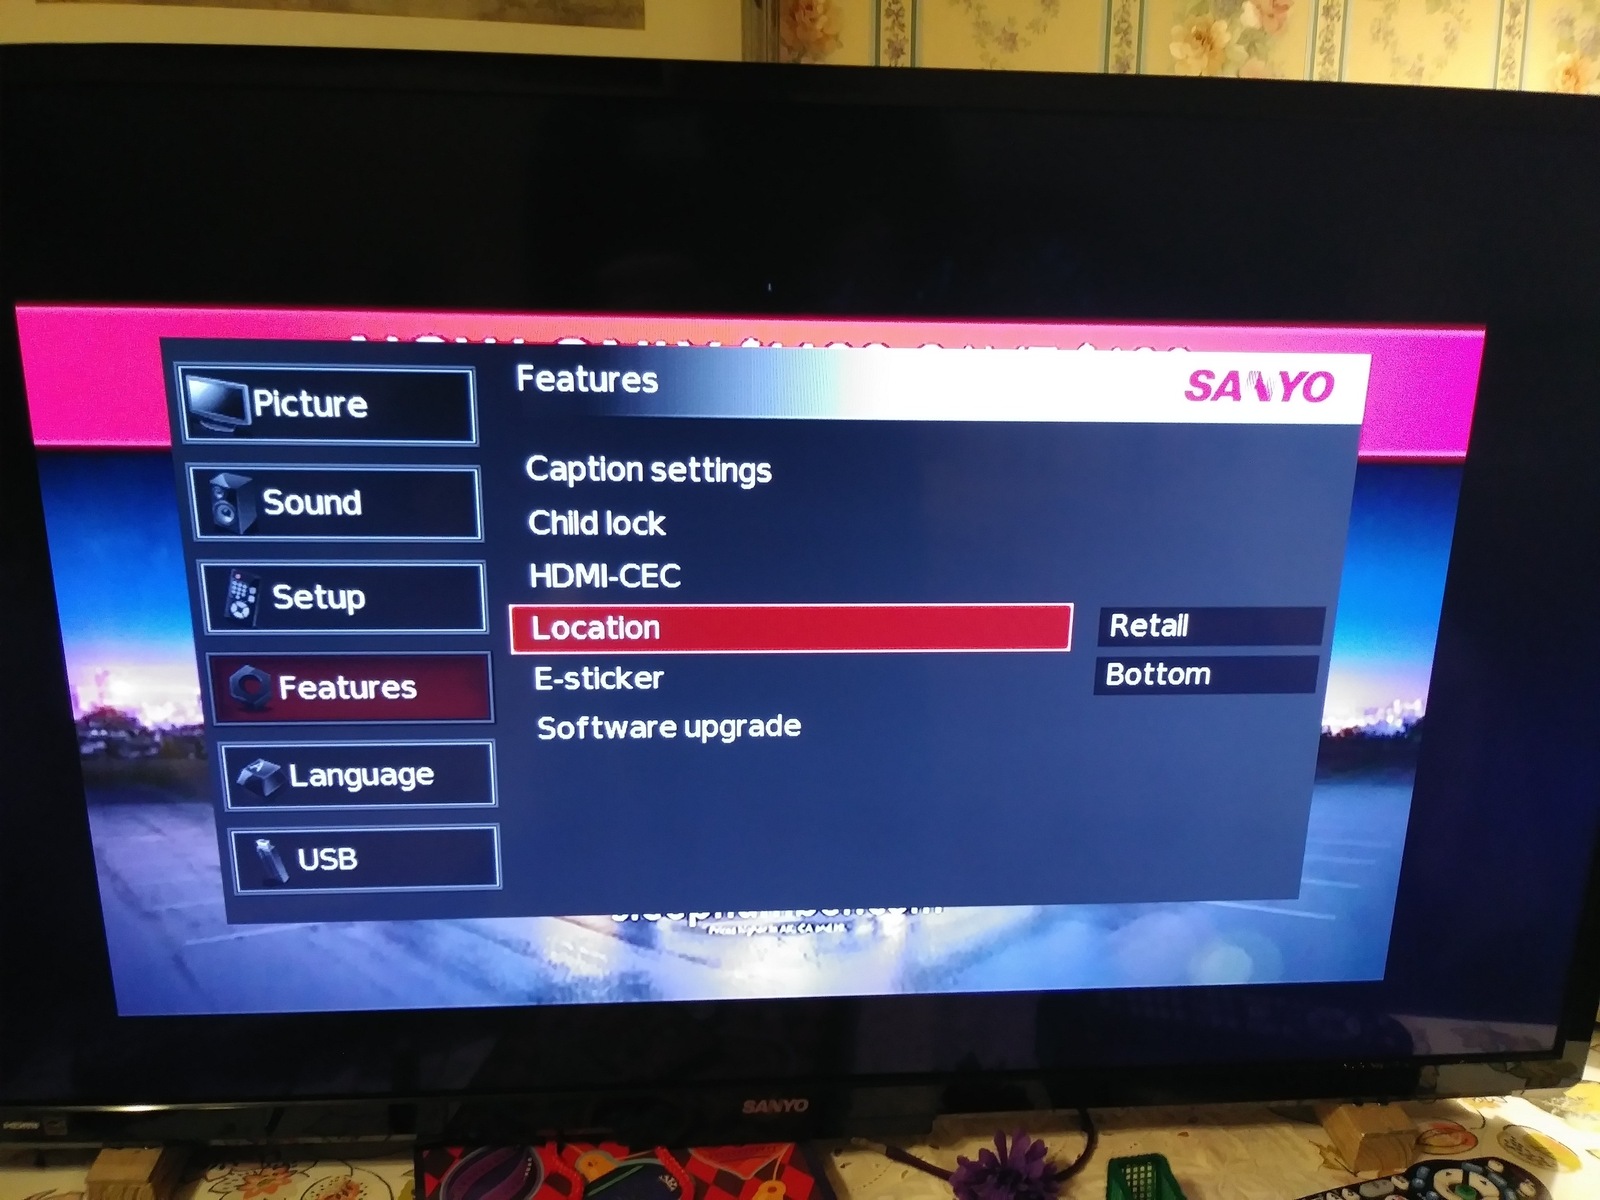
- Using your TV’s remote control, navigate to the settings menu.
- Look for the “Audio” or “Sound” settings and select it.
- Within the audio settings, find the option for “Audio Output” or “Sound Output”.
- Select the option for “External Speakers” or “Soundbar”. This will redirect the audio output from the TV’s built-in speakers to the connected soundbar.
- Save the settings and exit the menu.
By changing the TV’s audio output settings to external speakers, you ensure that the sound from your Sanyo TV is directed to your connected soundbar. This step is crucial for getting audio to play through the soundbar instead of the TV’s built-in speakers.
Remember that the exact steps and terminology may vary depending on your Sanyo TV model and software version. If you encounter any difficulties, refer to the TV’s user manual for specific instructions on how to adjust the audio output settings.
With the audio output set to external speakers, you are now ready for the final step: testing the soundbar connection.
Step 8: Test the Soundbar Connection
After connecting and configuring your soundbar to your Sanyo TV, it’s essential to test the connection to ensure that everything is working correctly. Follow these steps to test the soundbar connection:
- Play a sound or video on your Sanyo TV.
- Observe if the sound is coming from the soundbar instead of the TV’s built-in speakers.
- Adjust the volume on the soundbar using its remote control or the TV’s remote control if it is capable of controlling the soundbar.
- Listen carefully and determine if the sound quality is clear, balanced, and immersive.
- Change the audio settings on the TV or soundbar to customize the sound according to your preferences, if desired.
- Try different audio sources, such as streaming services, Blu-ray discs, or gaming consoles, to ensure that the soundbar is working properly with different content.
During the testing process, pay close attention to any issues such as audio delays, distorted sounds, or one-sided audio. If you notice any abnormalities, double-check the connections and make sure all cables are securely plugged in.
Keep in mind that sound settings might need adjustment to optimize the soundbar’s performance and cater to your preferences. Experiment with different settings such as equalizer presets, sound modes, or virtual surround sound to enhance your audio experience.
If you encounter any persistent issues, consult the user manuals for both your Sanyo TV and soundbar for troubleshooting guidance. Additionally, reach out to customer support for further assistance if necessary.
Once you have tested the soundbar connection and ensured that everything is working as expected, you can sit back, relax, and enjoy immersive audio for all your favorite movies, shows, and music!
Conclusion
Connecting a soundbar to your Sanyo TV is a fantastic way to elevate your audio experience and enjoy immersive sound quality. By following the step-by-step instructions in this guide, you can successfully connect your soundbar to your Sanyo TV using HDMI ARC, optical cable, or RCA cables.
Begin by checking the compatibility between your TV and soundbar to ensure a seamless connection. Gather all the necessary equipment, including the soundbar, appropriate cables, and power source. Choose the connection method that suits your needs, whether it’s HDMI ARC, optical cable, or RCA cables, based on the available ports on your devices.
Once connected, don’t forget to properly set the audio output on your Sanyo TV to direct the sound to the external speakers, which in this case is your newly connected soundbar. Finally, test the soundbar connection by playing various audio sources and adjusting the settings to achieve the best sound quality.
Remember to consult the user manuals for your TV and soundbar if you encounter any issues or need further guidance on troubleshooting or customization. Customer support is also available if you need additional assistance.
With your soundbar successfully connected to your Sanyo TV, you can now sit back, relax, and indulge in a truly immersive audio experience that will enhance your movie nights, music sessions, and gaming adventures. Enjoy the enhanced sound quality and make the most out of your entertainment!