Introduction
Connecting your guitar to a surround sound system can open up a whole new world of possibilities for musicians and music enthusiasts alike. Whether you want to amplify your guitar’s sound for live performances, jamming sessions, or simply enjoy a high-quality audio experience at home, having the right cable is essential.
In this article, we will dive into the world of guitar to surround sound system connections and explore the different types of cables available. Understanding the basics of connecting your guitar to a surround sound system will not only ensure optimal sound quality but also help you avoid any potential issues.
By selecting the appropriate cable and following the right connection steps, you can seamlessly integrate your guitar into a surround sound system and enjoy a rich and immersive audio experience.
When it comes to choosing the right cable for your guitar to surround sound connection, there are several factors to consider, including cable type, length, shielding, and connector type. We will discuss each of these factors in detail, providing you with the knowledge necessary to make an informed decision.
Additionally, we will provide you with valuable tips for achieving optimal sound quality and performance. This includes advice on proper setup techniques and troubleshooting common issues that may arise during the connection process.
So, whether you’re a guitarist looking to take your live performances to the next level or a music enthusiast wanting to transform your listening experience, this article will guide you through the process of connecting your guitar to a surround sound system.
Understanding the Basics of Guitar to Surround Sound System Connection
Before delving into the different types of cables available for connecting your guitar to a surround sound system, it’s crucial to grasp the fundamental principles of this connection. This understanding will help you make informed decisions when it comes to selecting the right cable and ensuring optimal audio quality.
When connecting a guitar to a surround sound system, it’s essential to comprehend the concept of audio signal transfer. The electrical signals produced by the instrument need to travel from the guitar’s output jack to the input of the surround sound system for amplification and playback.
Generally, the most common way to connect a guitar to a surround sound system is through a cable. The cable acts as a conduit, transmitting the audio signal from the guitar to the surround sound system.
It’s important to note that not all cables are created equal. Different cables are designed for specific purposes and offer varying levels of sound quality, shielding, and durability. Understanding these differences will help you choose the best cable for your needs.
An essential factor to consider is impedance matching. The impedance of the guitar’s output should match the input impedance of the surround sound system. This ensures that the audio signal is transferred without any loss of quality or undesirable effects.
Another critical aspect is the physical connectors on both ends of the cable. The guitar usually has a 1/4-inch output jack, while the surround sound system may have various input options such as an XLR, RCA, or TRS jack. It is crucial to choose a cable with the appropriate connectors that match both your guitar and surround sound system.
Understanding the basics of guitar to surround sound system connections will provide you with the necessary foundation to explore the different types of cables available. This knowledge will empower you to make an informed decision and ensure a seamless and efficient audio signal transfer.
Types of Cables for Guitar to Surround Sound System Connection
When it comes to connecting your guitar to a surround sound system, there are several types of cables to consider. Each type of cable offers unique characteristics and is suitable for different applications. Understanding the differences between these cables will help you make an informed decision based on your specific needs.
1. Instrument Cable:
An instrument cable, also known as a guitar cable or a 1/4-inch cable, is the most common type of cable used for connecting guitars to amplifiers or audio interfaces. It features a 1/4-inch jack on both ends and is designed to transmit the guitar’s signal with minimal interference. Instrument cables are robust, durable, and offer excellent sound quality.
2. TRS Cable:
A TRS (Tip-Ring-Sleeve) cable is commonly used for connecting instruments, including guitars, to audio interfaces or mixing consoles. It typically has a 1/4-inch TRS jack on one end and either a 1/4-inch or an XLR jack on the other end. TRS cables are versatile and can be used for balanced and unbalanced connections, depending on the devices’ input/output specifications.
3. XLR Cable:
XLR cables are widely used in professional audio setups and are commonly used for connecting microphones and other audio devices to mixers or audio interfaces. However, some guitars have XLR outputs, making XLR cables a suitable choice for directly connecting guitars to a surround sound system. XLR cables offer balanced audio signals, providing better noise rejection and longer cable runs.
4. RCA Cable:
RCA cables, also known as phono cables, are commonly used for consumer audio and video connections. While they are not commonly used for guitar-to-surround sound system connections, some guitar amplifiers feature RCA outputs. Therefore, it’s worth considering if your guitar amplifier has RCA outputs and you want to connect it to a surround sound system with RCA inputs.
When choosing the right cable for your guitar to surround sound system connection, consider factors such as the length of the cable, shielding, and connector type compatibility between your guitar and surround sound system. Each cable type has its own advantages and is suitable for different scenarios, so it’s important to choose the one that best fits your specific needs.
Understanding the different types of cables available will help you establish a reliable and high-quality connection between your guitar and surround sound system, ensuring you enjoy the best possible audio experience.
Instrument Cable
The instrument cable, also known as a guitar cable or a 1/4-inch cable, is the most common type of cable used for connecting guitars to surround sound systems, amplifiers, or audio interfaces. These cables are specifically designed to transmit the guitar’s audio signal without any loss of quality or interference.
Instrument cables typically feature a 1/4-inch jack on both ends, allowing you to connect your guitar’s output to the input of your surround sound system. The 1/4-inch connector is the standard size for guitar outputs and is widely compatible with most guitars and audio equipment.
One of the key features of instrument cables is their durability and robustness. They are designed to withstand the rigors of regular use, whether it’s on stage during a live performance or in a home studio setting. The cables are often constructed with high-quality materials, such as oxygen-free copper conductors and braided shielding, to ensure optimal signal transmission and noise rejection.
Another important factor to consider when selecting an instrument cable is the length. The length of the cable will depend on your specific setup and the distance between your guitar and the surround sound system. It’s essential to choose an appropriate length to maintain signal integrity and minimize any potential signal degradation or loss.
Instrument cables also come in various price ranges, depending on the quality of construction and materials used. It’s advisable to invest in a higher-quality cable if you want to ensure the best possible sound quality and durability. While budget-friendly options exist, they may not offer the same level of shielding and signal purity as higher-end cables.
Overall, the instrument cable is a reliable and versatile option for connecting your guitar to a surround sound system. Its compatibility with most guitars and audio devices, along with its durability and excellent sound quality, make it a popular choice among musicians and audio enthusiasts.
When selecting an instrument cable, consider factors such as length, construction quality, and price to ensure you choose a cable that meets your specific needs and provides optimal sound performance for your guitar to surround sound system connection.
TRS Cable
A TRS (Tip-Ring-Sleeve) cable is another type of cable that can be used for connecting guitars to surround sound systems or audio interfaces. TRS cables have a variety of applications and are known for their versatility.
TRS cables typically have a 1/4-inch TRS jack on one end and either a 1/4-inch or an XLR jack on the other end. This flexibility allows them to be used for both balanced and unbalanced connections, depending on the inputs and outputs of the devices you are connecting.
The TRS cable’s name reflects its physical structure. The “tip” refers to the first connection point, the “ring” represents the second connection point (which can transmit stereo signals or act as a microphone’s phantom power input), and the “sleeve” is the ground connection. This design allows for more complex audio signal transmissions compared to standard instrument cables.
One common application of TRS cables is connecting guitars equipped with a stereo output or a built-in preamp system to an audio interface or mixing console. The TRS cable supports the transmission of both the guitar’s signal and additional stereo effects or preamp signals, providing a comprehensive and dynamic audio connection.
In addition, TRS cables are often used for balanced audio connections. Balanced connections use two signal lines and a ground to reduce noise interference, resulting in cleaner and more reliable audio signals. This makes TRS cables a suitable option for professional audio setups or situations where keeping audio signals clean and free from interference is crucial.
When using a TRS cable, it’s essential to match the correct jack types on both ends. Some surround sound systems or audio interfaces may have TRS inputs, while others may have XLR inputs. It’s important to ensure compatibility between your guitar’s output and the surround sound system’s input to establish a proper connection.
Whether you need to connect a guitar with stereo outputs, utilize balanced audio connections, or have specific equipment that requires a TRS cable, this versatile option provides you with the flexibility to meet your unique audio needs.
Consider the specific requirements of your audio setup and the capabilities of your surround sound system when deciding whether a TRS cable is the right choice for connecting your guitar to a surround sound system.
XLR Cable
An XLR cable is a professional-grade cable commonly used in audio setups, including connecting guitars to surround sound systems. While XLR cables are traditionally associated with microphones, they can also be used for guitars that have XLR outputs or when connecting to devices with XLR inputs.
XLR cables offer balanced audio connections, making them ideal for long cable runs and environments prone to interference. Their three-pin connector design helps minimize noise and ensures high-quality audio transmission. The three pins consist of a ground, a positive signal, and a negative signal, allowing for better noise rejection and maintaining the integrity of the audio signal.
When connecting a guitar to a surround sound system using an XLR cable, it’s crucial to ensure that your guitar has an XLR output or that you have the necessary adapter or cable with an XLR jack on one end and the appropriate connector (such as 1/4-inch) on the other end to connect to your guitar’s output.
Utilizing an XLR cable for your guitar to surround sound connection offers several advantages. Firstly, it provides a balanced audio signal, resulting in cleaner audio with reduced interference, even over long cable runs. This makes it an excellent choice for professional audio setups, live performances, or studios where audio quality is of utmost importance.
Furthermore, XLR cables are known for their robustness and durability. They are designed to withstand the demands of touring musicians or frequent use in various environments. The connectors are secure and reliable, ensuring a solid and stable connection between your guitar and surround sound system.
While XLR cables are generally associated with microphones and audio equipment, they can be a suitable choice for specific guitars that have XLR outputs or when connecting to devices with XLR inputs. However, it’s important to check the compatibility between your guitar’s output and the surround sound system to ensure the proper connection.
Consider using an XLR cable when you require a balanced audio connection, need to cover long distances, or desire high-quality audio with excellent noise rejection for your guitar to surround sound system connection.
RCA Cable
An RCA cable, also referred to as a phono cable, is commonly used for consumer audio and video connections. While not as commonly used for connecting guitars to surround sound systems, there are situations where RCA cables can be a suitable option.
RCA cables feature distinctive red and white connectors, typically used for stereo audio connections. These cables are easy to identify, as they have corresponding red and white jacks on both ends. Some guitar amplifiers may feature RCA outputs, making it feasible to connect them to surround sound systems with RCA inputs.
When using an RCA cable, it’s important to check the compatibility between your guitar’s RCA output and the surround sound system’s RCA input. Ensure that your guitar amplifier has RCA outputs and determine if your surround sound system has RCA inputs available.
RCA cables are known for their simplicity and ease of use. They offer a straightforward connection solution, making them suitable for connecting guitars to surround sound systems for specific applications, such as home audio setups or situations where RCA connections are the only available option.
It’s worth noting that RCA cables are generally not known for their robustness or durability compared to other cable types. They are more commonly associated with consumer-grade audio equipment and may not withstand the demands of professional use or frequent transportation.
While using an RCA cable may be less common for guitar to surround sound system connections, it can still provide a viable solution in certain circumstances. If your guitar amplifier has RCA outputs and your surround sound system has available RCA inputs, an RCA cable can be a convenient option to integrate your guitar into your audio setup.
Consider using an RCA cable when you have a guitar amplifier with RCA outputs and need to connect your guitar to a surround sound system with RCA inputs. It offers a simple solution for audio connections, particularly in home listening environments or with consumer-grade audio equipment.
Factors to Consider When Choosing the Right Cable
When connecting your guitar to a surround sound system, selecting the right cable is crucial for achieving optimal sound quality and performance. Here are several factors to consider when choosing the cable for your guitar to surround sound system connection:
1. Length:
The length of the cable is an important consideration. Ensure that the cable is long enough to reach from your guitar to the surround sound system without any strain or tension. It’s advisable to choose a cable that is slightly longer than you think you will need to allow for flexibility in positioning and avoid unnecessary signal degradation.
2. Shielding:
Shielding refers to the protection against electromagnetic interference (EMI) and radio frequency interference (RFI). Look for a cable with proper shielding to minimize noise and maintain signal integrity. Cables with braided shields or conductive PVC layers offer better shielding capabilities.
3. Connector Type:
Consider the connector type on both ends of the cable. Ensure that the cable’s connectors match the input/output jacks on your guitar and surround sound system. Common connector types include 1/4-inch, XLR, TRS, and RCA. Verify the compatibility to establish a secure and reliable connection.
4. Audio Quality:
Choose a cable that offers high-quality signal transmission to preserve the integrity of your guitar’s sound. Look for cables made with high-quality materials and conductors, such as oxygen-free copper, which can enhance the overall audio fidelity of your guitar’s output.
5. Compatibility:
Ensure that the cable is compatible with your specific guitar model and the surround sound system you are connecting to. Some guitars may require specific cables due to unique outputs or preamp systems. Check the specifications of both your guitar and surround sound system to guarantee compatibility.
6. Durability:
Consider the durability and build quality of the cable, especially if you plan on using it in live performances or frequently transporting it. Look for cables with reinforced connectors, well-insulated shielding, and durable outer jackets to withstand the demands of regular use without compromising signal quality.
By carefully considering these factors, you can select the cable that best suits your needs, ensuring a reliable and high-quality connection between your guitar and surround sound system.
Length
When choosing a cable for your guitar to surround sound system connection, one crucial factor to consider is the length of the cable. Selecting the appropriate length is essential to ensure a seamless and hassle-free setup.
Firstly, you need to determine the distance between your guitar and the surround sound system. Measure the distance carefully, taking into account any obstacles or potential obstructions that might affect the cable’s path.
It’s generally advisable to choose a cable that is slightly longer than the actual distance needed. This additional length allows for flexibility in positioning and adjustments, preventing any strain or tension on the cable.
On the other hand, using a cable that is excessively long may result in signal degradation, especially for analog signals. Longer cables can experience higher resistance, causing a loss of high-frequency detail and introducing noise into the signal. Therefore, it’s crucial to strike a balance between having adequate length and minimizing potential signal degradation.
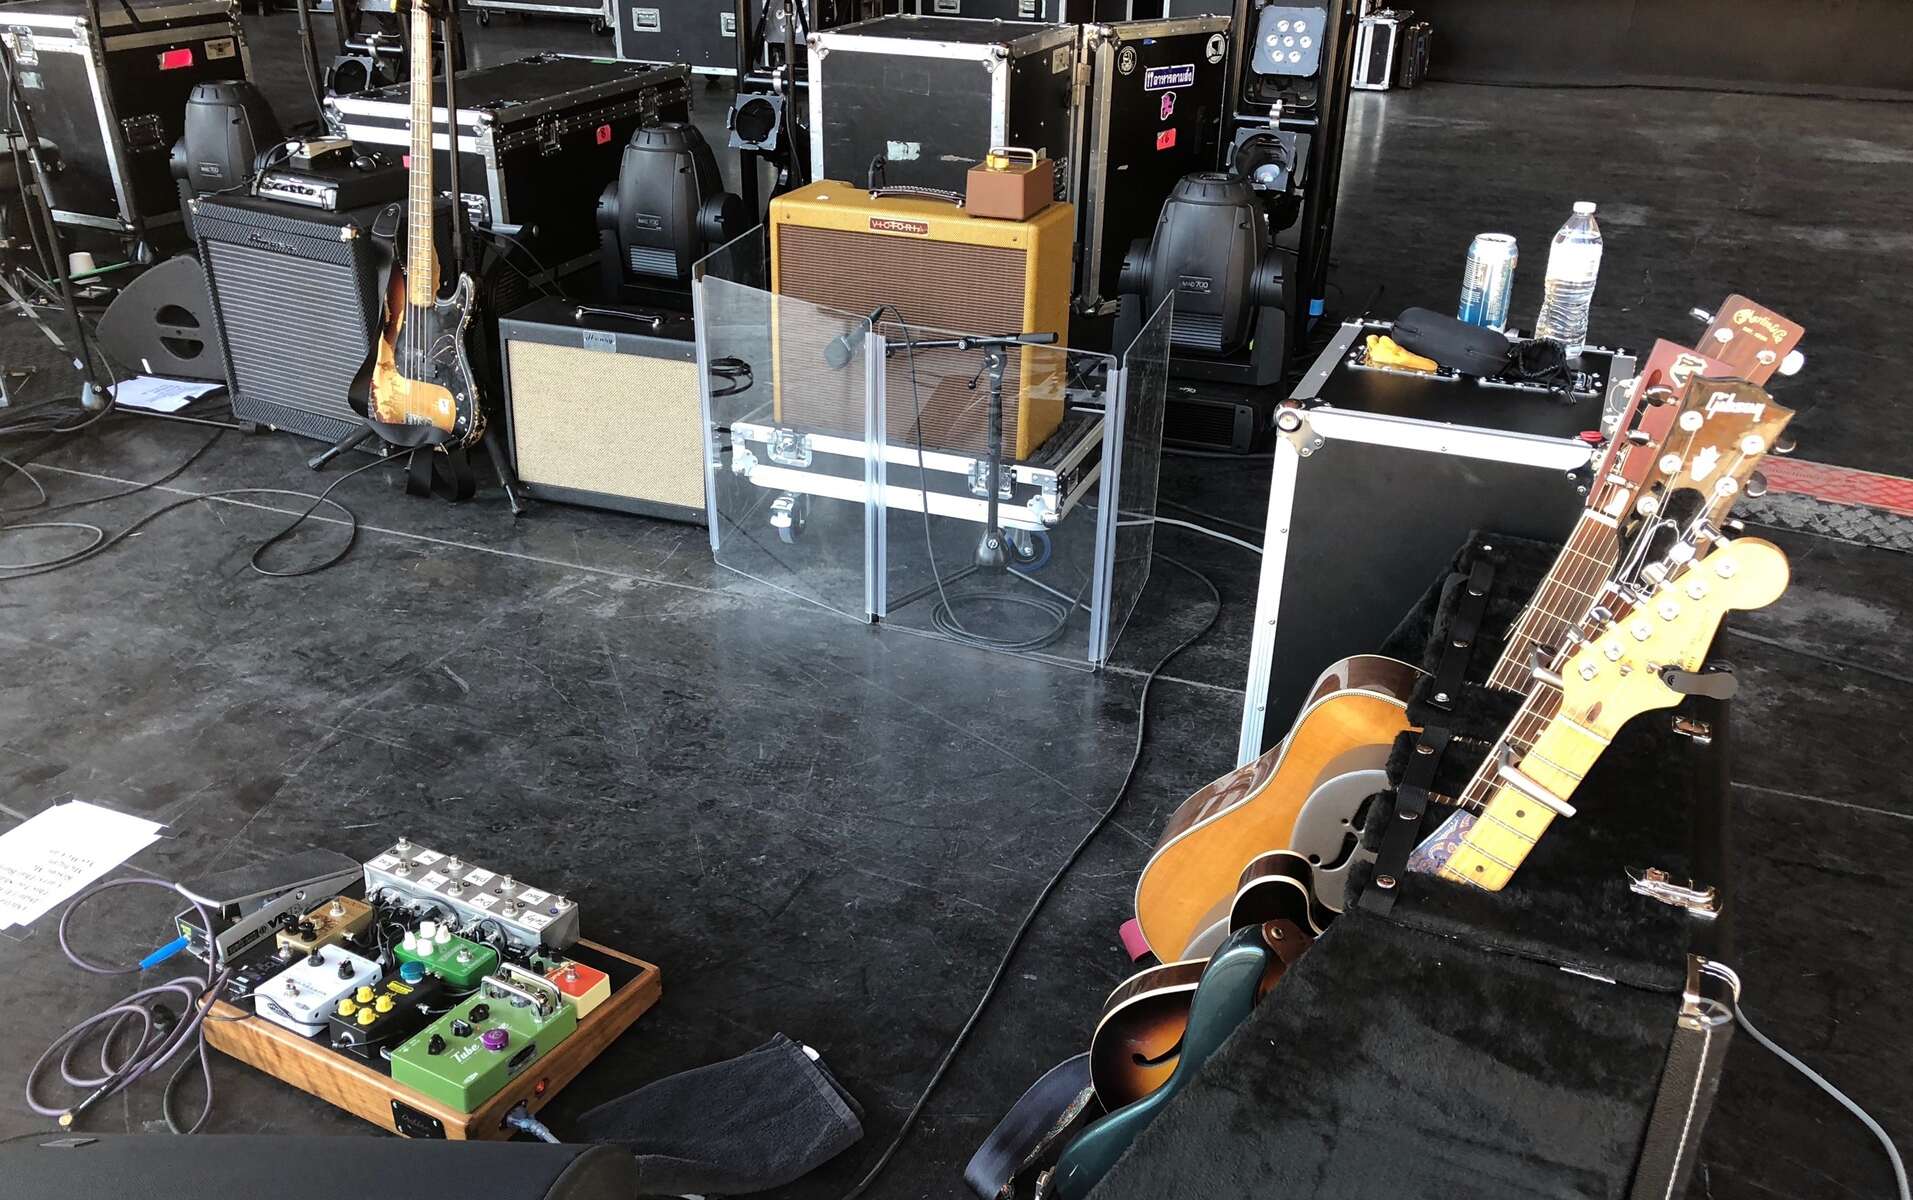
For live performances or situations where you anticipate moving around on stage, consider getting a longer cable to allow for freedom of movement. However, be cautious not to create an excessive cable length that might cause tripping hazards or unwanted tangling.
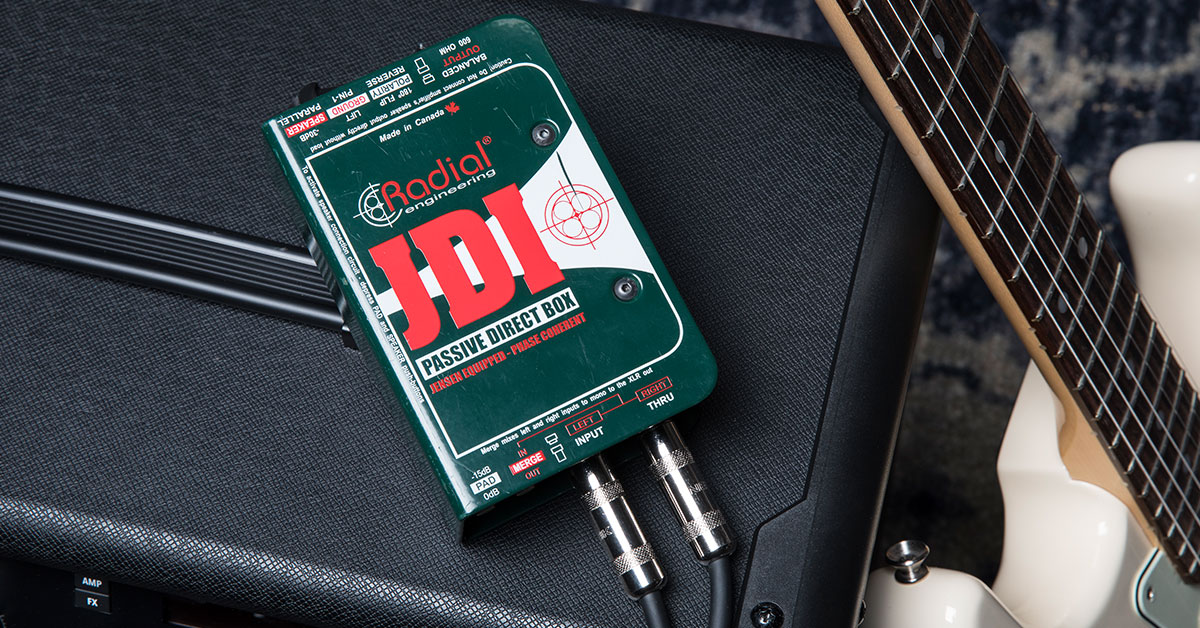
Additionally, keep in mind that longer cables might require additional signal boosting, especially for passive pickups or weaker output signals. In such cases, you may need to use a preamp or an active direct box to compensate for any signal loss over long distances.
It’s worth noting that different cable types have varying capabilities concerning maintaining signal quality over extended lengths. For longer distances, consider opting for cables with better shielding and lower resistance to minimize any potential signal degradation.
Ultimately, the right cable length depends on your specific setup requirements and the distance between your guitar and the surround sound system. Carefully consider the practicality, signal integrity, and potential limitations when determining the length of the cable to ensure an optimal connection.
Shielding
Shielding is a critical factor to consider when choosing a cable for connecting your guitar to a surround sound system. The shielding of a cable refers to its ability to protect against electromagnetic interference (EMI) and radio frequency interference (RFI).
EMI and RFI can result from various sources such as nearby electrical equipment, radio waves, and other electromagnetic signals. These interferences can cause unwanted noise, distortion, and signal degradation in your audio transmission.
A well-shielded cable helps minimize the impact of these interferences, ensuring clear and clean audio signals from your guitar to the surround sound system.
Shielding is typically achieved through the use of conductive materials such as copper or aluminum that surround the inner conductors of the cable. The shielding acts as a barrier, protecting the audio signal from external interference.
There are different types of shielding employed in cables, including braided shielding, foil shielding, and conductive PVC layers.
Braided shielding consists of woven strands of conductive material, providing excellent protection against EMI and RFI. It offers flexibility and durability, making it a preferred choice for many audio professionals.
Foil shielding, on the other hand, involves a thin metal foil, such as aluminum, wrapped around the inner conductors. Foil shielding is effective in blocking out high-frequency interference and is often combined with other shielding methods for enhanced protection.
Conductive PVC layers are another form of shielding, where the outer jacket of the cable contains a conductive material. This layer acts as a shield, blocking out unwanted interference and maintaining the signal integrity.
When selecting a cable, consider the level of shielding it provides. Cables with better shielding will offer greater protection against external interferences, resulting in cleaner and more reliable audio signals.
However, it’s important to note that cables with more shielding can be thicker and less flexible, making them less suitable for certain applications where flexibility and maneuverability are essential.
For most guitar to surround sound system connections, a cable with adequate shielding should suffice for typical home or studio setups. If you anticipate working in environments with a high level of EMI or RFI, such as in live performances, choosing a cable with robust shielding capabilities becomes even more important.
By considering the shielding properties of the cable, you can ensure a reliable and interference-free connection for your guitar to surround sound system setup.
Connector Type
When selecting a cable for connecting your guitar to a surround sound system, one essential factor to consider is the connector type on both ends of the cable. The connector type determines the compatibility between your guitar’s output and the input jacks of your surround sound system.
There are several common connector types used for guitar to surround sound system connections:
1. 1/4-Inch Jack:
The 1/4-inch jack is the most widely used connector for guitars. It features a cylindrical metal shaft with a tip that inserts into the corresponding input jack. The 1/4-inch jack is common on guitars, amplifiers, and audio interfaces, making it a versatile connector choice.
2. XLR (Three-Pin Connector):
The XLR connector is commonly associated with microphones and balanced audio connections. However, some guitars feature XLR outputs, allowing for direct connectivity to XLR-equipped surround sound systems. The XLR connector offers a secure and reliable connection and is renowned for its strong locking mechanism.
3. RCA (Phono) Jack:
The RCA connector, also known as a phono jack, is commonly used for consumer audio and video connections. While not as commonly used for guitar to surround sound system connections, some guitar amplifiers feature RCA outputs. If your guitar amplifier has RCA outputs and your surround sound system has RCA inputs, an RCA cable can be used for the connection.
4. TRS (Tip-Ring-Sleeve) Jack:
The TRS jack is commonly used for a variety of audio connections, including guitars to audio interfaces or mixing consoles. It features three distinct sections: the tip, the ring, and the sleeve, providing versatility for different types of connections. TRS cables can have various combinations of jacks, including 1/4-inch TRS, 1/4-inch to XLR, or XLR to XLR.
When selecting a cable, ensure that the connector type at one end matches your guitar’s output, while the other end matches the input jacks of your surround sound system.
It’s also important to consider the stability and reliability of the connectors. Look for cables with well-constructed connectors that provide a secure and stable connection without any unwanted signal interruptions.
Additionally, be aware of any specific requirements set by your guitar or surround sound system. Some guitars may have proprietary connectors, or your surround sound system may have specialized inputs that require specific cables or adapters.
By understanding the connector types and ensuring compatibility between your guitar and surround sound system, you can select the appropriate cable that establishes a stable and reliable connection, allowing for seamless integration and optimal audio transmission.
Setting Up Your Guitar to Surround Sound System Connection
Once you have chosen the appropriate cable for connecting your guitar to a surround sound system, it’s time to set up the connection. Following the correct setup process ensures a reliable and optimized audio experience. Here are the steps to set up your guitar to surround sound system connection:
1. Identify the Inputs on Your Surround Sound System:
Take a look at your surround sound system and locate the inputs available for connecting your guitar. Common input options include 1/4-inch instrument inputs, XLR inputs, or RCA inputs. Identify which input is suitable for your chosen cable’s connector type.
2. Connect the Cable to Your Guitar:
Take one end of the cable and plug it into the output jack on your guitar. Ensure a secure connection by pushing the connector all the way into the jack. For 1/4-inch jacks, you may need to twist the connector slightly to lock it in place.
3. Connect the Cable to Your Surround Sound System:
Take the other end of the cable and plug it into the appropriate input jack on your surround sound system. Match the connector type on the cable with the corresponding input jack on the system. Again, ensure a secure connection by pushing the connector firmly into the jack.
4. Adjust the Surround Sound System Settings:
Once the cable is connected, power on your surround sound system and adjust the settings accordingly. Set the appropriate input source to match the input jack connected to your guitar. Depending on your system, this might involve selecting an input channel or adjusting a selector switch.
5. Test the Connection and Sound Quality:
With everything set up, test the connection by strumming your guitar. Ensure that the sound is coming through the surround sound system’s speakers at the desired volume level. Adjust the system’s volume and any additional settings to achieve your desired sound quality and balance.
6. Fine-Tune as Needed:
Take the time to fine-tune the settings on your surround sound system and your guitar’s tone controls to achieve the desired sound. Experiment with different settings and adjustments to optimize the sound quality based on your preferences.
It’s also worth mentioning that some surround sound systems may have specific settings or modes designed for musical instruments. Explore these options, if available, to further enhance your guitar’s sound.
By following these steps, you can establish a proper and functional connection between your guitar and surround sound system. Remember to double-check the cable connections, adjust the system settings, and fine-tune the sound to create an immersive audio experience.
Identify the Inputs on Your Surround Sound System
Before connecting your guitar to a surround sound system, the first step is to identify the inputs available on your surround sound system. This will guide you in selecting the appropriate input for your guitar’s connection.
Surround sound systems typically offer various input options to accommodate different audio sources. Common input types include 1/4-inch instrument inputs, XLR inputs, or RCA inputs. The specific inputs available on your system will depend on the make and model. Consult your system’s manual or examine the rear panel of the system to locate the inputs.
1/4-Inch Instrument Inputs:
Many surround sound systems feature 1/4-inch instrument inputs, which are widely used for connecting guitars and other instruments. These inputs typically utilize a 1/4-inch TRS (Tip-Ring-Sleeve) jack. Look for the input labeled as “instrument input” or “1/4-inch input” on your surround sound system.
XLR Inputs:
Some surround sound systems provide XLR inputs. XLR inputs are commonly used in professional audio setups and are known for their balanced audio transmission. If your system has XLR inputs, they may be labeled as “XLR mic/line inputs” or “balanced inputs.”
RCA Inputs:
Certain surround sound systems are equipped with RCA inputs, also known as phono inputs. RCA inputs are commonly used for consumer audio connections. These inputs are typically color-coded as red (right channel) and white (left channel). Look for inputs labeled as “RCA inputs” or “phono inputs” on your surround sound system.
It’s crucial to identify which input type corresponds to your chosen cable’s connector. For example, if you are using an instrument cable with a 1/4-inch connector, you need to locate the 1/4-inch instrument input on your surround sound system.
Take note of the specific location and labeling of the inputs, as you will need this information when connecting your guitar.
In some cases, your surround sound system may have multiple inputs of the same type. It’s essential to determine which input you want to use for your guitar’s connection. Consider factors such as available channels, desired sound quality, and any specific features associated with each input.
By identifying the inputs on your surround sound system, you ensure that you connect your guitar to the appropriate input for the best possible audio performance.
Connect the Cable to Your Guitar
After identifying the input options on your surround sound system, the next step is to connect the cable to your guitar. This connection allows the audio signal from your guitar to be transmitted to the surround sound system for amplification and playback.
Before proceeding, ensure that your guitar is powered off or has the volume turned down to avoid any sudden loud noises or potential damage to the equipment.
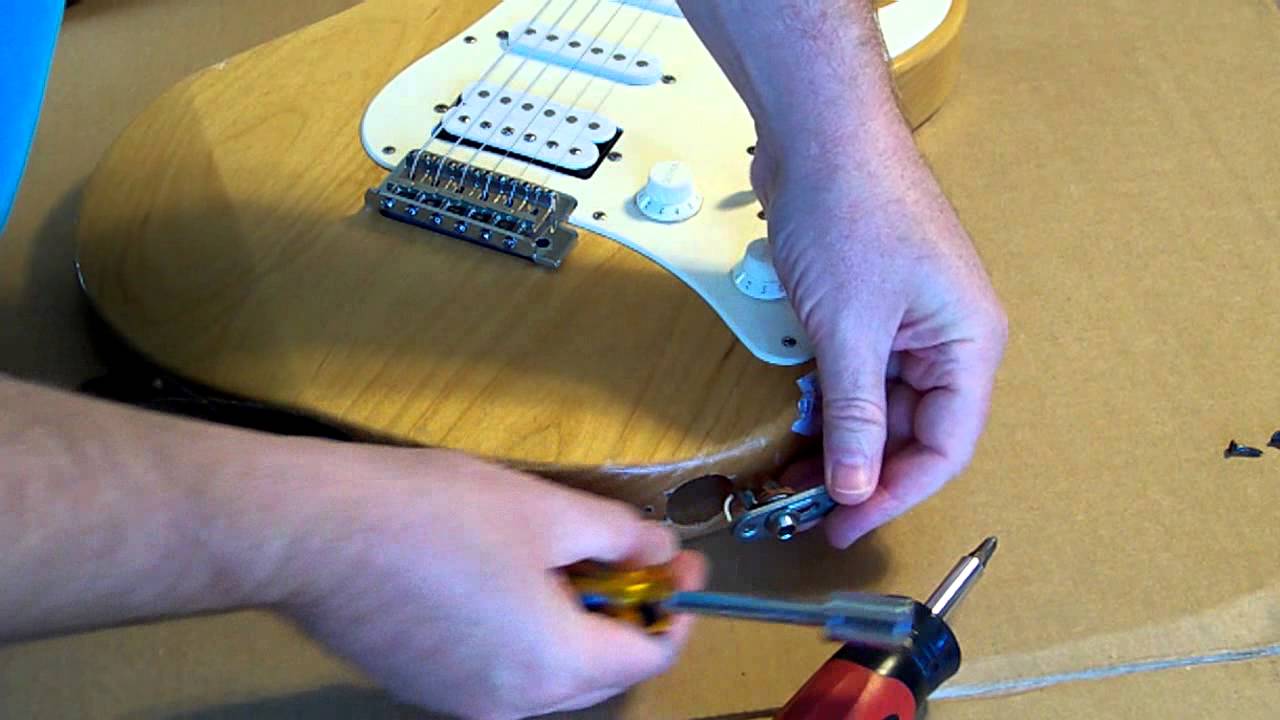
1. Locate the Output Jack on Your Guitar:
The output jack on your guitar is where you will connect one end of the cable. Most guitars have the output jack located on the lower edge, near the body or output plate. It typically resembles a 1/4-inch cylindrical socket.
2. Insert the Cable Connector into the Output Jack:
Take the cable and align the connector with the output jack on your guitar. Hold the connector firmly and gently insert it into the jack. Push it in until you feel a secure connection. For 1/4-inch jacks, you may need to give a slight twist to lock it in place.
3. Ensure a Secure Connection:
Once the connector is inserted into the output jack, double-check that it is firmly seated and securely connected. Ensure that there is no excessive movement or wobbling of the connector. A loose connection can result in intermittent audio or signal loss.
4. Test the Connection:
Prior to proceeding to the next steps, it’s a good idea to test the connection and ensure that the guitar’s signal is being properly transmitted. To do this, gently strum the guitar or play a few notes and listen for sound coming from the pickups or soundhole, depending on your guitar type. If you hear the expected sound, it indicates that the connection is successful.
It’s worth noting that some guitars may have multiple output options, such as stereo or multiple pickups. In such cases, ensure that you are using the appropriate output or consult your guitar’s manual for guidance on connecting to external audio equipment.
By connecting the cable to your guitar securely, you establish the link for audio signal transmission from your guitar to the surround sound system. This step sets the foundation for enjoying your guitar’s amplified sound through the surround sound system’s speakers.
Connect the Cable to Your Surround Sound System
With the cable securely connected to your guitar, the next step is to connect the other end of the cable to your surround sound system. This connection allows the audio signal from your guitar to be amplified and played through the surround sound system’s speakers. Follow these steps to connect the cable:
1. Locate the Input Jack on Your Surround Sound System:
Look for the corresponding input jack on your surround sound system where you will connect the cable. Refer to the input options you identified earlier, such as the 1/4-inch instrument input, XLR input, or RCA input.
2. Match the Cable Connector to the Input Jack:
Take the other end of the cable, with the appropriate connector type, and align it with the input jack on your surround sound system. Ensure that the connectors are compatible and that they match in size and type. This step will vary depending on the chosen cable and the input jack type on your system.
3. Insert the Cable Connector into the Input Jack:
Gently push the cable connector into the input jack on your surround sound system. Ensure a secure and snug connection, making sure that the connector is fully inserted into the jack. Avoid applying excessive force, but ensure it is firmly connected to prevent any signal loss or audio interruptions.
4. Double-Check the Connection:
Once the cable is connected to the input jack, double-check that it is securely in place. Give the cable a slight tug to ensure it is not loose. A loose connection can lead to poor sound quality or intermittent audio. Also, inspect the connection visually to ensure that the connector is properly inserted and aligned.
5. Test the Connection:
After the cable is connected to both your guitar and surround sound system, test the connection by playing your guitar. Strum a few chords or play a melody and listen for the sound coming from the surround sound system’s speakers. Adjust the volume and settings of your surround sound system as needed to achieve the desired sound quality.
It’s important to note that some surround sound systems may have multiple input jacks of the same type. Choose the appropriate input jack that matches the connector type of your cable and ensure that it corresponds to the desired audio source.
By connecting the cable securely to your surround sound system, you establish a seamless audio connection between your guitar and the system. This step ensures that the audio signal from your guitar is properly transmitted for amplification and playback through the surround sound system’s speakers.
Tips for Optimal Sound Quality and Performance
To enhance your overall audio experience and ensure optimal sound quality and performance when connecting your guitar to a surround sound system, consider implementing the following tips:
1. Use High-Quality Cables:
Invest in high-quality cables that are specifically designed for audio applications. These cables are built with better materials and construction techniques, resulting in improved signal transmission and durability. High-quality cables can help minimize signal loss and interference, resulting in cleaner and clearer sound.
2. Keep the Cables Away from Power Sources and Interference:
Avoid routing your cables near power sources, power cables, or other sources of electromagnetic interference. These can introduce unwanted noise or hum into your audio signal. Keep your guitar and surround sound system cables as far away from these potential sources of interference as possible to maintain a clean audio signal.
3. Check and Maintain Proper Grounding:
Ensure that both your guitar and surround sound system are properly grounded. Proper grounding helps reduce hum and noise in the audio signal. If you notice any buzzing or unwanted noise, check the grounding connections and address any grounding issues before troubleshooting further.
4. Experiment with Signal Processing and Effects:
Take advantage of the signal processing capabilities and effects available on your surround sound system or audio interface. Experiment with various settings such as equalization, reverb, or modulation effects to shape your guitar’s sound according to your preferences. These tools can enhance your overall tone and create a more immersive sound experience.
5. Optimize the Soundscape:
Take time to adjust the speaker placement and position within your listening space. Experiment with different configurations and orientations to achieve the best possible soundstage for your guitar’s output. This can include adjustments to speaker positioning, room acoustics, and speaker aiming angles to create a more balanced and immersive listening environment.
6. Regularly Clean and Maintain Your Equipment:
Keep your guitar and surround sound system clean to ensure the best performance. Regularly inspect and clean your guitar’s output jack and the input jacks on your surround sound system to remove any dust, dirt, or debris that may affect the audio connection. Additionally, clean your cables periodically to maintain optimal signal transmission.
By implementing these tips, you can optimize the sound quality and performance of your guitar to surround sound system connection. Experimenting with different settings and maintaining your equipment will help you achieve the best possible audio experience and make the most of your guitar’s capabilities when connected to a surround sound system.
Troubleshooting Common Issues
While setting up your guitar to a surround sound system connection is generally straightforward, you may encounter some common issues that can affect the audio quality or signal transmission. Understanding these issues and knowing how to troubleshoot them can help ensure a smooth and trouble-free performance. Here are some common problems and their possible solutions:
1. No Sound or Weak Signal:
If you’re not getting any sound or experiencing a weak signal, start by checking the cable connections. Ensure that both ends of the cable are securely plugged into the guitar and the surround sound system. If the connections are solid, try a different cable to rule out the possibility of a faulty cable. Additionally, verify that the volume levels are appropriately set on your guitar, surround sound system, and any other audio equipment in the signal chain.
2. Unwanted Noise or Hum:
If you hear humming or other unwanted noise, it could be caused by electrical interference. Make sure that your cables are away from power sources, transformers, or any other electrical devices that may introduce interference. Additionally, check your grounding connections. Ensure that your guitar and surround sound system are properly grounded to mitigate any potential grounding issues that may cause noise or hum in the audio signal.
3. Distorted or Muddy Tone:
If your guitar’s tone sounds distorted or muddy through the surround sound system, check your gain or volume levels. Excessive gain or volume can cause clipping, resulting in a distorted signal. Adjust the gain or volume levels on both your guitar and the surround sound system to find the proper balance. Additionally, review any equalization settings or digital effects that may be affecting the tone and adjust as needed.
4. Limited Stereo or Surround Sound Experience:
If you’re expecting a stereo or surround sound experience but only hearing mono sound, verify that you have connected the cables correctly. Some systems require specific input configurations for stereo or surround sound playback. Consult your surround sound system’s manual to understand the correct setup for stereo or surround sound output. Additionally, ensure that your audio source (such as your guitar) is capable of producing stereo or surround sound signals.
5. Feedback or Excessive Noise:
If you’re experiencing feedback or excessive noise during high-volume playing, make sure to manage your guitar’s position relative to the speakers. Position yourself and the guitar to avoid facing the speakers directly, as this can cause feedback. Experiment with speaker placement and aiming angles, as well as adjusting the volume levels, to find the optimal balance between sound projection and feedback.
6. Interference or Signal Dropouts:
If you’re encountering intermittent signal dropouts or interference, consider the proximity of your guitar and the surround sound system to other electronic devices. Wireless devices, mobile phones, or other wireless signals can sometimes cause interference. Move away from these potential sources of interference to improve signal stability. Additionally, check for loose or damaged connectors, and replace any faulty cables if necessary.
By troubleshooting these common issues, you can address potential problems and ensure a high-quality guitar to surround sound system connection. Remember to check your cable connections, adjust settings, and properly manage interference to optimize your audio experience.
Conclusion
Connecting your guitar to a surround sound system opens up a world of possibilities for enhancing your music experience. By using the right cable and following the proper setup techniques, you can achieve optimal sound quality and performance.
Understanding the basics of guitar to surround sound system connections, such as audio signal transfer and impedance matching, provides a solid foundation for making informed decisions. By choosing the appropriate cable type, considering factors like length, shielding, and connector type, you can find the best cable that suits your specific needs.
Once you have selected the right cable, the setup process becomes straightforward. Identifying the inputs on your surround sound system, connecting the cable securely to your guitar and surround sound system, and adjusting the settings will enable you to enjoy amplified sound through the surround sound system speakers.
To optimize sound quality and performance, consider implementing additional tips such as using high-quality cables, keeping cables away from interference sources, and experimenting with signal processing and effects. Regular maintenance of your equipment and fine-tuning the soundscape can also contribute to an enhanced audio experience.
In the event of common issues like no sound, unwanted noise, or distorted tone, troubleshooting techniques such as checking connections, managing interference, and adjusting volume or gain levels can help resolve the problem.
By following these guidelines and troubleshooting tips, you can create a seamless and immersive guitar to surround sound system connection. Whether you’re a musician looking to elevate your live performances or a music enthusiast seeking an enhanced auditory experience, the right cable and setup techniques can unlock new possibilities and enrich your musical journey.