Introduction
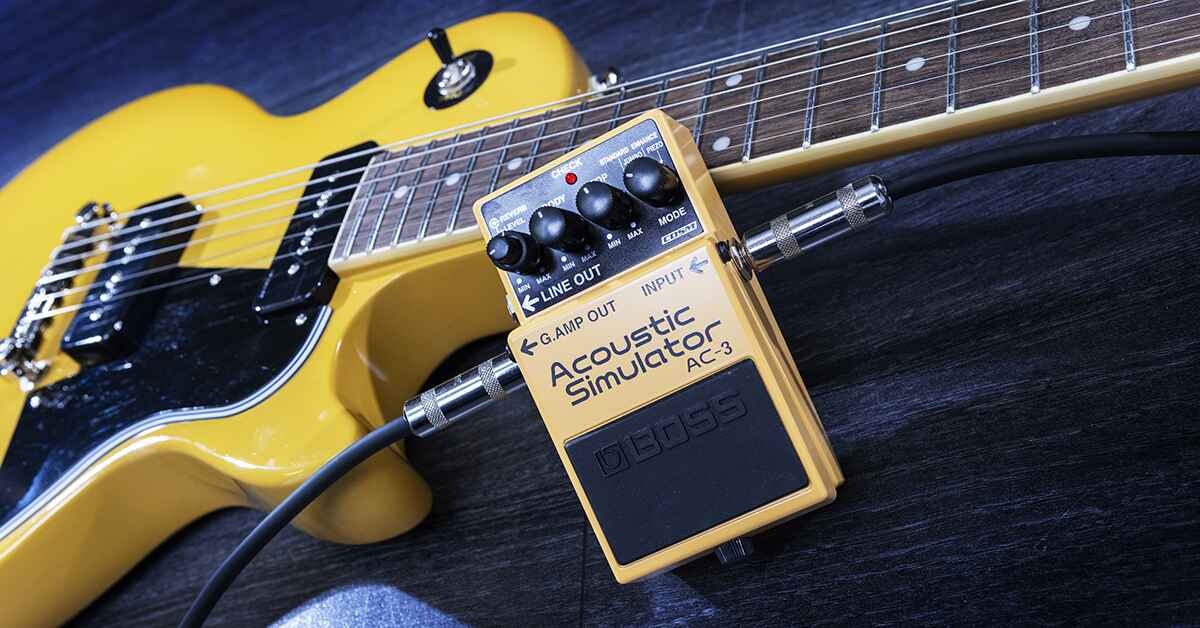
Acoustic-electric guitars are popular for their versatility, allowing players to easily amplify their sound for live performances and recording. These instruments are equipped with a battery-powered preamp system that enhances the natural acoustic tone when connected to an amplifier or PA system. However, like all batteries, the power source in an acoustic-electric guitar will eventually need to be replaced. This guide will walk you through the simple process of changing the battery in your acoustic-electric guitar, ensuring that you can continue to enjoy its amplified sound without interruption.
Whether you’re a seasoned musician or a beginner, knowing how to change the battery in your acoustic-electric guitar is an essential skill that can save you time and money. By following the steps outlined in this article, you’ll be able to maintain your instrument’s optimal performance and avoid any unexpected battery failures during performances or practice sessions.
Now, let’s dive into the step-by-step process of changing the battery in your acoustic-electric guitar and ensure that you can continue creating beautiful music with confidence.
Step 1: Gather the Necessary Tools
Before you begin the battery replacement process, it’s essential to gather the necessary tools and materials. Having everything on hand will streamline the process and prevent any interruptions as you work on your acoustic-electric guitar. Here’s what you’ll need:
- New Battery: The first item on your list is the replacement battery. Acoustic-electric guitars typically use 9-volt batteries for their preamp systems, but it’s crucial to check your guitar’s specifications to ensure you purchase the correct type.
- Small Screwdriver: Most acoustic-electric guitars feature a battery compartment secured by a small screw. A precision screwdriver that fits the compartment’s screw heads will be necessary for accessing the battery.
- Clean Cloth: It’s always a good idea to have a clean cloth or microfiber towel on hand to wipe down the battery compartment and surrounding areas. This helps maintain the overall cleanliness of your guitar and prevents any debris from interfering with the new battery.
- Backup Batteries (Optional): If you’re planning an extended performance or recording session, having spare batteries within reach is a smart precautionary measure. This ensures that you won’t be caught off guard by a drained battery during a crucial musical moment.
By gathering these tools and materials, you’ll be fully prepared to tackle the battery replacement process with confidence, ensuring that your acoustic-electric guitar remains in optimal playing condition.
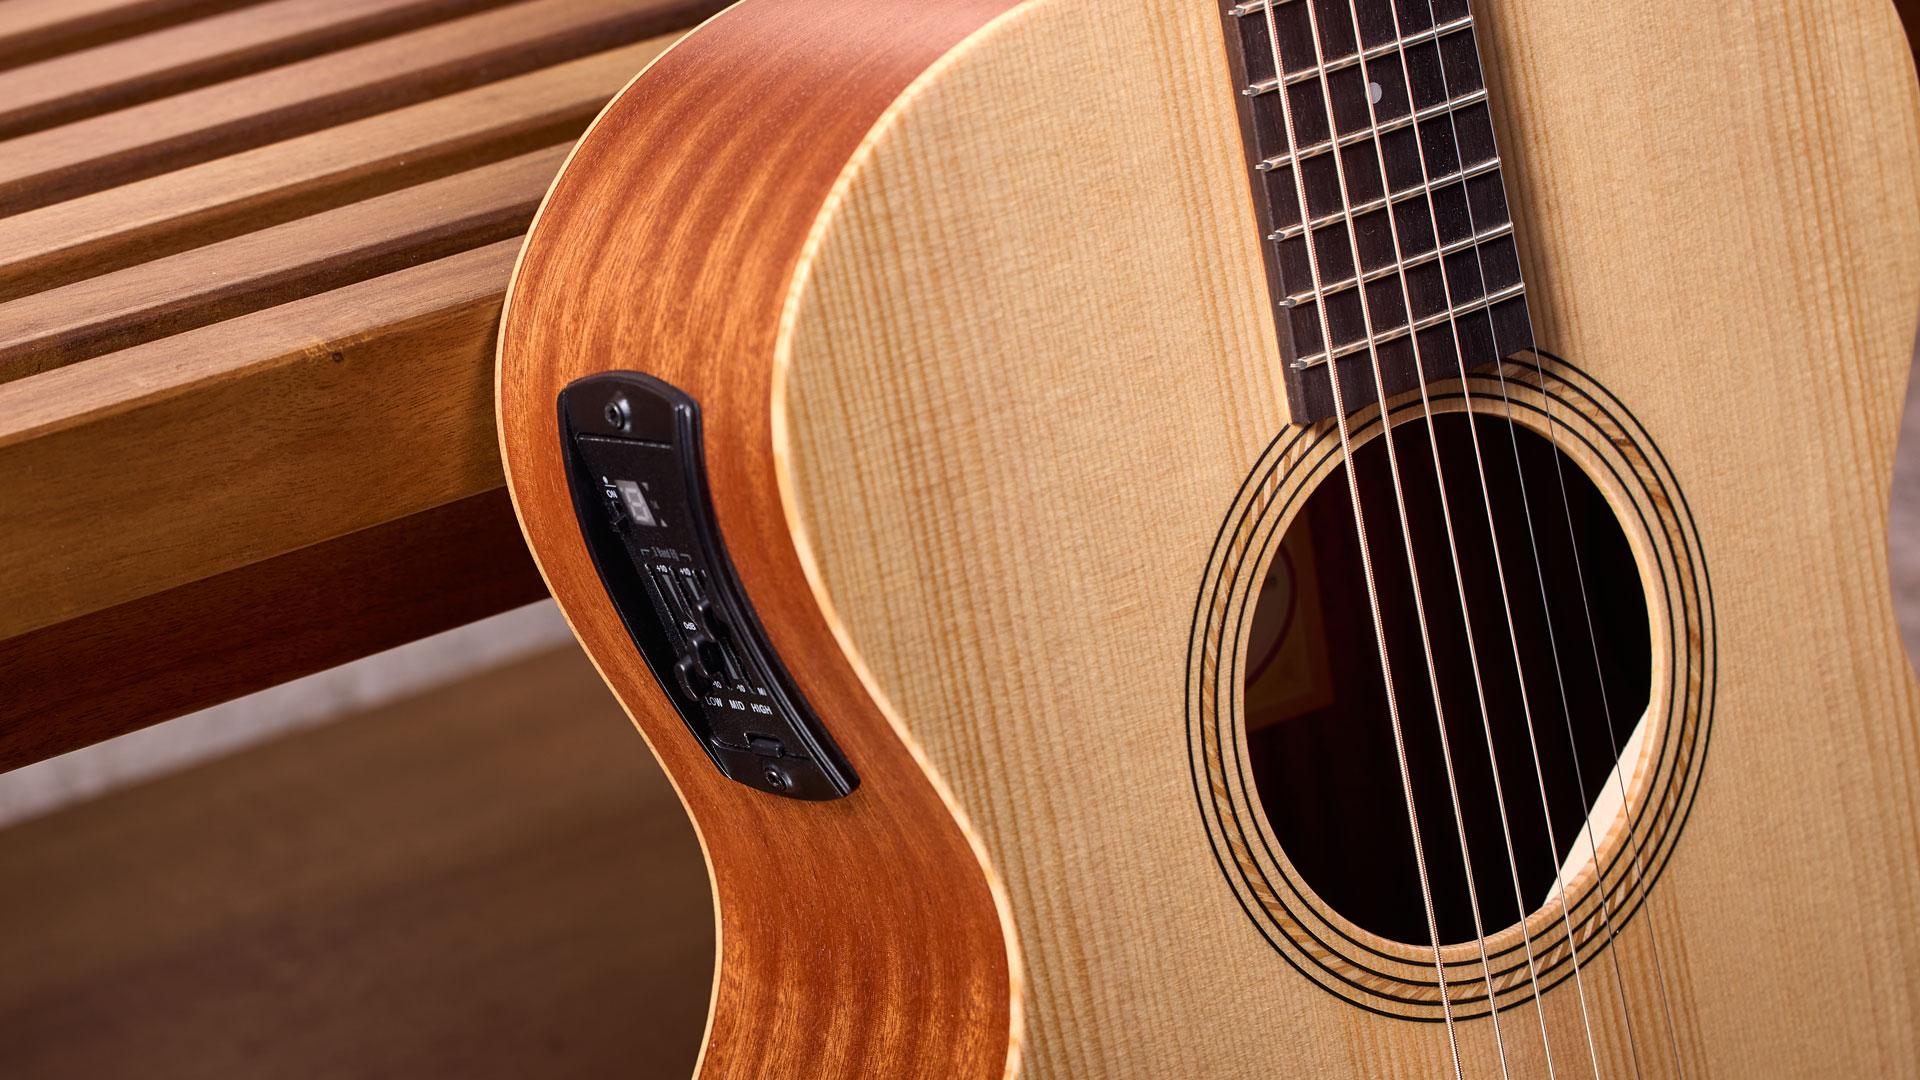
Step 2: Locate the Battery Compartment
Before proceeding with the battery replacement, it’s important to locate the battery compartment on your acoustic-electric guitar. While the exact placement may vary depending on the guitar model, the battery compartment is typically positioned within easy reach for convenient access. Here are the general steps to find the battery compartment:
- Refer to the Owner’s Manual: If you’re unsure about the location of the battery compartment, consulting the owner’s manual that came with your guitar can provide valuable guidance. The manual often includes detailed diagrams and instructions for accessing and replacing the battery.
- Inspect the Control Panel: On many acoustic-electric guitars, the battery compartment is integrated into the control panel, which houses the preamp controls. Look for a discrete cover or latch that provides access to the battery.
- Check Near the Output Jack: In some guitar models, the battery compartment may be situated near the output jack, where the cable connects to the guitar. This location allows for convenient battery replacement without requiring extensive disassembly.
- Examine the Lower Bout: On certain acoustic-electric guitars, the battery compartment is positioned on the lower bout of the body, accessible through a dedicated panel or cover. This placement ensures easy access while maintaining the guitar’s aesthetics.
By following these steps and visually inspecting your guitar, you’ll be able to identify the location of the battery compartment with ease. Once you’ve located the compartment, you can proceed to the next step of removing the old battery in preparation for the replacement process.
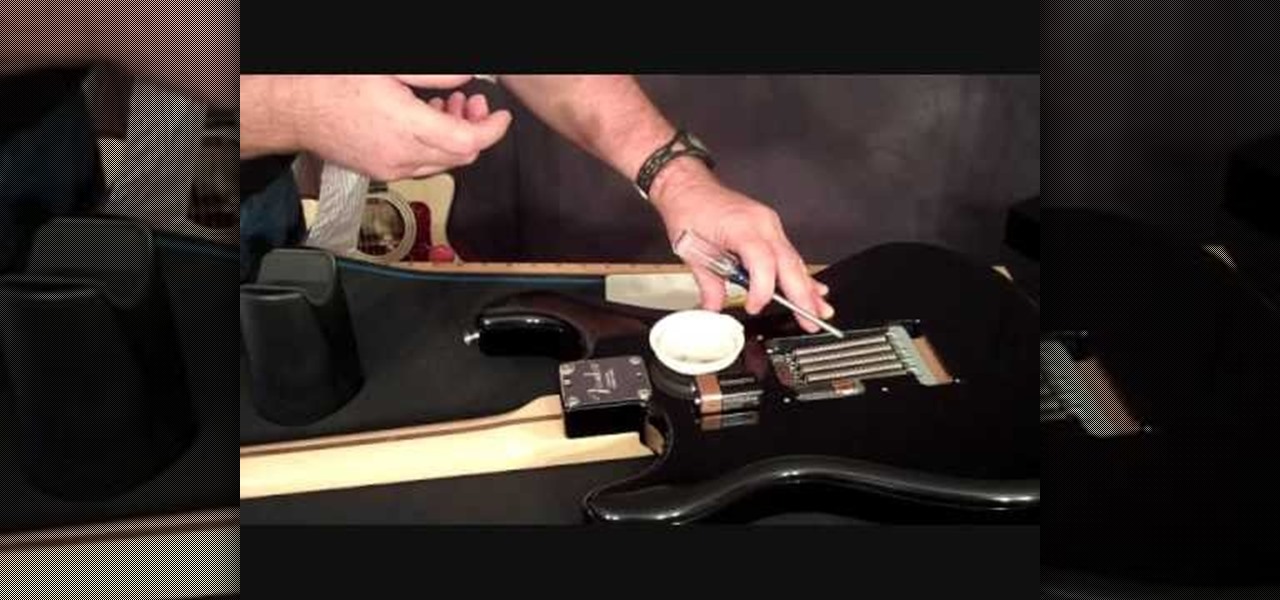
Step 3: Remove the Old Battery
With the battery compartment located, the next step is to remove the old battery from your acoustic-electric guitar. This process involves careful handling to ensure the safe extraction of the old battery and prepare the compartment for the new one. Here’s a step-by-step guide on how to remove the old battery:
- Power Off the Guitar: Before handling the battery, it’s essential to turn off the guitar’s preamp system to prevent any electrical mishaps. If your guitar has an onboard tuner or any other active electronics, make sure to deactivate them as well.
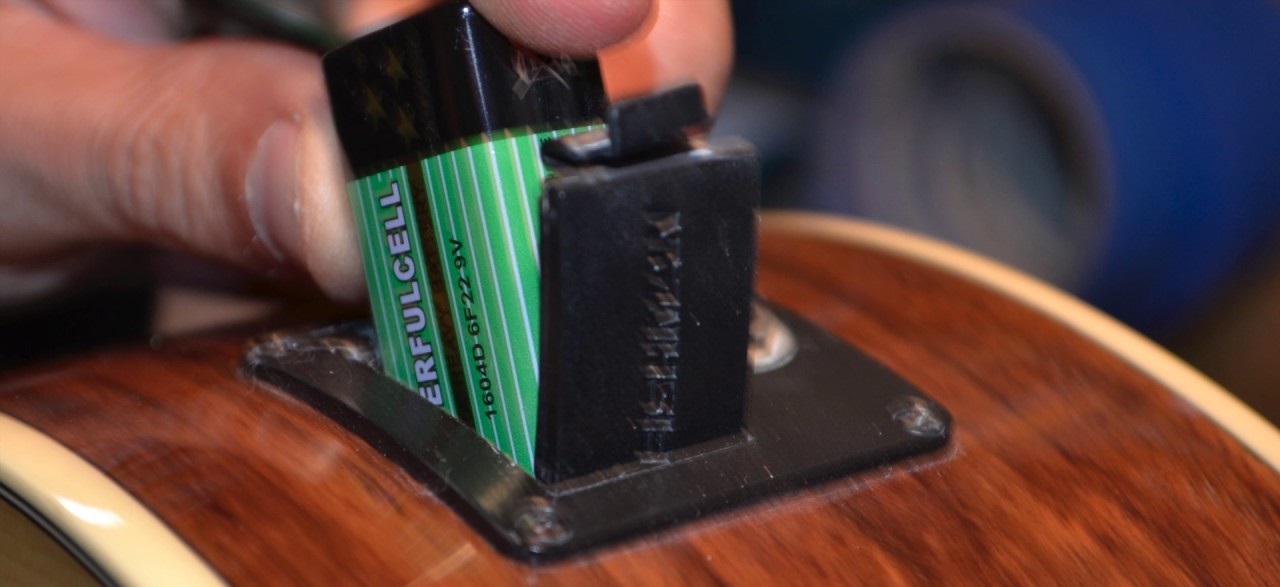
- Open the Battery Compartment: Using the appropriate tool, such as a small screwdriver, carefully remove the screws or fasteners securing the battery compartment cover. Place the screws in a safe location to prevent misplacement.
- Handle the Old Battery: Once the compartment is open, gently remove the old battery, paying attention to its orientation. Some batteries may be held in place by a small clip or harness, so take care to release any securing mechanism without applying excessive force.
- Inspect the Compartment: While the old battery is out, take a moment to inspect the interior of the compartment for any debris or corrosion. Use a clean cloth to wipe away any dust or buildup, ensuring a clean environment for the new battery.
- Dispose of the Old Battery Properly: Since the old battery may no longer hold a charge, it’s important to dispose of it responsibly. Many communities have designated recycling centers for batteries, so be sure to follow the appropriate disposal guidelines to protect the environment.
By following these steps, you can safely remove the old battery from your acoustic-electric guitar, setting the stage for the seamless installation of the new power source. With the old battery out of the way, you’re ready to proceed to the next step of inserting the fresh battery into the compartment.
Step 4: Insert the New Battery
After successfully removing the old battery, it’s time to insert the new battery into the compartment of your acoustic-electric guitar. Proper installation ensures that your instrument’s preamp system receives the necessary power to deliver optimal amplified sound. Follow these steps to insert the new battery:
- Check the Battery Orientation: Before placing the new battery into the compartment, ensure that you’ve verified the correct orientation. Most batteries have markings or diagrams indicating the positive and negative terminals. Align the battery accordingly to match the compartment’s polarity requirements.
- Secure the Battery: If your guitar’s battery compartment features a securing mechanism, such as a clip or harness, carefully fasten the new battery in place. This prevents any movement or disconnection during vigorous playing or handling of the guitar.
- Close the Compartment: Once the new battery is securely positioned, gently close the compartment cover and reattach the screws or fasteners using the appropriate tool. Ensure that the cover is snugly in place to protect the battery and maintain the guitar’s aesthetics.
- Power On and Test: With the new battery installed, power on the guitar’s preamp system and any associated electronics. Test the guitar’s amplified sound by connecting it to an amplifier or PA system, ensuring that the new battery functions as expected.
- Keep Spare Batteries Handy: Consider keeping spare batteries in your guitar case or gig bag for quick replacement during performances or practice sessions. This proactive approach ensures that you’re always prepared in the event of a battery depletion.
By following these steps, you can confidently insert the new battery into your acoustic-electric guitar, setting the stage for uninterrupted amplified performances and practice sessions. With the new power source in place, you’re ready to move on to the final step of testing the guitar to confirm its optimal functionality.
Step 5: Test the Guitar
After successfully replacing the battery in your acoustic-electric guitar, it’s crucial to test the instrument to ensure that the new power source is functioning as intended. Testing the guitar allows you to verify that the preamp system receives power and delivers the expected amplified sound. Follow these steps to test your guitar after the battery replacement:
- Connect to an Amplifier: Use a standard instrument cable to connect your acoustic-electric guitar to an amplifier or PA system. Ensure that the amplifier is properly powered and set to an appropriate volume level for testing.
- Activate the Preamp: Turn on the preamp system on your guitar, following the manufacturer’s instructions for activating the controls. If your guitar features onboard EQ or tone shaping, adjust the settings to your preference to hear the tonal enhancements.
- Strum and Listen: Strum the guitar strings and listen for the amplified sound through the connected amplifier. Pay attention to the clarity, volume, and tonal characteristics to confirm that the preamp system is receiving power from the new battery.
- Verify Tuner and Electronics: If your acoustic-electric guitar includes an onboard tuner or other active electronics, verify their functionality during the testing process. Ensure that the tuner accurately detects the pitch of the strings and that any other electronics operate as expected.
- Perform Sound Checks: Play various musical passages on the guitar to assess its amplified sound across different playing styles and dynamics. This comprehensive testing allows you to confirm that the new battery sustains consistent performance under varying musical demands.
By testing your guitar after the battery replacement, you can be confident in the functionality of the new power source and the overall performance of your acoustic-electric instrument. This final step ensures that you’re ready to continue creating music with the amplified sound and versatility that acoustic-electric guitars offer.
Conclusion
Changing the battery in your acoustic-electric guitar is a straightforward process that ensures your instrument remains ready for amplified performances and recording sessions. By following the step-by-step guide outlined in this article, you’ve gained the knowledge and confidence to maintain your guitar’s preamp system with ease. From gathering the necessary tools to testing the guitar’s functionality, each step contributes to the seamless replacement of the battery, allowing you to focus on your musical creativity without interruptions.
Remember, regular battery maintenance is essential for ensuring consistent performance from your acoustic-electric guitar. By keeping spare batteries on hand and periodically checking the power source, you can prevent unexpected disruptions during critical musical moments. Additionally, maintaining a clean battery compartment and handling the batteries with care prolongs the overall lifespan of your guitar’s preamp system.
With the ability to change the battery in your acoustic-electric guitar, you’re equipped to preserve the instrument’s amplified sound and enjoy its versatile capabilities for years to come. By staying proactive in battery management and following the guidelines provided, you can confidently showcase your musical talent with the amplified brilliance that acoustic-electric guitars offer.