Overview
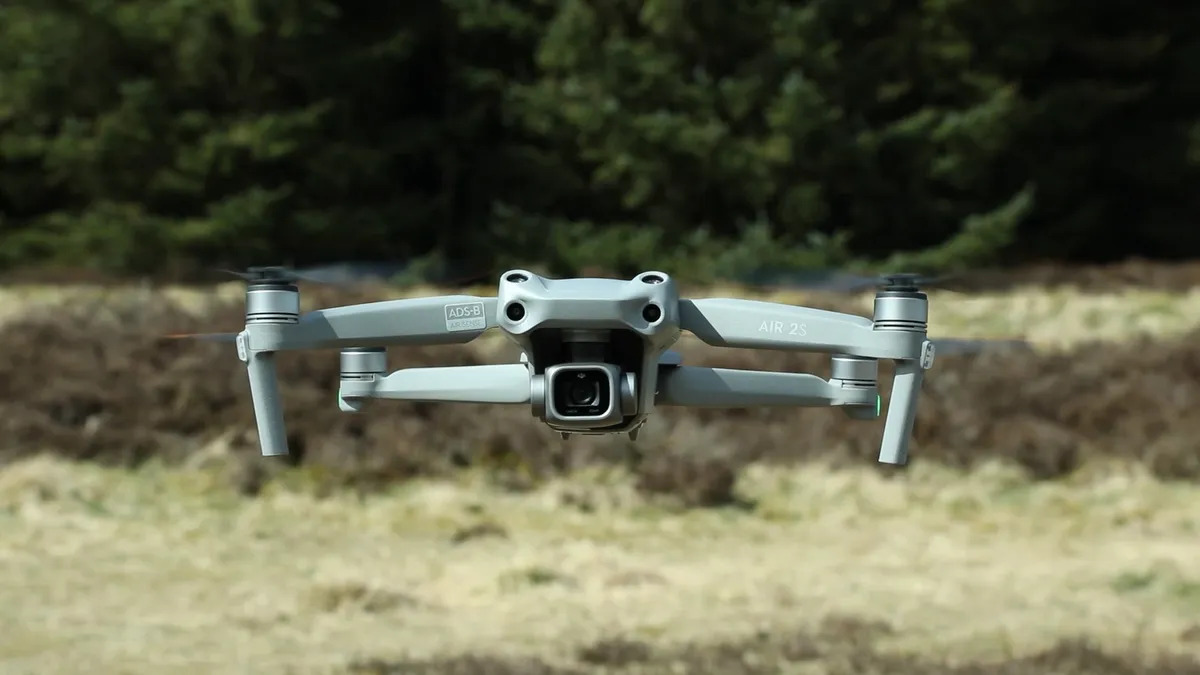
Zooming is a powerful feature that can add a new dimension to your aerial photography and videography with the DJI Mavic Air 2. By adjusting the focal length of the camera lens, you can bring distant subjects closer and capture breathtaking close-up shots. Whether you want to highlight intricate details or create a more intimate perspective, mastering the art of zooming is crucial.
In this article, we will explore various techniques to zoom with the DJI Mavic Air 2. We will discuss how to use the zoom slider on the remote controller, the zoom function in the DJI Fly app, and even how to zoom in post-production. Additionally, we will provide you with some tips and tricks to make the most out of your zooming capabilities.
Before we dive into the specifics, it’s important to note that the DJI Mavic Air 2 features a digital zoom rather than an optical zoom. This means that the zooming effect is achieved through cropping the image and enlarging it digitally. While it may not provide the same level of image quality as an optical zoom, the Mavic Air 2’s digital zoom can still produce impressive results when used properly.
Now, let’s explore the different techniques for zooming with the DJI Mavic Air 2 and unleash the full creative potential of your drone photography.
Zooming Techniques
The DJI Mavic Air 2 offers multiple ways to zoom in and out, allowing you to capture stunning shots from various perspectives. Let’s take a closer look at the different zooming techniques you can utilize:
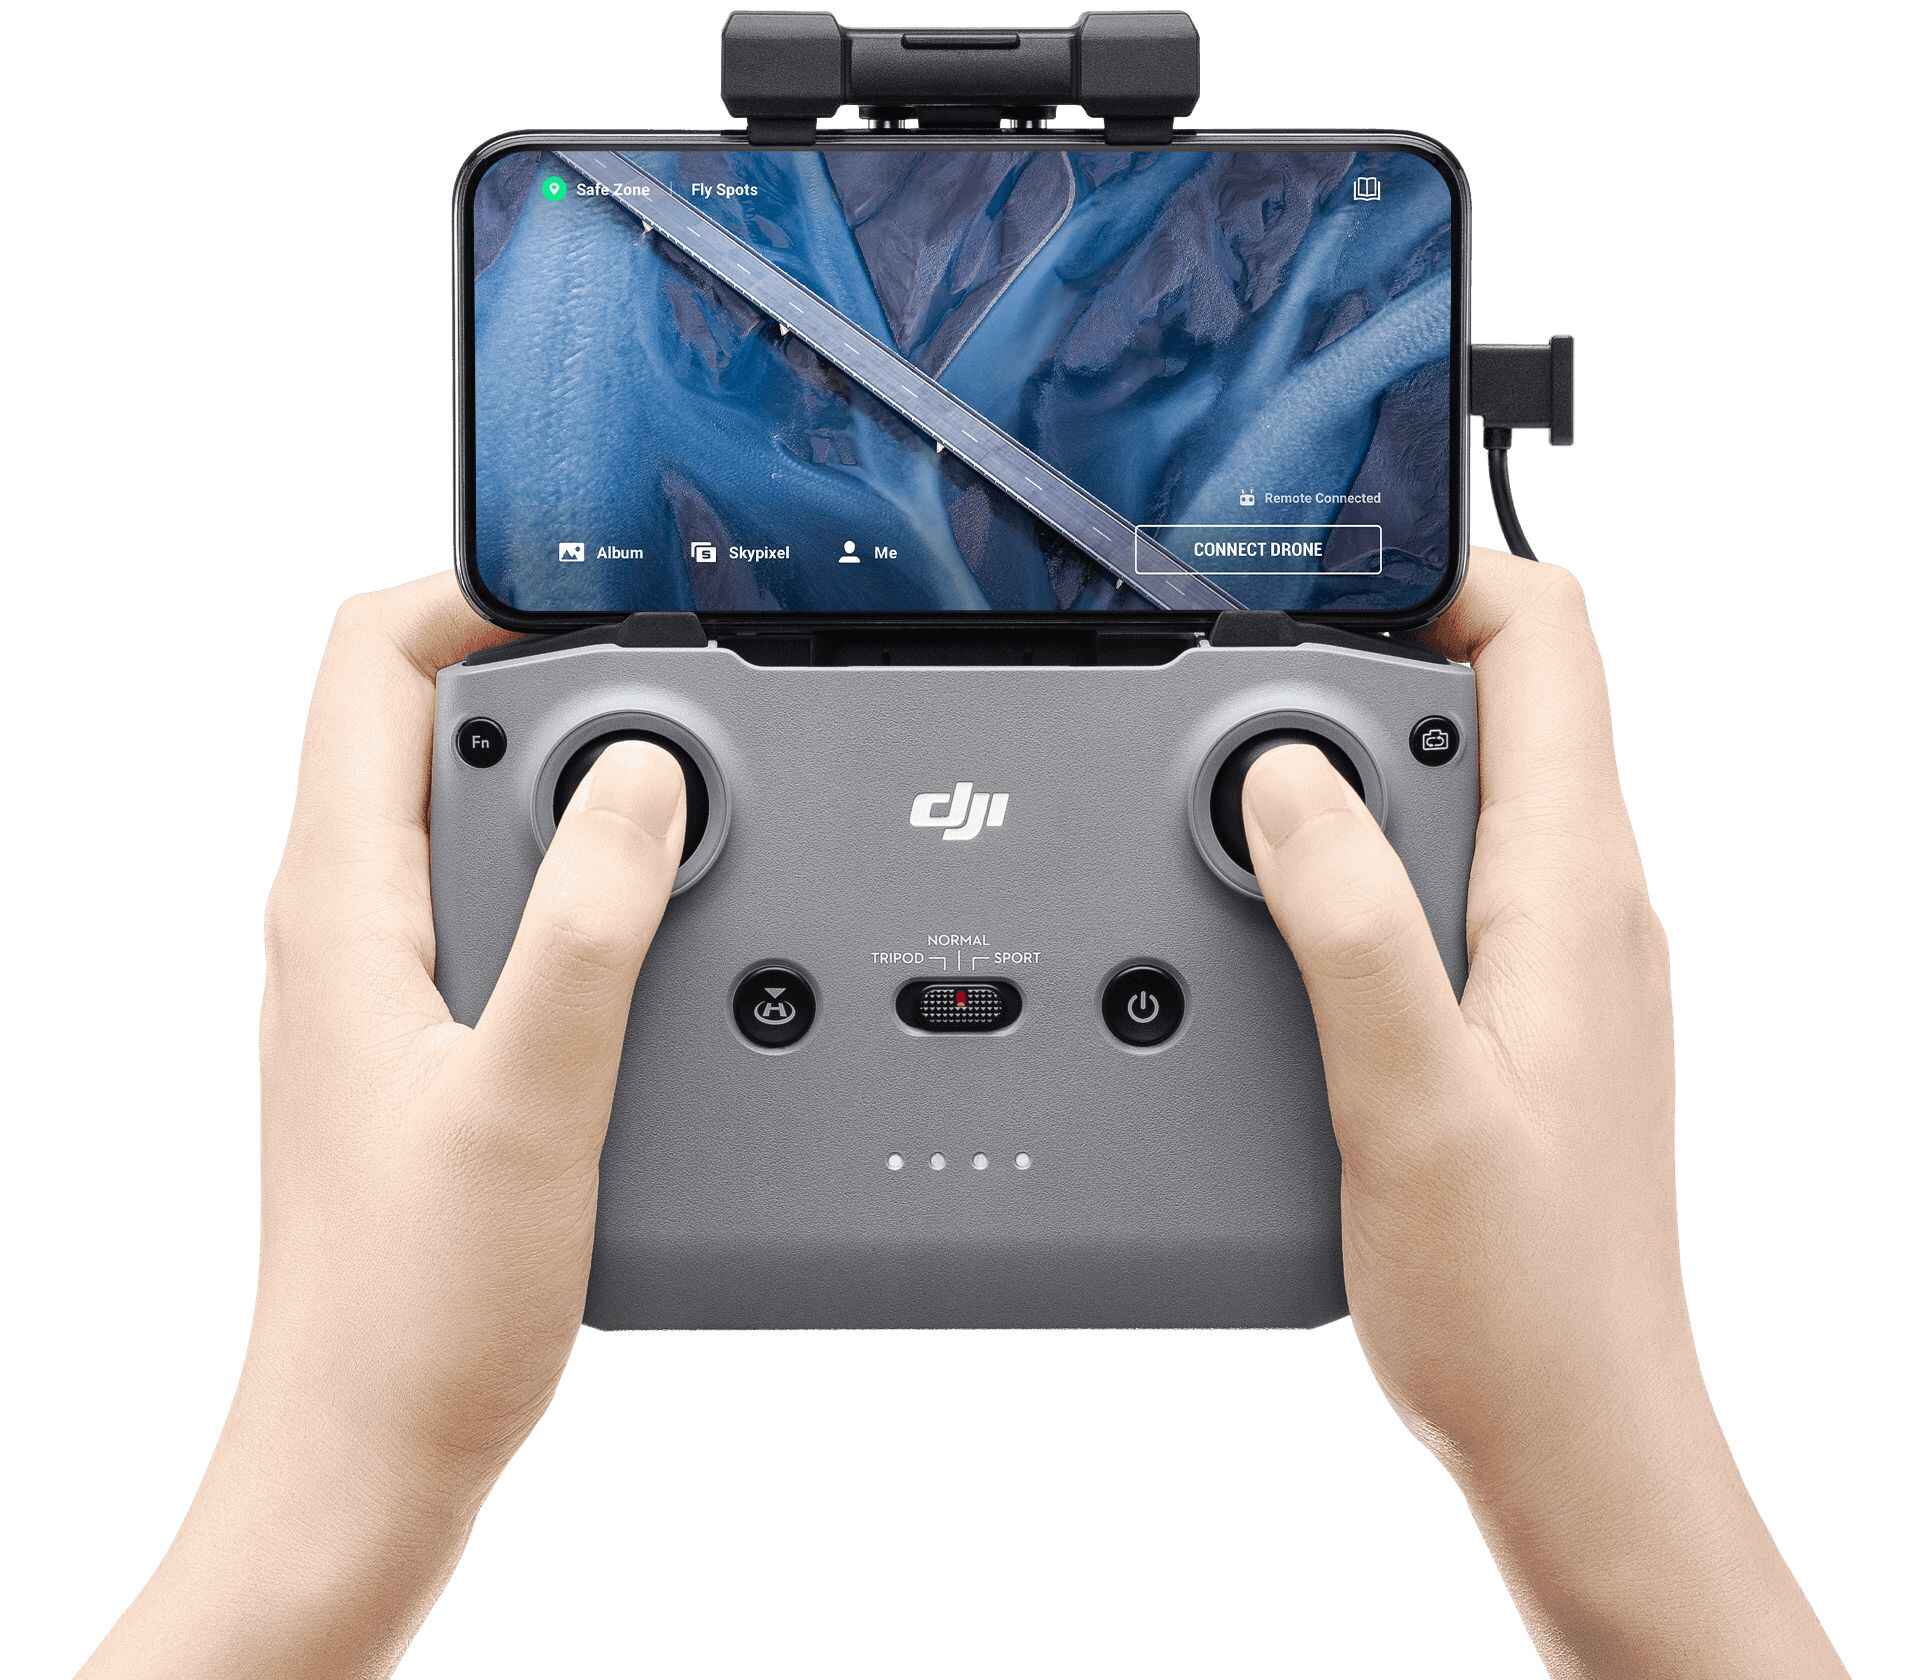
1. Using the Zoom Slider on the Remote Controller: The Mavic Air 2’s remote controller is equipped with a zoom slider located on the side. By sliding it up or down, you can adjust the zoom level in real-time. This physical control gives you precise control over the zoom, allowing for smooth and seamless transitions. Experiment with different zoom levels to find the perfect framing for your shots.
2. Using the Zoom Function in the DJI Fly App: The DJI Fly app provides a user-friendly interface to control the Mavic Air 2’s camera settings, including the zoom function. Simply open the app, connect your drone, and navigate to the camera settings. You will find a zoom icon that allows you to adjust the zoom level using a virtual slider. This digital zoom feature provides a convenient way to zoom in and out without the need to touch the drone’s physical controls.
3. Zooming in Post-Production: If you have captured footage without using any zooming techniques, don’t worry! You can still achieve a zoom effect during post-production. Import your footage into video editing software, and look for the zoom feature. Most editing software offers tools that allow you to digitally zoom into the footage, simulating the effect of a zoom lens. While this method may not be as flexible as zooming during the actual capture, it gives you the freedom to experiment and enhance your shots after the fact.
Utilizing these zooming techniques opens up a world of possibilities for your aerial photography. Whether you want to bring distant landscapes closer, emphasize intricate details in your subjects, or create engaging cinematic shots, zooming allows you to elevate your content to new heights.
In the next sections, we will explore how to use the zoom slider on the remote controller and the zoom function in the DJI Fly app in more detail. These techniques will help you unleash your creativity and capture mesmerizing aerial shots with the DJI Mavic Air 2.
Using the Zoom Slider on the Remote Controller
The DJI Mavic Air 2 is equipped with a convenient zoom slider on its remote controller. This physical control allows you to adjust the zoom level of the camera in real-time, providing you with precise control over your shots. Here’s how you can use the zoom slider effectively:
1. Familiarize Yourself with the Zoom Slider: Locate the zoom slider on the side of the remote controller. It is usually positioned near the camera settings buttons. Take a moment to get accustomed to the slider’s position and movement.
2. Slide Up or Down: To zoom in, slide the zoom slider up gently. The camera will start zooming in, bringing the subject closer with each upward slide. To zoom out, slide the zoom slider down gradually. The camera will zoom out, expanding the field of view.
3. Make Smooth Adjustments: It’s important to make smooth and gradual adjustments to maintain the quality of your footage. Avoid rapid or jerky movements, as this can lead to shaky footage or abrupt changes in perspective. Practice sliding the zoom control with precision and finesse to achieve professional-looking results.
4. Experiment with Different Zoom Levels: Don’t be afraid to experiment with different zoom levels to find the perfect framing for your shots. Zooming in can help emphasize details and create a more intimate perspective, perfect for capturing intricate patterns or revealing hidden elements. On the other hand, zooming out can provide a wider view, showcasing the context and surroundings of the subject.
5. Combine Zooming with Movement: Consider combining the zooming technique with the drone’s movement to add dynamism and visual impact to your shots. For example, gradually zoom out while ascending the drone to reveal a stunning aerial landscape. Or, zoom in while performing a slow flyby to highlight specific details in the scene. This combination of movement and zooming can create captivating and cinematic visuals.
Using the zoom slider on the remote controller gives you direct control over the zoom functionality of the Mavic Air 2’s camera. It provides a tactile and intuitive way to adjust the zoom level, allowing for precise and creative framing of your aerial shots.
Next, we will explore how to use the zoom function in the DJI Fly app, providing you with an alternative method to control the zoom level of your Mavic Air 2.
Using the Zoom Function in the DJI Fly App
The DJI Fly app offers a user-friendly interface that allows you to control various camera settings of the DJI Mavic Air 2, including the zoom function. This digital zoom feature provides a convenient way to adjust the zoom level without needing to interact with the physical controls on the drone or its remote controller. Here’s how you can utilize the zoom function in the DJI Fly app:
1. Connect your Drone: Ensure that your Mavic Air 2 is connected to the DJI Fly app on your mobile device. The app enables a seamless connection and communication between your drone and the device, giving you full control over its camera features.
2. Access the Camera Settings: Once your drone is connected, locate the camera settings within the DJI Fly app’s interface. This is where you can access and adjust various camera parameters and functions, including the zoom feature.
3. Locate the Zoom Icon: Look for the zoom icon within the camera settings. It is usually represented by a magnifying glass or a slider icon. Tap on the zoom icon to access the zoom controls.
4. Adjust the Zoom Level: Upon accessing the zoom controls, you will find a virtual slider that allows you to adjust the zoom level. Simply slide your finger up or down on the slider to zoom in or out, respectively. As you move the slider, the camera’s field of view will change, magnifying or reducing the subject’s size.
5. Fine-tune the Zoom: Use gentle and precise finger movements to fine-tune the zoom level to your desired focal length. The app provides a smooth and responsive control, enabling you to achieve the exact zoom setting you desire for your shots.
6. Practice and Experiment: Take the time to practice using the zoom function in the DJI Fly app. Experiment with different zoom levels to understand its effect on the composition and visual impact of your aerial shots. By playing around with the zoom, you’ll discover the creative possibilities it offers and develop a sense of when to use it to enhance your photography or videography.
The DJI Fly app’s zoom function provides a convenient way to adjust the zoom level of the Mavic Air 2’s camera. Whether you want to zoom in to capture intricate details or zoom out for a wider perspective, the app gives you the flexibility to achieve your desired framing and composition.
In the next section, we will explore how you can achieve zooming effects during post-production, allowing you to enhance your shots even after they have been captured.
Zooming in Post-Production
If you haven’t utilized any zooming techniques during the actual capture, don’t worry! You can still achieve a zoom effect during post-production. This means that even if you forgot to adjust the zoom settings on your DJI Mavic Air 2 or if you want to enhance the zoom effect further, you can do so in your video editing software. Here’s how you can zoom in post-production:
1. Import your Footage: Start by importing your drone footage into your preferred video editing software. Ensure that you have the necessary tools and features to perform digital zooming.
2. Locate the Zoom Feature: Look for the zoom or scale feature in your video editing software. It might be located in the effects panel, composition settings, or transformation controls. Familiarize yourself with the location of this feature so you can access it easily.
3. Adjust the Zoom Level: Once you’ve located the zoom feature, manipulate the parameters to adjust the zoom level of the footage. You can use the software’s controls to increase or decrease the scale of the video, simulating the effect of zooming in or out.
4. Keyframe the Zoom: To create a smooth and gradual zoom effect, consider using keyframes. Keyframes allow you to set specific zoom levels at different points in time. By adding keyframes at the beginning and end of the desired zoom, you can smoothly transition from one zoom level to another. This technique can create a more dynamic and cinematic look.
5. Preview and Refine: Play back the footage with the applied zoom effect to assess its impact. Make any necessary adjustments to ensure the zoom feels natural and enhances the overall composition. You can also experiment with different speeds and timings for the zoom animation to achieve the desired visual impact.
6. Render and Export: Once you are satisfied with the zoom effect, render the final video with the applied zoom. Choose the appropriate settings for your desired output format and quality. After rendering, you can export and share your video with the world, showcasing the stunning zoom effects you have achieved.
Zooming in post-production allows you to have more control over the final look of your footage. It gives you the flexibility to fine-tune the zoom effect, correct any missed opportunities during the capture, or even experiment with different zoom levels to create unique visual storytelling.
Now that you know how to achieve zooming effects during post-production, let’s proceed to the next section, where we will share some valuable tips and tricks to enhance your zooming techniques with the DJI Mavic Air 2.
Tips and Tricks for Effective Zooming
Mastering the art of zooming with the DJI Mavic Air 2 can greatly enhance your aerial photography and videography. Here are some tips and tricks to help you make the most out of your zooming techniques:
1. Plan Your Shots: Before taking flight, spend some time planning your shots and considering where zooming can add the most impact. Visualize the composition and think about how zooming in or out can enhance the storytelling or capture specific details.
2. Use Smooth Movements: When zooming, it’s important to maintain smooth movements to ensure a seamless and professional-looking result. Avoid sudden or jerky zoom changes, as they can distract the viewer and compromise the visual quality of your footage.
3. Pay Attention to Shutter Speed: When zooming in, keep in mind that a higher focal length can amplify camera shake, resulting in blurry or shaky footage. To mitigate this, adjust your shutter speed accordingly. Increasing the shutter speed will help freeze the motion and minimize image blur.
4. Combine Zoom with Perspective Changes: Experiment with changing your drone’s altitude or position while zooming. This technique can create more engaging shots by adding depth and dynamism to your aerial footage. For example, gradually zoom out while ascending the drone to reveal a breathtaking landscape.
5. Think Beyond Subject Magnification: While zooming can naturally be associated with magnifying subjects, don’t limit yourself to that perspective. Explore how zooming can be used creatively to emphasize textures, patterns, or even lead the viewer’s eye to a specific point of interest within the frame.
6. Use Zoom for Transitions: Zooming can be a great tool for smooth transitions between shots. Experiment with zooming in or out as a way to seamlessly transition between different scenes, providing a continuous flow to your aerial video.
7. Understand Zoom Limitations: Remember that the Mavic Air 2 has a digital zoom, which means that the quality of the zoomed-in footage may not be as sharp as the native resolution. To maintain the best possible quality, avoid excessive zooming, particularly beyond the recommended limits.
8. Practice and Experiment: The more you practice, the better you will become at utilizing zooming techniques effectively. Take the time to experiment with different zoom levels and movements to find your own unique style and create visually compelling aerial content.
By incorporating these tips and tricks into your zooming techniques, you can elevate the overall quality of your aerial footage, capture stunning details, and create mesmerizing visual storytelling with your DJI Mavic Air 2.
Now that you have a better understanding of effective zooming techniques, let’s wrap up this article with some concluding thoughts.
Conclusion
The DJI Mavic Air 2 opens up a world of possibilities for aerial photographers and videographers, and mastering the art of zooming can take your content to new heights. Whether you utilize the zoom slider on the remote controller, the zoom function in the DJI Fly app, or apply zooming effects in post-production, knowing how to effectively zoom with the Mavic Air 2 can greatly enhance your creative expression.
Remember that the Mavic Air 2 features a digital zoom, which provides a convenient way to adjust the zoom level and bring distant subjects closer. While not the same as an optical zoom, the Mavic Air 2’s digital zoom can still produce impressive results when used judiciously.
By planning your shots, using smooth movements, and paying attention to shutter speed, you can elevate the quality of your zoomed-in footage. Don’t be afraid to explore different perspectives and think beyond subject magnification. Zooming can emphasize textures, patterns, and guide the viewer’s eye within the frame.
Additionally, using zoom for transitions and combining it with changes in drone perspective can create visually captivating sequences. Remember to practice and experiment, allowing yourself to develop your unique style and take full advantage of the Mavic Air 2’s zooming capabilities.
Whether you’re capturing breathtaking landscapes, highlighting intricate details, or immersing viewers in cinematic storytelling, zooming with the DJI Mavic Air 2 is a powerful tool in your creative arsenal. Explore the various techniques, unleash your creativity, and capture stunning aerial shots that leave a lasting impression.
So, take to the skies, embrace the world of zooming, and let your creativity soar with the DJI Mavic Air 2!