Introduction
Editing DJI videos on a PC allows you to bring your footage to life, transforming raw clips into captivating stories. Whether you’re a professional videographer or an enthusiast, having the right tools and knowledge can make a significant difference in the quality of your final product.
In this guide, we will take you through a step-by-step process of editing DJI videos on your PC. From importing the videos to adding effects and exporting the final result, you’ll learn essential techniques to make your videos stand out.
DJI drones are popular among aerial videographers for capturing stunning visuals from unique perspectives. The footage captured by these drones is often high-quality and cinematic, filled with breathtaking landscapes and action-packed moments.
However, raw DJI videos usually require some editing to enhance their visual appeal and tell a compelling story. By following the steps outlined in this guide, you’ll gain the skills and knowledge needed to edit your DJI videos with ease.
Before diving into the editing process, it’s crucial to choose the right video editing software that is compatible with your PC. Additionally, you’ll need to ensure that your PC meets the system requirements to handle the editing software and process the high-resolution videos.
Are you ready to transform your raw DJI footage into stunning cinematic experiences? Let’s get started by importing your DJI videos onto your PC.
Step 1: Importing the DJI videos
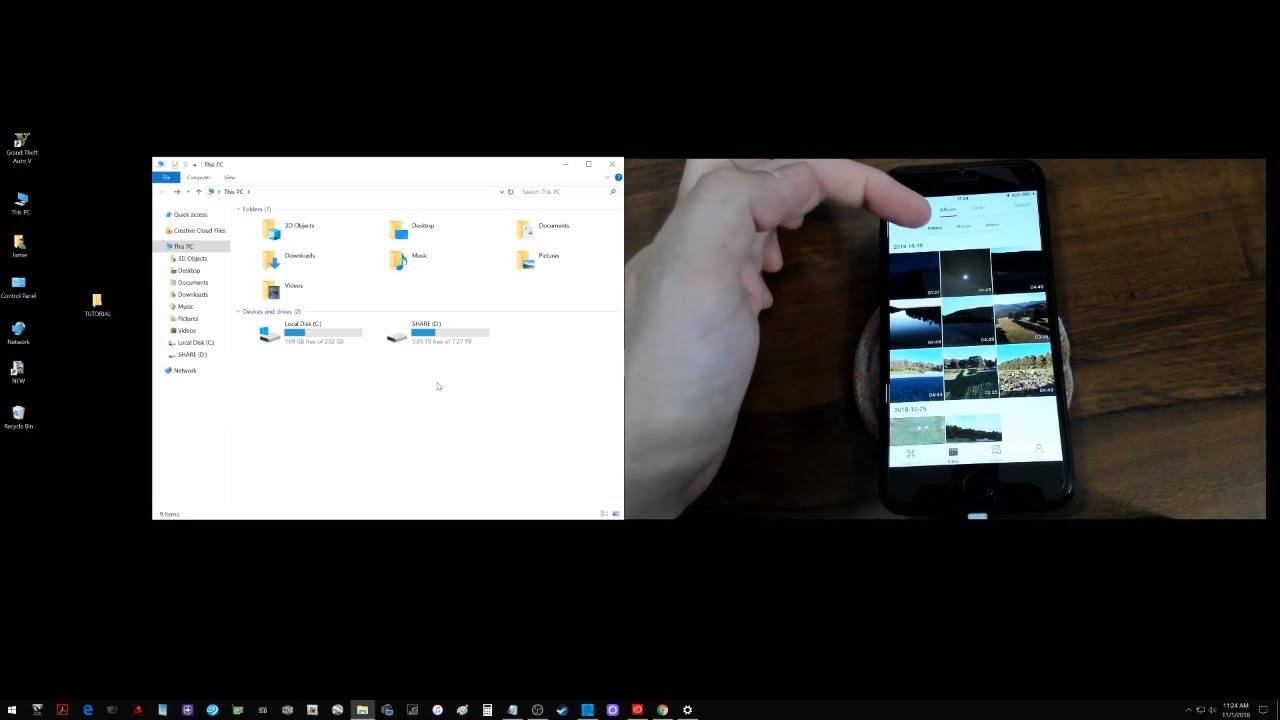
Before you can start editing your DJI videos, you’ll need to import them onto your PC. This step ensures that your videos are easily accessible and ready for editing in your chosen video editing software.
The process of importing DJI videos may vary slightly depending on the model of your DJI drone and the software you’re using. However, the following general steps should guide you through the process:
- Connect your DJI drone to your PC using the USB cable or remove the MicroSD card from your drone and insert it into your PC’s card reader.
- Once your drone or MicroSD card is connected, locate the video files on your device. In most cases, the videos will be stored in a folder named “DCIM” or “Video”.
- Create a new folder on your PC’s hard drive to store your DJI videos. This will help you stay organized and prevent any accidental loss of footage.
- Copy or drag the video files from your drone or MicroSD card and paste them into the newly created folder on your PC.
- Once the files have finished transferring, eject the drone or MicroSD card safely from your PC.
Now that you have successfully imported your DJI videos onto your PC, you’re ready to start editing them. Remember to keep your video files organized in a dedicated folder to easily locate and access them when needed.
Next, we will discuss how to choose the right video editing software for your needs. Different software offers various features and capabilities, so it’s essential to select one that suits your editing style and requirements.
Step 2: Choosing the right video editing software
Choosing the right video editing software is a crucial step in the DJI video editing process. The software you select will determine the tools and features available to you, as well as the overall editing experience.
When it comes to choosing video editing software, you have several options to consider, ranging from basic free software to advanced professional editing suites. Here are some factors to consider when making your decision:
- Editing capabilities: Assess your editing needs and determine the level of complexity and control you require. Basic software is suitable for simple cuts and trims, while advanced software offers features like multi-track editing, color grading, and special effects.
- User interface: Pay attention to the software’s user interface and consider how intuitive and user-friendly it is. A cluttered or confusing interface can make the editing process more challenging and time-consuming.
- Compatibility: Ensure that the software is compatible with your PC’s operating system. Some software may be designed specifically for Windows, while others are compatible with both Windows and Mac systems.
- Price: Consider your budget and evaluate whether the software fits within your financial parameters. Keep in mind that some software offers free versions with limited features, while others require a one-time purchase or a monthly subscription.
- Community and support: Research the software’s community and support options. Look for online forums, tutorials, and documentation to help you navigate the software and troubleshoot any issues that may arise.
Popular video editing software options for editing DJI videos include Adobe Premiere Pro, Final Cut Pro, DaVinci Resolve, and iMovie. Take the time to explore different software options and consider their features, reviews, and user experiences to make an informed decision.
Once you’ve chosen your video editing software, the next step is to check if your PC meets the system requirements necessary to run the software smoothly. We will cover this in the next step to ensure a seamless editing experience.
Step 3: Checking system requirements
Before diving into the DJI video editing process, it is crucial to ensure that your PC meets the necessary system requirements to handle the editing software and process the high-resolution videos effectively.
Each video editing software has specific system requirements that your PC must meet in order to run the program smoothly and avoid any performance issues. Here are some key aspects to consider when checking your system requirements:
- Operating System: Verify if the video editing software is compatible with your PC’s operating system. Most software supports both Windows and Mac platforms, but it is essential to check the software’s specific compatibility.
- Processor: Determine the minimum required processor speed and type. This information can usually be found on the software’s official website or documentation. A faster processor will ensure quicker rendering and smoother playback.
- RAM: Check the minimum RAM requirement for the software. Video editing can be resource-intensive, so having sufficient RAM is crucial for seamless editing and playback. The more RAM your PC has, the better it will perform.
- Graphics card: Look into the recommended graphics card specifications to ensure that your PC can handle the demands of video editing. A dedicated graphics card will significantly enhance performance, especially when working with high-resolution videos.
- Storage space: Consider the amount of available storage space on your PC. DJI videos can occupy a significant amount of storage, so ensure that you have enough space to accommodate your footage and the editing software.
- Additional peripherals: Some video editing software may require additional peripherals, such as external hard drives or graphics tablets. Confirm if any additional equipment is necessary for optimal editing performance.
Make sure to visit the official website or documentation of your chosen video editing software to obtain the precise system requirements. By ensuring that your PC meets these requirements, you’ll be able to enjoy a smooth and efficient editing process without any significant performance issues.
Once you’ve ascertained that your PC meets the system requirements, it is time to transfer the DJI videos from your drone or MicroSD card to your PC. We’ll cover the process in detail in the next step.
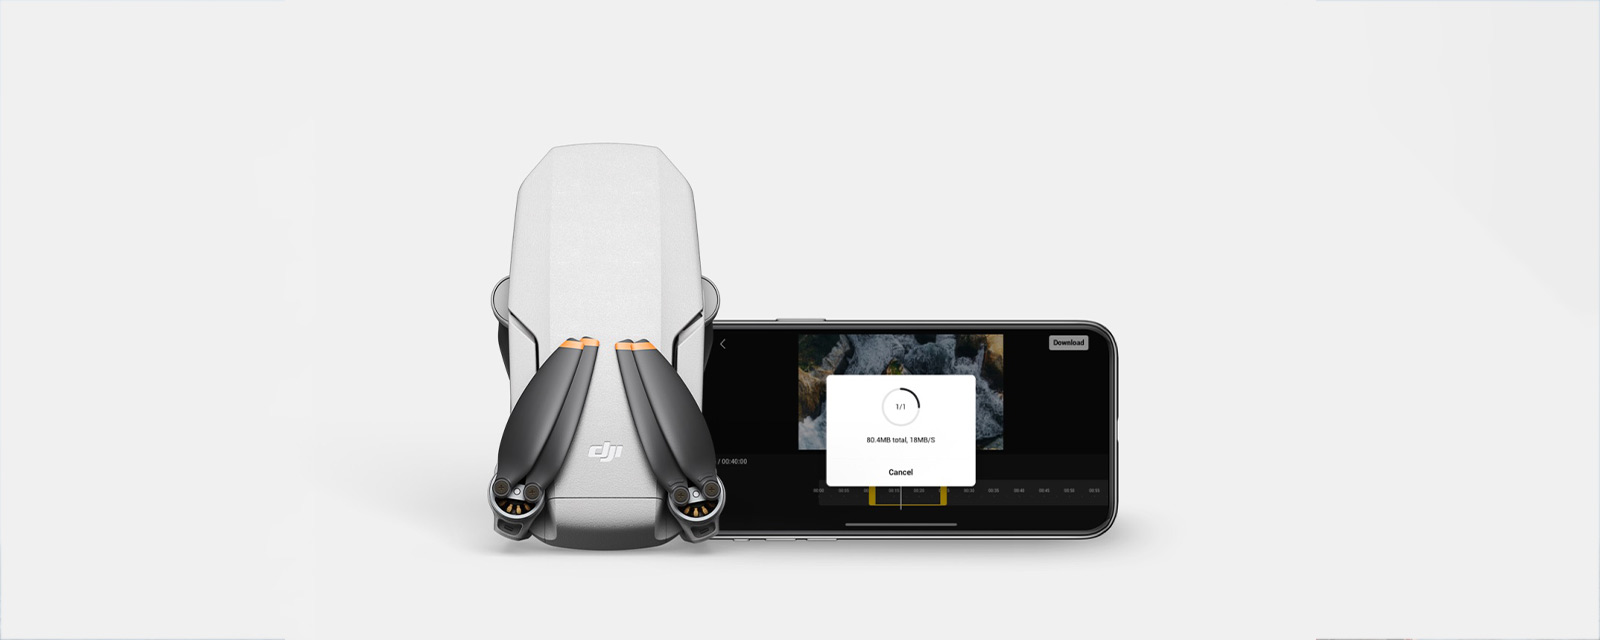
Step 4: Transferring the videos to your PC
Now that you have confirmed that your PC meets the necessary system requirements, it’s time to transfer the DJI videos from your drone or MicroSD card to your computer. By doing so, you’ll have easy access to your footage for editing.
The process of transferring your DJI videos to your PC may vary depending on the specific model of your DJI drone and the software you are using. However, the following general steps should guide you through the process:
- Connect your DJI drone to your PC using the provided USB cable, or remove the MicroSD card from your drone and insert it into your PC’s card reader.
- If you are connecting your drone to your PC via USB, ensure that the drone is powered on and in the correct mode for data transfer.
- Once connected, your PC should recognize the device as an external storage device.
- Navigate to the video files on your DJI drone or MicroSD card. Typically, these files can be found in a folder named “DCIM” or “Video.”
- Create a new folder on your PC’s hard drive where you want to store your DJI videos.
- Copy the video files from your drone or MicroSD card and paste them into the newly created folder on your PC.
- Allow the files to finish transferring to your PC before safely ejecting the drone or MicroSD card.
It’s important to note that the transfer speed depends on various factors, such as the size of the video files and the connection type between your PC and the drone or MicroSD card.
Once the transfer is complete, you can safely disconnect your DJI drone or remove the MicroSD card from your PC. Congratulations, you now have your DJI videos on your computer, ready for the editing process!
As we move forward, it’s essential to organize your video files effectively to streamline your editing workflow. In the next step, we’ll discuss the importance of organizing your video files for easy access and convenience.
Step 5: Organizing your video files
Organizing your video files is a crucial step in the DJI video editing process. By keeping your files well-organized, you can easily find and access specific footage during the editing process, saving you time and creating a more streamlined workflow.
Here are some tips for effectively organizing your video files:
- Create a dedicated folder: Start by creating a dedicated folder on your PC’s hard drive specifically for your DJI videos. This will serve as your main storage location for all your video files.
- Use descriptive file names: Rename your video files with descriptive names that reflect the content or subject of the footage. This will make it easier to identify specific clips and scenes during the editing process.
- Create subfolders: Organize your videos into subfolders based on categories, projects, or dates. For example, you can create subfolders for different shooting locations or events you have recorded.
- Sort by date: If you have shot multiple videos over a period of time, consider sorting them in chronological order. This will help you locate footage based on the date it was recorded, making it easier to find specific moments.
- Delete unnecessary footage: As you go through your video files, delete any footage that is unusable or not up to your standards. This will free up space on your hard drive and make it easier to navigate through your clips.
- Backup your files: It’s essential to regularly back up your video files to prevent any loss of footage. Consider using external hard drives, cloud storage, or a combination of both to keep your files safe and accessible.
By implementing these organization techniques, you’ll be able to keep track of your DJI videos and locate the specific footage you need with ease. Stay consistent with your organization methods to maintain an efficient and structured editing workflow.
Now that your video files are organized, it’s time to dive into the editing process. In the following steps, we will cover various editing techniques and features to help you create visually stunning DJI videos.
Step 6: Basic editing techniques
Now that your DJI video files are organized, it’s time to start editing. In this step, we will cover some basic editing techniques that will help you enhance your footage and create a cohesive and engaging video.
Here are some essential basic editing techniques to get you started:
- Trimming and cutting: Trim or cut out unnecessary parts of your video to create a more concise and impactful story. Remove any footage that doesn’t contribute to the overall narrative or slows down the pacing of your video.
- Arranging clips: Rearrange the order of your clips to create a logical flow and smooth transitions between scenes. Consider the sequence of events and the visual story you want to convey.
- Adding transitions: Use transitions to enhance the visual continuity between clips. Jump cuts can be jarring, so adding transitions such as fades, dissolves, or wipes can create a more seamless and professional-looking result.
- Adjusting playback speed: Modify the playback speed of specific clips to create dramatic or slow-motion effects. This technique can add excitement or emphasize certain actions within your video.
- Changing audio levels: Adjust the volume levels of your audio tracks to create a balanced audio mix. Lower background music during dialogue or boost audio during impactful moments to enhance the viewer’s experience.
- Adding basic effects: Experiment with basic video effects to enhance the visual appeal of your footage. Simple effects like color correction, saturation adjustment, or adding a vignette can make a significant difference in the overall look of your video.
As you explore these basic editing techniques, remember to save your progress regularly to avoid losing any changes. Don’t be afraid to experiment and try different approaches to find the editing style that best complements your DJI footage.
Once you are comfortable with these basic techniques, you can move on to more advanced editing features and techniques. In the next steps, we will explore some of these advanced techniques to further elevate your DJI videos.
Step 7: Advanced editing features
Now that you have a grasp of the basic editing techniques, it’s time to explore more advanced features that can take your DJI videos to the next level. These advanced editing features will provide you with greater control and creative options to enhance the visual storytelling of your footage.
Here are some advanced editing features to consider:
- Multi-track editing: Take advantage of multi-track editing to overlay multiple video and audio tracks. This allows you to add B-roll footage, insert graphics or text overlays, or incorporate additional audio elements for a more dynamic and complex video.
- Color grading: Use color grading tools to adjust the color and tone of your footage. This can help create a specific mood or atmosphere, ensure consistency across different clips, or achieve a particular cinematic look that matches your style and vision.
- Audio manipulation: Explore advanced audio editing techniques, such as noise reduction, EQ adjustments, or audio effects. This can help improve audio clarity, remove background noise, or add creative audio enhancements to elevate the overall sound quality of your video.
- Keyframing: Utilize keyframes to create animated effects or precise adjustments over time. This feature allows you to gradually change parameters like position, scale, opacity, or effects settings, adding a professional and polished touch to your video.
- Green screen/chroma key: Experiment with green screen or chroma key techniques to replace a solid-colored background with another video or image. This technique is commonly used for adding virtual backgrounds, creating visual effects, or placing subjects in different environments.
- Stabilization: Correct shaky footage by utilizing stabilization tools. This feature can smooth out camera movements, resulting in more professional-looking and steady shots.
Each editing software may have its own unique set of advanced features, so take the time to explore the capabilities of your chosen software to make the most of its advanced editing tools.
Remember, while these advanced editing features offer exciting possibilities, it’s important to use them judiciously and with purpose. Avoid overusing effects that may distract from the storytelling or overshadow the natural beauty of your DJI footage.
With these advanced editing features under your belt, you are well-equipped to elevate your DJI videos to new heights. In the next steps, we will delve into enhancing your videos with music and sound effects, applying filters and effects, adjusting color and exposure, and adding transitions and titles.
Step 8: Adding music and sound effects
Adding music and sound effects to your DJI videos can greatly enhance the overall viewing experience, evoking emotions and adding depth to your narrative. In this step, we will explore how to incorporate music and sound effects into your editing process.
Here are some key considerations when adding music and sound effects:
- Choosing the right music: Select music that complements the mood and tone of your video. Consider the setting, subject matter, and desired emotional impact. You can choose from a library of royalty-free music or create original compositions, depending on your creativity and budget.
- Timing and synchronization: Ensure that your music aligns with the pace and flow of your video. Adjust the duration of your clips or the timing of musical cues to create seamless transitions and maintain a harmonious relationship between the visuals and audio.
- Volume balancing: Strike a balance between your video’s dialogue, ambient sounds, and the music. Avoid overpowering the dialogue or sound effects with loud background music. Use audio mixing techniques to adjust volume levels and create a cohesive audio experience.
- Emphasizing key moments: Use music and sound effects strategically to highlight key moments or important scenes in your video. For intense action sequences, you may opt for energetic and dynamic music, while poignant moments may require softer and more emotional melodies.
- Sound effects: Incorporate relevant sound effects to enhance the realism and impact of your DJI footage. From subtle ambient sounds to dramatic effects, these sounds can heighten the viewer’s engagement and immerse them in your video.
Most video editing software provides an audio timeline where you can drag and drop music and sound effects onto your project. You can also trim or extend audio clips to fit the desired segments of your video.
Remember to respect copyright laws when using music in your videos. Ensure that you have the necessary licenses or use royalty-free music from reputable sources to avoid any legal issues.
By carefully selecting and incorporating music and sound effects, you’ll bring your DJI videos to life and create a more engaging and immersive experience for your viewers. In the next steps, we will explore applying filters and effects, adjusting color and exposure, and adding transitions and titles to further enhance your videos.
Step 9: Applying filters and effects
Applying filters and effects to your DJI videos can add visual flair, enhance the mood, and make your footage more captivating. In this step, we will explore how to effectively use filters and effects in your editing process.
Here are some tips for applying filters and effects:
- Consider the overall look: Before applying filters and effects, determine the visual style you want to achieve. Whether it’s a vintage look, a modern aesthetic, or a specific theme, keeping a consistent visual style throughout your video will create a cohesive and professional result.
- Experiment with color grading: Use color grading tools to manipulate the color and tone of your footage. Adjusting contrast, saturation, and hue can dramatically alter the mood or atmosphere of a scene, enhancing its impact on the viewer.
- Apply cinematic presets: Many editing software provide presets that replicate popular cinematic looks. These presets can help give your DJI videos a more polished and professional appearance. Experiment with different presets to find the one that best suits your footage.
- Add visual effects: Explore visual effects like transitions, overlays, and text animations to add interest and creative elements to your video. However, use them sparingly and purposefully to avoid overwhelming or distracting the viewer from the main content.
- Blend modes: Experiment with blend modes to combine multiple video clips or layers for unique visual effects. Blend modes can create interesting overlays, blend colors, or add textures to your footage, giving it a more artistic and stylized appeal.
- Slow-motion and fast-motion: Utilize the speed adjustment features to create slow-motion or fast-motion effects in specific parts of your video. This technique can emphasize details or create a sense of urgency, enhancing the overall visual storytelling.
When applying filters and effects, it’s important to strike a balance. Avoid going overboard with excessive effects that may distract from the story or dilute the impact of your DJI footage. Remember, the goal is to enhance the visuals and convey your intended message effectively.
Keep in mind that different editing software may offer different filters and effects. Familiarize yourself with the capabilities of your chosen software and explore various options to find the ones that best suit your DJI videos.
By skillfully applying filters and effects, you can elevate the quality and visual appeal of your DJI videos. In the final steps, we will cover adjusting color and exposure, as well as adding transitions and titles to create polished and professional-looking videos.
Step 10: Adjusting color and exposure
Adjusting color and exposure is a crucial step in the DJI video editing process to ensure optimal visual quality and consistency. With these adjustments, you can correct any color imbalances, enhance the overall look, and create a more polished final product. In this step, we will explore various techniques for adjusting color and exposure in your DJI videos.
Here are some key considerations when adjusting color and exposure:
- White balance: Start by setting the correct white balance to ensure accurate color representation in your footage. This is especially crucial when shooting in different lighting conditions, such as indoors or outdoors, to prevent your footage from appearing too warm or cool.
- Exposure adjustment: Adjust the exposure levels to achieve the desired brightness and contrast across your footage. This involves controlling the overall brightness, recovering details in shadows, and avoiding overexposure in highlights.
- Color correction: Correct any color imbalances to ensure consistent and natural-looking colors throughout your video. Use color correction tools to adjust tones, saturation, and overall color balance to achieve the desired look.
- Selective color grading: Consider applying different color adjustments to specific parts of your footage. You can isolate and enhance specific colors to create visual emphasis or separate different areas of your video to convey different moods or atmospheres.
- Tone curves and levels: Utilize tone curves and levels adjustments to fine-tune the distribution of brightness and contrast in your footage. This allows for precise control over the tonal range and can help achieve a desired aesthetic or look.
- Color LUTs: Experiment with color lookup tables (LUTs) to apply pre-determined color grading presets or create your own custom looks. LUTs can instantly transform the overall color and mood of your footage, providing a consistent and stylized appearance.
When making color and exposure adjustments, it’s crucial to maintain visual consistency throughout your video. Ensure that similar shots and scenes have a coherent and seamless appearance, free of jarring color shifts or exposure inconsistencies.
Each editing software may have specific tools and interfaces for adjusting color and exposure. Take the time to explore and experiment with these features to find the best techniques and settings that suit your DJI videos and your intended visual style.
By carefully adjusting color and exposure, you can achieve a professional and visually stunning look in your DJI videos. In the next step, we will discuss adding transitions and titles to further enhance the overall presentation and narrative flow of your video.
Step 11: Adding transitions and titles
Adding transitions and titles to your DJI videos is a great way to enhance the visual flow and provide important context or information. Transitions help smoothen the transition between clips, while titles can introduce scenes, provide explanations, or highlight key moments. In this step, we will explore how to effectively incorporate transitions and titles in your DJI video editing process.
Here are some tips for adding transitions and titles:
- Selecting appropriate transitions: Choose transitions that complement the style and mood of your video. Popular transition styles include fades, dissolves, wipes, and cuts. Consider the pace and energy of your video when deciding which transition best suits your footage.
- Using transitions sparingly: Avoid excessive use of transitions. Use them purposefully to serve a specific purpose or to enhance the visual storytelling. Overusing transitions can distract the viewer and take away from the main content of your video.
- Timing transitions: Pay attention to the timing and duration of your transitions. Ensure that the transition duration aligns with the pacing and rhythm of your video. Smoother transitions usually have shorter durations, while dramatic transitions may require longer durations.
- Creating custom titles: Customize your titles to match the style and tone of your video. Experiment with fonts, sizes, colors, and animations to create visually appealing titles. Provide essential information, introduce scenes, or add subtitles as needed.
- Balancing title placement: Consider the placement and timing of titles within your video. Avoid obscuring important visual elements or placing titles in distracting locations. Ensure that the titles are visible and readable without obstructing significant details.
- Animating titles: Utilize animation and keyframe techniques to add subtle movements or transitions to your titles. This can make them more engaging and visually interesting, while also ensuring that they align with the overall tone of your video.
Most video editing software provides a range of built-in transitions and titling tools. Experiment with different options and customize them to suit your DJI video’s specific needs and desired aesthetic.
Remember, the goal of adding transitions and titles is to enhance the visual flow and storytelling, not to overpower or distract from the main content. Use them thoughtfully and strategically to guide the viewer through your DJI videos.
With well-placed transitions and well-designed titles, you can further enhance the polish and professionalism of your DJI videos. In the final step, we will cover how to export and share your edited videos for the world to enjoy.
Step 12: Exporting and sharing your edited videos
After all the hard work you’ve put into editing your DJI videos, it’s time to share your final masterpiece with the world. In this final step, we will discuss how to export and share your edited videos.
Here are the key steps to export and share your DJI videos:
- Choosing the right export settings: Determine the optimal export settings for your intended use. Consider factors such as video resolution, frame rate, and file format. Make sure to select settings that maintain the quality of your edited video while fitting the requirements of the platform or device you plan to share it on.
- Exporting your video: Once you’ve selected the appropriate export settings, initiate the export process in your editing software. Specify the file name and destination folder for the exported video. Depending on the length and complexity of your video, the export process may take some time.
- Quality control: Before sharing your video, it’s essential to ensure that the exported file meets your expectations. Watch through the exported video, checking for any glitches, artifacts, or audio issues. Pay attention to the overall visual and audio quality to ensure a seamless viewing experience.
- Choosing the sharing platform: Decide where and how you want to share your DJI video. You have several options, including video hosting platforms like YouTube or Vimeo, social media platforms, or your own website. Consider your target audience and the platform that best aligns with your goals and reach.
- Sharing on social media: If you choose to share on social media platforms, optimize your video for each platform’s specifications. Tailor the video thumbnail, description, and accompanying text to attract viewers and provide context. Utilize appropriate hashtags and engage with your audience to maximize visibility and reach.
- Protecting your video: If desired, consider adding watermarks or copyright notices to your video to protect your intellectual property. Additionally, be mindful of the privacy settings on the platforms you choose to share on and adjust them according to your preferences.
Once you’ve exported and shared your DJI video, encourage engagement and feedback from viewers. Embrace the opportunity to learn and improve as you continue your journey in creating captivating and visually stunning videos.
Remember, sharing your edited DJI videos is not the end of the process. It’s a start to inspire, entertain, and connect with your audience. So share your work with confidence and continue to refine your skills as an accomplished DJI video editor.
Conclusion
Congratulations on completing the DJI video editing process on your PC! You have learned essential steps and techniques to transform your raw DJI footage into visually stunning videos that captivate and engage your audience.
Throughout this guide, we covered a range of topics, from importing and organizing your DJI videos to applying basic and advanced editing techniques, adjusting color and exposure, adding transitions and titles, and finally exporting and sharing your edited videos.
By following these steps and incorporating your creativity, you can bring your DJI videos to life, telling compelling stories and capturing the beauty and excitement of your aerial footage. Remember to choose the right video editing software that suits your needs and ensure your PC meets the necessary system requirements for a smooth editing experience.
Experiment with different editing techniques, filters, effects, music, and sound effects to create the desired mood and ambiance, while being mindful of not overusing them. Take the time to organize your video files and save your progress regularly to prevent any accidental loss of footage or edits.
When it comes to sharing your edited DJI videos, consider your target audience and choose the appropriate platforms or channels that align with your goals. Optimize your video for each platform’s specifications and engage with your viewers to build a community around your content.
Lastly, remember that practice makes perfect. Keep refining your skills, exploring new editing techniques, and staying up to date with the latest trends to continuously improve your DJI video editing abilities. Embrace feedback and use it as a stepping stone to grow as a skilled video editor.
Now it’s time for you to take what you have learned and apply it to your own DJI video editing projects. So go out there, unleash your creativity, and create amazing videos that will leave your audience in awe.