Introduction
Welcome to the fascinating world of drone photography! Drones have revolutionized the way we capture stunning aerial shots, providing a unique perspective and allowing us to unleash our creativity like never before. Whether you’re a professional photographer looking to expand your portfolio or simply an enthusiast wanting to explore a new hobby, drone photography offers endless possibilities.
By taking to the skies, you can capture breathtaking landscapes, architectural marvels, vibrant cityscapes, and even intimate moments that would otherwise be difficult to access. But before you embark on your drone photography journey, it’s important to understand the fundamentals of this exciting art form.
In this guide, we will explore everything you need to know to get started with drone photography. From choosing the right drone to mastering flight controls, understanding camera settings, and editing techniques, we will cover it all. So grab your drone, buckle up, and let’s dive into the world of drone photography!
But before we take flight, it’s essential to keep in mind that responsible drone operation is crucial. Always be aware of local regulations and respect the privacy of others. As drone enthusiasts, it’s our responsibility to fly safely and ethically, ensuring that our passion for photography does not infringe on the rights and needs of others.
Now that we have the groundwork covered, let’s explore the exciting world of drone photography and discover how you can capture breathtaking, one-of-a-kind shots.
Choose the Right Drone
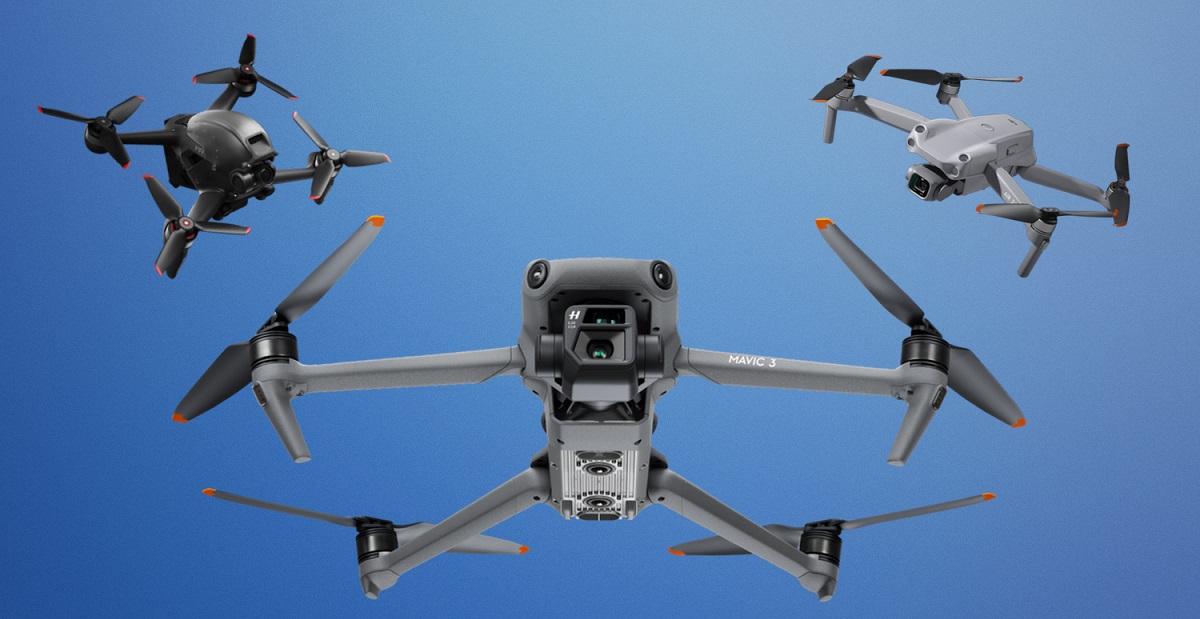
When it comes to drone photography, the first step is to choose the right drone for your needs. With so many options available in the market, it’s essential to consider several factors before making your purchase.
Firstly, consider the purpose of your drone photography. Are you planning to capture landscapes, document events, or create cinematic videos? Different drones offer varying features and capabilities, so understanding your goals will help you select a drone that aligns with your intentions.
Next, consider the drone’s flight time and range. A longer flight time allows you to capture more shots without having to constantly land and recharge. Additionally, a greater range provides the flexibility to explore different locations and angles, resulting in more diverse and captivating photographs.
Another crucial aspect to consider is the camera quality. Drones come with a wide range of cameras, from basic models to those with high-resolution capabilities and advanced stabilization features. For professional-level results, opt for a drone with a high-quality camera that suits your photography style.
Additionally, consider the size and portability of the drone. If you plan on traveling and capturing images on the go, a compact and lightweight drone will be more practical. On the other hand, if you require advanced features and a robust build, a larger drone may be suitable for your needs.
Budget is also an important consideration. Drone prices can vary greatly, so define your budget before starting your search. It’s essential to strike a balance between the features and capabilities you require and the price you are willing to pay.
Lastly, don’t forget to research and read reviews about different drone models. Consider the reputation of the manufacturer, customer feedback, and the overall performance of the drone. By doing your due diligence, you can make an informed decision and select a drone that meets your expectations.
Choosing the right drone is the foundation of successful drone photography. So take your time, evaluate your needs, and find the perfect drone that will be your companion in capturing stunning aerial photographs.
Understand Your Drone’s Manual and Features
Once you have selected the perfect drone for your photography needs, it’s crucial to thoroughly understand its manual and features. The manual is your go-to resource for learning about the specific functionalities and operations of your drone.
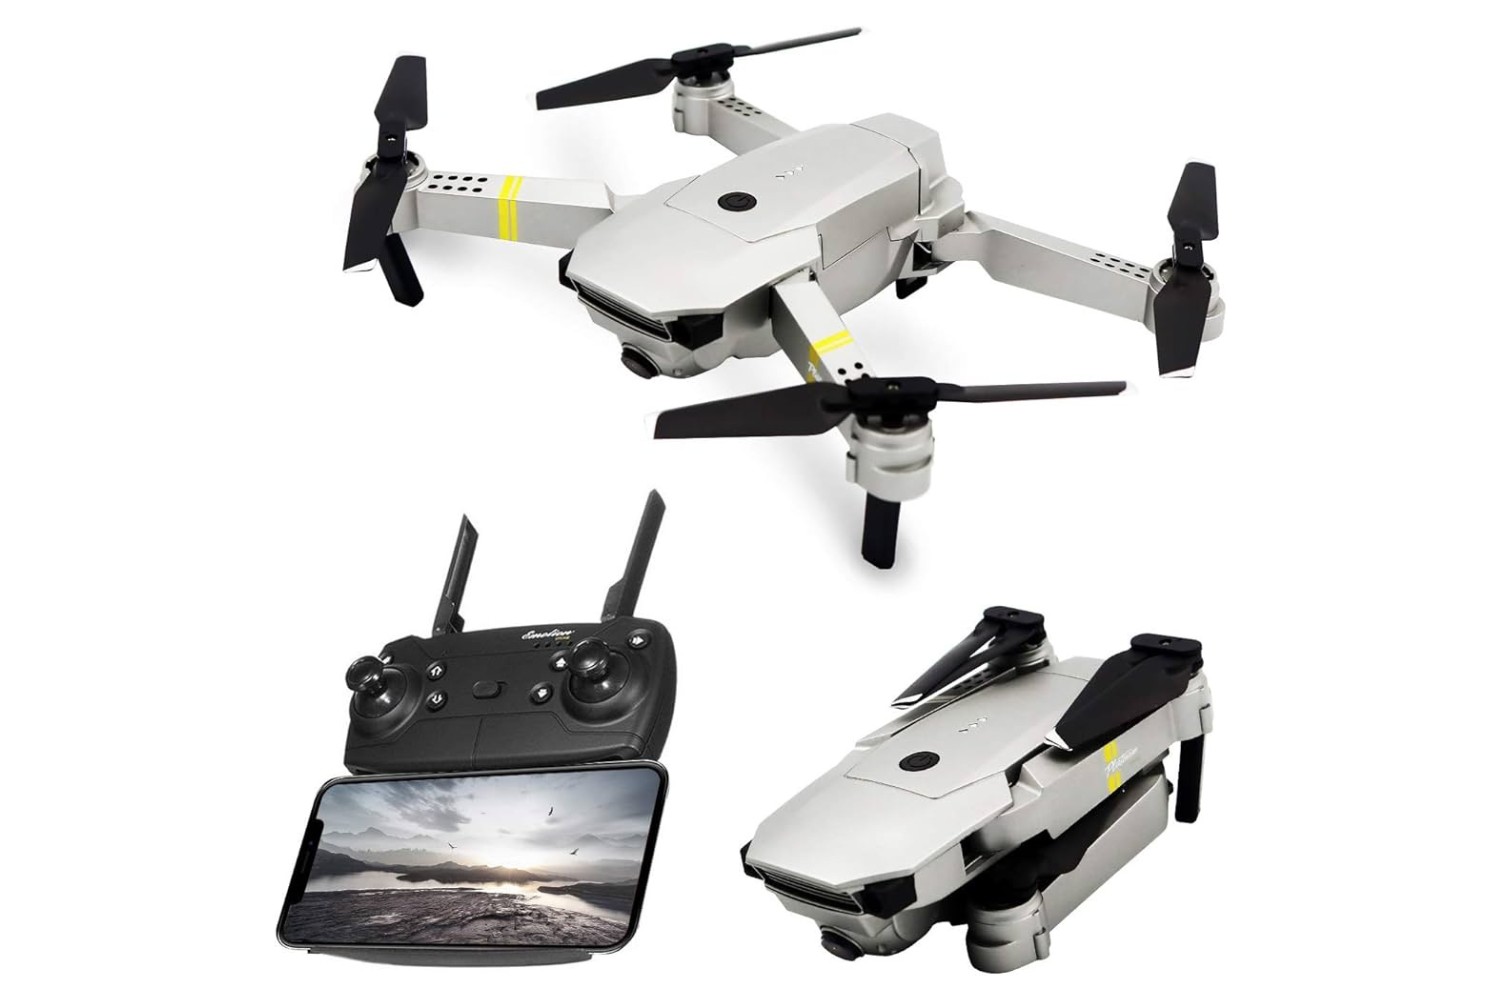
Start by familiarizing yourself with the basic components of the drone, including the remote controller, propellers, motors, and camera (if applicable). Understand how these parts work together to ensure a smooth and safe flight experience.
Next, delve into the various flight modes and settings available on your drone. Most drones offer different flight modes, such as GPS, altitude hold, and follow me mode. Each mode serves a specific purpose and can enhance your photography experience. By understanding and mastering these modes, you can capture more dynamic and stable shots.
Moreover, make sure you are well-versed in the controller’s functions and buttons. Understanding how to calibrate the drone, adjust flight speed, and control camera settings will greatly enhance your efficiency and control during flights.
Alongside understanding the manual, take the time to explore the drone’s features and functionalities firsthand. Fly the drone in an open space, away from obstacles, and practice basic flight maneuvers to get comfortable with its handling and responsiveness.
Experiment with the different camera settings, such as exposure, white balance, and frame rate, to understand their impact on your shots. This hands-on experience will allow you to become more adept at adjusting the settings to achieve desired results.
Remember, each drone model has its own unique capabilities and features. By thoroughly understanding your drone’s manual and features, you will be able to unlock its full potential and utilize its advanced functionalities to capture breathtaking aerial photographs.
Master the Basic Flight Controls
Before you take your drone photography to the next level, it’s essential to master the basic flight controls of your drone. Understanding how to maneuver your drone confidently will not only ensure the safety of your equipment but also enable you to capture the perfect shots.
Start by familiarizing yourself with the basic flight movements: ascending, descending, forward, backward, left, and right. Spend time practicing these movements in an open area with plenty of space. As you gain confidence, gradually increase your maneuvers’ complexity, incorporating smooth turns and adjusting altitude.
Most drones utilize a remote controller with two joysticks. The left joystick controls the throttle (for altitude) and yaw (for rotation), while the right joystick controls the pitch (for forward and backward movement) and roll (for left and right movement). Understanding how to maneuver these joysticks in combination with each other is key to achieving fluid and controlled flight.
Take advantage of the drone’s built-in flight modes, such as the GPS mode, which provides more stability and control. This mode utilizes satellite positioning to keep the drone in a fixed location, making it easier to focus on capturing the perfect shot without worrying about manual control adjustments.
Additionally, practice flying in different weather conditions and wind speeds to enhance your skills and adaptability. Wind can significantly affect your drone’s flight and stability, so learning how to compensate for wind turbulence is essential for capturing clear and steady shots.
Furthermore, don’t forget to familiarize yourself with emergency procedures. Accidents can happen, and being prepared for contingencies will prevent further damage. Understand how to execute an emergency landing and safely bring your drone back to the ground in case of technical glitches or low battery situations.
Mastering the basic flight controls of your drone is a fundamental step in becoming a skilled drone photographer. By dedicating time to practice and familiarize yourself with the controls, you will gain the confidence and skill needed to create stunning aerial shots.
Learn About Safety and Regulations
Drone photography offers incredible opportunities for capturing stunning aerial shots, but it comes with a responsibility to prioritize safety and adhere to regulations. Familiarizing yourself with safety guidelines and drone regulations is crucial to ensure a safe and enjoyable experience.
Begin by researching and understanding the local regulations regarding drone usage. Different countries and regions may have specific rules and restrictions, such as altitude limits, no-fly zones, and privacy regulations. It’s important to comply with these regulations to avoid legal issues and fly responsibly.
One of the primary safety considerations is maintaining line-of-sight with your drone during flight. Always keep your drone within your field of vision and avoid flying too far or behind obstacles where you might lose visual contact. This ensures you have full control over the drone and can navigate it safely.
When planning your flight, assess the weather conditions. Avoid flying in strong winds, rain, or other adverse weather conditions that could compromise your drone’s stability or safety. Unfavorable weather can affect the drone’s flight capabilities and increase the risk of accidents.
Another essential safety measure is checking your drone’s battery level before taking off. Flying with a low battery can result in unexpected power failure and cause your drone to crash. Always ensure the battery is adequately charged and consider bringing spare batteries for longer flights.
Ensure that your drone is in good working condition before each flight. Regularly inspect all components, including propellers and motors, for any signs of wear or damage. Follow the manufacturer’s maintenance recommendations to prolong the lifespan of your drone and prevent any malfunctions while in the air.
Respect the privacy and safety of others. Avoid flying over private properties without permission and maintain a safe distance from people and wildlife. Be considerate of your surroundings, taking into account noise levels and potential disturbances caused by the drone’s presence.
Lastly, invest in liability insurance to protect yourself financially in case of accidents or damages caused by your drone. It’s essential to have coverage that aligns with the regulations in your region and provides adequate protection.
By adhering to safety guidelines, understanding drone regulations, and prioritizing the well-being of yourself and others, you can enjoy drone photography responsibly and create breathtaking aerial photographs without compromising safety or privacy.
Invest in Filters for Optimal Shots
Filters play a crucial role in enhancing your drone photography and capturing optimal shots. Investing in a set of high-quality filters can significantly improve the quality and aesthetic of your aerial photographs.
One of the most popular filters for drone photography is the neutral density (ND) filter. ND filters reduce the amount of light that enters the camera, allowing you to achieve a more balanced exposure in bright conditions. This is especially useful during midday or when capturing scenes with reflective surfaces and water, helping you maintain proper exposure and avoid overexposed highlights.
Another commonly used filter is the polarizing filter. It helps reduce glare and reflections, making colors more vibrant and saturated. Polarizing filters are particularly effective when photographing landscapes, bodies of water, and scenes with excessive sunlight, enhancing the overall clarity and contrast of your images.
Graduated neutral density (GND) filters are also popular among drone photographers. These filters feature a gradual transition from dark to clear, allowing you to balance the exposure between a bright sky and a darker foreground. GND filters are ideal for landscape photography, ensuring that both the sky and the ground are properly exposed in the final image.
Experimenting with different filters will help you achieve specific effects and enhance the mood of your photographs. For example, using a color-enhancing filter can intensify the colors of fall foliage, while an infrared filter can create a unique and artistic interpretation of a scene.
To ensure optimal image quality, invest in filters specifically designed for your drone’s camera model. Look for reputable filter brands known for their quality optics and durability to maximize the value of your investment.
When using filters, it’s crucial to be mindful of the recommended camera settings for each specific filter. Some filters may require adjustments to exposure or white balance settings to achieve the desired effect. Consult the filter manufacturer’s guidelines and experiment with different settings to find the best combination for your photography needs.
By investing in filters and understanding how to use them effectively, you can elevate your drone photography to new heights, capturing stunning, professional-looking shots with enhanced colors, balanced exposures, and captivating visual effects.
Understand Different Camera Settings
Mastering the various camera settings of your drone is essential for achieving optimal results in your aerial photography. Understanding how different settings such as exposure, ISO, shutter speed, and white balance work together will allow you to have greater control over your drone’s camera and capture stunning images.
Exposure is a critical camera setting that determines the amount of light that reaches the sensor. Balancing the exposure is important to avoid overexposed or underexposed photos. Many drones have an auto exposure mode, but learning how to manually adjust the exposure compensation can help you fine-tune the brightness and achieve the desired look in your photos.
ISO refers to the sensitivity of your camera’s sensor to light. A low ISO setting (e.g., ISO 100) is ideal for bright lighting conditions, while a higher ISO setting (e.g., ISO 400 or above) can be used in low-light situations. However, keep in mind that using a higher ISO may result in more noise or grain in your images.
Shutter speed determines the amount of time that the camera’s sensor is exposed to light. A faster shutter speed (e.g., 1/1000th of a second) is ideal for capturing fast-moving subjects or maintaining sharpness in your photos. Conversely, a slower shutter speed (e.g., 1/30th of a second) can be used to create motion blur or capture long exposure shots, such as flowing water or light trails.
White balance influences the color temperature of your photos. It helps to ensure that the colors in your images appear natural and accurate. Depending on the lighting conditions, you can choose presets like sunny, cloudy, or auto white balance. Alternatively, you can set a custom white balance by using a white or gray card.
When capturing aerial shots, it’s crucial to take advantage of the drone’s gimbal stabilization feature. This feature helps to stabilize the camera, reducing the impact of drone movement and vibrations. It allows you to capture clear and sharp images, particularly when using longer focal lengths or slower shutter speeds.
Experimenting with different camera settings is key to understanding their impact on your images. Take the time to test various combinations of exposure, ISO, shutter speed, and white balance to achieve the desired effects and break free from the limitations of auto settings.
As with any photography technique, practice is essential. Familiarize yourself with your drone’s camera settings and experiment in different lighting conditions to determine which settings work best for various subjects and environments. By understanding and utilizing different camera settings, you can take full control of your drone’s camera and produce stunning, visually captivating aerial photographs.
Practice Composition Techniques
Composition is a fundamental aspect of photography, and mastering composition techniques will greatly enhance the impact of your drone photography. It’s not just about capturing beautiful scenery from the sky but also about telling a story and creating visually engaging images. Here are some composition techniques to practice and refine:
The rule of thirds is a basic guideline to create a well-balanced composition. Imagine dividing your frame into a grid of nine equal sections with two horizontal and two vertical lines. Place the main points of interest, such as buildings, landscapes, or subjects, along these lines or at their intersections. This creates a natural flow and adds visual interest to your images.
Leading lines are another powerful compositional tool. Look for natural or man-made lines, such as roads, rivers, or tree branches, that guide the viewer’s eyes towards the main subject. These lines create depth and provide a sense of movement, adding visual dynamics to your images.
Foreground elements help create depth and add interest to your photos. When composing your shots, try to include objects in the foreground, such as trees, rocks, or structures. This not only adds a sense of scale but also creates a three-dimensional feel in your images.
Consider the concept of symmetry and balance. Look for symmetrical subjects or scenes that can be divided evenly, such as reflections in water or perfectly aligned rows of trees. Centering these symmetrical elements or using the rule of thirds can create a harmonious and visually pleasing composition.
Don’t forget about negative space. Negative space refers to the empty or open areas surrounding the main subject. Embracing negative space can help emphasize the subject and create a sense of simplicity and focus in your images.
Experiment with different angles and perspectives. Drone photography allows you to capture unique vantage points that are impossible from the ground. Fly your drone low to capture an intriguing worm’s eye view or fly higher for a captivating bird’s eye perspective. Varying your angles and perspectives will add variety to your composition and provide a fresh, distinctive look to your images.
Remember that composition is subjective, and there are no strict rules. Use these techniques as a starting point, but don’t be afraid to break the rules and experiment with your own unique style. Keep practicing, analyze your favorite photographs, and learn from other drone photographers to continually improve your composition skills.
By honing your composition techniques, you’ll be able to create visually compelling and captivating aerial photographs that tell a story and leave a lasting impression on viewers.
Experiment with Different Shooting Modes
One of the advantages of drone photography is the ability to take advantage of various shooting modes that can elevate your aerial photography to the next level. These shooting modes offer unique perspectives and creative possibilities to capture breathtaking shots. Here are a few shooting modes to experiment with:
The auto mode is the most straightforward option for beginners. It allows the drone’s camera to automatically adjust settings such as exposure, white balance, and focus. This mode is great for capturing quick shots or familiarizing yourself with the drone’s capabilities. However, as you progress, it’s important to explore other shooting modes to have more control over your photography.
A popular mode for drone photography is the automatic exposure bracketing (AEB) mode. In this mode, the camera captures a series of photos with different exposure levels. This is particularly useful in high-contrast scenes where it is challenging to maintain detail in both bright and dark areas. By combining these photos, either manually or using HDR software, you can achieve a well-balanced and dynamic final image.
The time-lapse mode allows you to capture the passage of time in a compressed format. It’s an excellent way to capture stunning transformations, such as changing skies, city lights, or busy traffic patterns. Experiment with different intervals depending on the speed of the subject or the effect you want to achieve. Time-lapse videos can add a unique dimension to your drone photography portfolio.
Panorama mode is particularly effective in capturing vast landscapes or cityscapes. It allows you to capture a wider horizontal or vertical field of view in a single image. Panoramas can provide a sense of scale and dramatic perspective. Experiment with different panorama settings, such as 180-degree or 360-degree views, to create stunning, immersive images.
For capturing action sequences or creating visually dynamic shots, try the burst mode. Burst mode captures a rapid series of images with a single press of the shutter button. This is great for freezing fast-moving subjects or capturing precise moments within a sequence of motion.
Finally, don’t forget about the manual mode. Manual mode provides complete control over all camera settings, allowing you to fine-tune exposure, white balance, shutter speed, ISO, and more. While it requires more knowledge and experience, using manual mode gives you the most flexibility in capturing the perfect shot with your drone.
Experiment with different shooting modes, and don’t be afraid to combine them or create your own settings. Each mode offers unique creative opportunities and allows you to push the boundaries of your aerial photography. As you gain more experience, you’ll develop a better understanding of which shooting modes work best for different subjects and lighting conditions.
Remember, practice is key. Familiarize yourself with your drone’s shooting modes, test them in various situations, and review the results to refine your skills. By experimenting with different shooting modes, you’ll enhance your creativity and capture breathtaking aerial shots that stand out from the crowd.
Capture Stunning Aerial Shots
Now that you’ve familiarized yourself with drone photography techniques and honed your skills, it’s time to unleash your creativity and capture stunning aerial shots. Here are some tips to help you capture breathtaking images from the sky:
Scout locations and plan your shots beforehand. Research the area you want to photograph, identify interesting landmarks or compositions, and determine the best time of day for lighting. Having a clear vision in mind and a plan in place will help you make the most of your flight time and capture the shots you envision.
Utilize the unique perspective offered by drones. Take advantage of the bird’s eye view to highlight patterns, leading lines, and symmetry. Look for naturally occurring shapes or man-made structures that can create visually striking compositions when viewed from above.
Experiment with different altitudes and angles. Changing your drone’s altitude can dramatically alter the composition and perspective of your shots. Fly higher for a broad overview of the landscape or lower for a more intimate and detailed view. Play with angles by tilting the camera or rotating the drone to capture interesting and dynamic shots.
Compose your shots carefully. Use the rule of thirds, leading lines, and foreground elements to create visually appealing compositions. Pay attention to the balance between the sky and the ground, and consider the placement of key elements within the frame. Keep in mind that simplifying your composition often leads to more powerful and impactful images.
Experiment with different lighting conditions to create mood and drama. Capture vibrant, colorful shots during golden hour (the period shortly after sunrise or before sunset) when the light is soft and warm. Alternatively, embrace the drama of harsh midday lighting or capture the sparkle of city lights during the blue hour (the period before sunrise or after sunset when the sky is dark blue).
Take advantage of natural elements and weather conditions to add interest to your shots. Use clouds to create dynamic patterns and textures in the sky. Incorporate water reflections for added depth and visual impact. Experiment with weather phenomena such as fog, rain, or snow to create a sense of atmosphere and mood in your images.
Observe and capture fleeting moments, such as dynamic aerial actions or wildlife in motion. Be patient and ready to take the shot as the scene unfolds. Anticipate the movement of subjects and adjust your drone’s position accordingly to capture that perfect moment.
Post-process your images to enhance their visual impact. Use photo editing software to adjust exposure, contrast, saturation, and sharpness. Fine-tune the white balance to achieve accurate colors. Use filters or creative effects to add a personal touch and further enhance the mood of your shots.
Remember, a great aerial shot goes beyond technical excellence. It tells a story and evokes emotion. Develop a unique style and vision for your photography, and let your passion and creativity shine through in every image you capture.
Continuously expand your knowledge and skills by learning from other drone photographers, studying composition techniques, and staying updated with the latest photography trends. The sky is your canvas – explore, experiment, and capture breathtaking aerial shots that inspire and captivate viewers.
Edit and Enhance Your Drone Photos
Editing your drone photos is a crucial step in the photography process. It allows you to enhance colors, correct exposure, and bring out the full potential of your images. Here are some tips and techniques to help you edit and enhance your drone photos:
Start by transferring your images to a computer or a high-resolution display. Viewing your photos on a larger screen will give you a better sense of their details and overall quality.
Use professional photo editing software such as Adobe Photoshop or Lightroom to edit your drone photos. These tools provide a wide range of editing options and advanced features to help you achieve the desired results.
Begin by adjusting the basic settings of your image, such as exposure, contrast, highlights, shadows, and saturation. These adjustments will help bring out the details in the highlights and shadows, create a more balanced exposure, and enhance the colors in your photos.
Pay attention to the white balance of your images. Drones can sometimes capture images with a slight color cast due to the atmospheric conditions or the drone’s camera settings. Adjusting the white balance will ensure accurate colors and a more pleasing overall look.
Focus on fine-tuning the details of your images. Use sharpening tools to enhance the clarity and sharpness of your subjects, but be careful not to overdo it, as excessive sharpening can introduce unwanted noise or artifacts.
If necessary, make selective adjustments to specific areas of your photo. Use tools like the brush tool or the gradient tool to adjust exposure, contrast, and color in specific parts of the image. This allows you to target and enhance specific areas without affecting the entire photo.
Experiment with creative effects and filters to add a personal touch to your images. Explore different presets or create your own custom filters to give your photos a unique style and mood.
Crop your images to improve composition or to eliminate distracting elements. Experiment with different aspect ratios to showcase your subject or achieve a particular visual impact.
Consider creating panoramic images by stitching multiple photos together, especially if your drone’s camera has a lower resolution. This technique can help you capture wider perspectives or create high-resolution images with stunning detail.
Compare your edited images with the original shots to evaluate the improvements and make any final adjustments as needed. Remember that editing is subjective, and your goal should be to create a final image that matches your vision and conveys the desired message or emotion.
Lastly, keep a backup of your original files before making any edits. This ensures that you can always go back to the original image if you want to try a different editing approach or make further adjustments.
Editing your drone photos is a creative process that allows you to fine-tune your images and add your personal touch. With practice and experimentation, you’ll develop your own editing style and bring out the full potential of your aerial photography.
Share Your Work and Engage with the Drone Photography Community
Once you’ve captured and edited your stunning drone photos, it’s time to share your work with the world and connect with the vibrant drone photography community. Sharing your photos and engaging with fellow enthusiasts can provide valuable feedback, inspiration, and opportunities to grow as a drone photographer. Here are some tips on how to share your work and connect with the drone photography community:
Join online platforms and communities dedicated to drone photography. Websites, forums, and social media platforms such as Instagram, Facebook, and Flickr have dedicated drone photography groups and hashtags where you can share your images and connect with like-minded individuals.
When sharing your photos, make sure to provide context and stories behind your shots. Share the location, technique, or challenges you faced in capturing the image. This not only adds value to your work but also encourages engagement and discussion among the community members.
Participate in drone photography competitions and challenges. Many online communities and organizations host regular photo contests that focus specifically on drone photography. Participating in these competitions can provide recognition, exposure, and the opportunity to showcase your talent.
Offer constructive feedback and engage with other photographers. Comment on their work, ask questions, and engage in discussions. Building relationships with fellow photographers allows you to learn from each other, exchange ideas, and gain new perspectives on drone photography.
Consider creating a website or portfolio to showcase your best drone photos. Having a dedicated platform to showcase your work is a professional way to present your artistry and attract potential clients or collaborators.
Collaborate with other photographers or professionals in related industries. Work together on projects, share knowledge and resources, or participate in joint exhibitions or showcases. Collaborations can lead to new opportunities and expand your network within the drone photography community.
Attend drone meetups or workshops. Look for local gatherings or events where drone enthusiasts, photographers, and industry experts come together. These events provide opportunities to learn new techniques, network, and engage with professionals in the field.
Be open to feedback and continuously improve your skills. Embrace constructive criticism and use it as a catalyst for growth. Participate in online critiques or seek feedback from more experienced photographers. This will help you refine your techniques and expand your creative horizons.
Always credit and respect the privacy of others. When sharing aerial photographs or videos, be mindful of the laws and regulations regarding privacy and ethical drone usage. Seek permission before sharing images taken in private locations or featuring identifiable individuals.
Remember to give back to the community as well. Share your knowledge and experiences through tutorials, blog posts, or instructional videos. By sharing insights and techniques, you not only contribute to the drone photography community but also establish yourself as an authority in the field.
Sharing your work and engaging with the drone photography community is a rewarding experience. It allows you to receive recognition for your talent, learn from others, and establish a strong network of fellow drone photographers. So, don’t hesitate to showcase your artistry, connect with fellow drone enthusiasts, and become an active member of the thriving drone photography community.
Conclusion
Drone photography opens up a whole new world of artistic possibilities, allowing you to capture breathtaking aerial shots and unleash your creativity. By following the tips and techniques outlined in this guide, you can embark on a journey to become a skilled drone photographer.
From choosing the right drone for your needs and understanding its manual and features, to mastering flight controls and learning about safety regulations, each step is essential for a successful drone photography experience. Investing in filters and understanding different camera settings will further enhance the quality of your images, while practicing composition techniques will ensure visually appealing compositions.
Experimenting with shooting modes, editing your photos, and engaging with the drone photography community will take your skills and creativity to new heights. Sharing your work and connecting with fellow enthusiasts will provide valuable feedback, inspiration, and opportunities for growth as you continue to evolve as a drone photographer.
Remember, drone photography is not only about capturing stunning visuals but also about telling stories and evoking emotions through your imagery. Spend time refining your skills, honing your artistic vision, and continuously seeking out new inspiration and learning opportunities.
So, with your drone in hand and a passion for photography, take flight and explore the endless possibilities of drone photography. Capture the world from captivating angles, create awe-inspiring compositions, and let your unique perspective shapes the way we see the world from above.
Embrace the excitement and challenges of drone photography, and let your imagination soar as you create breathtaking aerial photographs that leave a lasting impact.


