Introduction
An external hard drive is a convenient and portable storage solution that allows you to expand the storage capacity of your computer. Whether you use it for data backup, file storage, or transferring large files between devices, it is important to ensure that your external hard drive functions properly. In this article, we will guide you through the process of testing an external hard drive to identify any potential issues or errors.
Testing your external hard drive is crucial because it not only helps you diagnose any existing problems but also allows you to take preventive measures to safeguard your valuable data. Common issues with external hard drives include hardware failures, bad sectors, disk errors, and performance degradation over time. By conducting regular tests, you can mitigate these risks and ensure that your external hard drive is functioning optimally.
In this guide, we will walk you through a series of steps to comprehensively test and evaluate the health and performance of your external hard drive. We will cover topics such as checking for drive recognition, running diagnostic tests, scanning for errors, testing speed and performance, and checking for bad sectors. By following these steps, you can gain valuable insights into the condition of your external hard drive and take appropriate actions to resolve any issues.
Before we dive into the testing process, it is important to note that depending on the operating system and the specific tools or software you have at your disposal, some steps might vary. However, the underlying principles and concepts remain the same. Regardless of the tools you use, this guide will provide you with a comprehensive testing methodology that you can adapt and apply to your specific situation.
Now that we understand the significance of testing an external hard drive, let’s get started with the first step: connecting the external hard drive to your computer.
Step 1: Connect the external hard drive to your computer
The first step in testing an external hard drive is to establish a connection between the drive and your computer. This is a simple process that involves plugging in the appropriate cables and ensuring a secure connection. Here’s how to do it:
- Locate the USB cable that came with your external hard drive. This cable will have a USB connector on one end and a connector specific to your external hard drive on the other end.
- Connect the USB cable to an available USB port on your computer. Make sure the port is functioning correctly by testing it with another device if necessary.
- Connect the other end of the USB cable to the appropriate port on your external hard drive. The port may be labeled as “USB” or display an icon that resembles a USB symbol.
- Once the cable is securely connected to both your computer and the external hard drive, you should hear a notification sound or see a prompt indicating that a new device has been detected.
- In some cases, you may need to provide additional power to the external hard drive. This can be done by connecting the power adapter or using a separate USB cable with additional power support. Refer to the manufacturer’s instructions for the specific power requirements of your external hard drive.
After connecting the external hard drive to your computer, it should appear as a new storage device in your operating system’s file explorer or desktop. Depending on your computer’s settings, it may automatically recognize and assign a drive letter to the external hard drive.
It is important to ensure that the connection between your computer and the external hard drive is stable and reliable throughout the testing process. Loose or faulty connections can result in data transfer issues and inaccurate test results. If you notice any connectivity problems, try using a different USB port, replacing the USB cable, or checking the power supply to resolve the issue.
Once you have successfully connected the external hard drive to your computer, you can proceed to the next step of checking if the drive is recognized by your computer.
Step 2: Check if the external hard drive is recognized by your computer
After connecting the external hard drive to your computer, the next step is to ensure that your computer recognizes the drive. This is important because if the external hard drive is not recognized, you won’t be able to access or test its functionality. Here’s how to check if the drive is recognized:
- Open the file explorer on your computer. In Windows, you can press the “Windows key + E” to open the file explorer.
- Look for a section called “This PC” or “My Computer” in the file explorer window. Your external hard drive should appear as a separate drive under this section.
- If you don’t see the external hard drive listed, try the following troubleshooting steps:
- Restart your computer and reconnect the external hard drive. Sometimes, a simple restart can resolve any recognition issues.
- Try connecting the external hard drive to a different USB port on your computer. This can help determine if the issue is related to a specific port.
- Check the USB cable and connectors for any signs of damage. A faulty cable can prevent the proper recognition of the drive.
- Update the USB drivers on your computer. Outdated drivers can cause compatibility issues and prevent the recognition of external devices.
- If none of the above steps work, try connecting the external hard drive to another computer. This will help determine if the issue is specific to your computer or the drive itself.
Once you confirm that your computer recognizes the external hard drive, you can proceed with testing its functionality. However, if the drive is still not recognized after exhausting all troubleshooting steps, it may indicate a potential hardware issue with the drive. In such cases, it is recommended to consult with a professional or contact the manufacturer for further assistance.
Checking the recognition of the external hard drive is an essential step to ensure that you can proceed with testing its performance and health. Once the drive is recognized by your computer, you can move on to the next step of running a diagnostic test on the external hard drive.
Step 3: Run a diagnostic test on the external hard drive
Running a diagnostic test is an important step in assessing the overall health and functionality of your external hard drive. This test can help detect any underlying issues or errors that might affect the performance and reliability of the drive. Here’s how you can run a diagnostic test on your external hard drive:
- There are several diagnostic tools available for testing external hard drives. One popular option is the CrystalDiskInfo utility, which is a free software that provides detailed information about the health of your hard drive. You can download and install it from the official website.
- Once installed, open CrystalDiskInfo and it will display a list of all the storage devices connected to your computer, including your external hard drive.
- Select your external hard drive from the list and take note of the “Health Status” section. This will give you an overview of the drive’s condition and any potential issues that need attention.
- Look for any warnings or errors displayed in the “Attributes” section. These attributes indicate specific parameters of the drive, such as temperature, power-on hours, and reallocated sector count. Analyzing these attributes can provide insights into the drive’s current state.
- In addition to CrystalDiskInfo, some external hard drive manufacturers provide their own diagnostic tools. Check the manufacturer’s website for any specific software designed for testing and diagnosing their drives.
- It is important to note that running a diagnostic test may take some time depending on the size and speed of your external hard drive. Allow the test to complete before moving on to the next steps.
Running a diagnostic test on your external hard drive can reveal potential issues that may affect its stability and performance. If the diagnostic tool detects any critical errors or warnings, it is recommended to backup your important data and consider replacing the drive if necessary.
By performing periodic diagnostic tests, you can proactively identify issues with your external hard drive and take appropriate measures to prevent data loss and ensure optimal performance. Now that we have completed the diagnostic test, let’s move on to the next step of checking the SMART status of the external hard drive.
Step 4: Check the SMART status of the external hard drive
The SMART (Self-Monitoring, Analysis, and Reporting Technology) status of your external hard drive provides valuable information about the drive’s health and performance. It tracks various attributes, such as temperature, error rates, and reallocated sectors, to detect any potential issues. Checking the SMART status can help you identify the overall condition of your drive and take necessary actions to prevent data loss. Follow these steps to check the SMART status of your external hard drive:
- Download and install a SMART monitoring tool. There are several options available, such as CrystalDiskInfo, HD Tune, or the manufacturer’s proprietary software specifically designed for checking SMART status.
- Open the SMART monitoring software and select your external hard drive from the list of connected drives.
- Once you have selected the drive, the software will display various attributes and their corresponding values.
- Look for any attributes that indicate a warning sign, such as a high temperature, increased error rates, or reallocated sectors. These signs might indicate potential issues with your external hard drive.
- Pay attention to the overall SMART status of your drive. If it shows as “OK” or “Passed,” it indicates that your drive is in good health. However, if the status shows as “Bad,” “Warning,” or “Failed,” it suggests that there are significant issues that require attention.
- It is important to note that SMART attributes vary for different drive models and manufacturers. Refer to the documentation provided with the SMART monitoring tool or check the manufacturer’s website for specific details about the attributes and their significance.
Checking the SMART status provides valuable insights into the health and reliability of your external hard drive. If you notice any warning signs or critical issues, it is advisable to back up your important data and consider replacing the drive if necessary.
Regularly monitoring the SMART status of your external hard drive allows you to take proactive measures to prevent data loss and ensure the longevity of your drive. Now that we have checked the SMART status, let’s move on to the next step of performing a surface test on the external hard drive.
Step 5: Perform a surface test on the external hard drive
Performing a surface test on your external hard drive helps identify any physical defects or bad sectors on the disk. Bad sectors can lead to data corruption and system slowdowns, so it is crucial to detect and address them early on. Follow these steps to perform a surface test on your external hard drive:
- There are various utilities available that can perform surface tests on your hard drive, such as CrystalDiskInfo, HD Tune, or manufacturer-specific tools. Choose a tool that suits your preference and download it from a reliable source.
- Launch the surface test utility and select your external hard drive from the list of available drives.
- Start the surface test. The utility will scan the entire disk, checking each sector for errors or inconsistencies.
- Pay attention to any blocks or sectors that the utility flags as bad or damaged. These can be indications of physical issues on your drive.
- Keep in mind that a surface test can take a significant amount of time, depending on the size and speed of your external hard drive. Allow the test to complete before proceeding to the next steps.
If the surface test detects bad sectors, it is crucial to address them promptly. You can try repairing the bad sectors using the utility’s repair or fix option, although this may not always be successful. In cases where the number of bad sectors is significant, it may be more practical to replace the external hard drive to ensure the safety of your data.
Performing periodic surface tests on your external hard drive is essential to identify any physical issues and prevent data corruption. By resolving bad sectors in a timely manner, you can extend the lifespan of your drive and maintain optimal performance.
Now that we have performed a surface test, let’s move on to the next step of scanning the external hard drive for errors.
Step 6: Scan the external hard drive for errors
Scanning your external hard drive for errors can help identify and fix any file system or disk errors that may be causing data corruption or performance issues. Errors can occur due to improper shutdowns, power outages, or general wear and tear of the drive. Follow these steps to scan your external hard drive for errors:
- Open the file explorer on your computer and locate the external hard drive.
- Right-click on the drive and select “Properties” from the context menu.
- In the Properties window, navigate to the “Tools” tab.
- Under the “Error-checking” section, click on the “Check” button.
- A dialog box will appear, allowing you to choose whether to scan and fix errors automatically or schedule the scan to run the next time you restart your computer.
- Select the option that suits your preference and click “Start” to initiate the scan.
- The scanning process may take some time, depending on the size of the external hard drive and the number of files it contains. Allow the scan to complete before proceeding.
- If any errors are found during the scan, the utility will attempt to fix them automatically. However, in some cases, manual intervention may be required.
Scanning your external hard drive for errors is essential for maintaining the integrity of your data and ensuring the drive’s optimal performance. If the scan results in the detection and repair of errors, it is advisable to back up your important data as a precautionary measure.
By regularly scanning your external hard drive for errors, you can identify and resolve any issues that may impact its functionality. It is recommended to perform these scans periodically to prevent potential data loss and maintain the health of your drive.
Now that we have scanned the external hard drive for errors, let’s move on to the next step of comparing the benchmark results to assess its performance.
Step 7: Compare the benchmark results of the external hard drive
Comparing the benchmark results of your external hard drive can provide valuable insights into its performance and help you gauge its efficiency compared to other similar drives. Benchmarking allows you to assess the read and write speeds, random access times, and other performance metrics of your drive. Follow these steps to compare the benchmark results of your external hard drive:
- Download and install a reliable benchmarking tool such as CrystalDiskMark, ATTO Disk Benchmark, or HD Tune.
- Launch the benchmarking tool and select your external hard drive from the available drives list.
- Choose the appropriate test settings. Most benchmarking tools offer different test options, including sequential and random read/write tests.
- Click on the “Start” or “Run” button to initiate the benchmark test.
- The benchmarking tool will measure various aspects of your drive’s performance and display the results in a tabulated format.
- Pay attention to metrics such as sequential read and write speeds, random access times, and input/output operations per second (IOPS).
- Compare the benchmark results of your external hard drive with the average performance of similar drives. This can help you determine whether your drive is operating at an expected level of efficiency.
- Keep in mind that the benchmark results may vary depending on the size of the files used in the test and other factors such as the USB connection type (USB 2.0, USB 3.0, etc.) and the performance capabilities of your computer.
Comparing the benchmark results of your external hard drive allows you to evaluate its performance and identify any potential bottlenecks or areas for improvement. If the benchmark results are significantly lower than expected, it may indicate a hardware issue or the need to optimize the drive’s settings.
Regularly benchmarking your external hard drive can help you track its performance over time and make informed decisions about its maintenance or possible upgrades. Now that we have compared the benchmark results, let’s move on to the next step of testing the read and write speeds of the external hard drive.
Step 8: Test the read and write speed of the external hard drive
Testing the read and write speed of your external hard drive allows you to evaluate its data transfer performance. This step is crucial if you frequently work with large files or need fast data transfer rates. By measuring the read and write speeds, you can determine whether your drive meets your performance needs. Follow these steps to test the read and write speed of your external hard drive:
- Download and install a reliable disk speed testing tool such as CrystalDiskMark, ATTO Disk Benchmark, or Blackmagic Disk Speed Test.
- Launch the speed testing tool and select your external hard drive from the available drives list.
- Choose the appropriate settings for the test, such as the file size and the number of test runs.
- Click on the “Start” or “Run” button to initiate the speed test.
- The testing tool will measure the read and write speeds of your external hard drive and display the results in a tabulated format.
- Note the read and write speeds reported by the tool and compare them against the performance expectations for your specific drive model.
- Take into consideration that the read and write speeds may vary depending on the file size, the connection type (USB 2.0, USB 3.0, etc.), and the capabilities of your computer.
Testing the read and write speed of your external hard drive allows you to assess its performance and determine if it meets your requirements. If the speeds are consistently lower than expected, it may be worth investigating possible factors impacting the performance, such as the drive’s condition, cable quality, or the connection type.
Regularly testing the read and write speeds of your external hard drive can help you keep track of its performance over time and make informed decisions about its usage and potential upgrades. Now that we have tested the read and write speed, let’s move on to the next step of checking for bad sectors on the external hard drive.
Step 9: Check for bad sectors on the external hard drive
Checking for bad sectors on your external hard drive is essential to identify any physical issues that may hinder its performance and reliability. Bad sectors are portions of the drive’s surface that are unable to reliably store and retrieve data. By detecting and addressing bad sectors, you can prevent data corruption and ensure the longevity of your drive. Follow these steps to check for bad sectors on your external hard drive:
- Download and install a disk scanning and repair tool such as CrystalDiskInfo, HD Tune, or the manufacturer’s proprietary software. These tools often include utilities for checking and repairing bad sectors.
- Launch the scanning tool and select your external hard drive as the target for the scan.
- Start the scanning process. The tool will scan the entire drive surface, identifying any bad sectors or areas of concern.
- Pay attention to the scan results. The scanning tool will indicate the presence and location of any bad sectors on the drive.
- If the scanning tool identifies bad sectors, you can attempt to repair them using the utility’s repair or fix option. However, keep in mind that not all bad sectors can be fixed. In some cases, it may be necessary to replace the drive to ensure data integrity.
- Regularly checking for bad sectors allows you to monitor the health of your external hard drive and take appropriate actions, such as data backup and drive replacement if necessary.
Detecting and addressing bad sectors on your external hard drive is crucial for data integrity and drive performance. By taking proactive measures, such as regular scans and repairs, you can ensure the optimal functioning of your drive and protect your valuable data from corruption.
Now that we have checked for bad sectors, let’s move on to the final step: testing the file transfer speed of the external hard drive.
Step 10: Test the file transfer speed of the external hard drive
Testing the file transfer speed of your external hard drive is the final step in assessing its overall performance. By measuring the speed at which files are transferred to and from the drive, you can determine if it meets your expectations for data transfer efficiency. Here’s how to test the file transfer speed of your external hard drive:
- Copy a large file or a folder containing multiple files from your computer’s internal storage to the external hard drive.
- Monitor the transfer speed displayed during the copying process. This speed indicates the rate at which data is being transferred to the external hard drive.
- Take note of the transfer speed achieved during the process, as it will give you an idea of the drive’s performance in real-world scenarios.
- Repeat the process by copying the file or folder back from the external hard drive to your computer’s internal storage. Monitor and note the transfer speed once again.
- Compare the transfer speeds with the read and write speeds obtained during the benchmark test. The transfer speeds during real-world file transfers may vary slightly due to different file sizes and system factors.
- Keep in mind that the transfer speed may be influenced by various factors, including the USB connection type, file fragmentation, and the performance capabilities of your computer.
Testing the file transfer speed of your external hard drive helps you gauge its efficiency and determine if it meets your requirements for quick and reliable data transfers. If the transfer speeds are consistently below expectations, it may be worth optimizing your drive or considering an upgrade for better performance.
Regularly testing the file transfer speed of your external hard drive allows you to monitor its performance over time and make informed decisions regarding its usage and potential alternatives.
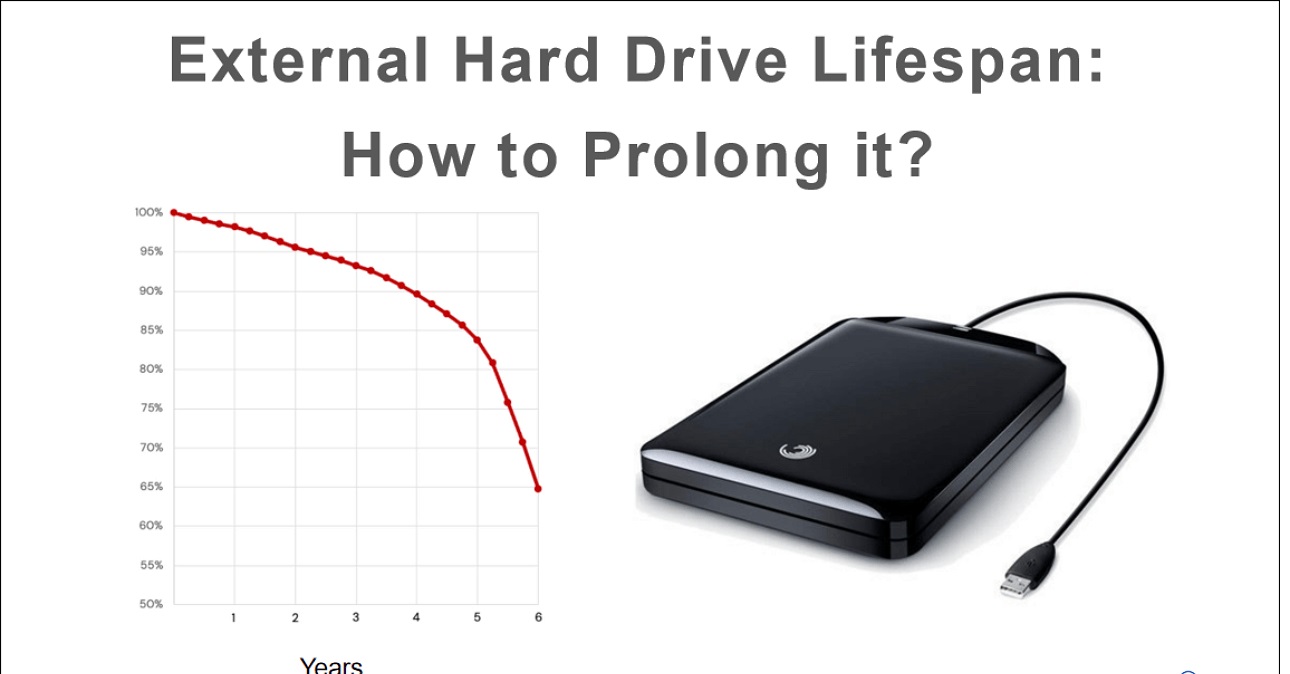
With the completion of the file transfer speed test, you have now assessed the performance and health of your external hard drive. By following these steps, you have gained valuable insights into any potential issues and taken necessary measures to ensure the optimal functioning of your drive. Regular maintenance and periodic testing will help prolong the lifespan of your external hard drive and protect your valuable data.
Conclusion
Testing an external hard drive is an important process to ensure its reliability, performance, and overall health. By following the step-by-step guide outlined above, you have learned how to effectively test your external hard drive and identify any potential issues or errors that may impact its functionality.
Throughout the testing process, you have learned to connect the external hard drive to your computer, check if it is recognized by the system, run diagnostic tests, assess the SMART status, perform surface tests, scan for errors, compare benchmark results, test the read and write speed, check for bad sectors, and analyze the file transfer speed.
Regularly testing your external hard drive allows you to address any issues early on, preventing data loss and ensuring optimal performance. By maintaining a healthy external hard drive, you can have peace of mind knowing that your important files are safe and accessible.
It is worth noting that while this guide provides a comprehensive testing methodology, the specific tools and steps may vary depending on your operating system, drive model, and available software. Be sure to refer to the instructions provided by the manufacturer and adapt the testing process to your specific situation.
Lastly, remember that prevention is key when it comes to maintaining the longevity of your external hard drive. Regular backups of your important files and adopting proper storage and handling practices can help protect your data and extend the lifespan of your drive.
By following these testing procedures and incorporating good maintenance practices, you can ensure that your external hard drive serves as a reliable storage solution for all your data storage needs.