Introduction
A virtual machine is a software emulation of a computer system that allows you to run multiple operating systems on one physical machine. It provides an isolated environment where you can install and run different operating systems, such as Windows 10, without interfering with your main operating system.
Virtual machines have become increasingly popular in recent years due to their numerous benefits and flexibility. They are widely used in various fields, including software development, system testing, and network administration.
In this article, we will guide you on how to set up a virtual machine with Windows 10. Whether you are a developer wanting to test your software on different operating systems or a user looking to run specific apps not compatible with your current OS, setting up a virtual machine will enable you to achieve this without the need for additional hardware.
Before diving into the process, it is important to understand the advantages of using a virtual machine and how to properly prepare your system for virtualization. Let’s explore further in the following sections.
What is a Virtual Machine?
A virtual machine (VM) is a software emulation of a physical computer system that allows you to run multiple operating systems on a single physical machine. It works by creating a virtualized environment where you can install and run different operating systems without affecting the host machine’s primary operating system.
Essentially, a virtual machine acts as a self-contained computer system with its own set of virtual hardware resources, including CPU, memory, storage, and network interfaces. These virtual resources are allocated from the physical host machine’s resources and are managed by a virtualization layer called a hypervisor. The hypervisor ensures efficient resource allocation and isolation for each virtual machine.
With a virtual machine, you can run multiple operating systems simultaneously, allowing you to test software compatibility, simulate various network configurations, or run applications that are not supported on your host machine’s operating system.
Each virtual machine operates independently of other virtual machines and the host machine. This means that you can run different operating systems, such as Windows, macOS, or Linux, side by side on the same physical machine.
Additionally, virtual machines offer the ability to take snapshots of the entire system state, allowing you to revert to a previous state if necessary. This feature is especially useful for developers and system administrators who need to test different configurations or recover from system failures.
Overall, virtual machines provide a flexible and efficient way to run multiple operating systems on a single physical machine, offering numerous benefits for both personal and professional use.
Benefits of Using a Virtual Machine
Using a virtual machine offers a wide range of benefits for both individuals and businesses. Let’s explore some of the key advantages:
- Isolation and Security: Virtual machines provide a high level of isolation between the host machine and the virtualized environments. This isolation ensures that any changes or issues within a virtual machine do not affect the host system. It also helps in maintaining security as any potential malware or viruses within a virtual machine are contained and cannot spread to the host or other virtual machines.
- Hardware Utilization: Virtual machines allow for efficient utilization of hardware resources. By consolidating multiple virtual machines on a single physical server, you can significantly reduce the number of physical machines required, resulting in cost savings on hardware, power, and cooling.
- Operating System Compatibility: Virtual machines enable you to run different operating systems on a single machine, regardless of the host operating system. This is particularly useful if you need to test software compatibility across different platforms or if you have specific software requirements that are only supported by certain operating systems.
- Easy Software Testing and Development: Virtual machines provide an ideal environment for software testing and development. With virtual machines, you can quickly set up different testing environments, simulate various network configurations, and easily revert back to a previous system state. This significantly streamlines the software testing and development process.
- Scalability: Virtual machines offer scalability by allowing you to easily add or remove virtual machines based on your needs. This flexibility makes it easier to adapt to changing workload demands and ensures optimal resource allocation.
- Disaster Recovery: Virtual machines simplify the implementation of disaster recovery strategies. By taking regular snapshots or backups of virtual machines, you can quickly restore the entire system to a previous state in case of a system failure or data loss.
- Flexibility and Portability: Virtual machines provide flexibility by enabling you to migrate them from one physical host to another without interrupting their operation. This makes it easier to move workloads between different servers and data centers, improving resource allocation and facilitating efficient management.
In summary, the use of virtual machines offers numerous benefits, including enhanced security, optimized hardware utilization, compatibility with different operating systems, simplified software testing and development, scalability, robust disaster recovery, and flexibility in workload management. These advantages make virtual machines a valuable tool for individuals and organizations alike.
Preparing Your System for Virtualization
Before setting up a virtual machine, it is important to ensure that your system meets the requirements for virtualization. Here are the key steps to prepare your system:
- Check Hardware Requirements: Verify that your computer’s hardware supports virtualization. Most modern processors, such as Intel’s VT-x or AMD’s AMD-V, have built-in virtualization technology. You can check your processor’s specifications on the manufacturer’s website or through system utilities like CPU-Z.
- Enable Virtualization in BIOS/UEFI: Access your computer’s BIOS or UEFI settings and enable the virtualization feature if it is not already enabled. The steps to access the BIOS/UEFI settings vary depending on your computer manufacturer. Typically, you need to restart your computer and press a specific key (e.g., F2, Del, Esc) during startup to access the settings.
- Update BIOS/UEFI Firmware: Make sure your computer’s BIOS/UEFI firmware is up to date. Check the manufacturer’s website for any available updates and follow their instructions for updating the firmware.
- Allocate Sufficient Resources: Determine the amount of RAM, storage, and CPU resources you can allocate to the virtual machine without degrading the performance of your host system. Consider the requirements of the guest operating system and applications you plan to run on the virtual machine.
- Create Sufficient Disk Space: Ensure that you have enough free disk space to create and store the virtual machine files. Virtual machines require significant disk space, especially when installing operating systems and applications.
- Check Software Compatibility: Verify that the virtualization software you choose is compatible with your operating system. There are several popular virtualization software options available, such as VMware Workstation, Oracle VirtualBox, and Microsoft Hyper-V. Research each software’s requirements and compatibility with your operating system before proceeding.
- Backup Important Data: Before proceeding with virtualization, it is always recommended to backup any important data on your computer. While virtual machines operate in an isolated environment, it is crucial to take precautions to prevent data loss.
By following these steps, you can ensure that your system is properly prepared for virtualization. This preparation will help avoid any compatibility issues or performance limitations during the virtual machine setup process and ensure a smooth virtualization experience.
Acquiring Virtual Machine Software
Once you have prepared your system, the next step is to acquire virtual machine software that suits your needs. There are several popular virtual machine software options available, each offering its own set of features and capabilities. Here are some of the most widely used virtual machine software:
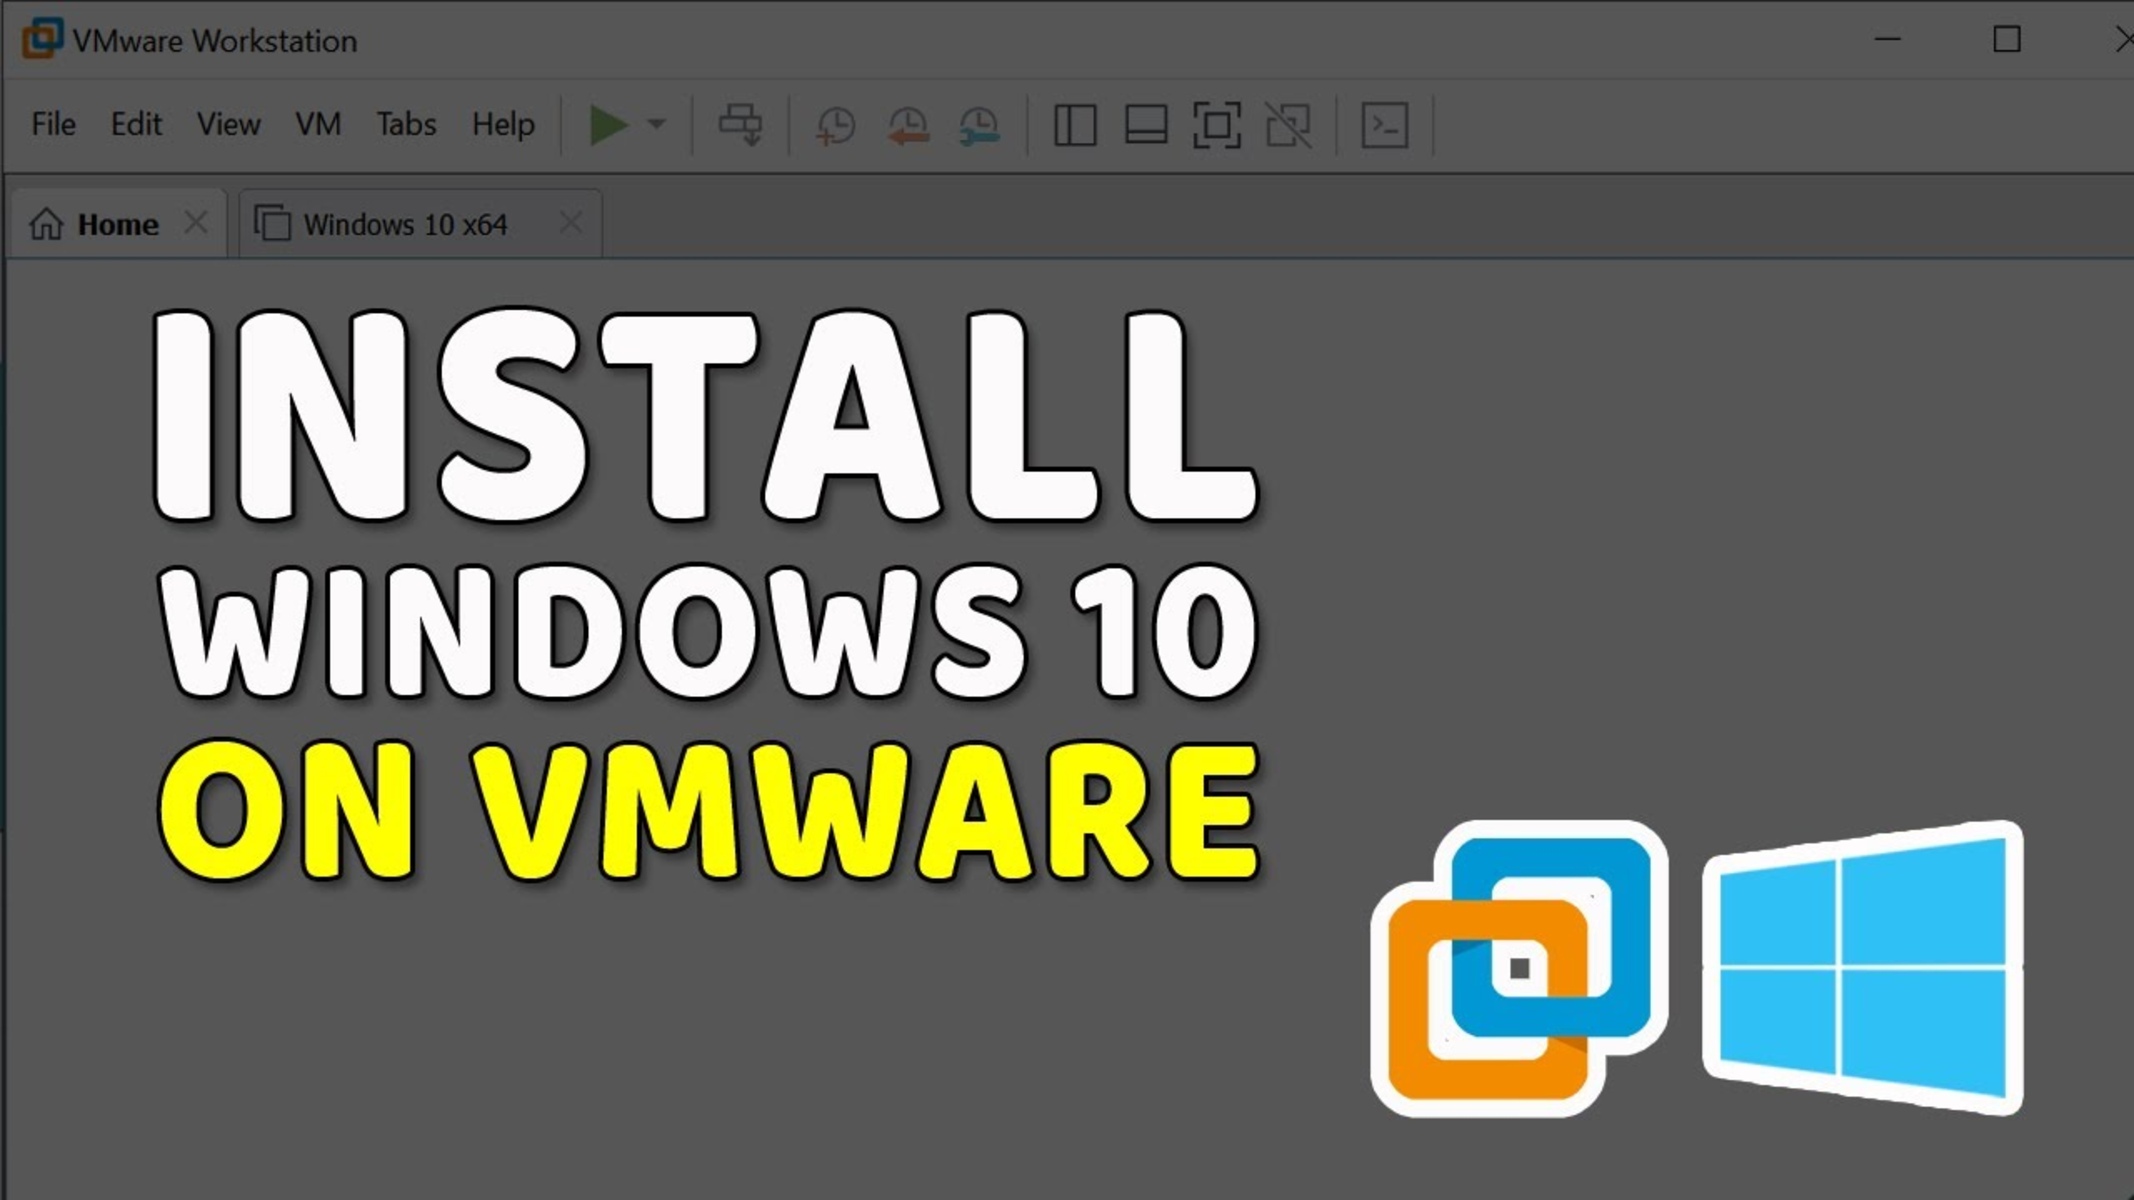
- VMware Workstation: VMware Workstation is a comprehensive virtual machine software that is widely used by professionals. It offers advanced features like snapshot management, virtual networking, and compatibility with a wide range of operating systems.
- Oracle VirtualBox: Oracle VirtualBox is a free, open-source virtual machine software that is suitable for both personal and professional use. It provides a user-friendly interface and supports a wide range of guest operating systems.
- Microsoft Hyper-V: Microsoft Hyper-V is a virtualization platform built into Windows operating systems. It allows you to create and manage virtual machines directly from the Windows environment and is well-suited for Windows-centric environments.
- Parallels Desktop: Parallels Desktop is a popular virtual machine software for Mac users. It enables you to run virtual machines seamlessly alongside your macOS operating system, offering excellent performance and integration.
When selecting virtual machine software, consider factors such as your operating system compatibility, desired features, and budget. If you are uncertain about the software choices, you can always try out the trial versions or seek recommendations from professionals in the field. Additionally, make sure to download the software from trusted sources, such as the official websites of the respective software vendors.
Once you have chosen your virtual machine software, proceed with the installation process as per the instructions provided by the software vendor. In the next section, we will guide you through downloading the Windows 10 image to use in your virtual machine setup.
Downloading the Windows 10 Image
In order to run Windows 10 on your virtual machine, you will need to download the Windows 10 image file. Here’s how you can obtain the Windows 10 image:
- Visit the Microsoft website: Go to the official Microsoft website (www.microsoft.com) and navigate to the Windows 10 download page.
- Select the Windows 10 edition: Choose the edition of Windows 10 that you want to download. Microsoft provides different editions such as Home, Pro, Education, and Enterprise. Select the one that suits your needs.
- Choose the language and architecture: Once you have selected the edition, choose the language and the architecture (32-bit or 64-bit) that matches your preferences.
- Click on “Download now”: After making your selections, click on the “Download now” button to start downloading the Windows 10 image file.
The Windows 10 image file is large in size, so the download time may vary depending on your internet speed. Make sure you have a stable and fast internet connection to avoid any interruptions during the download process.
It is important to note that when downloading the Windows 10 image, you are only obtaining the installation files. You will still need a valid product key to activate and use Windows 10 on your virtual machine. If you don’t have a product key, you can use Windows 10 in trial mode for a limited time period.
Once the Windows 10 image download is complete, you are ready to move on to the next step, which involves installing the virtual machine software on your system. We will guide you through the installation process in the upcoming section.
Installing Virtual Machine Software
After obtaining the Windows 10 image, the next step is to install the virtual machine software on your system. Here are the general steps to follow:
- Locate the downloaded installation file: Find the installation file of the virtual machine software you have chosen. It is usually in the form of an executable file (.exe) or a disk image file (.iso).
- Double-click the installation file: Double-click on the installation file to start the installation process. You may need to grant administrative access if prompted.
- Follow the installation wizard: The installation wizard will guide you through the installation process. Read the instructions carefully and accept the terms and conditions if prompted.
- Choose the installation location: Select the destination folder where you want to install the virtual machine software. The default location is usually recommended, but you can choose a different location if desired.
- Select additional features: Depending on the virtual machine software, you may have the option to install additional features or tools. Choose the ones that are relevant to your needs.
- Wait for the installation to complete: Once you have made your selections, click on the “Install” or “Next” button to begin the installation. The installation process may take a few minutes to complete.
- Launch the virtual machine software: After the installation is finished, you can launch the virtual machine software from the Start menu or desktop shortcut.
- Register and activate the software: Some virtual machine software may require registration or activation. Follow the prompts to register your software and enter any necessary activation details.
It is important to note that the installation process may vary slightly depending on the virtual machine software you have chosen. Always refer to the installation instructions provided by the software vendor for specific guidance.
Once the virtual machine software is installed, you are now ready to create a new virtual machine and start setting up Windows 10. We will guide you through the process of creating a new virtual machine in the next section.
Creating a New Virtual Machine
Now that you have installed the virtual machine software, it’s time to create a new virtual machine. Follow these steps to create a new virtual machine:
- Launch the virtual machine software: Open the virtual machine software that you have installed on your system. The software’s interface may vary depending on the virtualization platform you are using.
- Click on “New” or “Create a New Virtual Machine”: Look for a button or option that allows you to create a new virtual machine. Click on it to begin the creation process.
- Select the operating system: Choose the operating system that you want to install on the virtual machine. In this case, select “Windows 10” from the list of available options.
- Choose the installation method: Decide whether you want to install the operating system from an installation disc or an image file. If you have downloaded the Windows 10 image file, select the option to use an image file.
- Browse for the Windows 10 image: Use the file browsing feature to navigate to the location where you have stored the downloaded Windows 10 image file. Select the image file and proceed.
- Specify the virtual machine name and location: Give your virtual machine a name that will help you identify it. Choose a location on your computer where you want to save the virtual machine files.
- Allocate resources: Allocate resources to the virtual machine, such as memory (RAM) and CPU cores. Adjust these settings based on the requirements of your host system and the operating system you are installing.
- Configure networking options: Choose how the virtual machine will connect to the network. You can select options like bridged, NAT, or host-only networking, depending on your requirements.
- Create the virtual machine: Review the settings you have chosen and click on the “Create” or “Finish” button to create the virtual machine.
Once the virtual machine is created, you are ready to proceed with the installation of Windows 10. In the next section, we will guide you through the process of configuring the virtual machine settings and installing Windows 10 on the virtual machine.
Configuring Virtual Machine Settings
After creating a new virtual machine, the next step is to configure its settings according to your requirements. These settings allow you to customize the virtual machine’s behavior, performance, and resource allocation. Here are the key settings you should consider:
- Hardware settings: Adjust the hardware settings of the virtual machine, including the allocated RAM, CPU cores, and disk space. You can set these values based on the requirements of the guest operating system and the applications you plan to run.
- Display settings: Configure the display settings of the virtual machine, such as screen resolution and color depth. You can also enable features like hardware acceleration or 3D acceleration for enhanced graphics performance.
- Network settings: Choose the networking configuration for the virtual machine. You can opt for bridged networking to connect the virtual machine directly to the network, NAT networking for internet access through the host machine, or host-only networking for isolated communication between the host and virtual machine.
- Storage settings: Define the virtual hard disk settings for the virtual machine. You can allocate disk space, choose the storage type (e.g., dynamically allocated or fixed size), and set the location for storing the virtual hard disk file.
- Device settings: Configure additional devices and peripherals for the virtual machine, such as USB devices, optical drives, audio devices, and printers. Ensure that the necessary drivers are installed within the virtual machine for the devices to function correctly.
- Integration settings: Enable integration features that allow seamless interaction between the host and the virtual machine. These features may include shared clipboard, drag and drop functionality, and file sharing between the host and guest operating systems.
- Snapshot and backup settings: Consider enabling snapshot and backup features to capture the state of the virtual machine and create backups for easy recovery in case of software issues or system failures.
Take your time to review and configure the virtual machine settings according to your requirements. Keep in mind that the available settings may vary depending on the virtual machine software you are using.
Once you have configured the virtual machine settings, you are now ready to install the Windows 10 operating system on the virtual machine. In the next section, we will guide you through the process of installing Windows 10 on the virtual machine.
Allocating Resources to the Virtual Machine
Allocating the right resources to your virtual machine is crucial for optimal performance and smooth operation. The resources you allocate include memory (RAM), CPU cores, and storage space. Here are the key considerations when allocating resources:
- Memory (RAM) allocation: Determine the amount of memory to allocate to the virtual machine. It is recommended to assign enough memory to the virtual machine to ensure smooth operation of the guest operating system and any applications you intend to run. Consider the requirements of the guest operating system and the applications you plan to use as a guideline for memory allocation.
- CPU allocation: Decide how many CPU cores to allocate to the virtual machine. The number of cores to assign depends on the nature of the workload and the CPU capacity of your physical machine. Assigning more cores to the virtual machine can help improve multitasking performance.
- Storage allocation: Allocate the appropriate amount of storage space to the virtual machine. This includes the size of the virtual hard disk where the operating system and data will be stored. Consider the requirements of the guest operating system and any applications you plan to install when determining the storage allocation.
- Dynamic allocation: Some virtual machine software allows for dynamic allocation of resources, such as memory and CPU. With dynamic allocation, the virtual machine utilizes resources based on its workload demands, allowing for efficient resource management. This can be beneficial if you have varying resource needs or multiple virtual machines running simultaneously.
- Host system impact: Ensure that the resource allocation to the virtual machine does not negatively impact the performance and stability of the host system. Consider the available resources of your physical machine and leave enough headroom for the host system to function smoothly.
When allocating resources, it is important to strike a balance between providing sufficient resources to the virtual machine while also ensuring that the host system’s performance is not compromised. Adjusting resource allocation may require experimentation and monitoring to find the optimal balance.
Take the time to review and adjust the resource allocation as needed for your virtual machine. By allocating the appropriate resources, you can ensure optimal performance and a seamless experience when running the virtual machine and using the guest operating system and applications.
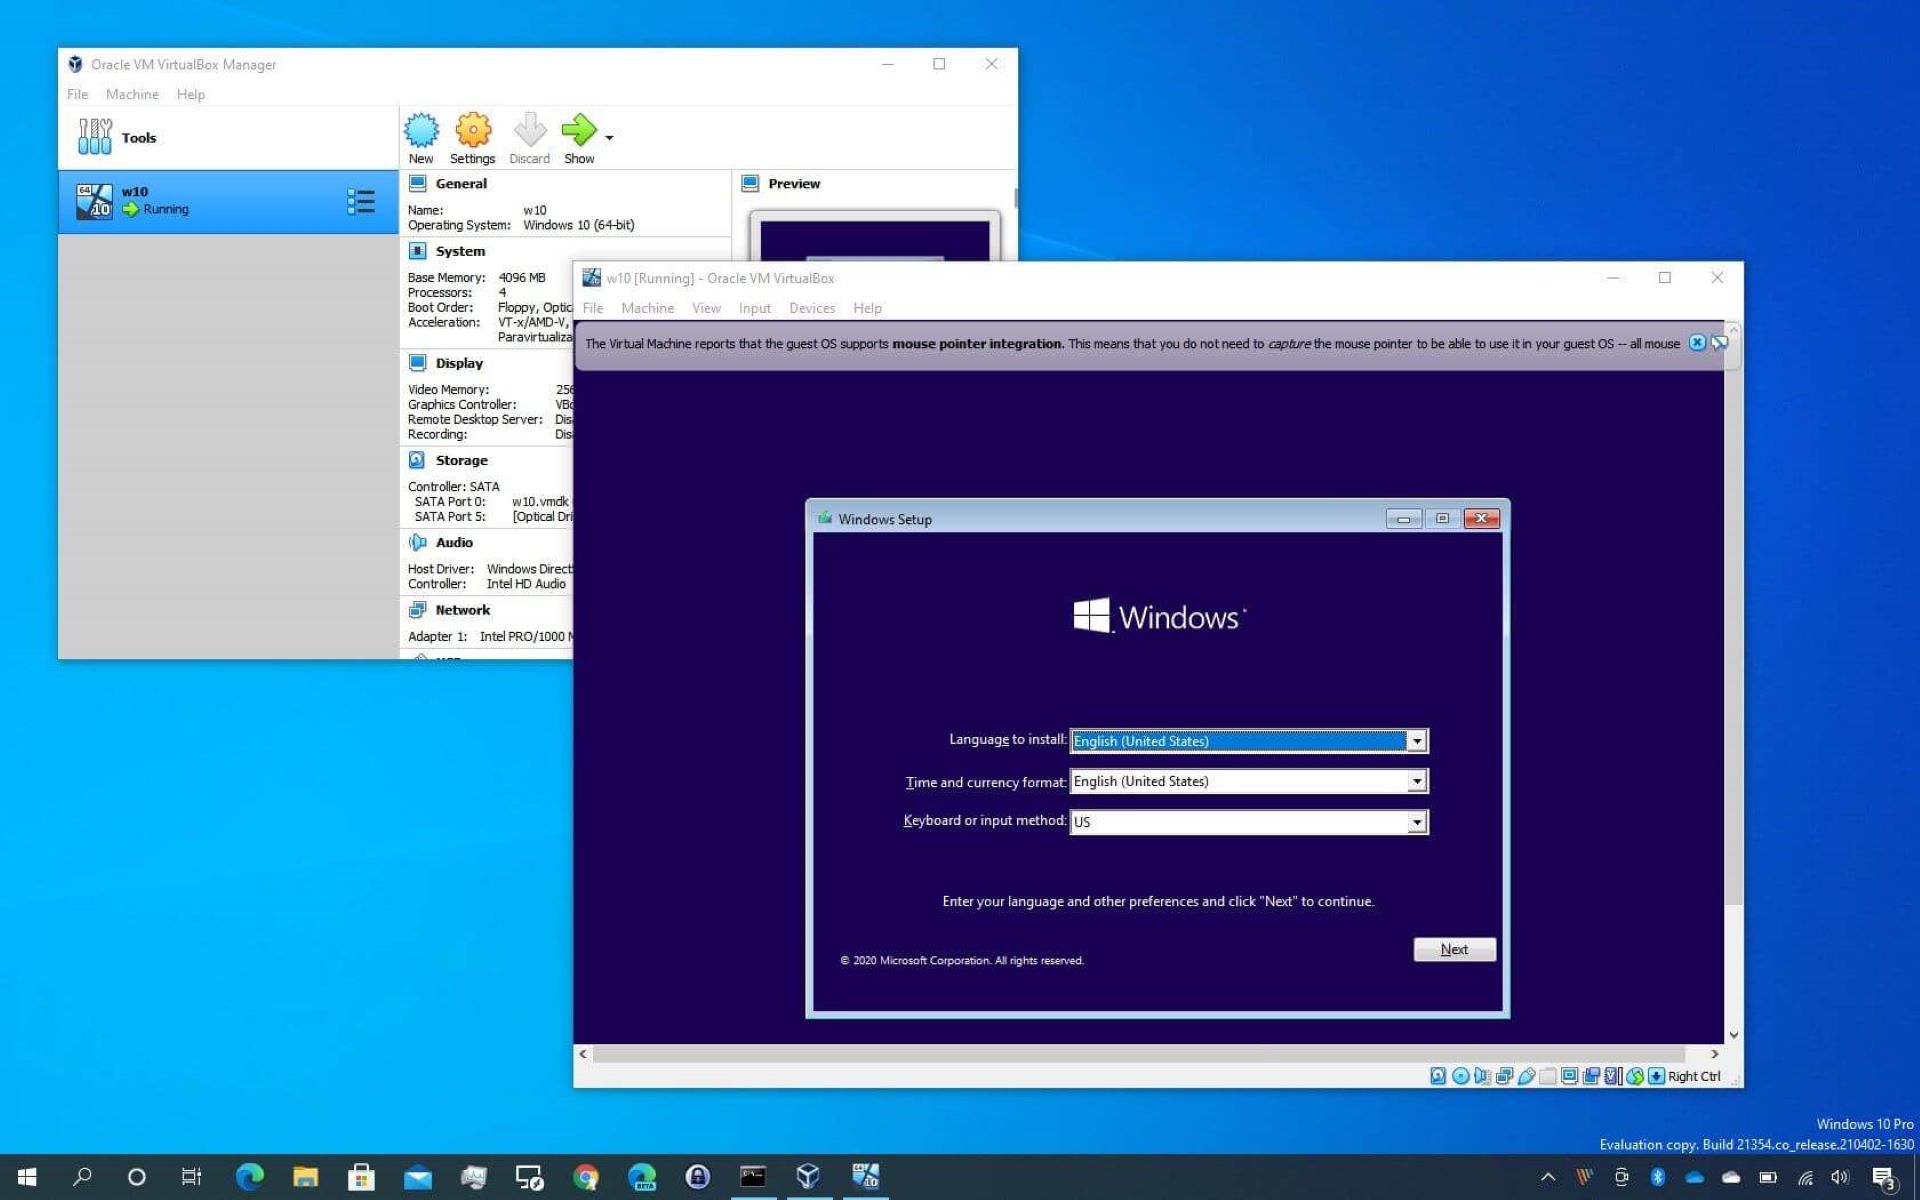
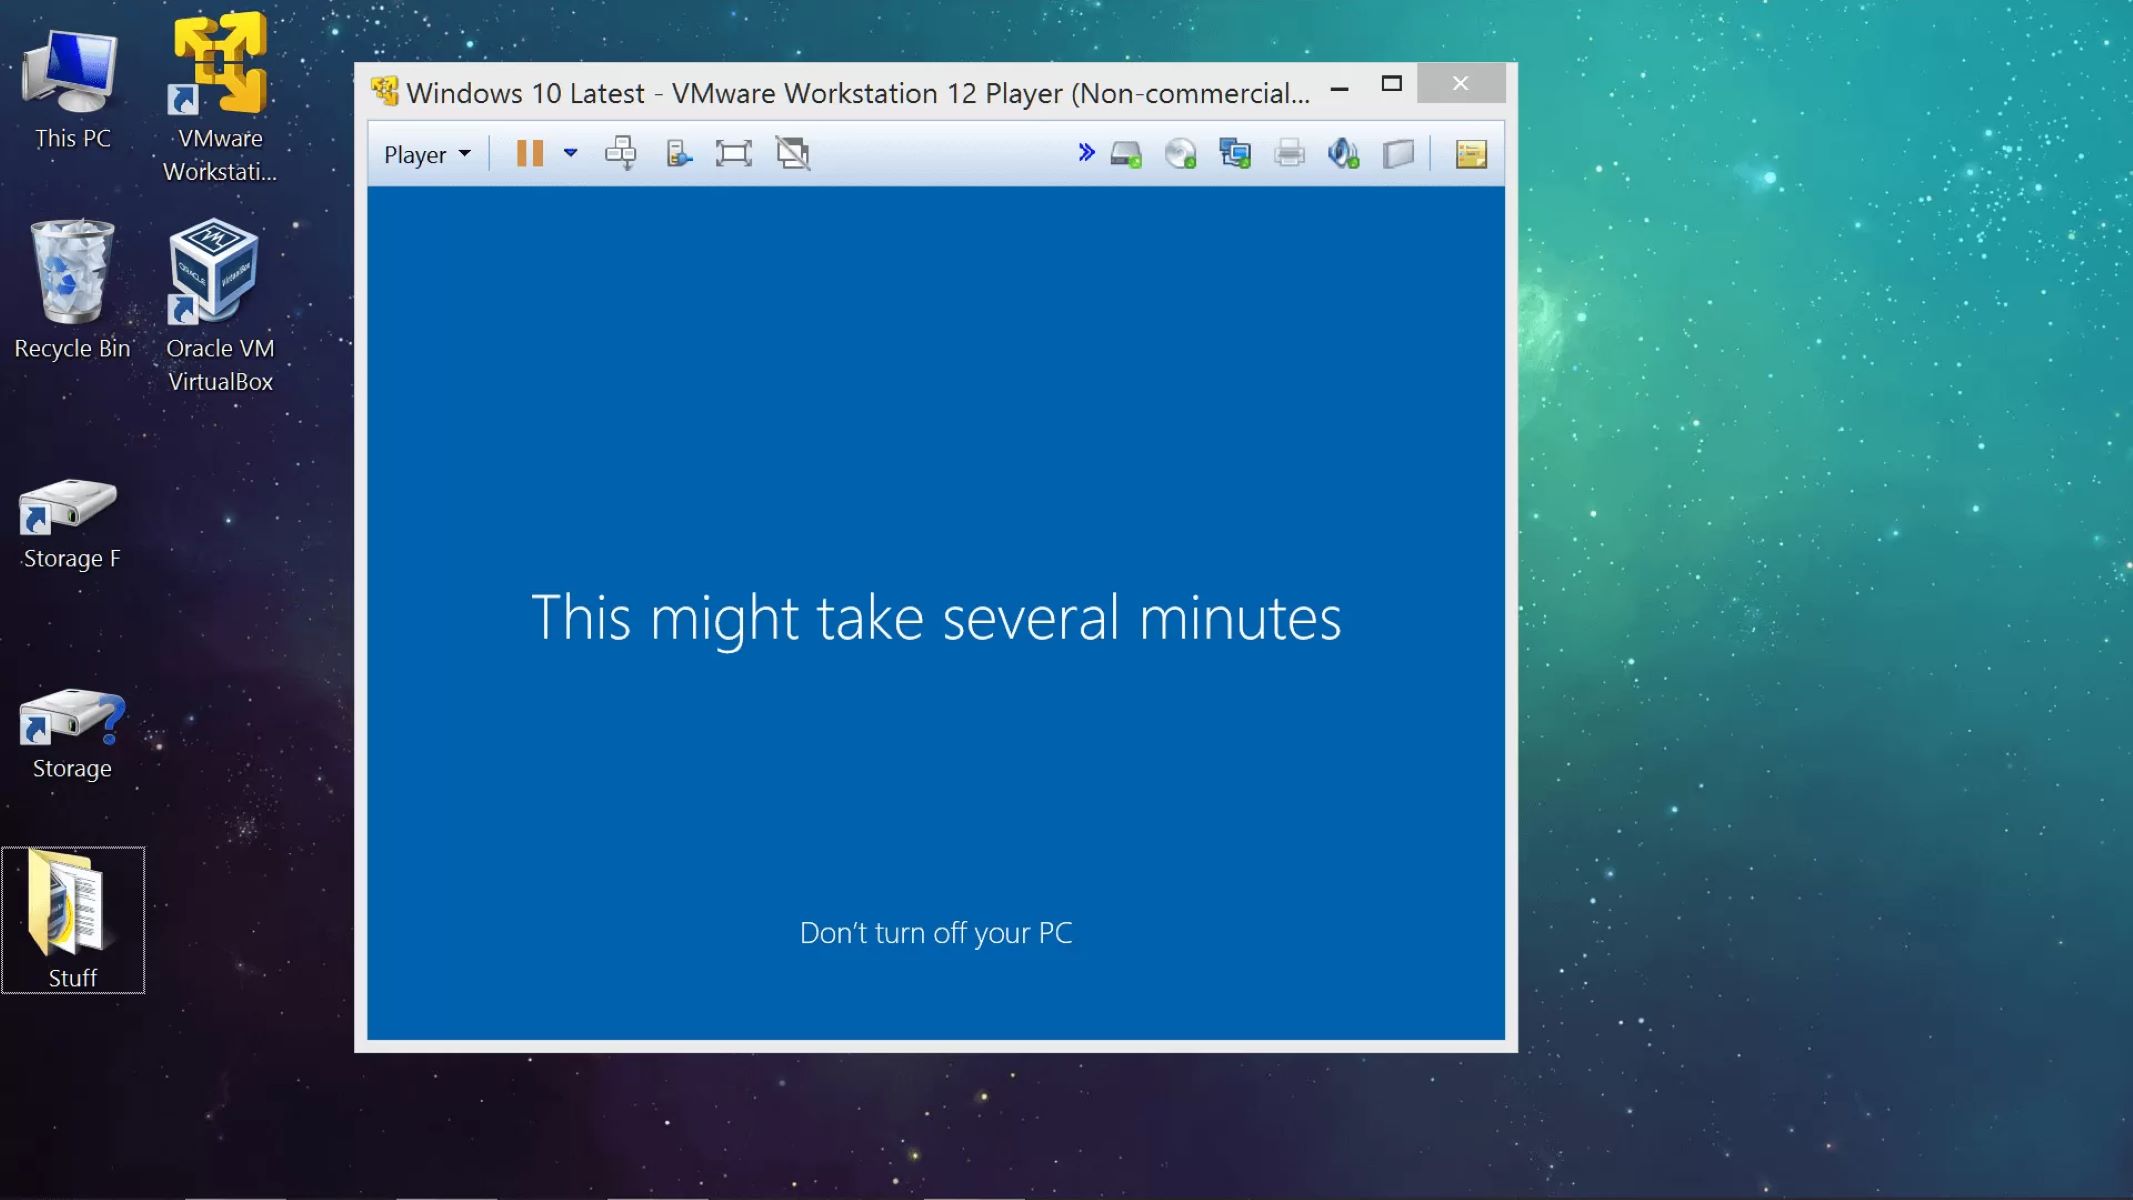
Installing Windows 10 on the Virtual Machine
Now that you have configured the virtual machine settings and allocated the necessary resources, it’s time to install the Windows 10 operating system on the virtual machine. Follow these steps to complete the installation:
- Select the virtual machine: Open the virtual machine software and select the virtual machine you created for installing Windows 10.
- Select the Windows 10 installation media: Choose the installation media option that corresponds to your Windows 10 image. If you downloaded a Windows 10 ISO file, you can select the ISO file as the installation media for the virtual machine.
- Start the virtual machine: Launch the virtual machine and start it. The virtual machine will boot up and display the boot screen.
- Follow the Windows 10 installation process: The virtual machine will begin the Windows 10 installation process. Follow the on-screen prompts to select your language preferences, accept the license agreement, and choose the installation location.
- Customize settings: Customize any additional settings, such as region and keyboard layout, and set up a user account with a password for the Windows 10 installation.
- Wait for the installation to complete: Allow the installation process to complete. The virtual machine will restart as needed during the installation.
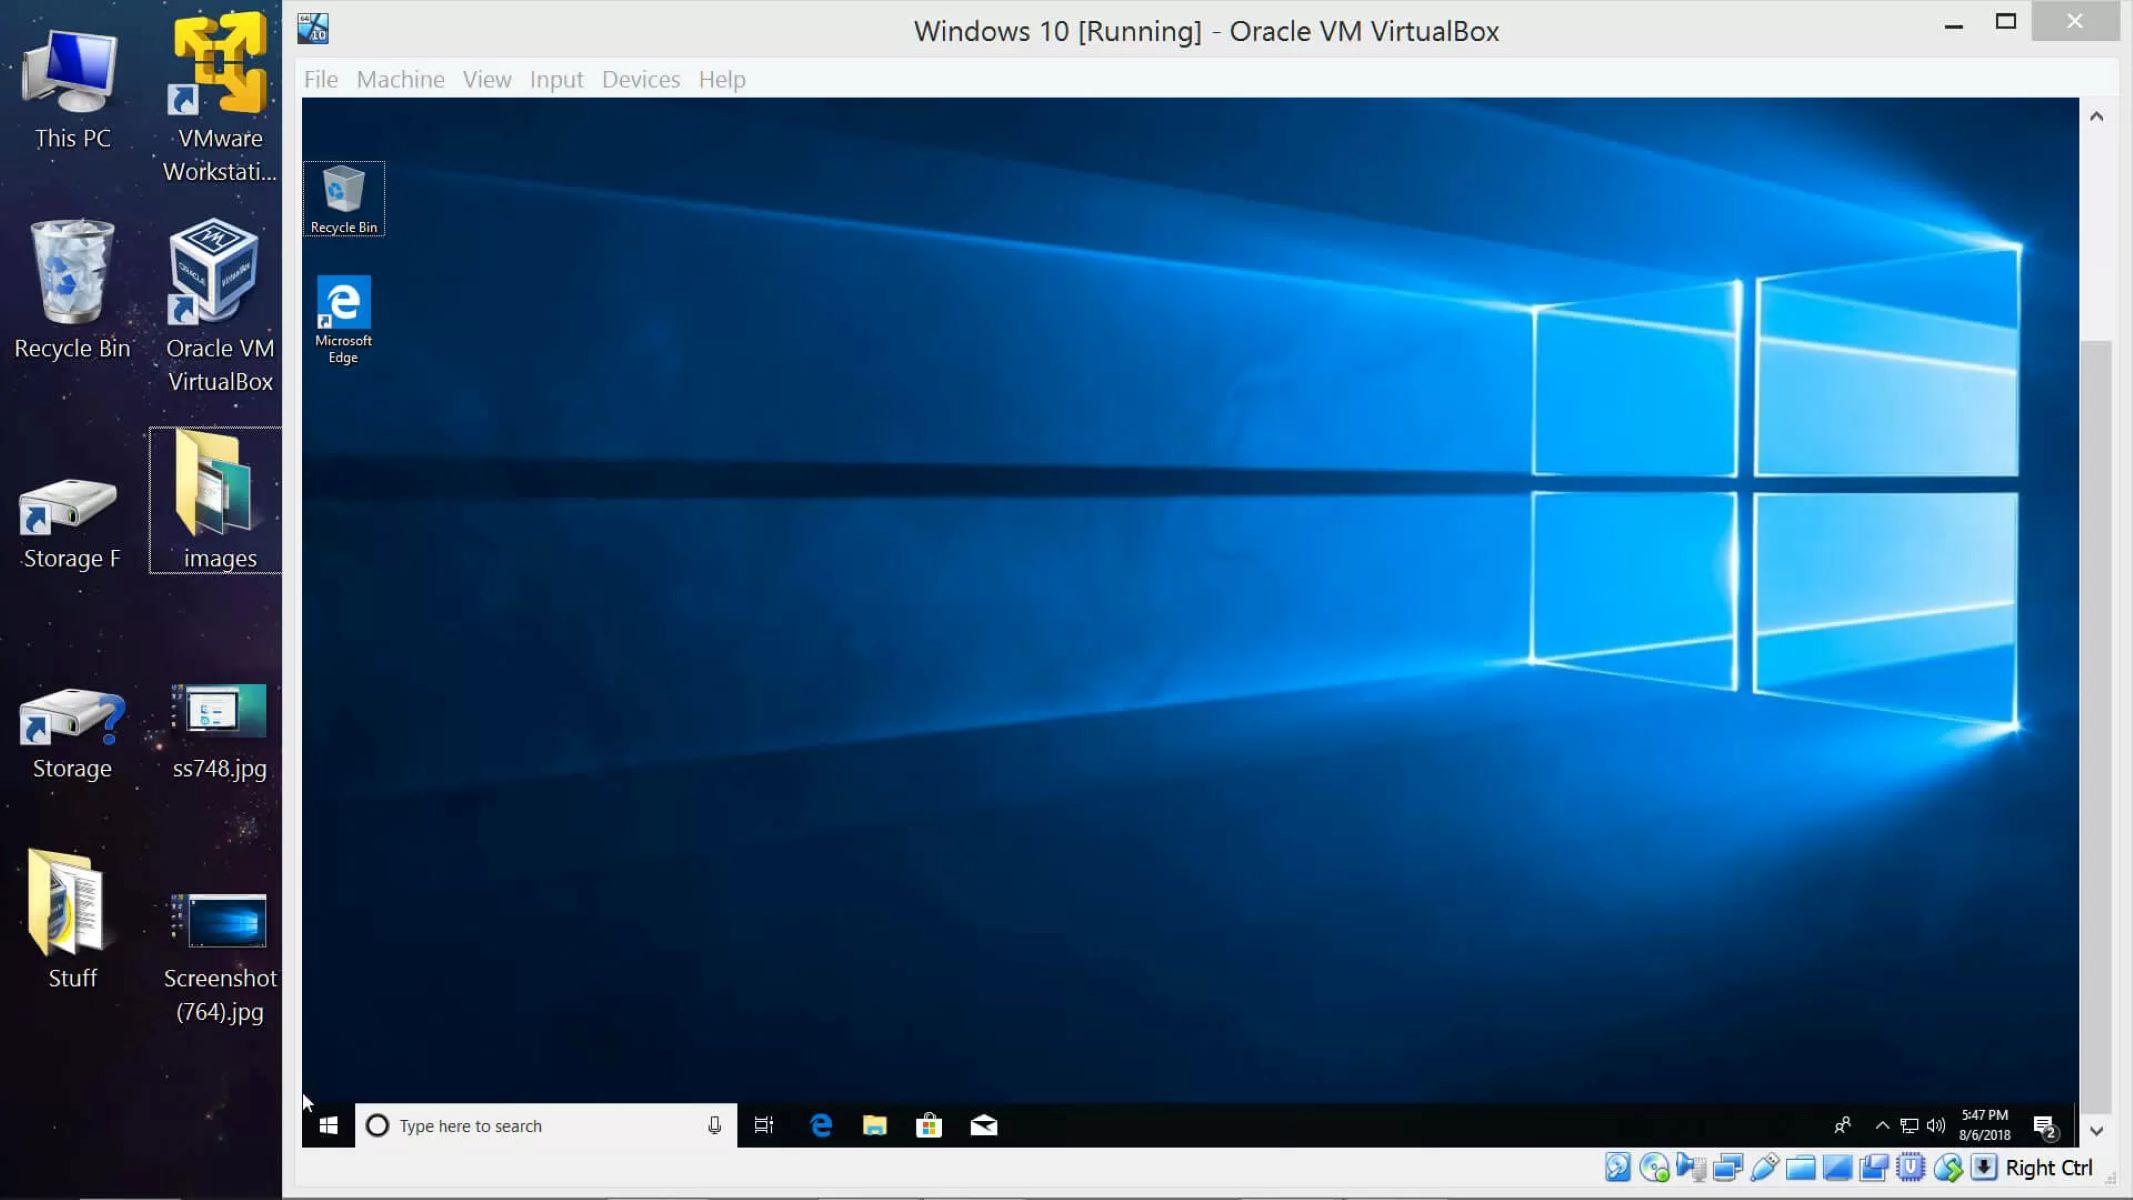
- Finalize the installation: Once the installation process is finished, the virtual machine will boot into the Windows 10 desktop. Follow the on-screen instructions to complete the initial setup, including configuring network settings and choosing privacy options.
- Install additional software and drivers: Install any additional software or drivers that are required for optimal performance or specific functionality within the virtual machine.
During the installation process, ensure that you provide the necessary information and make appropriate selections based on your preferences. It is also recommended to keep the Windows 10 product key handy to activate the operating system once the installation is complete.
Once Windows 10 is successfully installed on the virtual machine, you can begin using it as you would on a physical computer. Customize the settings, install necessary software, and enjoy the benefits of having a virtual Windows 10 environment.
Setting Up Windows 10 on the Virtual Machine
After installing Windows 10 on the virtual machine, there are a few essential steps to set it up properly. Follow these guidelines to complete the initial setup:
- Create a user account: During the initial setup, you will be prompted to create a user account. Provide the necessary details, including a username and password, to set up your account. This account will be used to log in to Windows 10 on the virtual machine.
- Customize system settings: Go through the system settings to customize your Windows 10 experience. Adjust settings related to privacy, notifications, power options, and appearance to suit your preferences.
- Connect to a network: Configure your network settings to connect the virtual machine to the internet or your local network. You can choose to connect via a wireless network or a wired connection, depending on your setup.
- Install essential software and updates: Install any necessary software or updates to enhance the functionality and security of your Windows 10 virtual machine. This may include drivers for hardware components, productivity tools, and security software.
- Set up backup and restore options: Configure backup and restore options to protect your data within the virtual machine. You can use built-in Windows 10 features or third-party backup software to create regular backups of your virtual machine’s data.
- Transfer files and folders: If you need to transfer files and folders from your host machine to the virtual machine, set up shared folders or use other file transfer methods supported by your virtual machine software.
- Install necessary software and applications: Install any specific software or applications you need within the Windows 10 virtual machine. This can include productivity software, development tools, or any other applications that are essential for your workflow.
- Configure security settings: Ensure that you have proper security measures in place within the virtual machine. This may involve setting up a firewall, installing antivirus software, and regularly updating Windows 10 to protect against security vulnerabilities.
Remember to tailor the settings and configurations to your specific needs and preferences. Take advantage of the flexibility provided by the virtual machine environment to optimize your Windows 10 experience.
Once you have completed the setup process, you can start using Windows 10 in the virtual machine as needed. Enjoy the benefits of running Windows 10 alongside your host operating system within the virtual machine environment.
Installing Virtual Machine Additions
After setting up Windows 10 on the virtual machine, it is recommended to install virtual machine additions or tools that are specific to the virtualization software you are using. These additions enhance the performance, functionality, and integration between the virtual machine and the host system. Here are the general steps for installing virtual machine additions:
- Launch the virtual machine: Start the virtual machine with Windows 10 running on it.
- Access the virtual machine additions menu: Look for a menu or toolbar within the virtual machine software that provides options related to virtual machine additions or tools.
- Click on “Install Virtual Machine Additions” or similar: Find and select the option to install virtual machine additions. This will typically mount a virtual CD or ISO image within the virtual machine.
- Run the installation file: Open the virtual CD or ISO image within the virtual machine and run the installation file provided by the virtual machine software.
- Follow the installation wizard: The installation wizard will guide you through the installation process. Read the instructions carefully and accept the terms and conditions if prompted.
- Restart the virtual machine: Once the installation is complete, restart the virtual machine for the changes to take effect.
- Configure additional settings (if required): Depending on the virtual machine software and virtual machine additions, you may need to configure additional settings. These can include options for enhanced graphics, shared folders, or improved integration features.
Virtual machine additions or tools differ depending on the virtualization software you are using. For example, in the case of Oracle VirtualBox, the additions package includes guest additions that provide additional drivers and features. VMware offers VMware Tools, which optimize guest OS performance and enhance integration with the host system.
Installing virtual machine additions improves the overall experience within the virtual machine environment. It enhances graphics performance, enables seamless integration between the host and virtual machines, and provides better hardware compatibility.
Ensure that you keep the virtual machine additions up to date by regularly checking for updates provided by the virtualization software vendor. By doing so, you can maximize the benefits of running Windows 10 on the virtual machine.
Configuring Virtual Machine Network Settings
Configuring the network settings for your virtual machine is essential to ensure proper connectivity and communication within the virtualized environment. Here are the steps to configure the network settings:
- Open the virtual machine settings: Launch the virtual machine software and access the settings for the specific virtual machine you want to configure.
- Select the Network settings: Find the network settings option within the virtual machine software. This may be labeled as “Network Adapter” or “Network Configuration.”
- Choose the network mode: Select the network mode that best suits your requirements. The options typically include:
- Bridged: This mode allows the virtual machine to connect directly to the physical network, obtaining its IP address from the network DHCP server. The virtual machine will appear as a separate entity on the network.
- NAT: Network Address Translation (NAT) creates a virtual network between the host and virtual machine, allowing the virtual machine to access the internet through the host’s network connection. The virtual machine will have a separate IP address within the NAT network range.
- Host-only: Host-only networking allows communication between the virtual machine and the host system but restricts external network access. This mode is useful for local development environments or isolated testing.
- Configure advanced settings (if applicable): Depending on the virtual machine software, you may have additional options to configure advanced network settings. These can include assigning a static IP address, configuring port forwarding, or setting up virtual network adapters.
- Apply the network settings: After adjusting the network settings according to your requirements, save the changes and exit the virtual machine settings.
- Test the network connectivity: Start the virtual machine and test the network connectivity. Verify that the virtual machine can connect to the internet, access local resources, and communicate with other devices on the network if necessary.
The network configuration for the virtual machine depends on your specific needs and the purpose of the virtualized environment. Consider the requirements of the guest operating system and any applications running on the virtual machine when deciding which network mode to use.
Understanding and configuring the network settings correctly ensures that your virtual machine can seamlessly connect to the network and access resources as needed.
If you encounter any network-related issues, refer to the documentation or support resources provided by the virtual machine software vendor for troubleshooting assistance.
Enabling Shared Folders in the Virtual Machine
Shared folders provide a convenient way to share files and data between the host system and the virtual machine. Enabling shared folders allows you to access and manipulate files seamlessly within the virtualized environment. Follow these steps to enable shared folders:
- Ensure the virtual machine is running: Start the virtual machine with the guest operating system that you want to enable shared folders for.
- Open the virtual machine settings: Within the virtual machine software, access the settings for the specific virtual machine you want to configure.
- Navigate to shared folders settings: Look for the shared folders or shared folders settings option within the virtual machine software. This may be located under the “Tools” or “Shared” section.
- Add a shared folder: Click on the “Add” or “Add Folder” button and browse for the folder you want to share from the host system. Select the folder and specify a name for the shared folder within the virtual machine.
- Choose the sharing options: Specify the sharing options for the shared folder. You can typically choose between read-only access or read-write access for the files contained within the shared folder.
- Apply the shared folder settings: Once you have added the shared folder and configured the desired sharing options, save the settings and exit the virtual machine settings.
- Access the shared folder within the virtual machine: Start the virtual machine and navigate to the shared folder location within the guest operating system. The shared folder should appear as a network drive or a mounted folder, depending on the virtual machine software and the guest operating system.
- Transfer files between the host and virtual machine: Move files or data between the host and virtual machine by copying them to and from the shared folder. Changes made to shared files within either the host or virtual machine will be reflected in both environments.
Shared folders provide a convenient way to exchange files and data seamlessly between the host and virtual machine. It simplifies tasks such as file transfer, collaborative work, and sharing resources between the two environments.
Ensure that you have proper permissions set up on the host system for the shared folder to avoid any access or permission issues within the virtual machine.
If you encounter any issues with shared folders, refer to the documentation or support resources provided by the virtual machine software vendor for troubleshooting assistance.
Tips for Efficiently Operating a Virtual Machine
Operating a virtual machine efficiently is crucial to ensure optimal performance, resource utilization, and a seamless experience. Consider the following tips to make the most out of your virtual machine:
- Allocate appropriate resources: Allocate resources such as memory (RAM), CPU cores, and storage space based on the requirements of the guest operating system and applications running within the virtual machine. Avoid over-allocating resources that may impact the performance of the host system.
- Regularly update the virtual machine software: Keep the virtual machine software up to date with the latest updates and patches provided by the vendor. This ensures compatibility, bug fixes, and security improvements.
- Take advantage of snapshots: Utilize the snapshot feature to capture the state and configuration of the virtual machine at a specific point in time. This allows you to experiment with different configurations or revert back to a known-working state if issues arise.
- Manage virtual machine backups: Implement regular backups of your virtual machine, including the virtual hard disk files and important data within the guest operating system. This helps safeguard against data loss in case of hardware failures or software issues.
- Optimize virtual machine networking: Configure networking settings to suit your needs, taking into account factors such as security, performance, and connectivity requirements. Regularly review and update network configurations to ensure efficient communication and access.
- Use integration features: Take advantage of integration features provided by the virtual machine software to enhance the interaction between the host and virtual machine. This may include shared clipboard, drag-and-drop functionality, or seamless file sharing.
- Monitor resource usage: Keep an eye on resource consumption within the virtual machine. Use monitoring tools to identify any resource bottlenecks or performance issues. Adjust resource allocation as needed to optimize performance.
- Secure the virtual machine: Implement security measures within the virtual machine, including regular updates, antivirus software, and secure network configurations. Treat the virtual machine as you would a physical machine in terms of security precautions.
- Regularly optimize and maintain the virtual machine: Perform periodic maintenance tasks such as disk defragmentation, disk cleanup, and system optimization within the virtual machine to keep it running smoothly.
- Stay informed and seek assistance if needed: Stay updated with the latest virtualization trends, best practices, and software features. Consult online resources, forums, and vendor documentation for guidance and seek assistance from support channels when encountering complex issues.
By following these tips, you can ensure efficient operation of your virtual machine, maximize its performance, and provide a stable and productive environment for your work or testing needs.
Remember, efficient management of a virtual machine requires ongoing monitoring, maintenance, and periodic adjustments to optimize resource allocation and performance based on changing requirements and workloads.
Conclusion
Setting up a virtual machine with Windows 10 provides a flexible and efficient solution for running multiple operating systems on a single physical machine. By following the steps outlined in this guide, you can successfully create a virtual machine, configure its settings, install Windows 10, and optimize its performance. Whether you are a developer looking to test software on different platforms, a system administrator managing multiple environments, or a user needing to run specific applications, virtual machines offer numerous benefits.
Remember to allocate the appropriate resources to your virtual machine, ensuring optimal performance while avoiding overloading your host system. Take advantage of features such as snapshots and backups to safeguard your virtual machine and easily recover from any issues. Secure your virtual machine by implementing regular updates, antivirus software, and secure network configurations.
Efficiently operating a virtual machine also involves regularly updating the virtual machine software, utilizing integration features to enhance interaction with the host system, and monitoring resource usage to identify and address any bottlenecks. Additionally, configuring network settings and enabling shared folders optimize connectivity and facilitate seamless file sharing between the virtual machine and the host.
By implementing these tips and best practices, you can make the most of your virtual machine environment, increasing productivity, scalability, and flexibility to meet your specific needs. Explore the possibilities that virtual machines offer and take advantage of the opportunities they provide for efficient multitasking, software development, testing, and running multiple operating systems simultaneously.
With the knowledge gained from this guide, you are equipped to embark on your virtual machine journey with Windows 10. Enjoy the benefits of running a virtual machine and leverage its capabilities to enhance your computing experience and achieve your desired goals.