What is Virtualization?
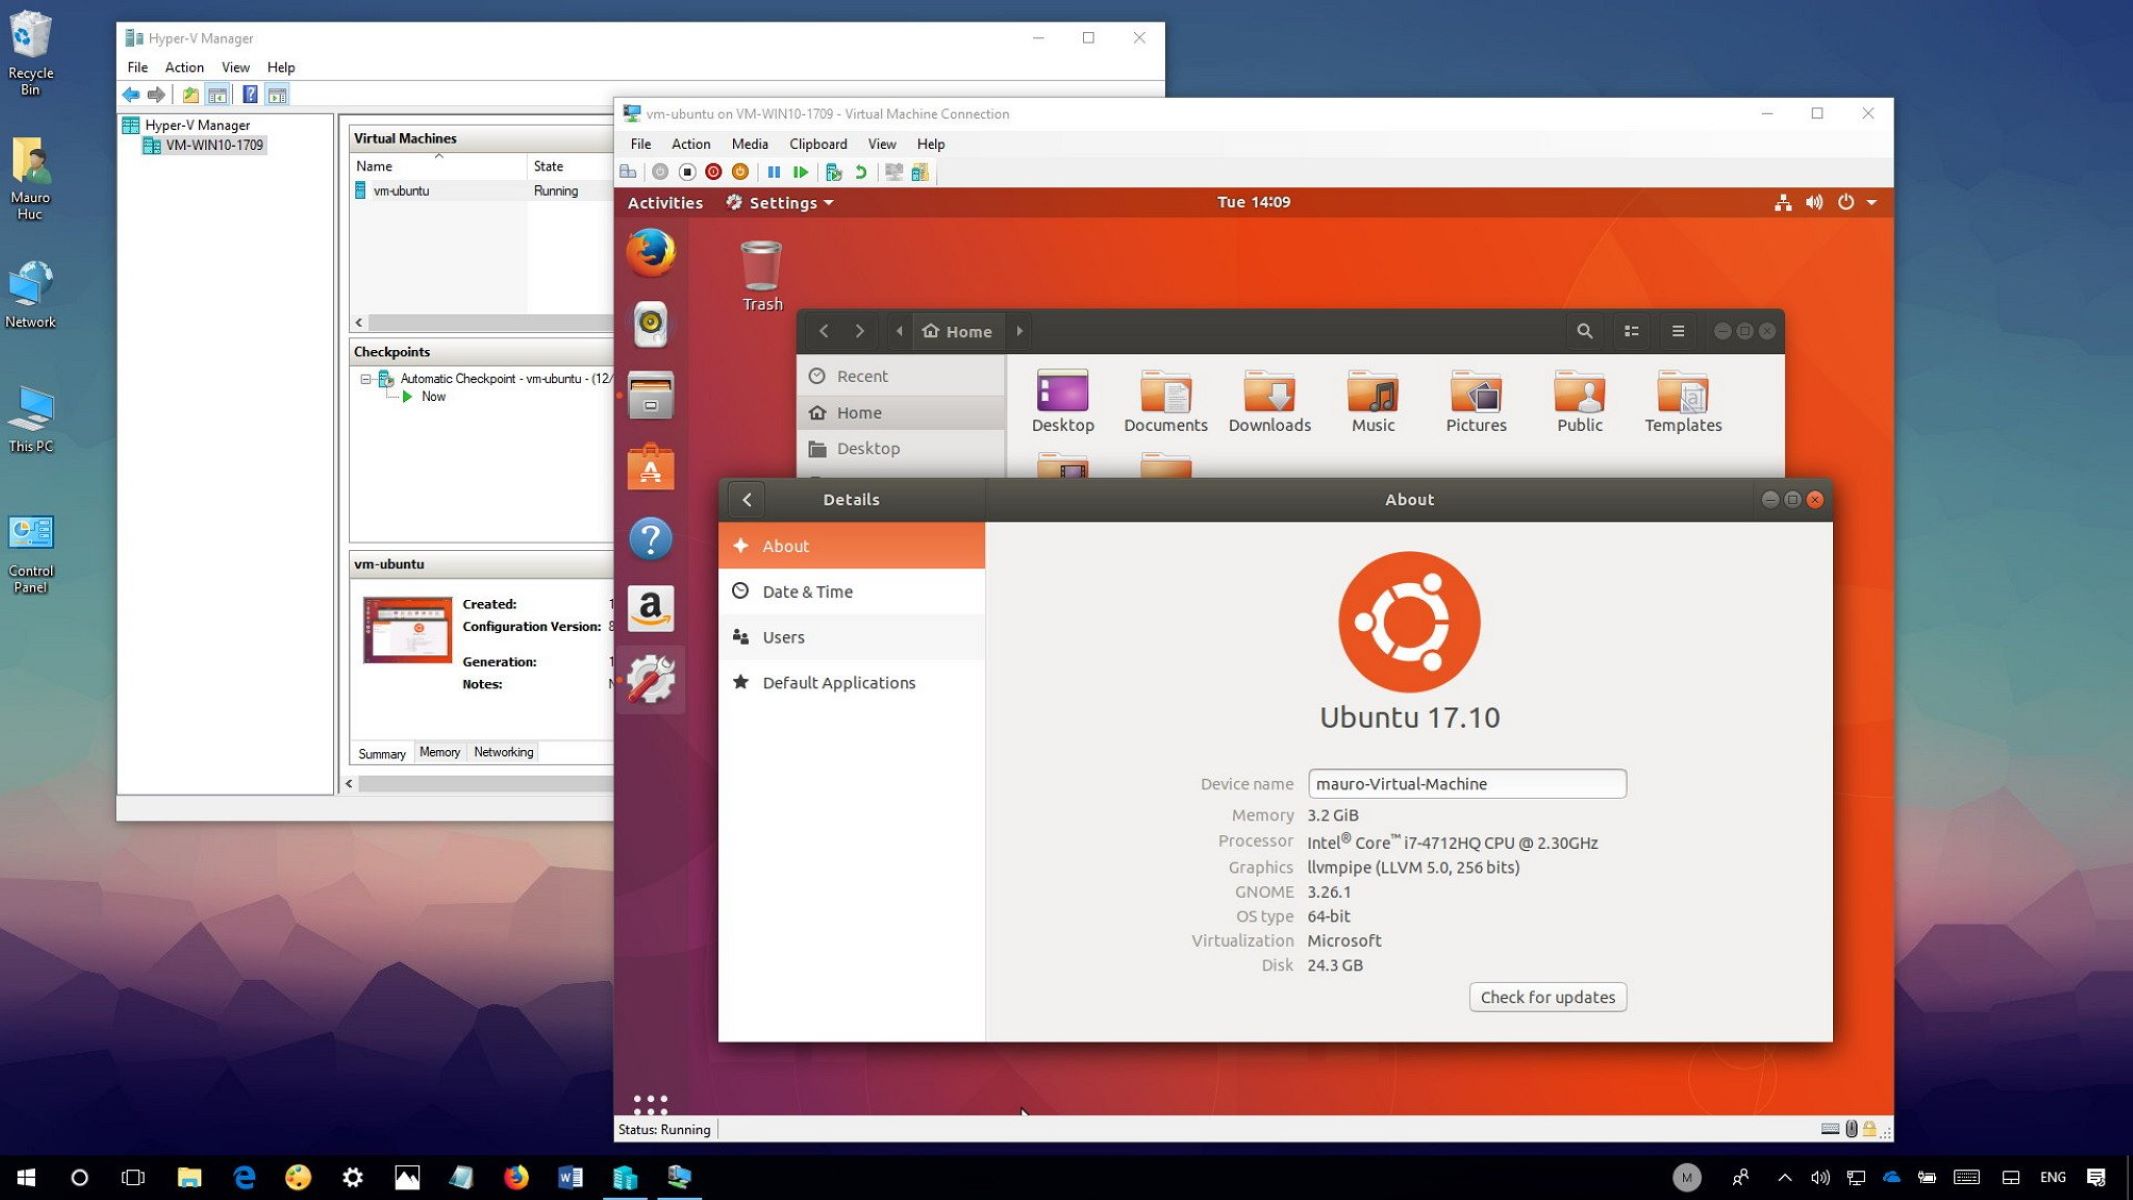
Virtualization is a technology that allows multiple virtual instances of an operating system and applications to run on a single physical computer. It enables you to create a virtual environment within your computer, where you can install and run different operating systems and applications without the need for separate physical hardware.
At its core, virtualization separates the software layer from the underlying hardware, allowing multiple operating systems and applications to run independently on the same physical machine. This is achieved through a virtualization software called a hypervisor or virtual machine monitor (VMM), which abstracts the hardware resources and presents them to each virtual instance.
There are several types of virtualization, including full virtualization, where the guest operating systems are not aware that they are running in a virtual environment, and para-virtualization, where the guest operating systems are modified to be aware of the virtualization layer.
Virtualization offers numerous benefits for both individuals and organizations. It allows you to consolidate multiple physical machines into a single server, reducing hardware costs and energy consumption. Additionally, it enables you to optimize resource allocation, improve scalability, and enhance system administration and maintenance.
Virtualization is widely used in various fields, including server virtualization, desktop virtualization, and application virtualization. In server virtualization, multiple virtual machines (VMs) can be created to run different server applications, optimizing server utilization and reducing hardware requirements. Desktop virtualization, on the other hand, enables the creation and management of virtual desktop infrastructure (VDI), allowing users to access their desktop environment from any device. Application virtualization allows applications to run in isolation from the underlying operating system, simplifying application deployment and reducing compatibility issues.
In summary, virtualization is a powerful technology that provides flexibility, efficiency, and cost savings. By enabling multiple virtual instances on a single physical machine, it allows you to maximize the utilization of hardware resources and streamline IT operations. Whether you are an individual user or part of an organization, understanding and enabling virtualization can greatly enhance your computing experience and unlock new possibilities.
Why Enable Virtualization?
Enabling virtualization on your computer can bring numerous benefits and open up a wide range of possibilities. Whether you are an individual user or part of an organization, here are some compelling reasons why you should consider enabling virtualization:
1. Run Multiple Operating Systems: With virtualization, you can create virtual instances of different operating systems and run them simultaneously on a single physical machine. This is particularly useful for software developers, IT professionals, or enthusiasts who need to test applications or work with different operating systems without the need for separate hardware.
2. Enhanced Hardware Utilization: By enabling virtualization, you can optimize the usage of hardware resources. Instead of having multiple physical machines for each operating system or application, virtualization allows you to consolidate them onto a single server or computer. This leads to better utilization of hardware, reduced energy consumption, and cost savings.
3. Streamlined Development and Testing: Virtualization provides a sandboxed environment where you can create isolated virtual machines for development and testing purposes. You can easily set up different configurations, experiment with software, and test compatibility without affecting your primary operating system or risking any data loss.
4. Simplified IT Infrastructure: For organizations, virtualization offers the ability to streamline IT infrastructure management. By consolidating multiple servers or desktops onto a few powerful machines, you can reduce hardware complexity, improve scalability, and simplify system administration tasks. This leads to lower maintenance costs and increased operational efficiency.
5. Disaster Recovery and Business Continuity: Virtualization plays a crucial role in disaster recovery and business continuity strategies. By creating virtual machine backups and replicating them to offsite locations, you can quickly restore critical systems and applications in the event of a hardware failure or disaster. This ensures minimal downtime and maximum uptime for business operations.
6. Flexibility and Mobility: Virtualization enables the creation of virtual desktop environments or remote desktop sessions. This allows users to access their desktop, applications, and data from any device, anywhere, and at any time. It provides flexibility and mobility, making it easier for remote workers or individuals on the go to stay productive and connected.
7. Improved Security: Virtualization can enhance the security of your computing environment. By isolating different operating systems and applications in their own virtual machines, you can mitigate the risk of malware infections or unauthorized access spreading across your entire system. It also provides the ability to take snapshots of virtual machines, allowing you to easily revert to a previous state if any security issues arise.
Enabling virtualization on your computer is a straightforward process and can usually be done through the BIOS/UEFI settings or the Task Manager in Windows 10. By harnessing the power of virtualization, you can unlock new potential and enjoy the advantages it brings to your computing experience.
Checking Virtualization Support in Windows 10
Before enabling virtualization on your Windows 10 computer, it is important to check if your hardware and operating system support virtualization. Here are some methods to verify virtualization support:
1. Task Manager: The easiest way to check virtualization support is through the Task Manager. Right-click on the taskbar and select “Task Manager” from the menu. In the Task Manager window, go to the “Performance” tab. If your system supports virtualization, you will see the “Virtualization” section with information on virtualization support for your CPU.
2. System Information: Another method is to use the System Information tool. Press the Windows key + R to open the Run dialog box, then type “msinfo32” and hit Enter. In the System Information window, navigate to “System Summary” and look for the “Virtualization Enabled” under the “System Firmware” section. If it says “Yes”, then virtualization is supported.
3. BIOS/UEFI Settings: Virtualization is typically enabled or disabled in the BIOS or UEFI settings of your computer. To access these settings, restart your computer and look for the key or combination of keys to enter the BIOS/UEFI setup. The key may vary depending on your computer manufacturer (common keys include F2, Del, or Esc). Once in the BIOS/UEFI settings, look for virtualization options under CPU settings or system configuration. Enable virtualization if it is disabled.
4. CPU Documentation: If you know the model of your CPU, you can check the manufacturer’s documentation or website to confirm if virtualization is supported. Look for the specifications or features section and see if it mentions virtualization (Intel virtualization Technology, AMD-V, or VT-x/AMD-V).
5. Third-Party Tools: There are also third-party tools available that can provide detailed information about your system’s virtualization support. Programs like CPU-Z and Speccy can display CPU features, including virtualization support.
It is important to note that not all CPUs and Windows 10 editions support virtualization. Some older processors or budget-oriented CPUs might not have virtualization support. Additionally, virtualization features might be disabled by default in the BIOS/UEFI settings, so it’s essential to check and enable them if necessary.
Once you have confirmed that your system supports virtualization, you can proceed to enable virtualization through the BIOS/UEFI settings or the Task Manager. Enabling virtualization will unlock the ability to run virtual machines and enjoy the benefits of virtualization technology.
Enabling Virtualization in BIOS/UEFI Settings
If you have confirmed that your system supports virtualization and want to enable it, you can do so through the BIOS/UEFI settings. The process may vary slightly depending on your computer’s manufacturer and BIOS version, but the general steps are as follows:
1. Restart Your Computer: Begin by restarting your computer. As it starts up, pay attention to the screen or look for a message indicating the key or combination of keys required to enter the BIOS/UEFI setup. Common keys to access the BIOS/UEFI setup are F2, Del, or Esc, but it may vary depending on your computer model.
2. Enter the BIOS/UEFI Setup: After pressing the appropriate key, you will enter the BIOS/UEFI setup utility. The exact layout and options may vary, but you should look for a section related to CPU settings or system configuration.
3. Locate Virtualization Options: Within the CPU settings or system configuration section, search for options related to virtualization. The terminology used may differ, but commonly you will find options such as “Virtualization Technology (VT-x)” for Intel CPUs or “AMD Virtualization (AMD-V)” for AMD CPUs. These options may be labeled as “Enable,” “On,” or a similar term.
4. Enable Virtualization: Once you have located the virtualization options, use the arrow keys to highlight the option and press Enter. A new menu will appear with options to enable or disable virtualization. Select the option to enable virtualization and press Enter to save the changes.
5. Save and Exit: After enabling virtualization, navigate to the exit menu within the BIOS/UEFI setup utility. Select the option to “Save and Exit” or a similar term. This will save the changes you made and exit the BIOS/UEFI setup.
After enabling virtualization in the BIOS/UEFI settings, your computer will now be ready to run virtual machines and take advantage of virtualization technology. Please note that depending on your system, you may need to reinstall or update virtualization software or hypervisors for optimal performance and compatibility.
If you are unsure about any of the steps or settings within the BIOS/UEFI setup, it is recommended to consult your computer’s documentation or the manufacturer’s website for specific instructions or guidance.
Once you have successfully enabled virtualization in the BIOS/UEFI settings, you can proceed to create and run virtual machines, install different operating systems, and enjoy the benefits of virtualization technology.
Enabling Virtualization in Windows 10 using Task Manager
If you have confirmed that your hardware supports virtualization but want a simpler way to enable it without accessing the BIOS/UEFI settings, you can utilize the Task Manager in Windows 10. Here’s how you can enable virtualization using Task Manager:
1. Open Task Manager: Right-click on the taskbar and select “Task Manager” from the context menu that appears. Alternatively, you can press Ctrl + Shift + Esc to directly open the Task Manager.
2. Check Virtualization Support: In the Task Manager window, click on the “Performance” tab. Look for the “CPU” section and check if it displays “Virtualization: Disabled” or “Virtualization: Off.”
3. Open Virtualization Options: To enable virtualization, click on “Open Resource Monitor” at the bottom of the Task Manager window. This will open the Resource Monitor window.
4. Navigate to the CPU Tab: In the Resource Monitor window, go to the “CPU” tab. Here, you will find detailed information about your CPU, including virtualization support.
5. Enable Virtualization: Look for the “Virtualization” section in the CPU tab. If virtualization is currently disabled, you will see a red “No” in the “Virtualization” column. To enable virtualization, right-click on this section and select “Enable” from the context menu.
6. Confirm Changes: After enabling virtualization, a confirmation dialog box will appear. Read the message carefully, as it may prompt you to restart your computer for the changes to take effect. Click “Yes” to proceed with enabling virtualization.
7. Restart Your Computer: Once you have confirmed the changes, it is recommended to restart your computer for the virtualization settings to be fully applied.
Enabling virtualization through the Task Manager is a convenient method, especially for individuals who are not comfortable accessing the BIOS/UEFI settings or prefer a simpler approach. However, keep in mind that some older versions of Windows 10 or certain editions may not have this option available in the Task Manager.
If, after following these steps, virtualization is still not enabled, it is possible that your hardware does not fully support virtualization or that it is permanently disabled in the BIOS/UEFI settings. In such cases, you may need to refer to your computer’s documentation or contact the manufacturer for further assistance.
Once virtualization is successfully enabled, you can take advantage of virtualization software and run multiple operating systems or applications simultaneously on your Windows 10 computer. Virtualization opens up a world of possibilities for testing, development, and running diverse software environments all within a single machine.
Troubleshooting Common Issues
While enabling virtualization on your Windows 10 computer is generally a straightforward process, you may encounter some common issues along the way. Here are some troubleshooting tips for addressing these issues:
1. Virtualization Not Supported: If you find that virtualization is not supported on your hardware, it could be due to an older processor or certain budget-oriented CPUs. Unfortunately, in such cases, enabling virtualization may not be possible. You might consider upgrading your hardware to a more capable processor that supports virtualization.
2. Virtualization Disabled in BIOS/UEFI: If virtualization support is available but disabled in the BIOS/UEFI settings, you need to enter the BIOS/UEFI setup, locate the virtualization options, and enable them. Ensure that you save the changes before exiting the BIOS/UEFI setup utility.
3. Inadequate BIOS/UEFI Version: If your computer’s BIOS/UEFI version is outdated, it might lack necessary virtualization features or have compatibility issues. Check the manufacturer’s website for any BIOS/UEFI updates specific to your computer model and install the latest version recommended for virtualization support.
4. Security Software Restrictions: Some security software, such as antivirus or firewall programs, might interfere with virtualization. Temporarily disabling or adjusting the settings of these security programs can help in enabling virtualization. However, exercise caution and ensure that you understand the potential security impact of these adjustments.
5. Windows 10 Edition Limitations: Virtualization capabilities may vary depending on the edition of Windows 10 you are using. The Home edition, for example, may have limitations compared to the Pro or Enterprise editions. Verify that you are using a version of Windows 10 that supports virtualization features, as some functionalities may not be available in certain editions.
6. Hardware Compatibility: Ensuring that your hardware components, such as the CPU, motherboard, and RAM, are compatible with virtualization is essential. Incompatibility issues may arise if your hardware does not meet the requirements for virtualization support. Refer to the specifications and documentation of your hardware to confirm compatibility.
7. Conflicting Virtualization Software: If you have previously installed virtualization software, such as VMware or VirtualBox, conflicts may arise when trying to enable virtualization through the Task Manager or BIOS/UEFI settings. Uninstalling or updating the virtualization software might resolve these conflicts and enable the system’s virtualization capabilities.
If you continue to experience issues despite following these troubleshooting steps, it can be beneficial to seek assistance from technical support forums, your computer manufacturer, or a professional technician who specializes in virtualization.
By addressing and resolving these common issues, you can ensure a seamless experience in enabling virtualization on your Windows 10 computer, allowing you to take full advantage of the benefits of virtual machine environments.
Conclusion
Enabling virtualization in Windows 10 opens up a world of possibilities, allowing you to run multiple operating systems and applications on a single physical machine. Whether you’re a software developer, an IT professional, or simply an enthusiast looking to experiment with different software environments, virtualization offers numerous benefits.
We began by understanding what virtualization is and how it separates the software layer from the underlying hardware. With virtualization, you can create a virtual environment within your computer, optimizing hardware utilization and reducing costs. We also explored the different types of virtualization, including server, desktop, and application virtualization, and the advantages they offer.
Next, we discussed the importance of checking virtualization support in Windows 10. Through the Task Manager, you can easily confirm if your hardware supports virtualization without accessing the BIOS/UEFI settings. If virtualization is not enabled, we provided instructions on how to enable it through the BIOS/UEFI settings or the Task Manager.
In addition, we offered troubleshooting tips for common issues that may arise during the virtualization process. These issues include hardware limitations, BIOS/UEFI settings, security software conflicts, and Windows 10 edition limitations. By addressing these issues, you can overcome obstacles and successfully enable virtualization on your computer.
Enabling virtualization enhances your computing experience by providing flexibility, efficiency, and cost savings. It allows you to run multiple operating systems and applications simultaneously, simplifies IT infrastructure management, enables streamlined development and testing, and ensures better resource utilization.
Virtualization has revolutionized the way we use computers and offers endless possibilities for both individuals and organizations. By harnessing the power of virtualization in Windows 10, you can unlock new potentials and take your computing capabilities to the next level.
So, go ahead and enable virtualization on your Windows 10 computer, whether it’s through the BIOS/UEFI settings or using the Task Manager. Embrace the flexibility, efficiency, and countless opportunities that virtualization brings, and explore a whole new world of computing possibilities.


