Introduction
Welcome to our guide on how to set up macOS 10.14 Mojave in VMware Workstation Pro 12! If you’re an avid macOS user or simply curious to explore the features and functionalities of Mojave, this guide will walk you through the step-by-step process of installing and configuring macOS 10.14 Mojave on a virtual machine using VMware Workstation Pro 12.
Running macOS on a virtual machine allows you to experience the power and versatility of the operating system without the need for a dedicated Mac machine. Whether you’re a developer who wants to test applications on different operating systems or a Windows user who wants to delve into the world of macOS, VMware Workstation provides a convenient and efficient platform for virtualization.
Before we get started, it’s important to note that this guide is intended for educational and testing purposes only. It is not meant as a substitute for owning a genuine Mac computer. Additionally, running macOS on a virtual machine may have certain limitations, as it relies on your computer’s hardware resources to emulate the Mac environment.
Throughout this guide, we will cover all the necessary steps required to set up macOS 10.14 Mojave in VMware Workstation Pro 12. We will start by discussing the system requirements and downloading the macOS 10.14 Mojave image. Next, we will guide you through the installation of VMware Workstation Pro 12 and the creation of a new virtual machine. We will then proceed with the installation of macOS 10.14 Mojave and configuring the virtual machine settings.
Finally, we will wrap up the guide by explaining how to install VMware Tools on macOS 10.14 Mojave, which will ensure optimal performance and functionality of the virtual machine. So, without further ado, let’s dive in and explore the process of setting up macOS 10.14 Mojave in VMware Workstation Pro 12!
System Requirements
Before proceeding with the installation of macOS 10.14 Mojave in VMware Workstation Pro 12, it’s important to ensure that your computer meets the necessary system requirements. This will ensure a smooth and efficient virtualization experience. Here are the recommended system requirements:
- Operating System: Windows 10 or later
- Processor: Intel Core i3 or higher
- RAM: Minimum of 8GB (16GB or more is recommended for optimal performance)
- Hard Disk Space: Minimum of 50GB free space
- Graphics Card: Supports DirectX 11 or later with at least 2GB of VRAM
- Virtualization Technology: Enabled in BIOS
It’s also important to note that running macOS on a virtual machine may require additional resources, depending on the applications and processes you intend to run. If you plan on using resource-intensive applications or running multiple virtual machines simultaneously, you may need to allocate additional resources to ensure optimal performance.
In addition to the system requirements, you will need to download a macOS 10.14 Mojave image file (also referred to as an ISO image). This can be obtained from the Apple Developer website or other reliable sources. Make sure to choose a reputable source to ensure the integrity and authenticity of the image file.
With the system requirements met and the macOS 10.14 Mojave image file ready, you are now ready to proceed with the installation of VMware Workstation Pro 12 and the creation of a new virtual machine. Please note that the process may vary slightly depending on the version of VMware Workstation you are using, but the overall steps should remain similar.
We hope this section has provided you with a clear understanding of the system requirements necessary to run macOS 10.14 Mojave in VMware Workstation Pro 12. Let’s move on to the next section, where we’ll explore the process of downloading the macOS 10.14 Mojave image.
Downloading macOS 10.14 Mojave
In order to install macOS 10.14 Mojave in VMware Workstation Pro 12, you will need to have a macOS 10.14 Mojave image file. This image file contains the necessary installation files for macOS 10.14 Mojave and will serve as the basis for creating your virtual machine.
To obtain the macOS 10.14 Mojave image file, there are a few different methods you can use:
- Download from the Apple Developer website: If you have access to an Apple Developer account, you can download the macOS 10.14 Mojave image file directly from the Apple Developer website. Simply sign in to your account, navigate to the Downloads section, and search for the macOS Mojave installer. Once you locate it, click the download button to begin the download process. Please note that you will need a valid Apple Developer account and membership to access this method.
- Download from reliable third-party sources: If you don’t have an Apple Developer account or prefer to obtain the macOS 10.14 Mojave image file from another source, there are reliable third-party websites that offer the image file for download. Make sure to choose a reputable source to ensure the integrity and authenticity of the image file. It is important to exercise caution when downloading files from the internet to avoid any potential security risks.
Once you have obtained the macOS 10.14 Mojave image file, you can proceed with the installation of VMware Workstation Pro 12 and the creation of a new virtual machine. In the next section, we will guide you through the installation process of VMware Workstation Pro 12, which will serve as the virtualization platform for running macOS 10.14 Mojave.
We recommend saving the macOS 10.14 Mojave image file in a location on your computer where you can easily access it during the virtual machine creation process. Additionally, make sure that the image file is intact and hasn’t been corrupted during the download process. This can be verified by checking the file size and comparing it to the official file size provided by the source from which you downloaded it.
With the macOS 10.14 Mojave image file in hand, you are now ready to proceed with the installation of VMware Workstation Pro 12. Let’s move on to the next section where we will guide you through the process.
Installing VMware Workstation Pro 12
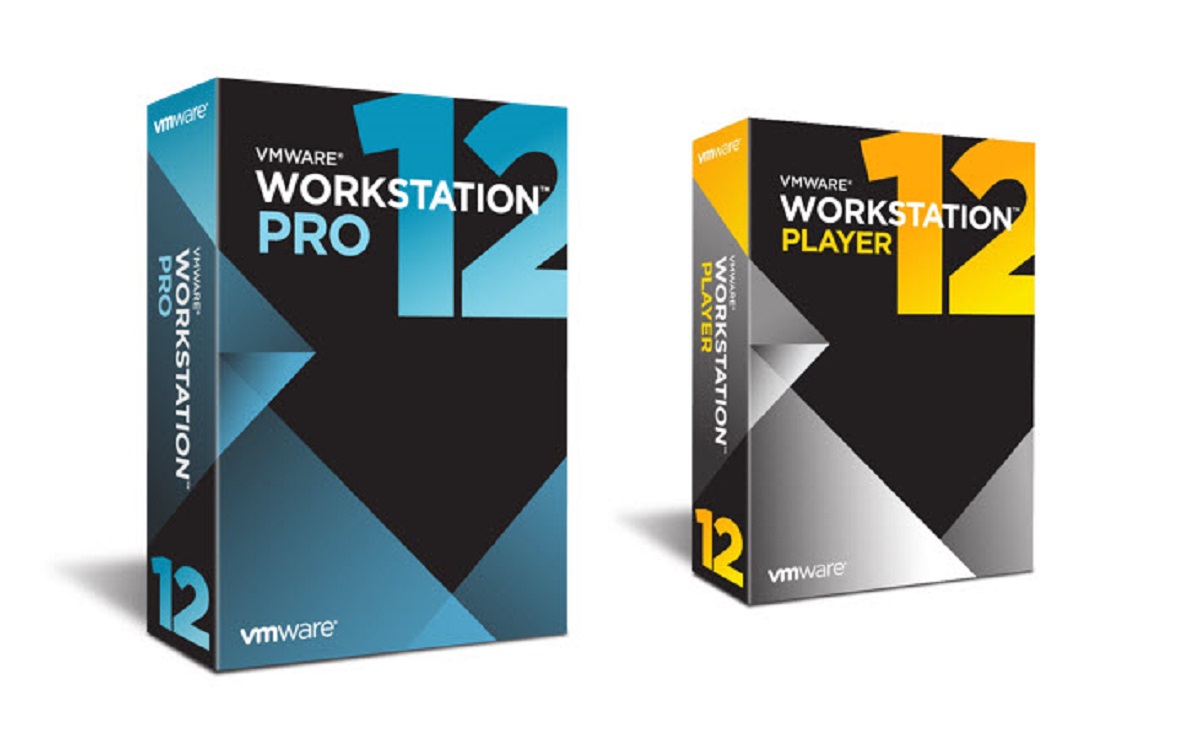
In order to run macOS 10.14 Mojave in a virtual machine, you’ll need to have VMware Workstation Pro 12 installed on your computer. VMware Workstation Pro is a powerful virtualization software that allows you to create and run multiple virtual machines on your Windows or Linux operating system.
To install VMware Workstation Pro 12, follow these steps:
- Download the installer: Visit the official VMware website and navigate to the Downloads section. Look for the VMware Workstation Pro 12 installer and click on the download button. Make sure to download the appropriate version for your operating system.
- Run the installer: Once the installation file is downloaded, locate it on your computer and double-click on it to run the installer. This will launch the VMware Workstation Pro 12 installation wizard.
- Accept the license agreement: Read the license agreement carefully and click on the “I accept the terms” option to proceed with the installation.
- Choose the installation location: Select the destination location where you want to install VMware Workstation Pro 12. You can choose the default location or choose a different directory by clicking on the “Browse” button.
- Select the installation type: VMware Workstation Pro 12 offers two installation types: “Typical” and “Custom”. For most users, the “Typical” installation type is recommended as it installs VMware Workstation Pro 12 with the default settings. If you want to customize the installation, you can choose the “Custom” installation type.
- Configure additional settings: If you selected the “Custom” installation type, you will be presented with additional options to configure during the installation process. Review and choose the desired options based on your requirements.
- Start the installation: Once you have selected the installation type and configured any additional settings, click on the “Install” button to begin the installation process. The installer will then copy the necessary files and components to your computer.
- Complete the installation: Once the installation is complete, click on the “Finish” button. This will finalize the installation process of VMware Workstation Pro 12 on your computer.
After successfully installing VMware Workstation Pro 12, you are now ready to proceed with creating a new virtual machine and installing macOS 10.14 Mojave. In the next section, we will guide you through the process of creating a new virtual machine in VMware Workstation Pro 12.
By following these steps, you will have VMware Workstation Pro 12 installed on your computer, which is the essential platform required to run macOS 10.14 Mojave in a virtual machine. Move on to the next section to learn how to create a new virtual machine in VMware Workstation Pro 12.
Creating a New Virtual Machine in VMware Workstation Pro 12
Now that you have VMware Workstation Pro 12 installed on your computer, it’s time to create a new virtual machine where you’ll install macOS 10.14 Mojave. Follow these steps to create a new virtual machine:
- Launch VMware Workstation Pro 12: Open the VMware Workstation Pro 12 application from your desktop or start menu.
- Create a new virtual machine: Click on the “Create a New Virtual Machine” option in the welcome screen or go to the “File” menu and select “New Virtual Machine.”
- Choose the installation method: In the New Virtual Machine Wizard, select the “Typical (recommended)” option and click “Next.”
- Select the ISO image: Choose the “Installer disc image file (iso)” option and browse to locate the macOS 10.14 Mojave image file you downloaded earlier. Click “Next” to proceed.
- Enter the virtual machine name: Provide a name for your virtual machine, such as “macOS 10.14 Mojave.” Choose a location to save the virtual machine files and click “Next.”
- Allocate disk space: Set the maximum disk size for the virtual machine. It is recommended to allocate at least 40 GB for macOS 10.14 Mojave. Select the option to “Store virtual disk as a single file” and click “Next.”
- Customize hardware: In this step, you can customize the hardware specifications for your virtual machine. Adjust settings such as memory, CPU, and network configurations according to your system requirements. Click “Finish” when done.
Once you have completed these steps, your new virtual machine for macOS 10.14 Mojave will be created in VMware Workstation Pro 12. You can now proceed to configure the virtual machine settings before installing macOS 10.14 Mojave. In the next section, we will guide you through the process of configuring the virtual machine settings in VMware Workstation Pro 12.
Creating a new virtual machine is an essential step in running macOS 10.14 Mojave on VMware Workstation Pro 12. By following these steps, you’ll have a virtual environment prepared for the installation of macOS 10.14 Mojave. Move on to the next section to learn how to configure the virtual machine settings.
Configuring Virtual Machine Settings
After creating a new virtual machine in VMware Workstation Pro 12, it’s important to configure the virtual machine settings to ensure optimal performance and compatibility with macOS 10.14 Mojave. Follow these steps to configure the virtual machine settings:
- Start the virtual machine: Select the newly created virtual machine from the VMware Workstation Pro 12 library and click on the “Play virtual machine” button.
- Customize the hardware: In the virtual machine window, go to the “Edit virtual machine settings” option.
- Adjust memory allocation: In the “Hardware” tab, navigate to the “Memory” section and allocate the desired amount of memory (RAM) to the virtual machine. It is recommended to allocate at least 4GB of memory for macOS 10.14 Mojave.
- Set the number of CPU cores: In the same “Hardware” tab, locate the “Processors” section and adjust the number of virtual processor cores allocated to the virtual machine. For optimal performance, it is recommended to assign at least 2 cores.
- Configure display settings: Go to the “Display” section and set the desired screen resolution and graphics memory allocation. Adjust the settings based on your system’s capabilities and preferences.
- Enable virtualization features: In the “Processors” section, ensure that the “Virtualize Intel VT-x/EPT or AMD-V/RVI” option is enabled.
- Configure network settings: Navigate to the “Network Adapter” section and choose the network connection type. It is recommended to select “Bridged” or “NAT” to ensure network connectivity within the virtual machine.
- Save the settings: Once you have made the necessary adjustments, click on the “OK” button to save the virtual machine settings.
With the virtual machine settings configured, you are now ready to proceed with installing macOS 10.14 Mojave on the virtual machine. In the next section, we will guide you through the installation process, ensuring that the virtual machine is properly set up to run macOS 10.14 Mojave.
Configuring the virtual machine settings is an important step in ensuring the smooth functioning of macOS 10.14 Mojave on VMware Workstation Pro 12. By following these steps, you’ll have a virtual machine optimized for running macOS 10.14 Mojave. Move on to the next section to learn how to install macOS 10.14 Mojave on the virtual machine.
Installing macOS 10.14 Mojave on VMware Workstation Pro 12
Now that your virtual machine is set up and configured, it’s time to proceed with the installation of macOS 10.14 Mojave. Follow these steps to install macOS 10.14 Mojave on VMware Workstation Pro 12:
- Start the virtual machine: Launch VMware Workstation Pro 12 and select the macOS 10.14 Mojave virtual machine. Click on the “Play virtual machine” button to start the virtual machine.
- Select the installation language: You will be prompted to choose the installation language. Select your preferred language and click “Continue”.
- Set up the macOS installer: In the macOS Utilities window, click on “Install macOS” and then click “Continue”.
- Agree to the license terms: Read the license agreement carefully and click on “Agree” to proceed with the installation.
- Select the installation destination: Choose the destination disk where macOS 10.14 Mojave will be installed. Click on “Install” to begin the installation process.
- Wait for the installation to complete: The installation process may take some time. Allow the installation process to run until it reaches 100%.
- Set up macOS Mojave: Once the installation is complete, the virtual machine will restart, and you will be guided through the initial setup process of macOS 10.14 Mojave. Follow the on-screen instructions to set up your macOS Mojave environment.
After completing these steps, you will have successfully installed macOS 10.14 Mojave on your virtual machine using VMware Workstation Pro 12. Now you can explore the features and functionalities of macOS Mojave within the virtual environment.
It’s important to note that during the installation process, your virtual machine may restart multiple times. This is a normal part of the installation procedure. Be patient and allow the installation process to complete uninterrupted to ensure a successful installation.
In the next section, we will guide you through the process of installing VMware Tools on macOS 10.14 Mojave, which enhances the performance and functionality of the virtual machine. This step is crucial for a seamless virtual machine experience. Let’s move on!
Installing VMware Tools on macOS 10.14 Mojave
Installing VMware Tools on macOS 10.14 Mojave is an essential step to ensure optimal performance and functionality of your virtual machine. VMware Tools provides additional drivers and software that enhance the integration between the virtual machine and the host operating system. Follow these steps to install VMware Tools on macOS 10.14 Mojave:
- Start the virtual machine: Launch the virtual machine running macOS 10.14 Mojave.
- Go to the VM menu: In the VMware Workstation Pro 12 menu, go to “VM” and select “Install VMware Tools.”
- Mount the VMware Tools image: A virtual CD/DVD drive containing the VMware Tools image will be mounted inside the virtual machine. Double-click on it to open the VMware Tools installer.
- Start the installation: In the VMware Tools installation window, click on the “Install VMware Tools” button.
- Authenticate the installation: Enter your administrator password and click “Install Software.” This will initiate the installation process.
- Follow the installation wizard: The VMware Tools installation wizard will guide you through the installation process. Follow the on-screen instructions, accepting the default settings.
- Restart the virtual machine: Once the installation is complete, restart the virtual machine to apply the changes.
After restarting the virtual machine, VMware Tools will be installed and running on macOS 10.14 Mojave. This will enable features such as seamless mouse integration, improved video and audio performance, and better overall guest-host interaction.
It’s important to note that periodically updating VMware Tools to the latest version is recommended to ensure compatibility and access to the latest features and enhancements. You can check for updates by going to the “VM” menu in VMware Workstation Pro 12 and selecting “Check for VMware Tools Updates.”
With VMware Tools installed on macOS 10.14 Mojave, you can now enjoy a more integrated and seamless experience within your virtual machine.
In the concluding section, we will briefly recap the steps covered in this guide and highlight the importance of following proper installation procedures.
Configuring macOS 10.14 Mojave Settings
After installing macOS 10.14 Mojave on your virtual machine, there are a few essential settings you should configure to optimize your experience and ensure smooth operation. Follow these steps to configure macOS 10.14 Mojave settings:
- Set up Apple ID: Launch the System Preferences application in macOS Mojave and click on “Apple ID”. Sign in with your Apple ID or create a new one if you don’t have an existing Apple ID. This will enable access to iCloud services and other Apple features.
- Update macOS: To ensure you have the latest features, bug fixes, and security updates, go to the System Preferences, click on “Software Update”, and check for any available updates. Follow the prompts to install any updates.
- Configure privacy settings: macOS Mojave introduces enhanced privacy settings. Go to the System Preferences and click on “Security & Privacy”. Review and adjust the privacy settings for applications that require access to sensitive data like camera, microphone, and location.
- Customize appearance: To personalize the look and feel of macOS Mojave, navigate to the System Preferences and click on “General”. Here you can adjust settings like the appearance (light or dark mode), highlight color, and sidebar icon size.
- Set up Time Machine: Time Machine is macOS’s built-in backup solution. Connect an external hard drive to your computer and go to System Preferences. Click on “Time Machine” and select your backup drive to enable automatic backups and protect your data.
- Explore system preferences: Take some time to go through the System Preferences and explore various settings and customization options. Familiarize yourself with the options available to tailor macOS Mojave to your preferences and needs.
Configuring these settings will help you optimize your experience with macOS 10.14 Mojave on VMware Workstation Pro 12. It is important to regularly check for updates, manage privacy settings, and customize the appearance and functionality of your macOS environment.
Remember to allocate ample system resources to the virtual machine to ensure smooth performance. Adjust the allocated memory and CPU cores in VMware Workstation Pro 12 as needed, based on your computer’s capabilities and the demands of your virtual machine.
By following these steps and properly configuring macOS 10.14 Mojave, you can enjoy a feature-rich and personalized virtual machine experience within VMware Workstation Pro 12.
Now that you have successfully configured macOS Mojave settings, you are ready to explore and utilize the vast array of features and applications available in this powerful operating system.
Thank you for following this guide on how to set up macOS 10.14 Mojave in VMware Workstation Pro 12. We hope this guide has been helpful in navigating the installation and configuration process. Feel free to refer back to this guide or explore other resources to further enhance your experience with macOS Mojave.
Conclusion
Congratulations! You have successfully set up macOS 10.14 Mojave in VMware Workstation Pro 12. Throughout this guide, we discussed the system requirements, the process of downloading macOS 10.14 Mojave, installing VMware Workstation Pro 12, creating a new virtual machine, configuring virtual machine settings, installing macOS 10.14 Mojave, installing VMware Tools, and configuring macOS 10.14 Mojave settings.
By following these steps, you now have a fully functional virtual machine running macOS 10.14 Mojave, allowing you to explore the features and functionalities of this popular operating system on a Windows or Linux computer. Whether you’re a developer testing applications or a curious user looking to experience macOS, VMware Workstation Pro 12 provides a convenient and efficient platform for virtualization.
Remember to periodically check for updates for both macOS Mojave and VMware Workstation Pro 12 to ensure compatibility and access to the latest features and enhancements. Additionally, make sure to allocate adequate system resources to the virtual machine for smooth performance.
We hope that this guide has been of assistance to you in setting up macOS 10.14 Mojave in VMware Workstation Pro 12. If you have any questions or encounter any issues, don’t hesitate to consult additional resources or reach out to the VMware community for support.
Now that macOS 10.14 Mojave is up and running on your virtual machine, enjoy exploring the vast range of applications, features, and functionalities that Apple’s operating system has to offer. Whether you’re testing software, developing apps, or simply experiencing macOS, this virtual environment provides a flexible and accessible way to dive into the world of macOS 10.14 Mojave.
Thank you for choosing VMware Workstation Pro 12 and for following our guide. We wish you a seamless and enjoyable experience using macOS 10.14 Mojave on your virtual machine!


