Introduction
When it comes to computer storage, SSDs (Solid State Drives) have become increasingly popular due to their fast performance and durability. However, there may be instances where you need to remove an SSD from your computer. Whether you are upgrading to a larger capacity SSD, troubleshooting a hardware issue, or simply replacing a faulty drive, knowing how to remove an SSD properly is essential.
In this guide, we will take you through the steps for safely removing an SSD from your computer. We will discuss the precautions you should take before proceeding, the tools you will need, and provide you with a step-by-step guide to ensure a smooth removal process.
It is important to note that removing an SSD requires a certain level of technical knowledge, and if you are unsure or uncomfortable with any step, it is advisable to seek assistance from a professional.
So, if you are ready to learn how to remove an SSD from your computer, let’s dive in!
What is an SSD?
An SSD, or Solid State Drive, is a type of storage device that uses flash memory to store data. Unlike traditional hard disk drives (HDDs) that use spinning disks and magnetic platters to store information, SSDs have no moving parts. This unique design allows SSDs to offer faster data access times, improved overall performance, and increased durability.
SSDs have gained popularity in recent years due to their significant advantages over HDDs. One of the main benefits of SSDs is their speed. They can read and write data at a much faster rate than HDDs, resulting in quicker program launches, shorter boot times, and faster file transfers.
Another advantage of SSDs is their reliability. Since SSDs do not have any mechanical components, they are less prone to damage from physical shocks or vibrations. Additionally, SSDs are more resistant to wear and tear, making them an excellent choice for portable devices such as laptops, where durability is crucial.
Furthermore, SSDs are quieter and consume less power than traditional HDDs. This not only results in a quieter computing experience but also increases battery life in laptops and other portable devices.
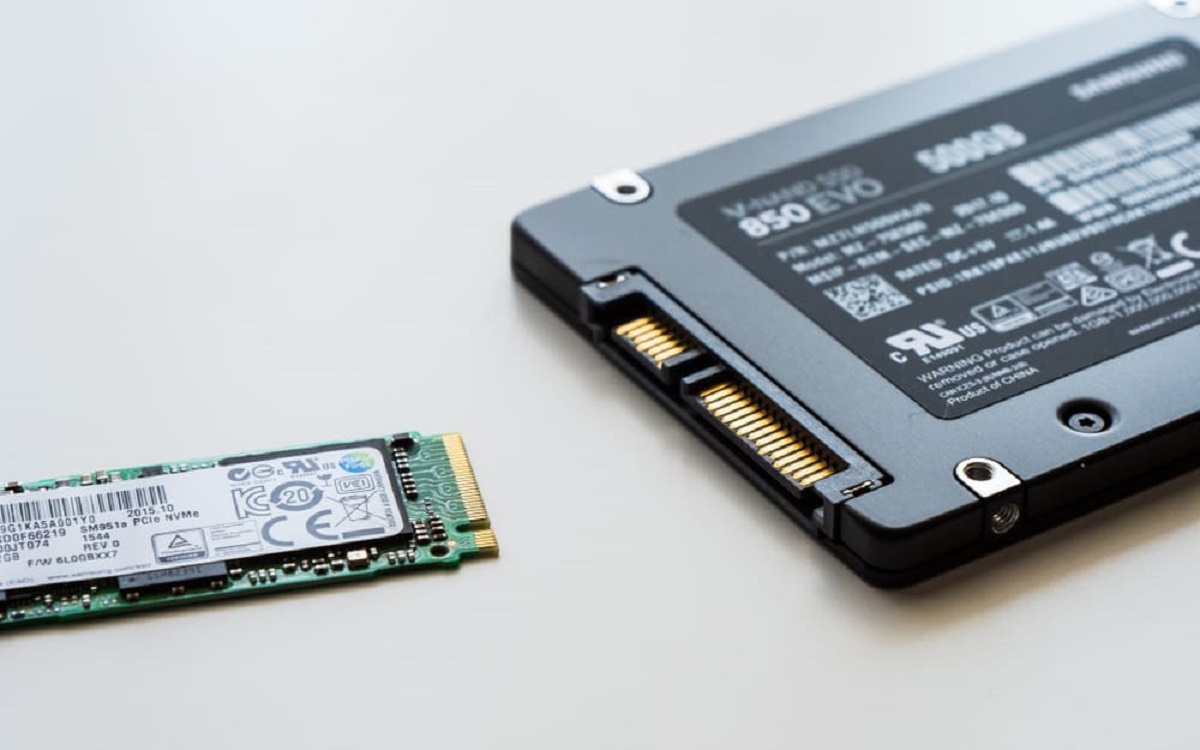
SSDs come in various form factors, including 2.5-inch drives that are compatible with most laptops and desktops, M.2 drives that are smaller and more suitable for ultra-thin laptops, and PCIe SSDs that offer even faster performance through a different interface.
Overall, SSDs have revolutionized computer storage by providing faster speeds, improved reliability, and greater energy efficiency. They have become the preferred choice for many users seeking a significant performance boost for their systems.
Why would you want to remove an SSD?
There are several reasons why you may need to remove an SSD from your computer:
1. Upgrading to a larger capacity SSD: As technology advances, SSD storage capacities continue to increase. If your current SSD no longer provides enough storage space for your needs, you may want to upgrade to a larger capacity SSD. Removing the old SSD is the first step in this process.
2. Troubleshooting hardware issues: If you are experiencing performance problems or errors on your computer, it is possible that the issue lies with the SSD. Removing the SSD allows you to inspect it for any physical damage or connection issues that may be causing the problem. You can then either replace the faulty SSD or try reseating it to ensure a proper connection.
3. Replacing a faulty drive: SSDs, like any other hardware component, can fail over time. If your SSD is constantly causing system crashes, displaying errors, or failing to boot, it may be necessary to remove the faulty drive and replace it with a new one to restore proper functionality.
4. Transferring data to a new computer: If you are upgrading to a new computer or building a new system, you may want to transfer the data from your old SSD to your new system. This may involve temporarily removing the SSD from the old computer to connect it to the new one and transfer the files.
5. Performing a clean installation of the operating system: Sometimes, a fresh installation of the operating system is required to resolve software-related issues or start with a clean slate. In such cases, removing the current SSD allows you to install the operating system on a fresh drive without any existing data or conflicts.
It is important to note that before removing an SSD, you should ensure that you have backed up any important data stored on the drive. This helps to prevent data loss and allows for a smooth transition to a new SSD or system.
Regardless of the reason, removing an SSD should be done with care to avoid any damage to the drive or the computer’s internal components. Following the correct steps and precautions will ensure a successful removal process.
Precautions before removing an SSD
Before you proceed with removing an SSD from your computer, it is important to take certain precautions to ensure the process goes smoothly and safely. Here are some essential precautions to keep in mind:
1. Backup your data: Before removing your SSD, make sure to back up any important data stored on the drive. This will prevent data loss in case of accidental damage or mishaps during the removal process. You can use external storage devices, cloud services, or backup software to create a copy of your files.
2. Shut down your computer: Ensure that your computer is powered off completely before attempting to remove the SSD. This will prevent any potential electrical hazards or damage to the drive or other components.
3. Disconnect from power sources: Unplug your computer’s power cord from the electrical outlet and disconnect any other external power sources. This step is crucial in maintaining safety and preventing any accidental power surges.
4. Ground yourself: Before handling any internal components of your computer, it is important to ground yourself to prevent static electricity discharge. You can do this by touching a grounded metal surface or wearing an anti-static wrist strap.
5. Refer to your computer’s documentation: Every computer model may have different methods for accessing and removing the SSD. Refer to your computer’s user manual or manufacturer’s website for specific instructions related to your system.
6. Take note of the connections: Before removing the SSD, carefully observe how it is connected to the motherboard and other components. Take note of the connectors and cables involved to ensure proper reinstallation or replacement.
7. Remove any power source from the SSD: If your SSD has a separate power cable or uses a power adapter, disconnect it before attempting to remove the SSD. This will eliminate the risk of electrical damage or short circuits.
8. Use proper tools: To avoid damage to the SSD or other parts, use the appropriate tools for opening your computer’s casing and removing screws. Common tools include a screwdriver, anti-static gloves, and cable ties.
9. Handle the SSD with care: SSDs are sensitive to physical shocks and should be handled with caution. Hold the drive by its edges, avoiding touching any of the exposed electrical components or circuitry.
By following these precautions, you can ensure a safe and successful removal process for your SSD. Remember, if you are unsure about any step or lack the necessary technical expertise, seek assistance from a professional or consult the manufacturer’s support resources.
Tools needed for removing an SSD
When it comes to removing an SSD from your computer, having the right tools on hand can make the process much easier and efficient. Here are the essential tools you may need:
1. Screwdriver: Depending on your computer model, you may need a screwdriver to open the computer casing and access the internal components. The type of screwdriver required will vary, so it is advisable to have a set of precision screwdrivers that includes various sizes and types (such as Phillips or Torx) to handle different screws.
2. Anti-static wrist strap: To protect your SSD and other sensitive internal components from static electricity damage, it is recommended to use an anti-static wrist strap. This will help discharge any built-up static electricity from your body and prevent accidental static discharge while handling the SSD.
3. Cable ties: Cable ties can come in handy for organizing and securing cables inside your computer. They help prevent cables from tangling or obstructing the removal and reinstallation of components, including the SSD.
4. Flashlight: A small flashlight or a headlamp can be useful for providing enhanced visibility inside your computer. It can help you spot connectors, screws, and other small details while removing or installing the SSD, especially in dimly lit areas.
5. Cleaning materials: It is good practice to have some cleaning materials, such as lint-free cloths or compressed air cans, to clean the inside of your computer and remove any dust or debris that may have accumulated. This can help maintain optimal conditions for your new SSD or any other components you may be working on.
6. Replacement components (if applicable): Depending on the reason for removing the SSD, you might need replacement components such as a new SSD, drive caddy, or mounting brackets. Ensure that you have the necessary components ready before starting the removal process.
It is important to note that the specific tools required can vary based on your computer model and the design of your case. It is recommended to consult the documentation or support resources provided by your computer manufacturer to ensure you have the appropriate tools for your particular setup.
By having these tools readily available, you can ensure a smooth and successful removal of the SSD from your computer. Remember to use caution, follow proper procedure, and seek assistance from a professional if needed.
Step-by-step guide to removing an SSD
Removing an SSD from your computer may seem daunting, especially if you are not familiar with the internal components. However, by following these step-by-step instructions, you can safely and efficiently remove the SSD from your computer:
1. Power off your computer: Ensure that your computer is completely powered off. Shut down your operating system and turn off the power supply to your computer.
2. Disconnect all cables: Unplug any cables connected to your computer, including the power cord, network cable, and peripheral devices. This will prevent any potential electrical problems during the removal process.
3. Open the computer case: Use a screwdriver to remove the screws securing the computer case. Set the screws aside in a safe place. Gently slide off the computer case, exposing the internal components.
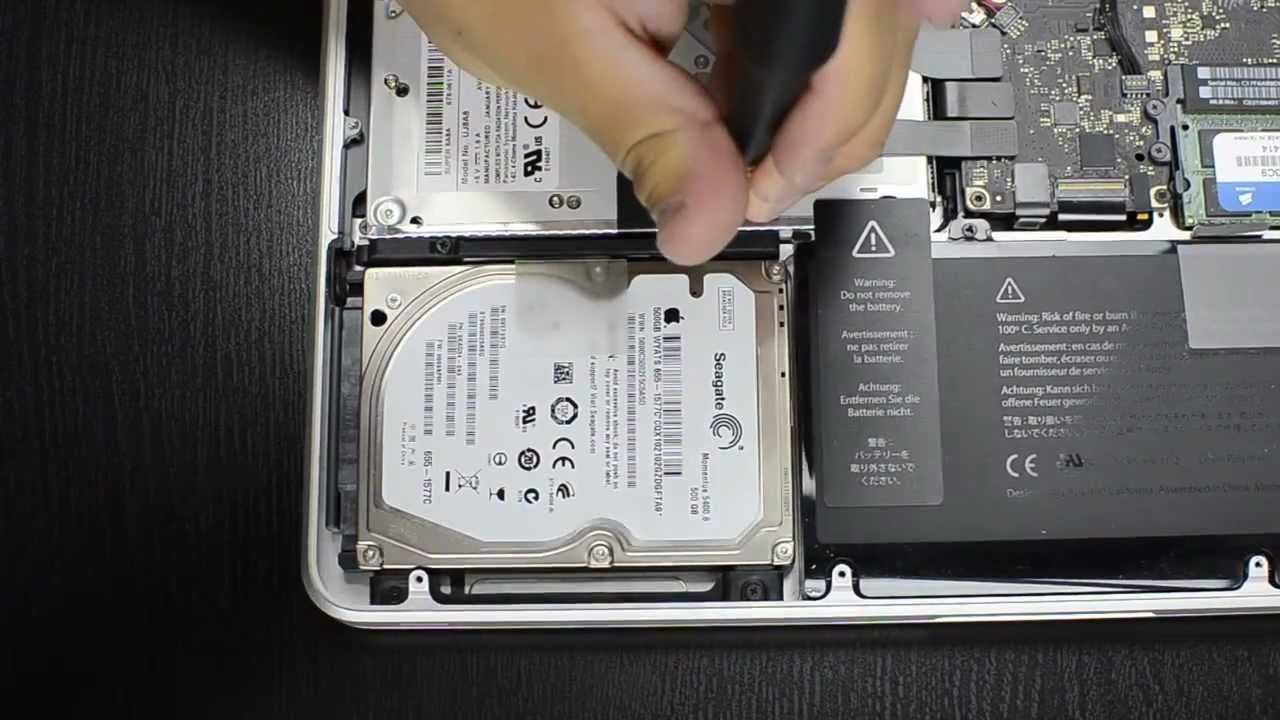
4. Locate the SSD: Locate the SSD within your computer. It is typically a small rectangular device connected to the motherboard or tucked away in a drive bay. Take note of its position and the connectors attached to it.
5. Disconnect the SSD: Carefully disconnect the cables connected to the SSD. These cables may include a data cable, power cable, or both. Unplug each cable by gently pulling it straight outwards from the connectors. Be cautious not to bend or damage the connectors.
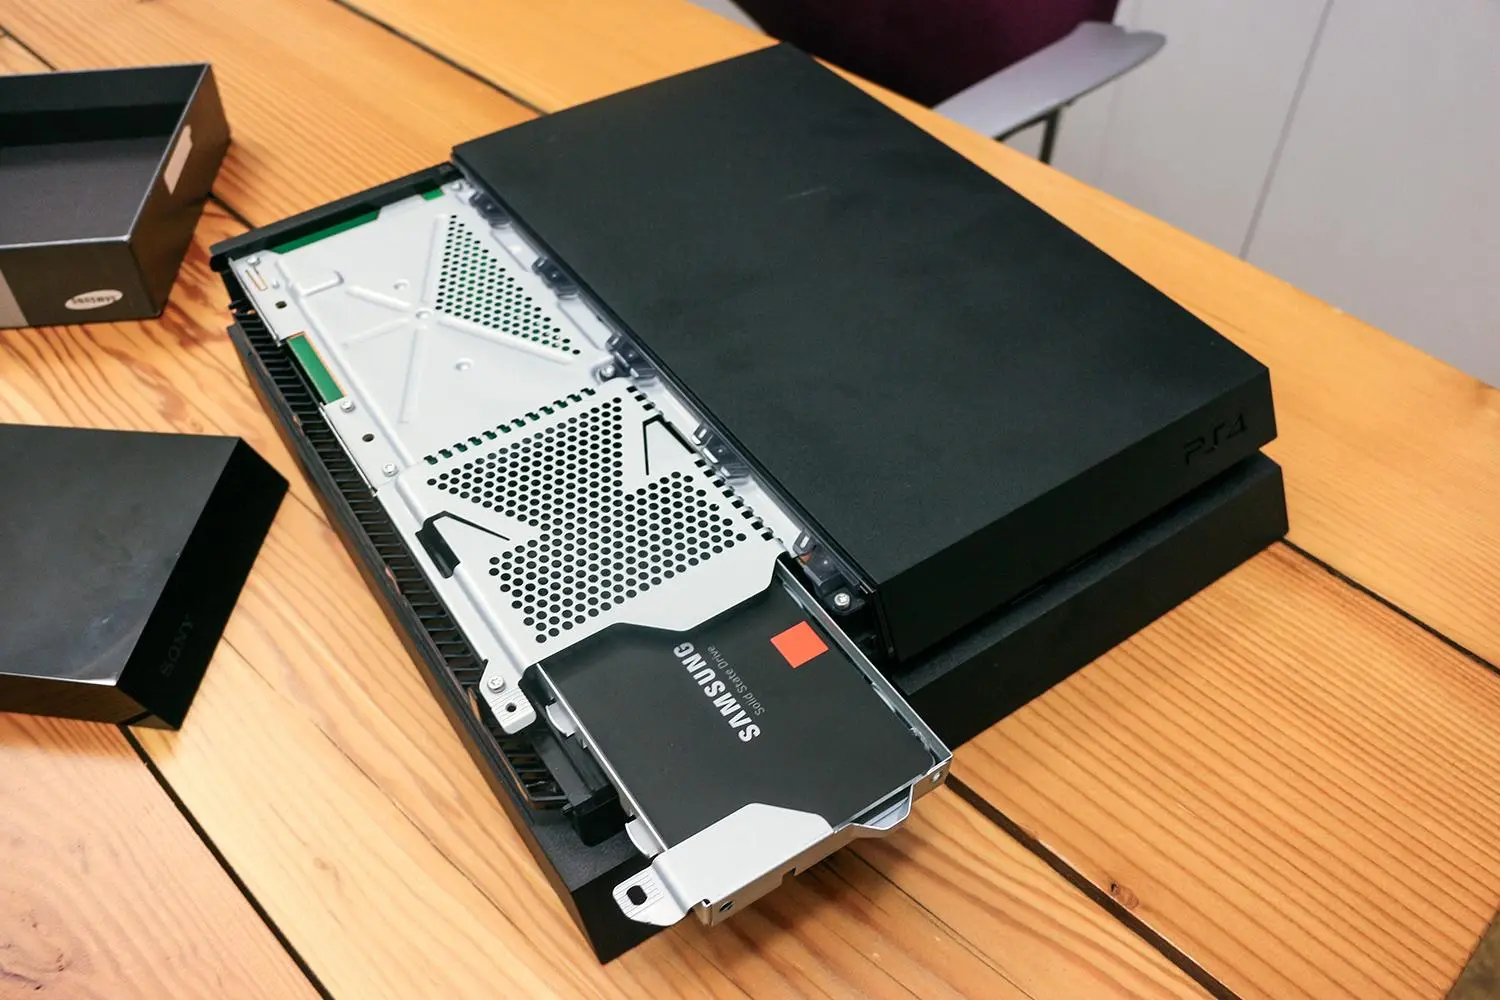
6. Remove the SSD: Once the cables are disconnected, locate any screws or mounting brackets holding the SSD in place. Use a screwdriver to remove these screws and brackets. Keep track of the screws and place them in a safe spot. With the screws removed, you can now slide the SSD out of its slot or drive bay.
7. Handle the SSD with care: While removing the SSD, make sure to handle it with care, holding it by the edges and avoiding touching the connectors or circuitry. SSDs are sensitive to static electricity and physical damage, so ensure a firm grip without exerting excessive force.
8. Store the removed SSD safely: Once the SSD is successfully removed, place it in an anti-static bag or wrap it in an anti-static material to prevent static discharge. Store it in a safe location away from any magnetic devices or excessive heat.
Congratulations! You have successfully removed the SSD from your computer. If you are replacing the SSD or installing a new one, refer to the manufacturer’s instructions for the installation process. If you are not replacing the SSD, you can now proceed to close the computer case and reconnect all cables.
Remember, if you are unsure about any step or lack the necessary technical expertise, it is best to seek assistance from a professional or consult the manufacturer’s support resources.
Where to store the removed SSD
After removing an SSD from your computer, it is important to store it properly to ensure its safety and optimal performance if you plan to reuse it or keep it as a backup. Here are some guidelines on where to store the removed SSD:
1. Anti-static bag: One of the best ways to store an SSD is in an anti-static bag. These bags are designed to prevent static electricity build-up, which can potentially damage the SSD. Place the SSD inside the bag and seal it to protect it from static discharge.
2. Anti-static foam: If you do not have an anti-static bag, you can use anti-static foam as an alternative. Cut the foam to fit the size of the SSD and place it between the SSD and any external pressure to protect it from physical damage.
3. Hard drive case or enclosure: Another option is to store the removed SSD in a hard drive case or enclosure. These cases provide additional protection against physical damage and may offer extra features such as USB connectivity for easy access to the stored data.
4. Dedicated SSD storage box: There are specialized storage boxes available specifically designed to store SSDs. These boxes usually have anti-static properties and compartments to securely hold the SSD, providing an organized and safe storage solution.
5. Cool and dry place: Regardless of the storage method you choose, it is essential to keep the SSD in a cool and dry place. Extreme temperatures or high humidity can potentially damage the drive and lead to data corruption. Avoid storing the SSD near sources of heat, moisture, or magnetic fields.
6. Away from magnetic devices: Magnetic fields can interfere with the SSD’s data integrity. Therefore, it is important to store the SSD away from any devices or objects that generate strong magnetic fields, such as speakers, electric motors, or magnets.
7. Label and documentation: To easily identify the stored SSD in the future, consider labeling the storage container or bag with relevant information such as drive capacity, model number, or date of removal. Additionally, keep track of any documentation, warranty information, or installation notes relevant to the SSD.
By following these storage guidelines, you can ensure that the removed SSD remains protected until you are ready to use it again or access the data stored on it. Remember to handle the SSD with care when retrieving it from storage and follow proper procedures for installation or disposal if necessary.
Conclusion
Removing an SSD from your computer may be necessary for various reasons, such as upgrading to a larger capacity drive, troubleshooting hardware issues, or replacing a faulty SSD. By following the step-by-step guide and precautions outlined in this article, you can safely remove the SSD without causing damage to your computer or the drive itself.
Remember to back up your data before proceeding, shut down your computer, and disconnect all cables and power sources. Use the appropriate tools, handle the SSD with care, and store it in an anti-static bag or a dedicated storage solution to protect it from static electricity and physical damage.
When removing an SSD, it is essential to be cautious and seek assistance if needed. If you are unsure about any step or lack the necessary technical expertise, it is always advisable to consult a professional or refer to the manufacturer’s support resources.
By properly removing and storing the SSD, you can ensure its safety and potentially reuse it in the future or access any important data stored on it. With the right knowledge and precautions, the process of removing an SSD can be smooth and successful.
Thank you for reading this guide on how to remove an SSD. We hope you have found it informative and helpful for your specific needs. Should you have any further questions or require additional assistance, please don’t hesitate to reach out for support.