Introduction
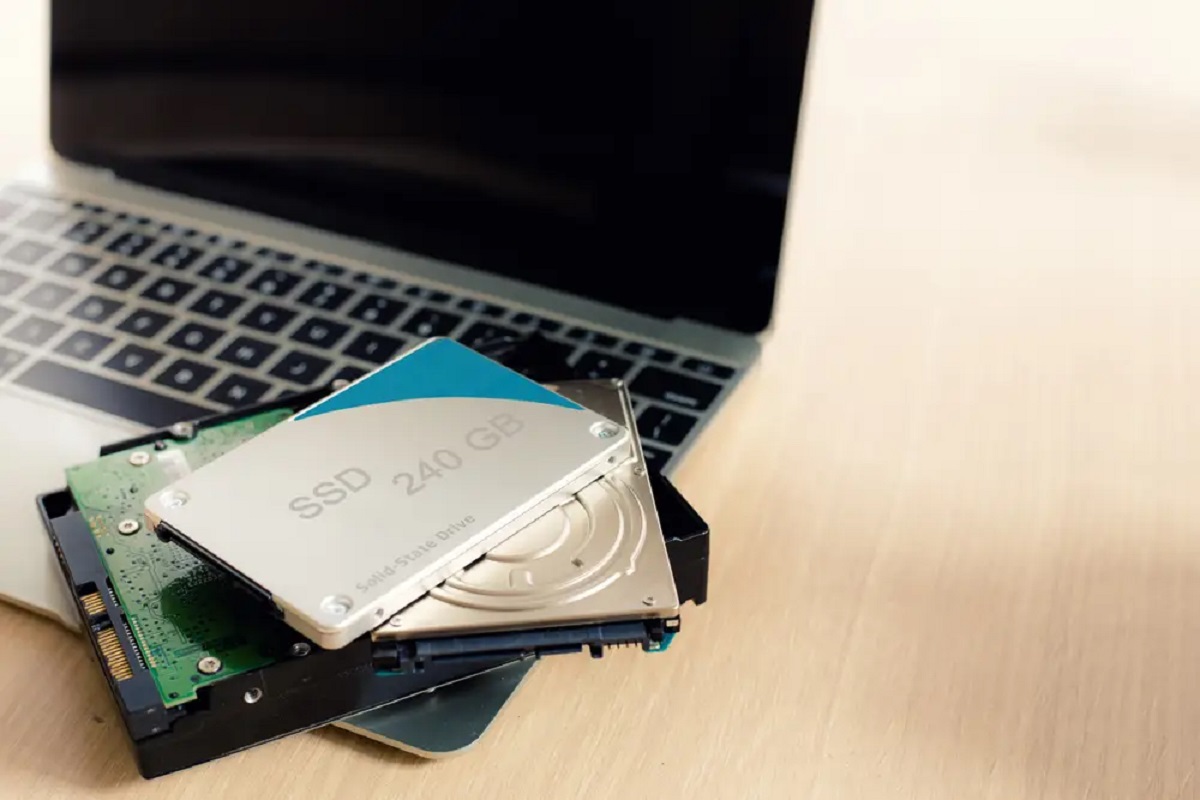
A solid state drive (SSD) is a popular storage device that offers faster data access, better performance, and increased reliability compared to traditional hard disk drives (HDDs). Whether you want to upgrade your computer’s storage capacity or replace a faulty SSD, knowing how to properly open and handle the drive is essential.
In this guide, we will walk you through the step-by-step process of opening a solid state drive. By following these instructions, you can safely access the internal components of the SSD, be it to install it in a new device or troubleshoot any issues you may be facing. It is important to note that opening an SSD may void the warranty, so make sure you have exhausted all other options before proceeding with these steps.
Before diving into the process, it’s crucial to gather the necessary tools to ensure a smooth experience. We recommend having a small screwdriver set, an anti-static wristband, and a clean and stable work surface. These tools will help you maintain the integrity of the drive and prevent any damage from static electricity.
Opening an SSD requires caution and precision, as the internal components are delicate and sensitive. Therefore, it’s important to handle the drive with care and avoid any unnecessary force or pressure. With the right tools and a gentle touch, you can successfully open your solid state drive, access its internal components, and proceed with any necessary repairs or upgrades.
Tools Needed
Before you can proceed with opening a solid state drive (SSD), it’s important to gather the necessary tools to ensure a smooth and efficient process. Here’s a list of essential tools you will need:
- Small Screwdriver Set: A small screwdriver set with various head sizes will allow you to remove any screws that may be securing the SSD casing.
- Anti-Static Wristband: An anti-static wristband is crucial in preventing static electricity from damaging the sensitive electronic components of the SSD. It will also help protect you from accidentally discharging static electricity onto the drive.
- Clean Work Surface: It’s important to have a clean and stable work surface to prevent any dust particles or debris from entering the SSD during the opening process.
By having these tools on hand, you’ll be well-prepared to open your SSD and handle its internal components with care. Remember to always use the appropriate tool for each step and avoid applying excessive force or pressure that could damage the drive.
Once you have gathered these tools, you’re ready to move on to the next step of the process: preparing the work area.
Step 1: Prepare the Work Area
Before you begin opening your solid state drive (SSD), it’s important to prepare a suitable work area. Here’s what you need to do:
- Select a Clean and Stable Surface: Choose a work surface that is clean, flat, and stable. Ensure that there are no loose objects or debris that could interfere with the opening process.
- Remove any Static Electricity: Before handling the SSD, it’s crucial to discharge any static electricity from your body. You can do this by wearing an anti-static wristband, connecting it to a grounded object such as a metal part of your computer case.
- Organize Your Tools: Lay out the necessary tools you gathered in the previous step, such as the small screwdriver set and anti-static wristband, within easy reach. This will help streamline the opening process and prevent any unnecessary delays or misplacements.
Creating an optimal work area will ensure that you have a controlled and safe environment to open your SSD. It’s important to maintain cleanliness and minimize the risk of static electricity to protect the sensitive electronic components of the drive.
Once you have prepared your work area, you’re ready to move on to the next step: identifying the solid state drive.
Step 2: Identify the Solid State Drive (SSD)
Before proceeding with opening a solid state drive (SSD), it’s important to correctly identify the drive in your system. Follow these steps to identify the SSD:
- Power off your computer: Shut down your computer completely and disconnect it from any power source. This will prevent any electrical accidents and ensure your safety during the process.
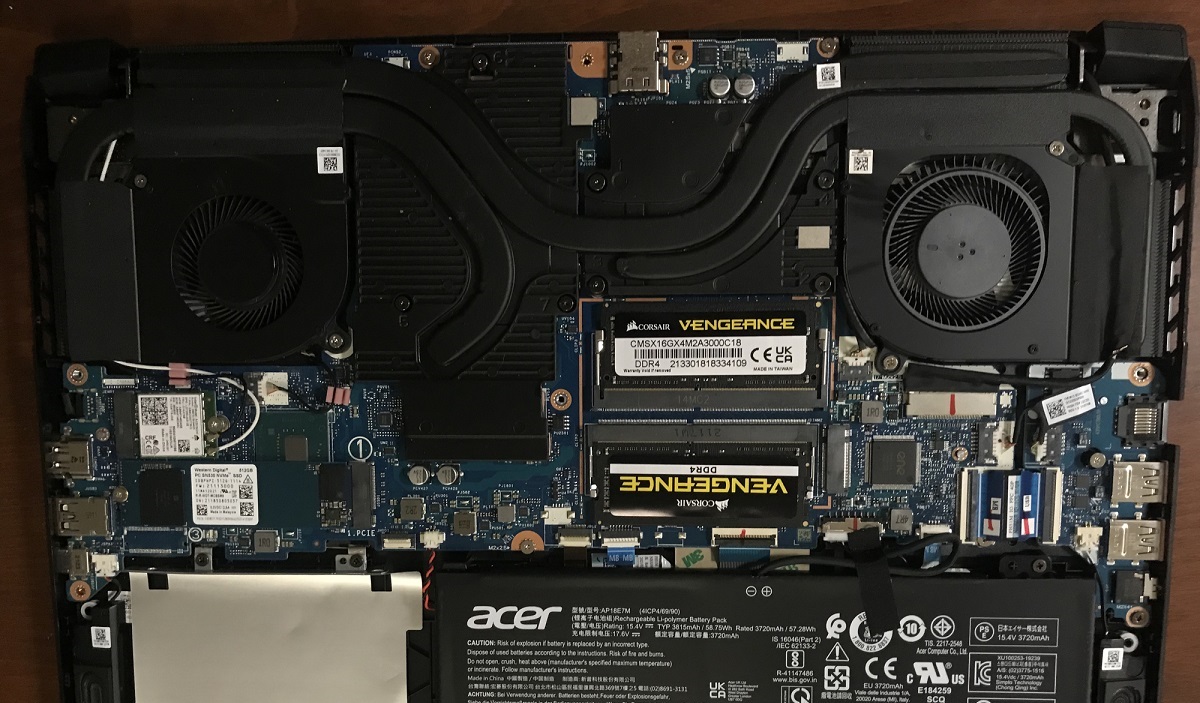
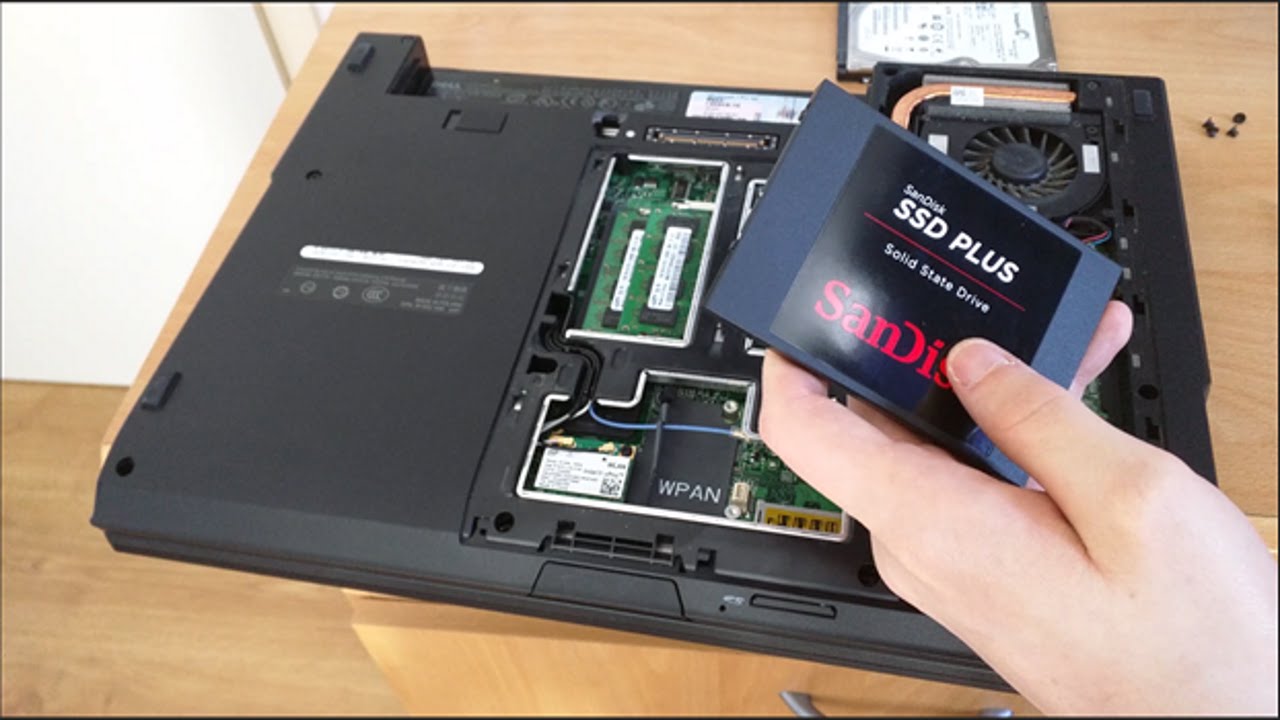
- Open your computer case: If your SSD is installed internally, you’ll need to open your computer case. Consult the user manual or search online for instructions specific to your computer model on how to safely open the case.
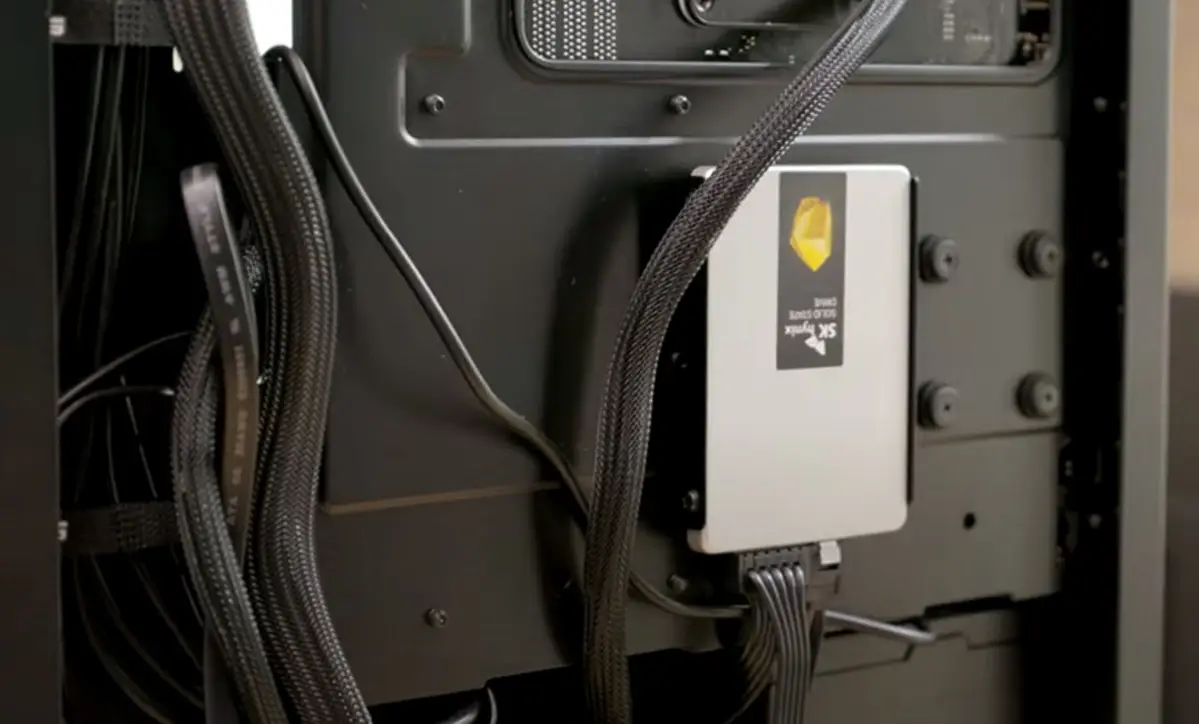
- Locate the SSD: Once the computer case is open, visually locate the solid state drive. It is typically a small rectangular-shaped device with no moving parts, often attached to the motherboard or securely placed in a drive bay.
- Verify the labeling: Check for any labels or markings on the drive that indicate it is an SSD. Look for terms such as “Solid State Drive” or “SSD” written on the device.
It’s important to correctly identify the SSD before proceeding with opening it to prevent any accidental damage to other components or drives in your system. If you’re uncertain about identifying the SSD, refer to the manufacturer’s documentation or seek assistance from a professional.
Once you have successfully identified the solid state drive, you’re ready to move on to the next step: removing the casing of the SSD.
Step 3: Remove the Casing of the SSD
Now that you have identified the solid state drive (SSD) in your system, it’s time to remove the casing. Follow these steps to safely remove the casing:
- Ensure you have a suitable work area: Refer back to Step 1 and make sure you are working on a clean, stable surface with all the necessary tools within reach.
- Inspect the SSD casing: Take a close look at the casing of the SSD to identify any screws or fasteners that are securing it. In some cases, the casing may be held together by adhesive or plastic clips instead of screws.
- Use the appropriate tool: Depending on the type of fasteners used, select the appropriate size of the small screwdriver from your set. Alternatively, if the casing is held together by clips, use a plastic pry tool or your fingers to gently separate the parts.
- Begin removing the casing: Carefully unscrew any screws or gently pry open the clips, starting from one side of the casing. Take your time and apply gentle pressure to avoid damaging the SSD or its internal components.
- Continue with caution: As you progress, be mindful of any resistance or unusual sounds. If you encounter significant resistance, double-check for any additional screws or fasteners that may still be holding the casing together.
- Remove the casing completely: Once all the screws or clips have been released and there is no resistance, the casing should come apart easily. Set the casing aside in a safe place where it won’t get damaged or lost.
By following these steps carefully, you should be able to successfully remove the casing of the SSD. Remember to handle the drive and its components with utmost care to avoid any unnecessary damage.
With the casing removed, you are now ready to proceed to the next step: disconnecting the data cable from the SSD.
Step 4: Disconnect the Data Cable
After removing the casing of the solid state drive (SSD), the next step is to disconnect the data cable. Follow these steps carefully to safely disconnect the data cable:
- Locate the data cable: Look for a thin, flat cable connected to the SSD. This cable is responsible for transmitting data between the SSD and the motherboard or other connected devices.
- Identify the connector: The data cable connector is typically rectangular with a series of small pins or sockets. Take note of its shape and orientation to ensure you reconnect it properly later.
- Gently remove the cable: Hold the connector firmly and pull it straight away from the SSD. It should come off easily with little force. Avoid twisting or bending the cable excessively to prevent any damage to the connectors or pins.
- Set the cable aside: Once the data cable is disconnected, place it in a secure location where it won’t get tangled or damaged. This will make it easier to reconnect later.
Disconnecting the data cable is a crucial step in opening the SSD. Take your time and be gentle when removing the cable to avoid causing any damage to the connectors or SSD itself.
With the data cable successfully disconnected, you can now proceed to the next step: disconnecting the power cable from the SSD.
Step 5: Disconnect the Power Cable
After disconnecting the data cable, the next step in opening a solid state drive (SSD) is to disconnect the power cable. Follow these steps carefully to safely disconnect the power cable:
- Locate the power cable: Look for a cable connected to the SSD that provides power. This cable is responsible for supplying electrical power to the drive.
- Identify the power connector: The power cable connector is typically a rectangular or square shape with a series of pins or sockets. Take note of its shape and arrangement to ensure proper reconnection later.
- Hold the connector firmly: To disconnect the power cable, firmly grasp the connector where it is connected to the SSD. Ensure that you have a secure grip to prevent accidental dislodgement of other cables or components.
- Disconnect the power cable: Pull straight up or away from the SSD to disengage the power connector. Use a steady and controlled motion, avoiding any excessive force or twisting that may damage the cable or connectors.
- Safely set aside the power cable: Once the power cable is disconnected, place it in a safe spot where it won’t get tangled or damaged. This will make it easier to reconnect later if needed.
Disconnecting the power cable ensures that the SSD is no longer receiving power during the opening process. This step is crucial to avoid any electrical mishaps or damage to the SSD or other connected components.
With the power cable successfully disconnected, you can now proceed to the next step: removing any screws or mounts securing the SSD.
Step 6: Remove Any Screws or Mounts
Once the power cable is disconnected, the next step in opening a solid state drive (SSD) is to check for any screws or mounts that may be securing the drive. Follow these steps carefully to remove any screws or mounts:
- Inspect the SSD: Take a close look at the SSD and identify if there are any screws or mounts attached to it. These screws or mounts are often used to secure the SSD in place.
- Use the appropriate tool: If you find any screws, select the suitable screwdriver from your set. Ensure that the screwdriver fits securely into the screw head. If there are mounts, prepare a small pry tool or your fingers for removal.
- Remove the screws: If there are screws, gently rotate the screwdriver counterclockwise to loosen and remove them one by one. Place the screws in a safe location where they won’t get lost or mixed up with other components.
- Detach the mounts: If there are mounts securing the SSD, carefully pry them away using the pry tool or your fingers. Apply gentle pressure and work around the mount until it detaches from the SSD. Be cautious not to use excessive force, as it may damage the SSD or other components.
- Set aside the screws and mounts: Once all screws and mounts are removed, set them aside in a safe place where they won’t get misplaced or cause any interference during the rest of the opening process.
Removing any screws or mounts ensures that the SSD can be safely accessed and manipulated as needed. Take your time and handle the screws and mounts with care to avoid any damage to the SSD or other components.
With the screws or mounts successfully removed, you can now proceed to the next step: carefully opening the SSD.
Step 7: Carefully Open the SSD
Now that any screws or mounts securing the solid-state drive (SSD) have been removed, it’s time to carefully open the SSD. Follow these steps to ensure a safe and successful opening:
- Hold the SSD securely: Place your fingers on opposite sides of the SSD, applying gentle pressure to keep it steady and balanced. Avoid placing excessive force on any specific area of the SSD to prevent damage.
- Identify the opening points: Examine the edges of the SSD casing to locate any small gaps or slots where the casing can be opened. These openings may vary depending on the manufacturer and model of the SSD.
- Use a pry tool or your fingers: If the casing has small tabs or clips, gently insert a plastic pry tool or your fingers into the gaps. Apply slight pressure to release the tabs or clips while maintaining a controlled motion.
- Work around the edges: Slowly move along the edges of the SSD, releasing any additional tabs or clips one at a time. Be patient and cautious to avoid exerting excessive force that may cause damage to the SSD or its components.
- Separate the casing: As you release the tabs or clips, the casing should start to separate. Continue working around the edges until the casing is fully opened. Be careful not to drop or misplace any small components that may become loose during this process.
- Set aside the opened casing: Once the casing is fully open, set it aside in a safe place where it won’t get damaged. Make sure it is kept away from dust, liquids, or any potential sources of static electricity.
Remember to be gentle and patient when opening the SSD to avoid causing any damage. If you encounter resistance during the process, recheck for any remaining tabs, clips, or fasteners that may still be holding the casing together.
With the SSD casing successfully opened, you can now move on to the next step: accessing the internal components of the SSD.
Step 8: Access the Internal Components
After carefully opening the solid-state drive (SSD) casing, you can now access the internal components of the drive. Follow these steps to safely access the SSD’s internal components:
- Observe the internal layout: Take a moment to observe the internal layout of the SSD. Note the positioning of the memory chips, circuit board, and other components.
- Handle the SSD with care: When accessing the internal components, it’s crucial to handle the SSD with utmost care. Avoid touching any exposed electrical contacts or delicate components directly with your fingers to prevent damage from static electricity or oils on your skin.
- Use an anti-static wristband: If you have an anti-static wristband, connect it to a grounded object such as a metal part of your computer case before proceeding. This will help minimize the risk of static discharge that could harm the SSD’s internal components.
- Inspect and troubleshoot: If you’re accessing the internal components for troubleshooting purposes, carefully examine the SSD for any visible signs of damage, loose connections, or other issues that may be causing problems.
- Make necessary adjustments or repairs: If you identify any issues, such as loose connections or damaged components, you can attempt to fix them using appropriate techniques. Ensure you have the necessary knowledge or seek professional assistance if needed.
Keep in mind that accessing the internal components of an SSD should be done with caution and only if necessary. Avoid making any unnecessary adjustments or repairs that may further compromise the drive’s functionality or void its warranty.
After accessing the SSD’s internal components and performing any necessary actions, you can move on to the next step: handling the SSD with caution.
Step 9: Handle the Solid State Drive with Caution
As you work with the internal components of the solid-state drive (SSD), it’s crucial to handle the drive with utmost caution to prevent damage. Follow these guidelines to ensure the safe handling of the SSD:
- Avoid touching the connectors: Refrain from touching the electrical connectors or pins on the SSD or the circuit board. Oils and static electricity from your fingers can potentially disrupt the connection or damage the components.
- Hold the SSD by its edges: When moving or manipulating the SSD, always hold it by its edges. This minimizes the risk of touching sensitive areas and helps maintain the cleanliness of the components.
- Protect the SSD from static electricity: If you’re working in an environment with a high static electricity risk, it’s advisable to use an anti-static wristband. This will ground any static charges and prevent them from damaging the SSD’s components.
- Avoid exposing the SSD to liquids or debris: Keep the SSD away from liquids, dust, and any other foreign debris that may enter the drive. These can cause damage to the internal components and render the SSD inoperable.
- Do not apply excessive force: As you handle the SSD, refrain from applying excessive force or pressure on any part of the drive. Delicate components, such as the memory chips or circuit board, are vulnerable to damage.
By following these guidelines, you can ensure the safe handling of the SSD and minimize the risk of causing any harm to its internal components. Remember that an SSD is a sensitive electronic device, and proper handling is essential to maintain its functionality and longevity.
With the SSD handled with caution, you can proceed to the next step: closing the SSD securely.
Step 10: Close the SSD
After accessing and handling the internal components of the solid-state drive (SSD), it’s time to carefully close the drive. Follow these steps to securely close the SSD:
- Inspect the internal components: Before closing the SSD, double-check that all components are properly aligned and in their correct positions. Ensure that no cables or components are caught or pinched between the casing.
- Align the casing: Align the casing of the SSD with the edges of the internal components. Make sure that the casing fits securely and evenly, with no gaps or misalignments.
- Apply gentle pressure: With the casing aligned, apply gentle pressure to the edges to close the SSD. Use your fingertips or a plastic pry tool to ensure an even and controlled closure. Avoid using excessive force that may damage the drive or its components.
- Confirm proper closure: Once the SSD is closed, visually inspect the casing to ensure it is securely in place. Check for any protruding screws or mounts that may indicate a misalignment.
- Reinsert any screws or mounts: If necessary, reinsert any screws or mounts that were removed earlier to secure the casing. Ensure that they are tightened to an appropriate level, but avoid overtightening.
By following these steps, you can safely and securely close the SSD, protecting the internal components from damage and maintaining the integrity of the drive. Take your time during the closing process to ensure everything is properly aligned and secured.
With the SSD securely closed, you have successfully completed the process of opening and closing the solid-state drive. You can now reassemble your computer or use the SSD as needed.
Conclusion
Opening a solid state drive (SSD) requires careful attention, precision, and the right tools. By following the step-by-step process outlined in this guide, you can safely open the SSD, access its internal components, and handle it with caution. Whether you are upgrading your computer’s storage capacity or troubleshooting issues with your SSD, these steps will help you navigate the process effectively.
Remember to gather the necessary tools, prepare a suitable work area, and approach each step with patience and care. Avoid applying excessive force or pressure, and be mindful of static electricity to prevent damaging the SSD or its components.
Once you have opened the SSD, you can troubleshoot any issues, make necessary adjustments or repairs, and then securely close the drive. Confirm that all components are properly aligned and that the casing is tightly secured, taking care not to overtighten any screws or mounts.
After completing the opening and closing process, you can reassemble your computer or use the SSD as required. It’s important to note that opening the SSD may void its warranty, so explore alternate solutions or seek professional assistance if you are unsure about performing these steps yourself.
Remember to handle your SSD with caution at all times to ensure its longevity and proper functioning. With the right knowledge and approach, you can successfully open and work with your solid state drive.