Introduction
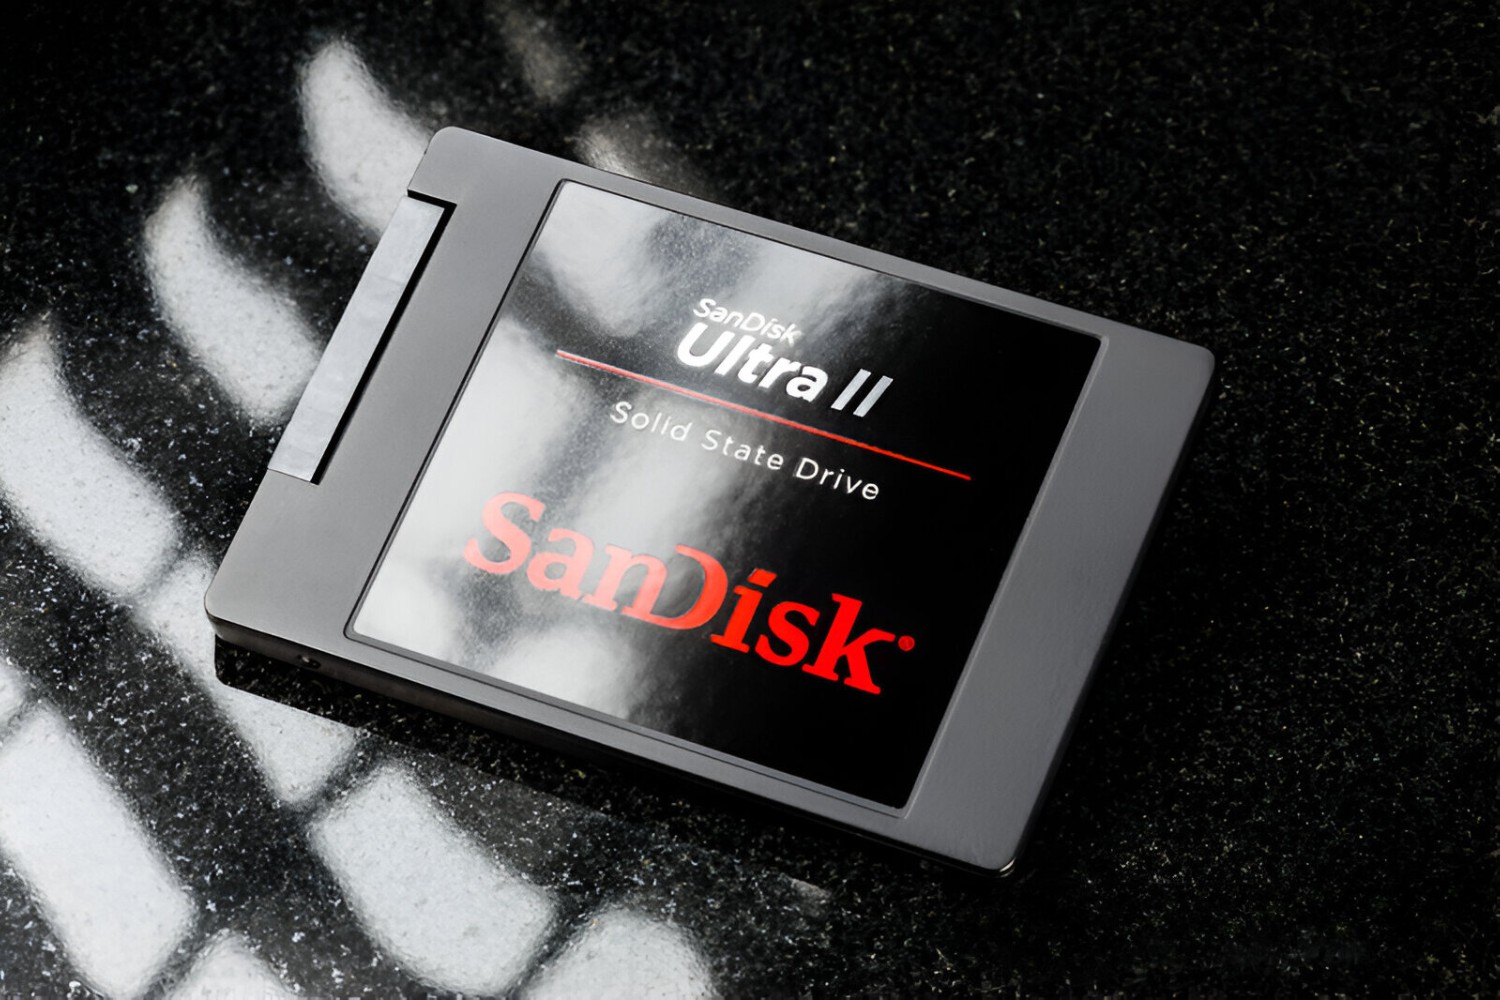
Upgrading your laptop’s storage capacity is a great way to improve its performance and speed up data access. The SanDisk 960GB Internal SATA SSD is an excellent choice for those looking to enhance their laptop’s storage capabilities. With its high storage capacity and fast data transfer speeds, this SSD can handle all your files and applications with ease.
In this guide, we will walk you through the step-by-step process of installing the SanDisk 960GB Internal SATA SSD in your laptop. Before we begin, it is important to note that this installation process may vary slightly depending on your laptop model. Therefore, it is always recommended to consult your laptop’s user manual or manufacturer’s website for specific instructions.
Before diving into the installation process, there are a few important considerations to keep in mind. Firstly, make sure that your laptop is compatible with the SanDisk 960GB Internal SATA SSD. Check the storage specifications and interface requirements of your laptop to ensure compatibility.
Secondly, backup all the data from your current hard drive to prevent any data loss during the installation process. You can either transfer your files to an external storage device or create a backup on cloud storage platforms. Remember, once you install the new SSD, the data on your old hard drive will not be accessible unless you clone it onto the new drive.
Lastly, gather all the necessary tools for the installation. This may include a screwdriver (typically Phillips or Torx), an anti-static wristband to protect your laptop from any static discharge, and any additional tools required to access your laptop’s internal components.
With these considerations in mind, let’s begin the installation process for the SanDisk 960GB Internal SATA SSD and give your laptop a much-needed storage boost.
Important Considerations before Installing a SanDisk 960GB Internal SATA SSD
Before you begin the installation process for the SanDisk 960GB Internal SATA SSD in your laptop, there are a few important considerations that you should keep in mind. These considerations will ensure a smooth and successful installation process, without any unforeseen issues or complications.
Firstly, check if your laptop is compatible with the SanDisk 960GB Internal SATA SSD. Verify the storage specifications and interface requirements of your laptop to ensure compatibility. The SanDisk 960GB SSD uses a SATA interface, so make sure your laptop supports this type of connection. Additionally, check the physical dimensions to ensure the SSD will fit properly within your laptop’s storage bay.
Secondly, it is crucial to backup all the data from your current hard drive. This is to prevent any potential data loss during the installation process. You can transfer your files to an external storage device or create a backup on cloud storage platforms. This step is essential because once you install the new SSD, the data on your old hard drive will not be accessible unless you clone it onto the new drive. Take the time to organize and backup your important files to avoid any complications.
Next, gather all the necessary tools for the installation. This typically includes a small Phillips or Torx screwdriver, as well as an anti-static wristband. The anti-static wristband is important to protect your laptop from any static discharge that could damage its internal components. Additionally, if your laptop requires any additional tools or accessories to access its internal components, make sure you have those on hand as well.
It is also recommended to ensure that your laptop is fully charged or connected to a power source during the installation process. Sudden power loss during the installation can result in data corruption or damage to the new SSD. Keeping your laptop plugged in will provide a stable power supply throughout the installation.
Lastly, carefully read through your laptop’s user manual or visit the manufacturer’s website for specific instructions regarding the installation process. Different laptop models may have variations in the steps required to access the storage bay and install the new SSD. Following the correct procedure will help avoid any potential issues or damages.
By considering these important factors before proceeding with the installation, you can ensure a successful and trouble-free upgrade to the SanDisk 960GB Internal SATA SSD, providing your laptop with enhanced storage capabilities and improved performance.
Step-by-Step Guide to Installing a SanDisk 960GB Internal SATA SSD
Follow these step-by-step instructions to successfully install the SanDisk 960GB Internal SATA SSD in your laptop. Remember to consult your laptop’s user manual or manufacturer’s website for any specific instructions particular to your laptop model.
-
Start by shutting down your laptop and disconnecting it from any power sources. This will eliminate the risk of electrical shock during the installation process.
-
Next, locate the access panel on the bottom of your laptop. This panel grants you access to your laptop’s internal components, including the hard drive bay. Use the appropriate screwdriver to remove the screws that secure the access panel in place. Keep the screws in a safe place as you will need them later.
-
Once the access panel is removed, locate the existing hard drive. Gently disconnect any cables or connectors attached to the hard drive. Take note of their positions and how they are connected as you will need to reconnect them later.
-
Remove the screws that secure the old hard drive in place. Carefully slide the hard drive out of the bay and set it aside. Again, keep the screws in a safe place as you will need them later.
-
Take the SanDisk 960GB Internal SATA SSD out of its packaging. Align it with the empty bay in your laptop and carefully slide it into place. Make sure the connectors on the SSD are properly aligned with the corresponding ports in the bay.
-
Secure the SSD in place by replacing the screws that you removed earlier. Ensure that they are tightened securely but avoid over-tightening them.
-
Reconnect the cables and connectors that were previously attached to the old hard drive to the SSD. Be sure to align them correctly and push them in firmly to ensure a secure connection.
-
Double-check all the connections and make sure everything is properly in place. Replace the access panel and secure it with the screws you removed earlier.
-
Finally, power on your laptop. The SanDisk 960GB Internal SATA SSD should now be installed and ready to use. You may need to initialize and format the SSD through your laptop’s operating system before you can start using it.
Congratulations! You have successfully installed the SanDisk 960GB Internal SATA SSD in your laptop. Enjoy the increased storage capacity and improved performance that the SSD brings to your device.
Unboxing the SanDisk 960GB Internal SATA SSD
Before you begin the installation process of the SanDisk 960GB Internal SATA SSD, let’s take a moment to unbox and familiarize ourselves with this high-quality storage device. The unboxing experience not only adds to the excitement of the upgrade but also helps ensure you have all the necessary components for a smooth installation.
The SanDisk 960GB Internal SATA SSD comes securely packaged in a compact box, designed to protect the SSD from any potential damage during transit. Upon opening the box, you will find the SSD itself, user manuals, and any additional accessories that may be included.
The SSD is typically wrapped in an anti-static bag, which prevents static electricity from damaging the delicate electronic components. Carefully remove the SSD from the bag, making sure to hold it by the edges to avoid leaving fingerprints or smudges on the surface.
Inspect the SSD for any physical defects or damage. SanDisk takes great care in manufacturing their products, but it’s always a good idea to double-check for any potential issues. Ensure that all the necessary connectors and ports are present and undamaged.
Once you have inspected the SSD, take a moment to review the user manuals and documentation included in the box. These documents provide valuable information about the installation process, specifications, and any additional features or requirements of the SSD. Familiarize yourself with the content, as it will guide you through the installation process and address any questions or concerns you may have.
In some cases, the box may also include a mounting bracket or adapter. This accessory can be used to secure the SSD in the laptop’s storage bay if needed. Check if such bracket or adapter is included and determine whether it is required for your specific laptop model.
By unboxing the SanDisk 960GB Internal SATA SSD and reviewing the accompanying documentation, you are now fully prepared to proceed with the installation process. Having this understanding of what’s inside the box and how to handle the SSD ensures a smooth and successful upgrade to enhance your laptop’s storage capacity and performance.
Preparing Your Laptop for Installation
Before you jump into the installation process of the SanDisk 960GB Internal SATA SSD, it’s important to properly prepare your laptop to ensure a smooth and successful upgrade. Taking the time to prepare your laptop will help avoid any potential issues or complications during the installation process.
The first step in preparing your laptop is to shut it down completely and disconnect it from any power sources. This will prevent any electrical accidents and ensure your safety while working with the internal components.
It is also recommended to remove any external peripherals, such as USB drives or external hard drives, from your laptop. Disconnecting these devices reduces the risk of accidentally damaging them during the installation process.
Before proceeding, familiarize yourself with your laptop’s user manual or manufacturer’s website to understand its internal layout and locate the storage bay. Different laptop models have varying designs, so having this knowledge in advance will make it easier for you to access the necessary components for the installation.
To further protect your laptop from static discharge, consider wearing an anti-static wristband. This device helps to discharge any static electricity in your body and prevents it from damaging sensitive electronic components.
Next, find a clean and well-lit workspace with ample space to work on your laptop. It is important to have a clutter-free area where you can lay out the necessary tools and components without any obstructions. A clean workspace minimizes the risk of losing small screws or damaging components accidentally.
Lastly, gather all the required tools for the installation. The tools typically needed for this process include a small Phillips or Torx screwdriver, which are commonly used to remove the screws that secure the access panel and the old hard drive. Make sure you have the appropriate screwdriver for your specific laptop model to avoid damaging the screws.
By properly preparing your laptop for installation, you set the stage for a successful upgrade to the SanDisk 960GB Internal SATA SSD. Taking the time to follow these steps ensures a smooth and hassle-free installation process, allowing you to reap the benefits of improved storage capacity and performance in your laptop.
Disassembling Your Laptop
Now that you have prepared your laptop for the installation of the SanDisk 960GB Internal SATA SSD, it’s time to disassemble your laptop to gain access to the internal components. This step is necessary to remove the old hard drive and make way for the new SSD.
Start by referring to your laptop’s user manual or manufacturer’s website for specific instructions on how to disassemble your particular laptop model. The disassembly process may vary depending on the laptop’s design and internal layout, so it’s crucial to follow the correct procedure to avoid damaging any components.
To begin, locate the access panel on the bottom of your laptop. This panel is usually secured with screws. Use the appropriate screwdriver to remove these screws and set them aside in a safe place to avoid losing them.
Once the screws are removed, gently lift or slide off the access panel. Be careful not to force it as it may be attached with clips or hooks that need to be released first. Take note of any cables or connectors that may be attached to the access panel and remember their positions for reassembly later.
With the access panel removed, you can now see the internal components of your laptop. Look for the original hard drive, which is typically located in a storage bay. The hard drive may be secured with screws or brackets. Remove any screws or detach any brackets that are holding the hard drive in place, and carefully lift the hard drive out of the bay. Place it in a safe location as a backup or for future use.
During this process, take note of the cables and connectors that are attached to the old hard drive. These will need to be disconnected in order to proceed with the installation of the SanDisk 960GB Internal SATA SSD. Pay close attention to how they are connected and make sure to reconnect them correctly later on.
Remember to handle the internal components of your laptop with care. Avoid touching sensitive parts or components with your hands and be mindful of static electricity that can damage electronic components. If you are concerned about static discharge, consider wearing an anti-static wristband or frequently grounding yourself by touching a metal surface.
By following the proper disassembly process for your laptop and taking necessary precautions, you are now ready to remove the old hard drive and prepare for the installation of the SanDisk 960GB Internal SATA SSD. Stay tuned for the next steps in this guide to complete the upgrade and improve your laptop’s storage capacity.
Removing the Old Hard Drive
With your laptop already disassembled, it’s time to remove the old hard drive to make way for the installation of the SanDisk 960GB Internal SATA SSD. Removing the old hard drive requires careful handling and attention to detail to avoid damage to any components.
Start by locating the old hard drive within the laptop’s storage bay. It is usually secured with screws or brackets to keep it in place. If there are any screws, use the appropriate screwdriver to remove them. Keep the screws in a safe place as you will need them later.
After removing the screws, gently slide or lift the old hard drive out of the storage bay. Be cautious not to apply excessive force or damage any connected cables or components while removing it.
Once the old hard drive is detached from the storage bay, set it aside. You may choose to keep it as a backup or for later use if it is still functional. However, if you no longer require the old hard drive, it’s recommended to properly dispose of it following appropriate e-waste regulations.
While removing the old hard drive, take note of any cables or connectors that are attached to it. These cables will need to be disconnected in order to proceed with the installation of the SanDisk 960GB Internal SATA SSD. Pay close attention to how they are connected and remember their positions to ensure proper reconnection later on.
During this process, it’s important to handle the internal components of your laptop with care. Avoid touching sensitive parts or components with your hands and be mindful of static electricity that can damage electronic components. If you have concerns about static discharge, consider wearing an anti-static wristband or frequently grounding yourself by touching a metal surface.
By removing the old hard drive, you have made space for the installation of the SanDisk 960GB Internal SATA SSD. In the next section, we will guide you through the step-by-step process of installing the new SSD into your laptop, bringing additional storage capacity and improved performance to your device.
Installing the SanDisk 960GB Internal SATA SSD
Now that you have removed the old hard drive from your laptop, it’s time to install the SanDisk 960GB Internal SATA SSD. The installation process is straightforward and requires careful handling to ensure a successful upgrade. Follow these steps to install the new SSD into your laptop’s storage bay.
-
Take the SanDisk 960GB Internal SATA SSD out of its packaging. Carefully handle the SSD by the edges to avoid leaving fingerprints or smudges on the surface.
-
Inspect the SSD for any physical defects or damage. Ensure that all the necessary connectors and ports are present and undamaged.
-
Align the SanDisk 960GB Internal SATA SSD with the empty storage bay in your laptop. Make sure the connectors on the SSD are properly aligned with the corresponding ports in the bay.
-
Gently slide the SSD into the storage bay, ensuring that it fits securely in place. Do not force the SSD; it should slide in smoothly.
-
If your laptop requires additional hardware to properly secure the SSD, such as a mounting bracket or adapter, attach it according to the manufacturer’s instructions. This hardware ensures the SSD remains in place and prevents any unwanted movement or vibrations.
-
If necessary, use the screws that you previously removed from the old hard drive to secure the SanDisk 960GB Internal SATA SSD in place. Ensure that the screws are tightened securely but avoid over-tightening them.
-
Next, reconnect any cables or connectors that were previously attached to the old hard drive to the SSD. Make sure to align them correctly and push them in firmly to ensure a secure connection. Double-check that all connections are properly seated and secure.
By following these steps, you have successfully installed the SanDisk 960GB Internal SATA SSD into your laptop. Take a moment to ensure that everything is securely in place and properly connected before moving on to the next step. In the following sections, we will guide you through the reassembly of your laptop and the initialization of the new SSD, bringing your device one step closer to enhanced storage capacity and improved performance.
Reassembling Your Laptop
Now that you have successfully installed the SanDisk 960GB Internal SATA SSD into your laptop, it’s time to reassemble your device. Careful reassembly ensures that all components are properly secured, and your laptop functions smoothly. Follow these steps to reassemble your laptop and complete the installation process.
-
Begin by carefully reattaching the access panel to the bottom of your laptop. Align the panel with the screw holes and gently slide or press it into place.
-
Retrieve the screws that you previously removed and use the appropriate screwdriver to securely fasten the access panel. Tighten the screws but be careful not to over-tighten or strip them.
-
Double-check that all the cables and connectors inside your laptop are properly aligned and securely connected. Take a moment to verify that everything is in its correct position and that nothing is loose or dangling.
-
Once you are satisfied that everything is assembled correctly, it’s time to power on your laptop. Connect the power source and press the power button to start up your device.
-
During the boot-up process, your laptop’s operating system should detect the new SanDisk 960GB Internal SATA SSD. Follow any on-screen prompts to initialize and format the SSD to make it ready for use.
After the initialization process is complete, your laptop should recognize the SanDisk 960GB Internal SATA SSD as the primary storage device. You can now start enjoying the enhanced storage capacity and improved performance that the SSD brings to your device.
Remember to install any necessary drivers or firmware updates for the SSD. Check the manufacturer’s website for any available software or firmware updates that can optimize the performance of your new SSD.
Congratulations! You have successfully reassembled your laptop and completed the installation of the SanDisk 960GB Internal SATA SSD. Take a moment to appreciate the increased storage space and faster performance that your laptop now provides. Enjoy using your upgraded device and explore the possibilities that come with the enhanced storage capacity.
Initializing the SanDisk 960GB Internal SATA SSD
After installing the SanDisk 960GB Internal SATA SSD and reassembling your laptop, the next step is to initialize the SSD. Initialization involves preparing the SSD for use by your laptop’s operating system, allowing it to recognize and utilize the new storage device effectively. Follow these steps to initialize your SSD and ensure optimal functionality.
-
Start by booting up your laptop. Make sure that the power source is connected and that your laptop is powered on.
-
Once your laptop has booted, navigate to the Disk Management utility. This utility can typically be accessed by right-clicking on the “Computer” or “This PC” icon and selecting “Manage.” From there, select “Disk Management” under the “Storage” section.
-
In the Disk Management window, you should see the newly installed SanDisk 960GB Internal SATA SSD listed. It may appear as “unallocated” or as a new drive with no assigned letter.
-
Right-click on the unallocated drive and select “New Simple Volume” from the context menu.
-
In the “New Simple Volume Wizard” window, click “Next” to begin the process.
-
Specify the size of the partition or volume you want to create for the SSD. In most cases, you can select the maximum available space, which is the entire capacity of the SanDisk 960GB Internal SATA SSD.
-
Assign a drive letter or mount point to the SSD. Choose a letter that is not already in use by another drive in your system.
-
Format the partition using the desired file system (typically NTFS). You can choose the default allocation unit size or customize it based on your specific requirements.
-
Label the volume with a meaningful name if you wish, and select the option for a quick format. This process will erase any existing data on the SSD, so ensure that you have backed up any important files beforehand.
-
Click “Next” to review the settings, and then click “Finish” to complete the initialization process.
Once the initialization process is complete, your laptop’s operating system will recognize the SanDisk 960GB Internal SATA SSD as a usable storage device. You can now start saving files, installing applications, and enjoying the benefits of the enhanced storage capacity and improved performance that the SSD offers.
Remember to transfer any necessary files or applications from your old hard drive or backup onto the new SSD. You can do this by copying the files or utilizing backup and migration software. Organize your data and take advantage of the increased speed and reliability of the new SSD.
By following these steps to initialize your SanDisk 960GB Internal SATA SSD, you have completed the installation process and made your laptop ready for optimal performance and efficient storage utilization. Enjoy the enhanced storage capacity and improved functionality that the SSD brings to your laptop.
Conclusion
Upgrading the storage capacity of your laptop with the SanDisk 960GB Internal SATA SSD is a fantastic way to improve performance and enhance your computing experience. Throughout this guide, we have walked you through the step-by-step process of installing the SSD, from preparing your laptop to initializing the new storage device.
Before delving into installing the SSD, it is crucial to consider important factors such as compatibility, backing up data, and gathering the necessary tools for the installation. These considerations ensure a smooth upgrade process and protect your valuable data.
We then provided a detailed guide on each stage of the installation process, including unboxing the SSD, preparing your laptop, disassembling your device, removing the old hard drive, installing the SanDisk 960GB Internal SATA SSD, reassembling your laptop, and initializing the new SSD.
By following these instructions and taking necessary precautions, you can successfully complete the installation and enjoy the benefits of increased storage capacity and improved performance. With the faster data transfer speeds and reliable performance of the SSD, your laptop will now operate more efficiently, allowing for quicker file access and smoother multitasking.
Remember to take advantage of the extra storage space provided by the SanDisk 960GB Internal SATA SSD. Organize your files and applications to maximize efficiency and keep your laptop running smoothly. Additionally, regularly update your SSD’s firmware and software to ensure optimal performance and functionality.
We hope that this guide has been helpful in upgrading your laptop’s storage with the SanDisk 960GB Internal SATA SSD. Enjoy the enhanced storage capacity, faster performance, and improved productivity that this reliable and high-quality SSD provides. Should you encounter any difficulties or have any questions along the way, always refer to your laptop’s user manual or seek assistance from SanDisk’s customer support.
Congratulations on completing the installation of your SanDisk 960GB Internal SATA SSD. Embrace the benefits of enhanced storage and take your laptop to new heights of performance and productivity.