Introduction
Welcome to this guide on how to print W-2 forms in QuickBooks Online. If you’re an employer who uses QuickBooks Online for your payroll, you may need to print W-2 forms for your employees at the end of the year. W-2 forms are important documents that provide information about the wages and taxes withheld from an employee’s paycheck.
Printing W-2 forms in QuickBooks Online is a straightforward process that can be done within the Payroll Center. In this guide, we will walk you through the necessary steps to access, review, and print these forms for both your records and your employees.
Before we begin, make sure you have the necessary information and resources available. This includes your QuickBooks Online login credentials, employee details, such as names and social security numbers, and access to a printer.
Let’s dive in and learn how to print W-2 forms in QuickBooks Online!
Step 1: Access the Payroll Center
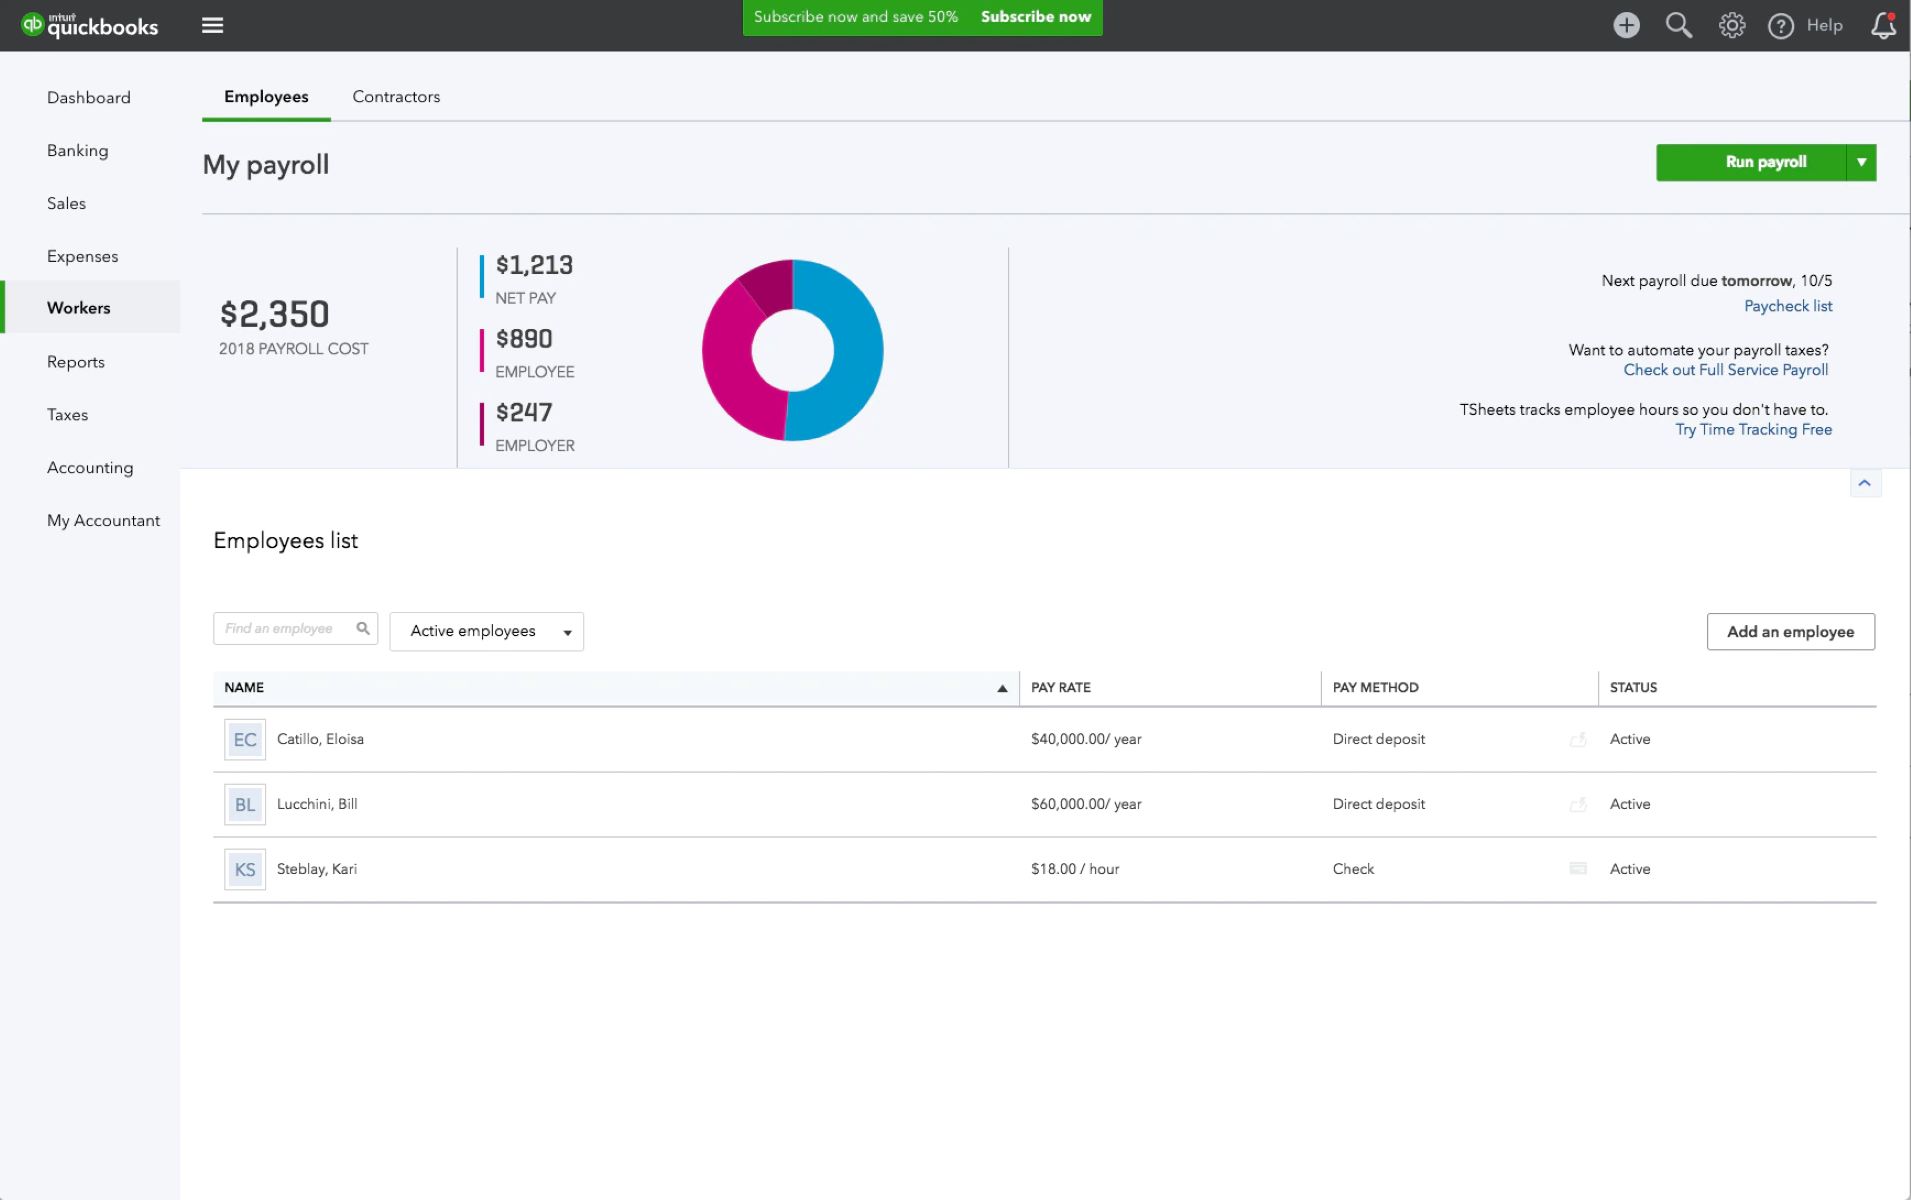
The first step to printing W-2 forms in QuickBooks Online is to access the Payroll Center. The Payroll Center is a hub where you can manage all your payroll-related tasks, including generating and printing W-2 forms.
To access the Payroll Center, follow these steps:
- Log in to your QuickBooks Online account using your credentials.
- Once logged in, navigate to the left-hand side of the dashboard and click on the “Employees” tab.
- From the drop-down menu that appears, click on the “Payroll Center” option.
After completing these steps, you will be redirected to the Payroll Center, where you can proceed to the next step of printing W-2 forms.
It’s important to note that accessing the Payroll Center requires you to have the necessary permissions set up in your QuickBooks Online account. If you don’t have access or encounter any issues, reach out to your system administrator or the account owner for assistance.
Now that you have successfully accessed the Payroll Center, let’s move on to the next step of printing W-2 forms in QuickBooks Online!
Step 2: Choose the W-2 form
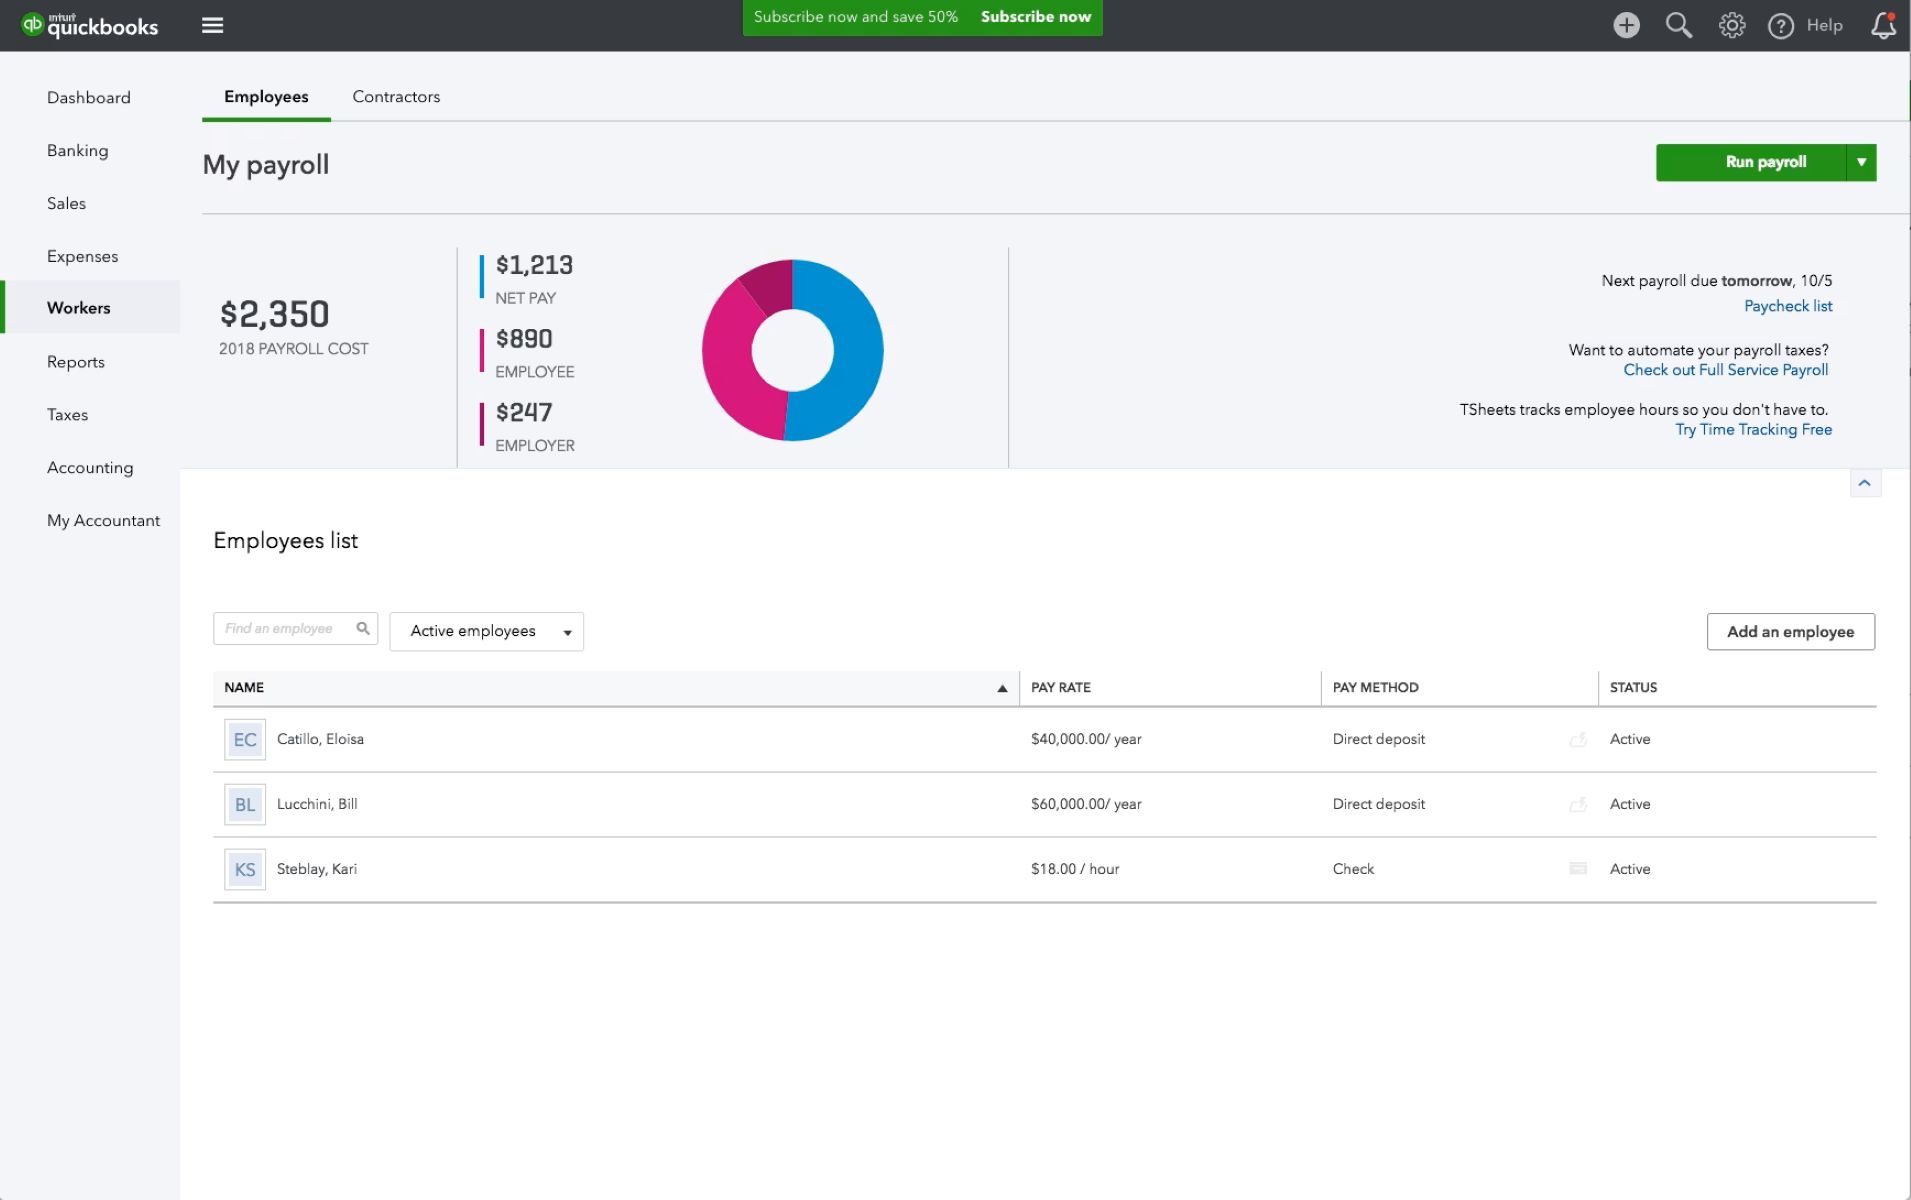
Once you are in the Payroll Center of QuickBooks Online, the next step in printing W-2 forms is to select the appropriate form for printing. QuickBooks Online provides options to choose different types of W-2 forms based on your specific needs.
To choose the W-2 form, follow these steps:
- Within the Payroll Center, locate the “Forms” section and click on the “Annual Forms” tab.
- In the list of available forms, find and click on the “W-2” form.
By selecting the W-2 form, you will be able to proceed with reviewing and printing the necessary information for your employees.
QuickBooks Online also offers the option to choose the “W-3” form, which is the transmittal summary form that is submitted along with the W-2 forms to the Social Security Administration (SSA). If you need to print the W-3 form, follow the same steps as above but select the “W-3” form instead.
Now that you have selected the appropriate W-2 form, it’s time to move on to the next step of reviewing and printing the forms.
Step 3: Review and print the W-2 forms
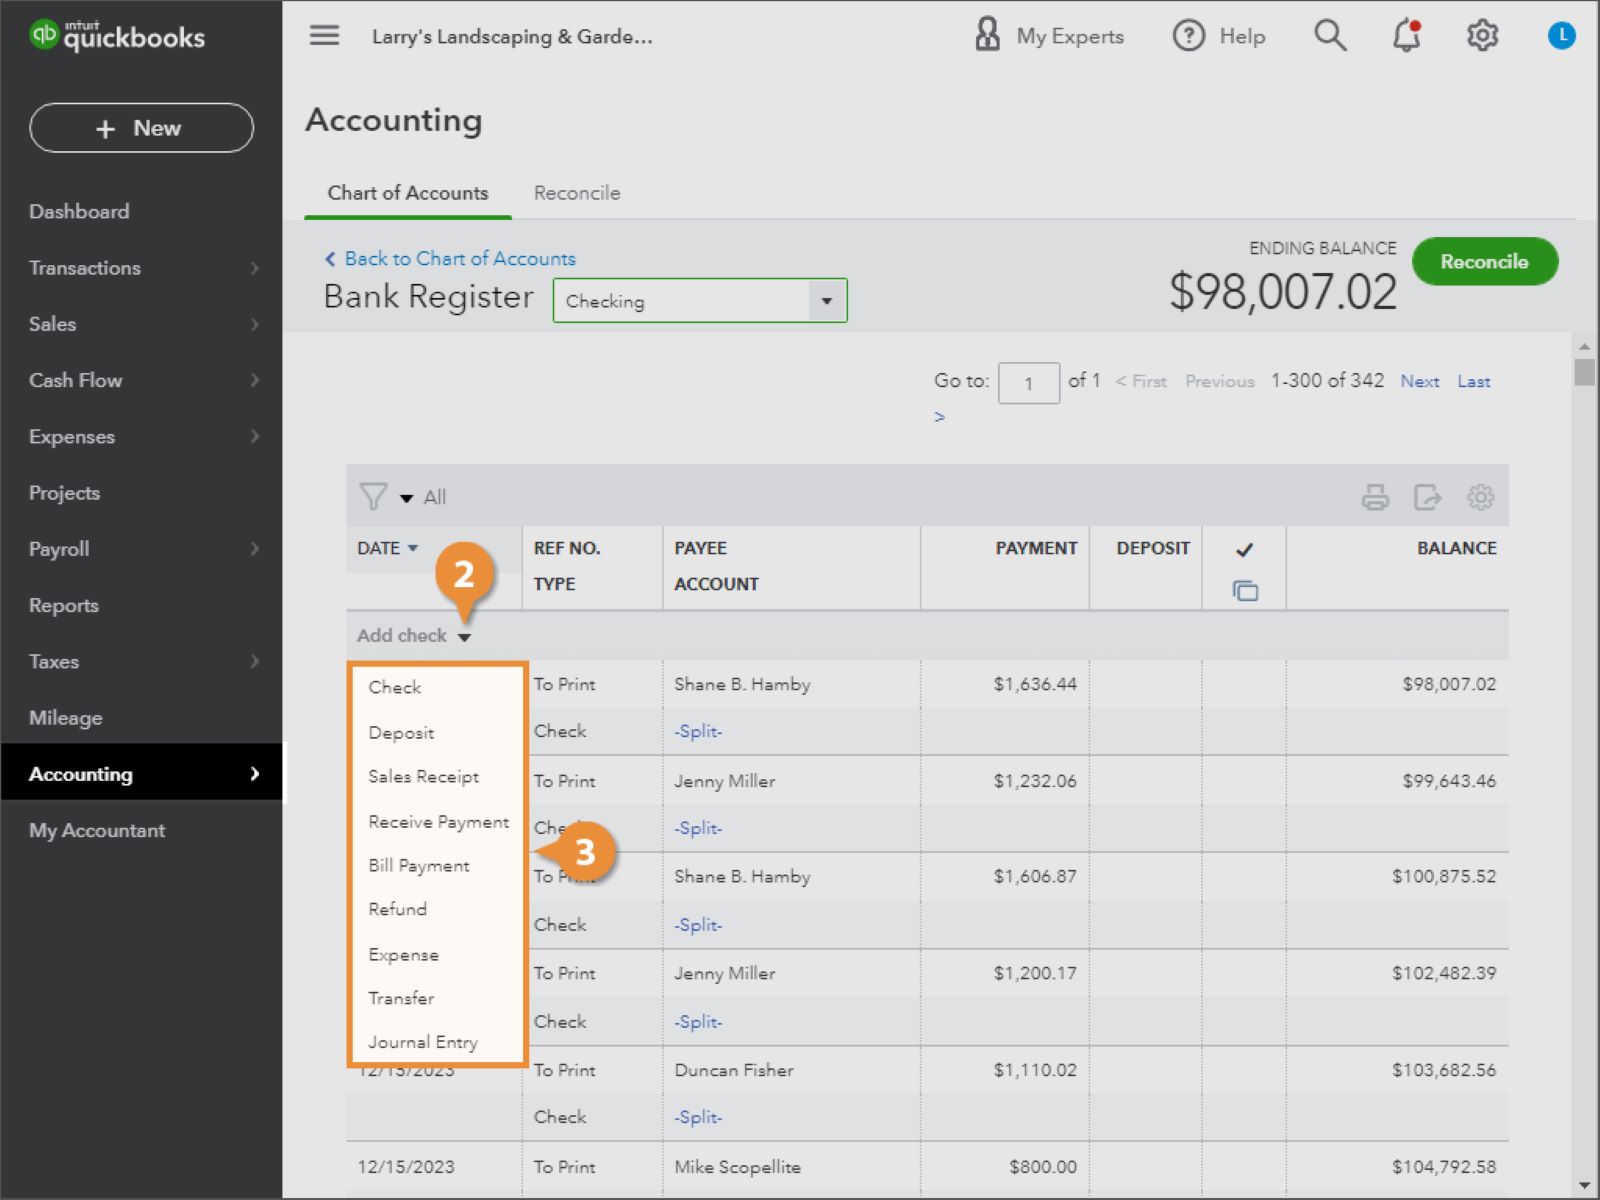
After choosing the W-2 form in QuickBooks Online, you will need to review and print the forms to ensure accuracy before distributing them to your employees. QuickBooks Online provides an easy-to-use interface that allows you to review and make any necessary changes to the W-2 information before printing.
To review and print the W-2 forms, follow these steps:
- In the “Forms” section of the Payroll Center, click on the “Process W-2s” option.
- Choose the year for which you want to print the W-2 forms.
- Verify the employee information, including names, social security numbers, and wages, to ensure accuracy.
- If any corrections are needed, you can make the changes directly in QuickBooks Online.
- Once you have reviewed and verified all the information, click on the “Print” button.
- Follow the on-screen instructions to select the printer and set any printing preferences.
- Click “Print” to generate the W-2 forms.
QuickBooks Online will generate the W-2 forms based on the information provided and send them to the selected printer. Make sure to have sufficient paper and ink available in your printer before initiating the printing process.
It is recommended to print a test page first to ensure everything appears correctly before printing multiple copies. This will help you identify any issues and make adjustments if necessary.
Now that you have reviewed and printed the W-2 forms, it’s time to move on to the next step of printing employee copies.
Step 4: Print employee copies of the W-2 forms
Once you have printed the W-2 forms for your records, the next step is to print employee copies of the forms to distribute to your employees. Each employee should receive a copy of their W-2 form for their tax filing purposes.
To print employee copies of the W-2 forms, follow these steps:
- Make sure you have enough blank W-2 forms or pre-printed forms for your employees.
- Separate the printed W-2 forms into individual employee copies.
- Insert a blank or pre-printed W-2 form into the printer tray.
- In the “Forms” section of the Payroll Center, click on the “Process W-2s” option.
- Choose the year for which you want to print the employee copies.
- In the list of employees, select the one for whom you want to print the W-2 form.
- Click on the “Print” button and follow the on-screen instructions to print the employee copy.
- Repeat this process for each employee until all employee copies have been printed.
Once you have printed the employee copies, it is important to securely distribute them to your employees. Consider using sealed envelopes or password-protected digital methods to ensure confidentiality and protect sensitive information.
It is also a good practice to provide instructions and guidance to your employees on how to use their W-2 forms for tax filing purposes. This will help them understand the importance of these forms and ensure compliance with tax regulations.
Now that you have printed the employee copies of the W-2 forms, the next step is to submit the W-2 forms to the Social Security Administration (SSA).
Step 5: Submit W-2 forms to the Social Security Administration
After printing the employee copies of the W-2 forms, the final step is to submit the W-2 forms to the Social Security Administration (SSA). This ensures that the SSA has the necessary information for tax reporting and enables them to verify the accuracy of the W-2 data.
To submit the W-2 forms to the SSA, follow these steps:
- In the Payroll Center of QuickBooks Online, click on the “Print/E-file” tab.
- Under the “Forms” section, click on the “Print for SSA” option.
- Choose the year for which you want to print the W-2 forms for submission.
- Review the information and ensure its accuracy before printing.
- Insert the appropriate W-2 form for SSA submission into the printer tray.
- Click “Print” and follow the on-screen instructions to print the forms.
- Once printed, prepare the printed W-2 forms for mailing to the SSA.
It is important to note that the submission of W-2 forms to the SSA typically has a specific deadline. Make sure to check the IRS guidelines and submit the forms within the designated timeframe to avoid any penalties or late fees.
When mailing the W-2 forms to the SSA, it is recommended to use certified mail or a secure courier service to track and confirm the delivery. Retain a copy of the forms, as well as any proof of submission, for your records.
With Step 5 completed, congratulations! You have successfully printed and submitted the W-2 forms to the Social Security Administration.
Remember, this guide has provided you with the necessary steps to print W-2 forms in QuickBooks Online. We hope you found it helpful in navigating the process and ensuring compliance with tax regulations.
Conclusion
Printing W-2 forms in QuickBooks Online is a crucial task for employers at the end of the year. By following the steps outlined in this guide, you can easily access the Payroll Center, choose the appropriate W-2 form, review and print the forms, and submit them to the Social Security Administration.
Remember to have all the necessary information, such as employee details and access to a printer, before beginning the process. It’s also important to review the information on the forms for accuracy and make any necessary corrections before printing.
Additionally, printing employee copies of the W-2 forms ensures that your employees receive the necessary documents for their tax filing purposes. Take precautions to securely distribute these copies and provide instructions to your employees on how to use them correctly.
Lastly, don’t forget to submit the W-2 forms to the Social Security Administration within the specified deadline. This ensures compliance with tax regulations and the accurate reporting of employee wages and tax withholdings.
By following these steps and being diligent in the printing and submission process, you can fulfill your responsibilities as an employer and maintain accurate and organized records.
We hope this guide has been helpful in navigating the process of printing W-2 forms in QuickBooks Online. If you have any further questions or need additional assistance, consult the QuickBooks Online support resources or reach out to a professional tax advisor.