Introduction
Virtual Reality (VR) gaming has become increasingly popular, offering an immersive and interactive experience like never before. And with the release of the PlayStation 5 (PS5), gamers can now take their VR adventures to a whole new level by hooking up their PlayStation VR (PSVR) headset to the console.
Connecting the PSVR to the PS5 might seem like a daunting task, but fear not! In this guide, we will walk you through the step-by-step process to make it as smooth and straightforward as possible. Whether you’re an avid VR gamer or just starting out, get ready to dive into a world of mind-blowing virtual reality.
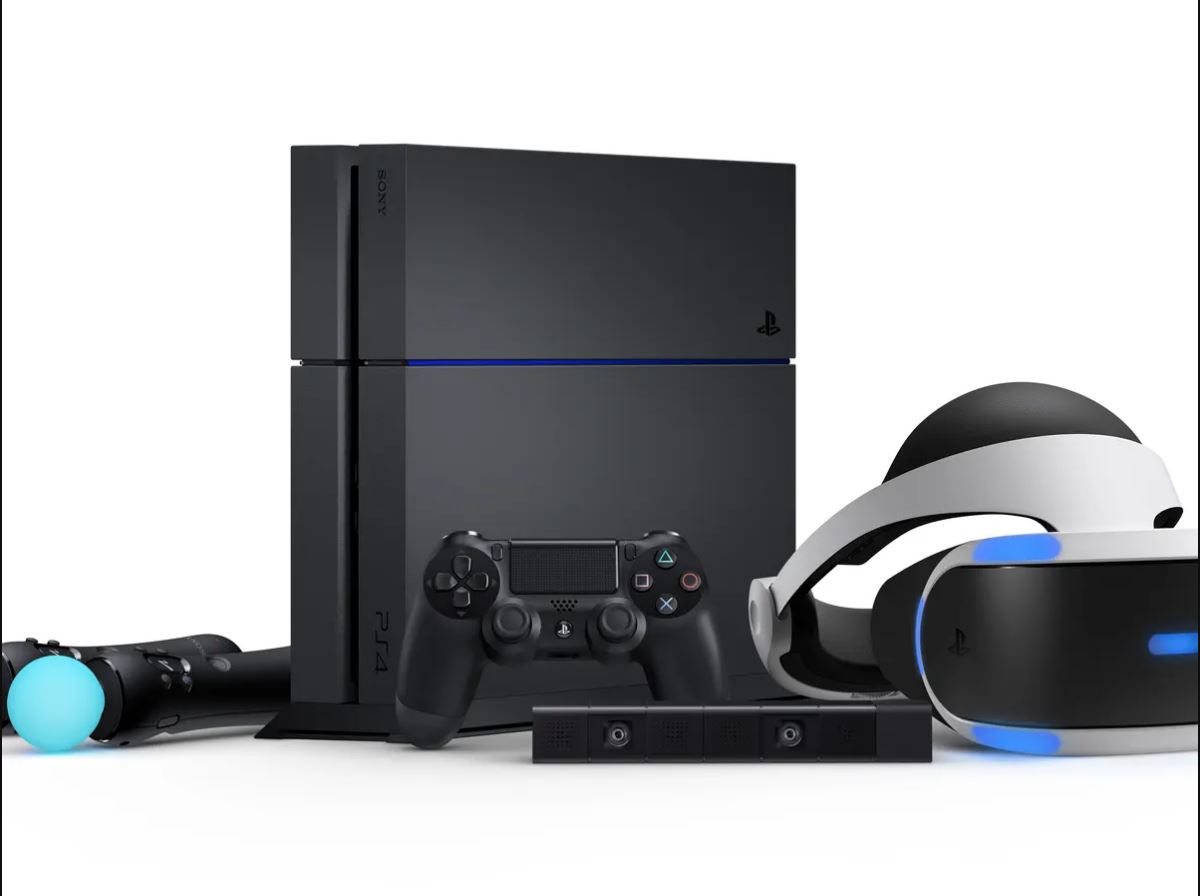
Before we get started, it’s important to note that you will need a few things to successfully connect your PSVR to the PS5. These include the PSVR headset, the PSVR processor unit, the PS Camera, and, of course, a PlayStation 5 console. Once you have all these components ready, follow the steps outlined below to set up your PSVR and embark on an incredible VR gaming journey.
Step 1: Update your PS5
Before you can connect your PSVR to your PS5, it’s important to ensure that your console is fully updated with the latest firmware. Updates often include important system optimizations and compatibility improvements, which are crucial for a smooth VR experience.
To update your PS5, simply follow these steps:
- Turn on your PS5 and connect it to the internet. You can do this either by using an Ethernet cable or connecting to a Wi-Fi network.
- Once your PS5 is connected to the internet, navigate to the settings menu. You can find it by selecting the gear icon located on the top right corner of the home screen.
- In the settings menu, select “System Software Update” and choose “Update System Software.”
- Follow the on-screen prompts to start the update process. Your PS5 will automatically search for the latest firmware and begin downloading and installing it.
- Once the update is complete, restart your PS5 to finalize the installation.
It’s important to note that system updates can take some time, depending on the size of the update and your internet connection. Make sure you have a stable internet connection and enough time to complete the update without interruptions.
By keeping your PS5 up-to-date, you ensure that you have the latest features, bug fixes, and optimizations necessary for a seamless VR experience. With your console updated, you’re now ready to move on to the next step and connect your PSVR headset to your PS5.
Step 2: Connect the PSVR processor unit to your PS5
Now that your PS5 is updated, it’s time to connect the PSVR processor unit to your console. The processor unit acts as the intermediary between your PSVR headset, the PS5, and the TV, allowing for the seamless transmission of audio and video signals.
Follow these steps to connect the PSVR processor unit to your PS5:
- Locate the HDMI cable that came with your PSVR headset. One end of the cable has a smaller connector, while the other end has a standard HDMI connector.
- Insert the smaller end of the HDMI cable into the HDMI OUT port on the back of the PS5 console.
- Take the other end of the HDMI cable and connect it to the HDMI IN port on the PSVR processor unit.
- Next, locate the USB cable that came with your PSVR headset. Connect one end of the USB cable to the USB port on the front of the PS5 console.
- Connect the other end of the USB cable to the USB port on the PSVR processor unit.
- Finally, take the AC power cord that came with your PSVR headset and connect it to the AC adapter. Plug the adapter into a power outlet and connect the other end of the power cord to the PSVR processor unit.
Once all the cables are properly connected, make sure the PSVR processor unit is powered on. You can do this by pressing the power button located on the front of the processor unit.
By connecting the PSVR processor unit to your PS5, you establish the necessary audio and video connections for a seamless VR gaming experience. Now that the processor unit is connected, it’s time to move on to the next step and connect the PSVR headset.
Step 3: Connect the PSVR headset to the processor unit
With the PSVR processor unit connected to your PS5, it’s time to connect the PSVR headset itself. This step is crucial as it establishes the direct connection between your eyes and the virtual world.
Follow these steps to connect the PSVR headset to the processor unit:
- Locate the long cable that came with your PSVR headset. This cable has an HDMI connector on one end and a proprietary connector on the other end.
- Connect the HDMI connector to the HDMI port on the back of the PSVR processor unit.
- Next, take the proprietary connector and connect it to the corresponding port on the PSVR headset. Make sure the connector is properly aligned and securely connected.
- Now, locate the small cable with a 3.5mm audio jack on both ends. Connect one end of the cable to the 3.5mm audio jack on the PSVR headset.
- Connect the other end of the cable to the audio output port on the PSVR processor unit. This will ensure that the audio is transmitted to your headset.
Once the PSVR headset is connected to the processor unit, make sure to adjust the headband and fit the headset comfortably on your head. The adjustable headband and the positioning of the display screen will play a crucial role in the quality of your VR experience.
Keep in mind that the PSVR headset requires power from the processor unit, so ensure that the processor unit is properly connected to a power source and turned on.
By successfully connecting the PSVR headset to the processor unit, you’re one step closer to diving into the immersive world of virtual reality gaming. Next, we’ll cover how to set up the PS Camera in order to track your movements and interactions within the virtual environment.
Step 4: Connect the PS Camera to your PS5
The PS Camera is a crucial component for the PSVR system, as it tracks your movements and allows for interactive and immersive gameplay. To fully utilize the tracking capabilities of the PSVR headset, you need to connect the PS Camera to your PS5.
Follow these steps to connect the PS Camera to your PS5:
- Locate the USB cable that came with your PS Camera. This cable has a specific connector designed to fit into the port on the back of the PS5 console.
- Connect one end of the USB cable to the port on the back of the PS5 console.
- Take the other end of the USB cable and connect it to the USB port on the PS Camera.
Once the PS Camera is connected, you can position it accordingly to capture your movements. Place the camera on top or below your TV, making sure it has a clear view of your play area. Adjust the angle of the camera to ensure that it can track your movements accurately.
It’s important to note that proper positioning and calibration of the PS Camera are essential for optimal tracking performance. Make sure to minimize any potential obstructions or bright lights that could interfere with the camera’s tracking capabilities.
With the PS Camera connected and positioned correctly, you’re ready to move on to the next step of adjusting the camera position for optimal tracking performance.
Step 5: Adjust the camera position
Once you have connected the PS Camera to your PS5, it’s crucial to properly adjust its position for optimal tracking performance. Proper placement of the camera ensures that your movements are accurately tracked in the virtual environment, enhancing your overall VR gaming experience.
Follow these steps to adjust the camera position:
- Ensure that the camera is positioned securely on top or below your TV, facing towards your play area.
- Make sure the camera is at the appropriate height. Ideally, it should be positioned at the same level as your head or slightly above it.
- Ensure that the camera is centered and not tilted. A level camera position helps in accurately capturing your movements.
- Remove any obstructions that may interfere with the camera’s field of view. Move any objects or furniture that may block the camera’s line of sight to your play area.
- Avoid excessive lighting or direct sunlight directly hitting the camera. Bright lights can interfere with the camera’s ability to track your movements accurately. Adjust the lighting in your play area to minimize any potential issues.
It’s a good idea to test the camera position by accessing the Settings menu on your PS5 and selecting “Adjust PlayStation Camera.” Follow the on-screen instructions to ensure that the camera is capturing your movements correctly and making the necessary adjustments if needed.
By properly adjusting the camera position, you optimize the tracking capabilities of the PSVR system, resulting in a more immersive and accurate VR gaming experience. With the camera in the right position, it’s time to proceed to the next step of setting up the PSVR headset.
Step 6: Set up the PSVR headset
Now that all the necessary connections and adjustments have been made, it’s time to set up the PSVR headset itself. This step involves ensuring that the headset is properly fitted and adjusted on your head, along with connecting the headphones and adjusting the volume.
Follow these steps to set up the PSVR headset:
- Place the PSVR headset onto your head, adjusting the headband and earpieces for a comfortable fit. Make sure the headset is snug but not too tight.
- Position the front display screen of the headset directly in front of your eyes, ensuring that it sits comfortably and securely on your face.
- Adjust the inter-pupillary distance (IPD) by moving the scope adjuster on the underside of the PSVR headset. This helps align the lenses with your eyes, enhancing the visual clarity of the VR experience.
- If your PSVR headset includes built-in headphones, connect them to the audio jack on the headset. If not, you can use your own headphones by connecting them to the 3.5mm audio jack on the PSVR processor unit.
- Adjust the volume according to your preference using either the volume controls on the PSVR headset or the volume controls on your connected headphones.
It’s important to ensure that the PSVR headset is properly positioned and adjusted for maximum comfort and optimal visual and audio experience. Take some time to adjust the various straps and settings until you find the perfect fit.
By setting up the PSVR headset correctly, you’re ready to fully immerse yourself in the world of virtual reality gaming on your PS5. The next step involves calibrating the PSVR to fine-tune the tracking and optimize your VR experience.
Step 7: Calibrate the PSVR
Calibrating the PSVR is an important step to ensure accurate tracking and optimal performance during your virtual reality gaming sessions. The calibration process fine-tunes the settings of the PSVR headset, allowing for a more immersive gaming experience.
Follow these steps to calibrate the PSVR:
- From the home screen of your PS5, navigate to the settings menu by selecting the gear icon.
- In the settings menu, select “Devices” and then choose “PlayStation VR.”
- Select “Adjust PlayStation VR.” This will launch the calibration process.
- Follow the on-screen instructions to calibrate the PSVR headset. This usually involves adjusting the position and fit of the headset, ensuring that each eye is aligned with the center of the display and optimizing the tracking capabilities.
- During the calibration process, make sure to follow the instructions carefully and provide any necessary input, such as confirming your position or adjusting the scope.
- Once the calibration is complete, you will receive a confirmation message. This indicates that the PSVR is now calibrated and ready for use.
After calibrating the PSVR, it’s a good idea to test it out with a VR game or experience. This will allow you to verify that the tracking and visual quality are properly adjusted and that you’re ready to dive into an immersive VR gaming session.
By taking the time to calibrate the PSVR, you ensure that the headset performs optimally, delivering an immersive and accurate virtual reality experience on your PS5.
Step 8: Start enjoying VR gaming on your PS5
Now that you have successfully set up and calibrated your PSVR headset, it’s time to dive into the exciting world of virtual reality gaming on your PS5. Get ready to embark on immersive adventures and experience your favorite games in a whole new way.
Here are a few tips to enhance your VR gaming experience:
- Start with shorter gaming sessions: VR gaming can be intense, especially for newcomers. Begin with shorter sessions to get accustomed to the VR environment and gradually increase the duration as you become more comfortable.
- Take breaks: It’s important to take regular breaks during VR gaming sessions to give your body a rest and avoid any discomfort or motion sickness.
- Explore a variety of games: The PSVR library offers a wide range of games and experiences, including thrilling adventures, immersive simulations, and captivating puzzle games. Experiment with different genres to find what suits your preferences.
- Follow safety guidelines: Always follow safety guidelines provided by the game developers and consult the instruction manual for any specific instructions regarding VR gameplay.
- Invite friends to join: Many VR games offer multiplayer features, allowing you to enjoy the virtual world with friends. Invite them to join for a more social and interactive gaming experience.
Remember, VR gaming is all about having fun and immersing yourself in a virtual world. Embrace the incredible experiences that await you and get ready to be amazed by the possibilities of virtual reality on your PS5.
Enjoy your VR gaming adventures!
Conclusion
Connecting and setting up your PSVR headset on your PS5 opens up a whole new world of immersive and interactive gaming experiences. By following the step-by-step guide outlined above, you can easily and successfully set up your PSVR and begin your virtual reality journey.
We started by ensuring that your PS5 is updated with the latest firmware, which is essential for compatibility and optimal performance. Then, we walked through the process of connecting the PSVR processor unit to your PS5, followed by connecting the PSVR headset itself and adjusting it for maximum comfort.
We also covered the importance of connecting and positioning the PS Camera for accurate tracking, as well as adjusting its position to align with your play area. Additionally, we discussed the importance of calibrating the PSVR headset to fine-tune its settings and optimize tracking performance.
Finally, we concluded with some tips on how to make the most of your VR gaming experience, such as starting with shorter sessions, taking breaks, exploring different games, and inviting friends to join in multiplayer experiences.
Now that you have completed the setup process and calibration, it’s time to embark on your VR gaming adventures. Immerse yourself in breathtaking virtual worlds, engage in thrilling gameplay, and enjoy the ultimate gaming experience on your PS5 and PSVR headset.
Get ready to take your gaming to a whole new dimension. It’s time to enter the exciting realm of virtual reality!