Introduction
Installing Windows on a new SSD is an essential step to improve the speed and overall performance of your computer. Whether you’ve just purchased a brand new SSD or want to upgrade your existing storage, this guide will walk you through the process of installing Windows on your new SSD.
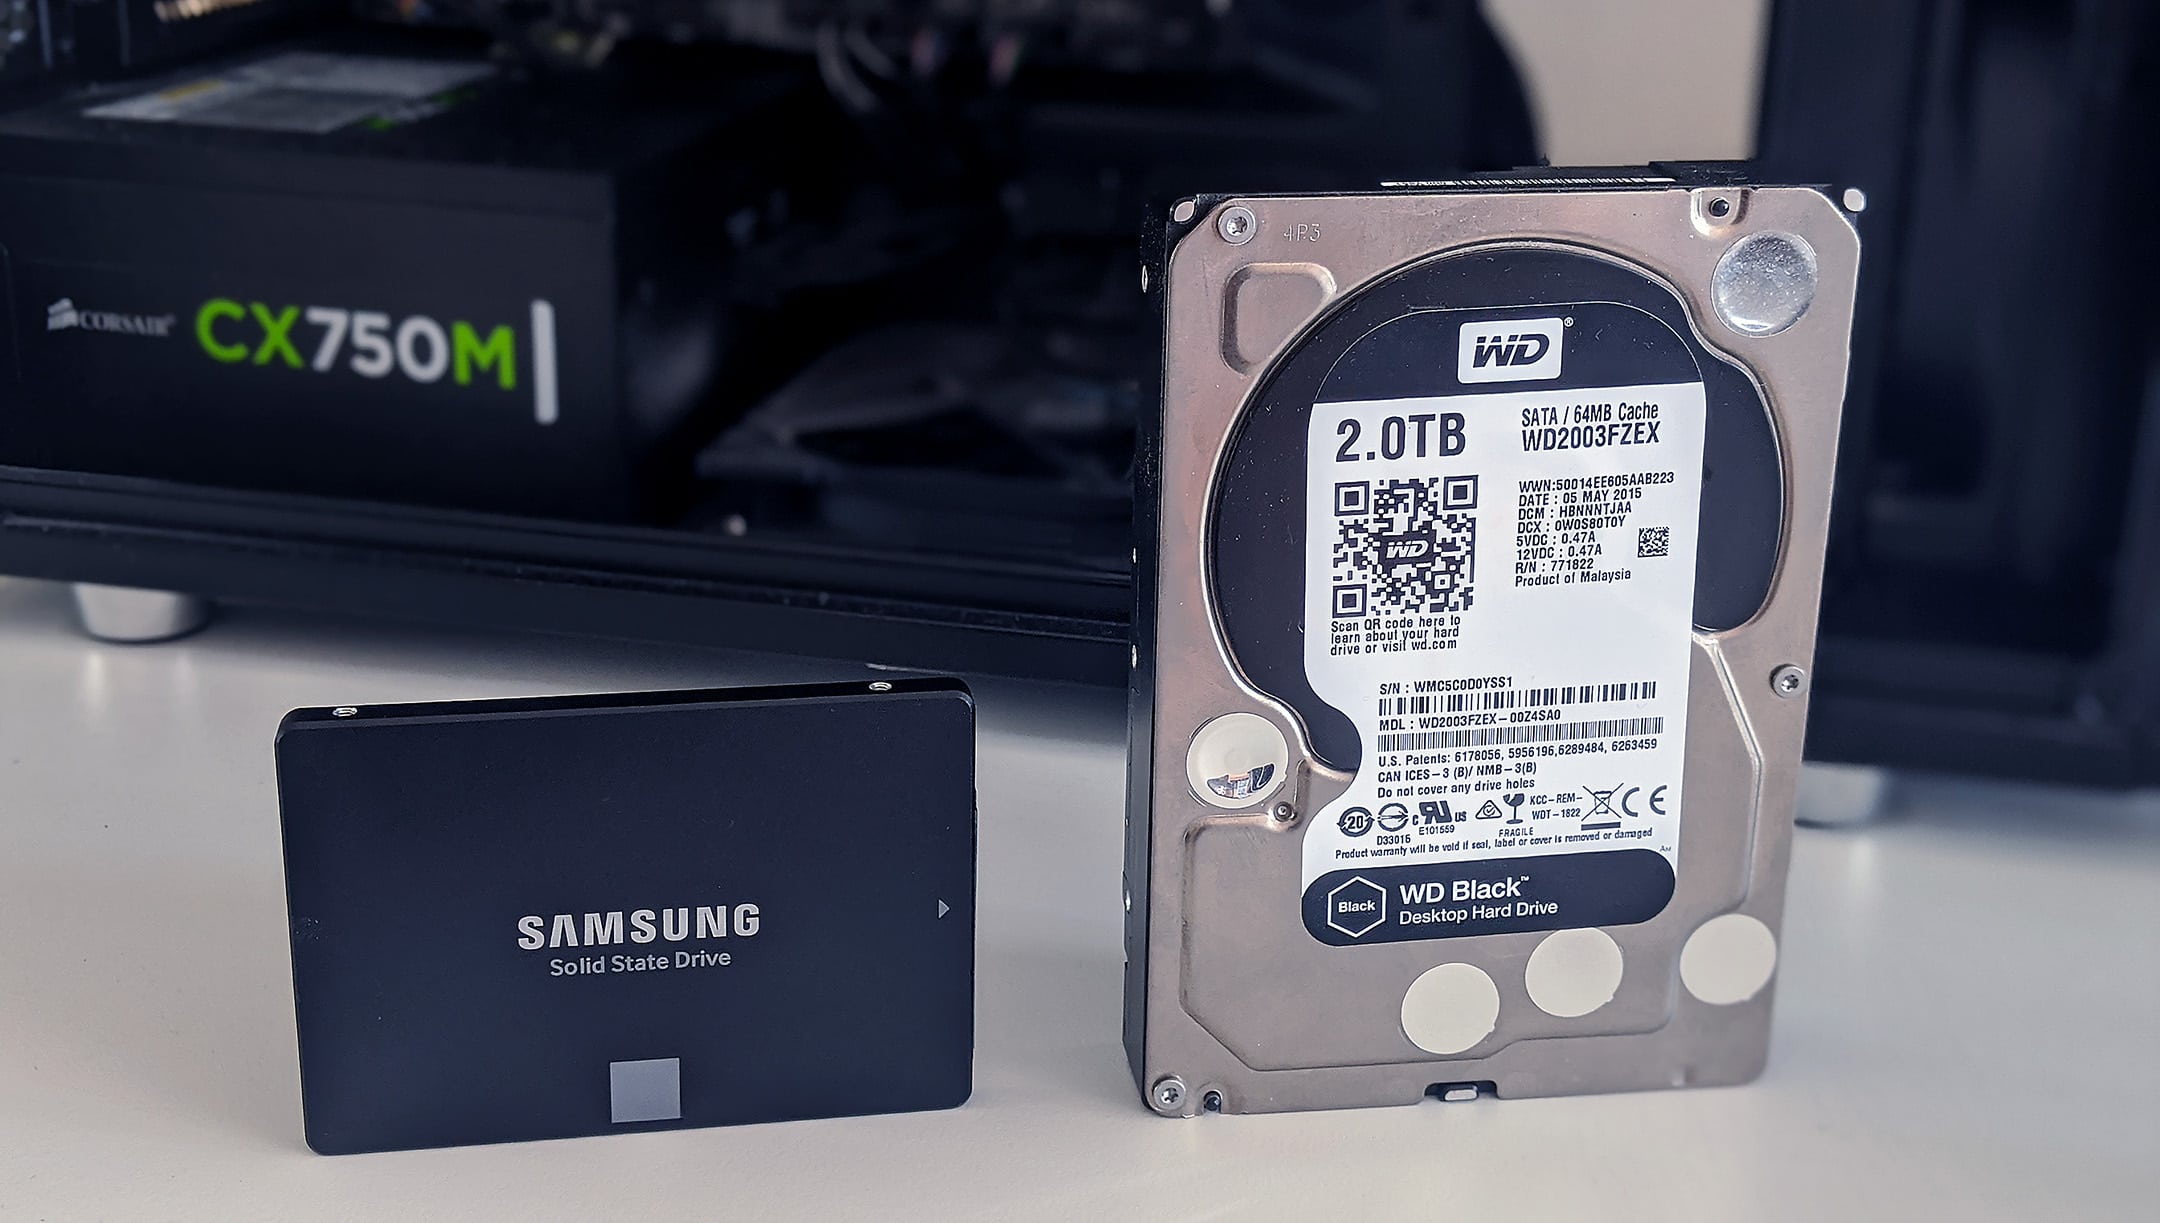
With the increasing availability and affordability of solid-state drives (SSDs), many computer users are opting to switch from traditional hard drives to SSDs. This shift is driven by the superior speed, durability, and efficiency that SSDs offer. By installing Windows on an SSD, you can experience significant improvements in boot times, application loading times, and overall system responsiveness.
While the process of installing Windows on an SSD may seem daunting at first, it is actually a straightforward procedure that can be accomplished by following a few simple steps. In this guide, we will provide you with a step-by-step walkthrough to ensure that the installation process goes smoothly.
Before we dive into the installation process, it’s important to note that installing Windows on a new SSD will require a fresh installation of the operating system. This means that you will need to back up your existing data and reinstall any necessary applications. However, the benefits of installing Windows on an SSD are well worth the effort, as the performance gains will greatly enhance your computing experience.
In the following sections, we will outline the necessary tools and materials you’ll need, walk you through the process of physically installing the SSD in your computer, guide you through the Windows installation process, and provide tips on optimizing your new SSD for better performance. By the end of this guide, you’ll have a faster and more efficient computer with Windows running smoothly on your new SSD.
Step 1: Prepare the necessary tools and materials
Before you begin the process of installing Windows on your new SSD, it’s important to gather all the necessary tools and materials. Here’s a checklist of what you’ll need:
1. Windows installation media: This can be in the form of a USB drive or a DVD. Make sure you have a copy of the Windows operating system that you want to install on your computer.
2. Product key: If you’ve purchased a copy of Windows, you’ll need the product key to activate your license during the installation process. Keep it handy.
3. Backup storage device: Before proceeding with the installation, it’s vital to back up all your important data to an external storage device. This will ensure that your files are safe in case of any unforeseen issues during the installation process.
4. Screwdriver: Depending on your computer model, you may need a screwdriver to open the case and access the internal components. Check the user manual or consult the manufacturer’s website to determine the specific tools required.
5. Internet connection: To download any necessary drivers and updates during the installation process, ensure that you have a stable and reliable internet connection.
6. System specifications: Familiarize yourself with the system requirements for the version of Windows you’ll be installing. This includes the minimum processor, RAM, and storage space requirements. Ensure that your computer meets or exceeds these specifications to ensure optimal performance.
By gathering all the necessary tools and materials beforehand, you’ll be well-prepared to embark on the installation process without any unnecessary delays or interruptions. It’s crucial to have everything you need on hand to ensure a smooth and hassle-free installation experience.
Step 2: Backup your data
Before proceeding with the installation of Windows on your new SSD, it’s crucial to create a backup of all your important data. This step ensures that your files are safe and can be easily restored in case of any unexpected issues during the installation process. Here’s how you can backup your data:
1. Identify important files: Start by identifying the files and folders that contain valuable data such as documents, photos, videos, and personal files. Make a list of these items to ensure that nothing is overlooked during the backup process.
2. Choose a backup method: There are several backup methods you can choose from, depending on your preference and available resources. Some common options include:
- External hard drive or USB drive: Connect an external hard drive or USB drive to your computer and copy the important files onto it.
- Cloud storage: Use a cloud storage service such as Google Drive, Dropbox, or OneDrive to upload your files and keep them securely stored online.
- Network attached storage (NAS): If you have a NAS device on your local network, you can back up your files to it.
3. Create a backup: Once you’ve chosen a backup method, follow the instructions provided by the chosen method to create a backup of your important files. This may involve copying and pasting files to an external drive, uploading them to the cloud storage service, or configuring your computer to backup to a NAS device.
4. Verify the backup: After the backup process is complete, take some time to verify that all your important files have been successfully backed up. Double-check the copied files on the external drive, ensure that the cloud storage service has synced all the files, or confirm the successful transfer to the NAS device.
By taking the time to back up your data before installing Windows on your new SSD, you’ll have peace of mind knowing that your files are safely stored and easily recoverable. In the unlikely event of any issues during the installation process, you can restore your files from the backup and continue working without any major disruptions. Don’t skip this step – it’s an essential precautionary measure to protect your valuable data.
Step 3: Physically install the SSD in your computer
Now that you’ve backed up your data, it’s time to physically install the SSD in your computer. Follow these steps to ensure a smooth installation:
1. Power down your computer: Before working inside your computer, it’s important to shut it down completely. Ensure that all cables are disconnected, and that the power is turned off.
2. Open your computer case: Depending on your computer model, you may need to use a screwdriver to remove the side panel or access door. Refer to your computer’s user manual or the manufacturer’s website for specific instructions on opening the case.
3. Identify the storage bay: Look for the storage bays inside your computer case. These are typically rectangular slots where the hard drives and SSDs are installed. If your computer already has an SSD or hard drive installed, you may need to disconnect it to make room for the new SSD. Refer to your computer’s manual for guidance.
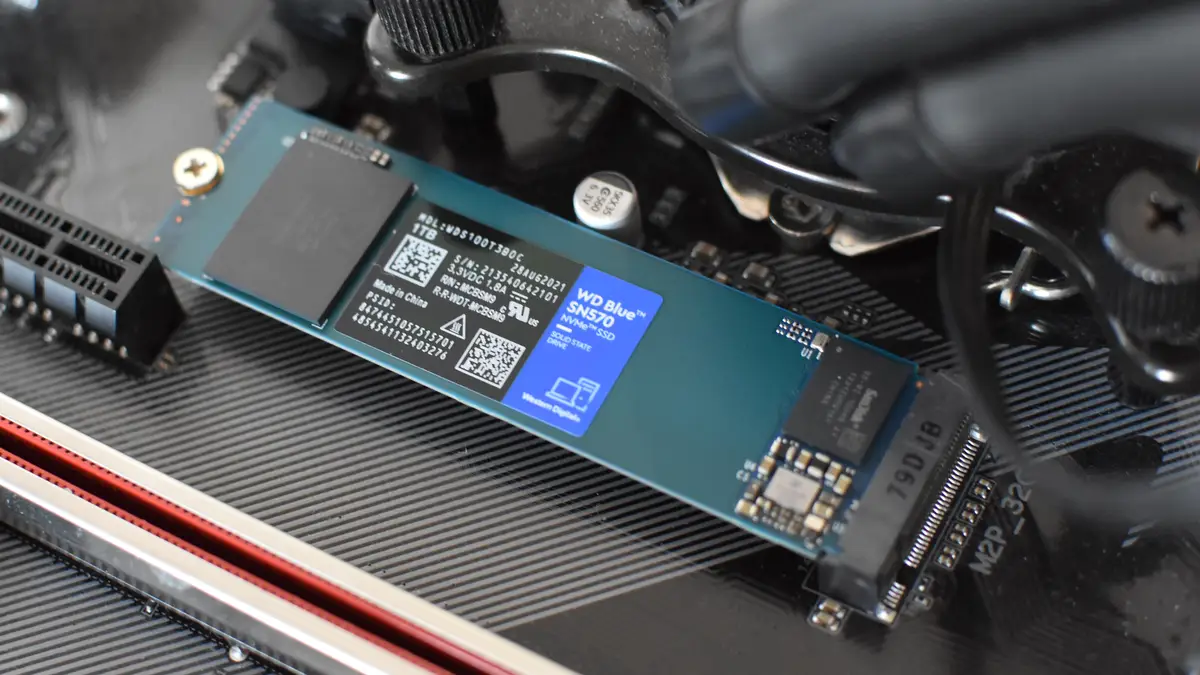
4. Mount the SSD: Gently insert the new SSD into an available storage bay. Align the screw holes on the SSD with the holes on the bay and secure it with screws. Be careful not to overtighten the screws, as this may damage the SSD or the bay.
5. Connect the cables: Locate the SATA data cable and the SATA power cable. Connect one end of the SATA data cable to the SSD and the other end to the SATA port on your motherboard. Connect the SATA power cable to the SSD and the power supply unit (PSU).
6. Close the computer case: Once the SSD is securely installed and the cables are connected, carefully close the computer case. Ensure that all screws are tightened and that the case is properly secured.
7. Power on your computer: Connect the power cable and any other necessary cables to your computer. Press the power button to turn it on.
8. Access the BIOS: During the boot process, press the designated key (usually ESC, F2, or DEL) to access the BIOS settings. Navigate to the “Boot” or “Boot Options” section and ensure that the new SSD is recognized as a bootable device.
By following these steps, you will physically install the SSD in your computer, preparing it for the Windows installation process. Take your time and ensure that all connections are secure before moving on to the next step. With the SSD successfully installed, you’re one step closer to enjoying the improved performance and speed it has to offer.
Step 4: Boot from a Windows installation media
With the SSD installed, it’s time to boot your computer from a Windows installation media. Here’s how to do it:
1. Insert the Windows installation media: If you’re using a USB drive, insert it into a USB port. If you’re using a DVD, insert it into the optical drive of your computer.
2. Restart your computer: Once the installation media is inserted, restart your computer. You may need to press the designated key (often F12, F11, ESC, or DEL) during the boot process to access the boot menu. Consult your computer’s manual or the manufacturer’s website for the specific key to access the boot menu.
3. Select the boot device: In the boot menu, use the arrow keys to select the drive that corresponds to the Windows installation media. Press Enter to boot from the selected device.
4. Windows loading screen: After booting from the Windows installation media, you’ll see the Windows loading screen. This indicates that the installation process is about to start.
5. Choose language and other preferences: Follow the on-screen instructions to select your preferred language, timezone, and keyboard layout. Click “Next” to proceed.
6. Activate Windows: If prompted, enter your Windows product key to activate your license. It’s usually found on a sticker on the packaging of your installation media or in the confirmation email if you purchased Windows online. Click “Next” to proceed.
7. Accept the license terms: Read through the license terms and conditions, and click the checkbox to accept them. Click “Next” to continue.
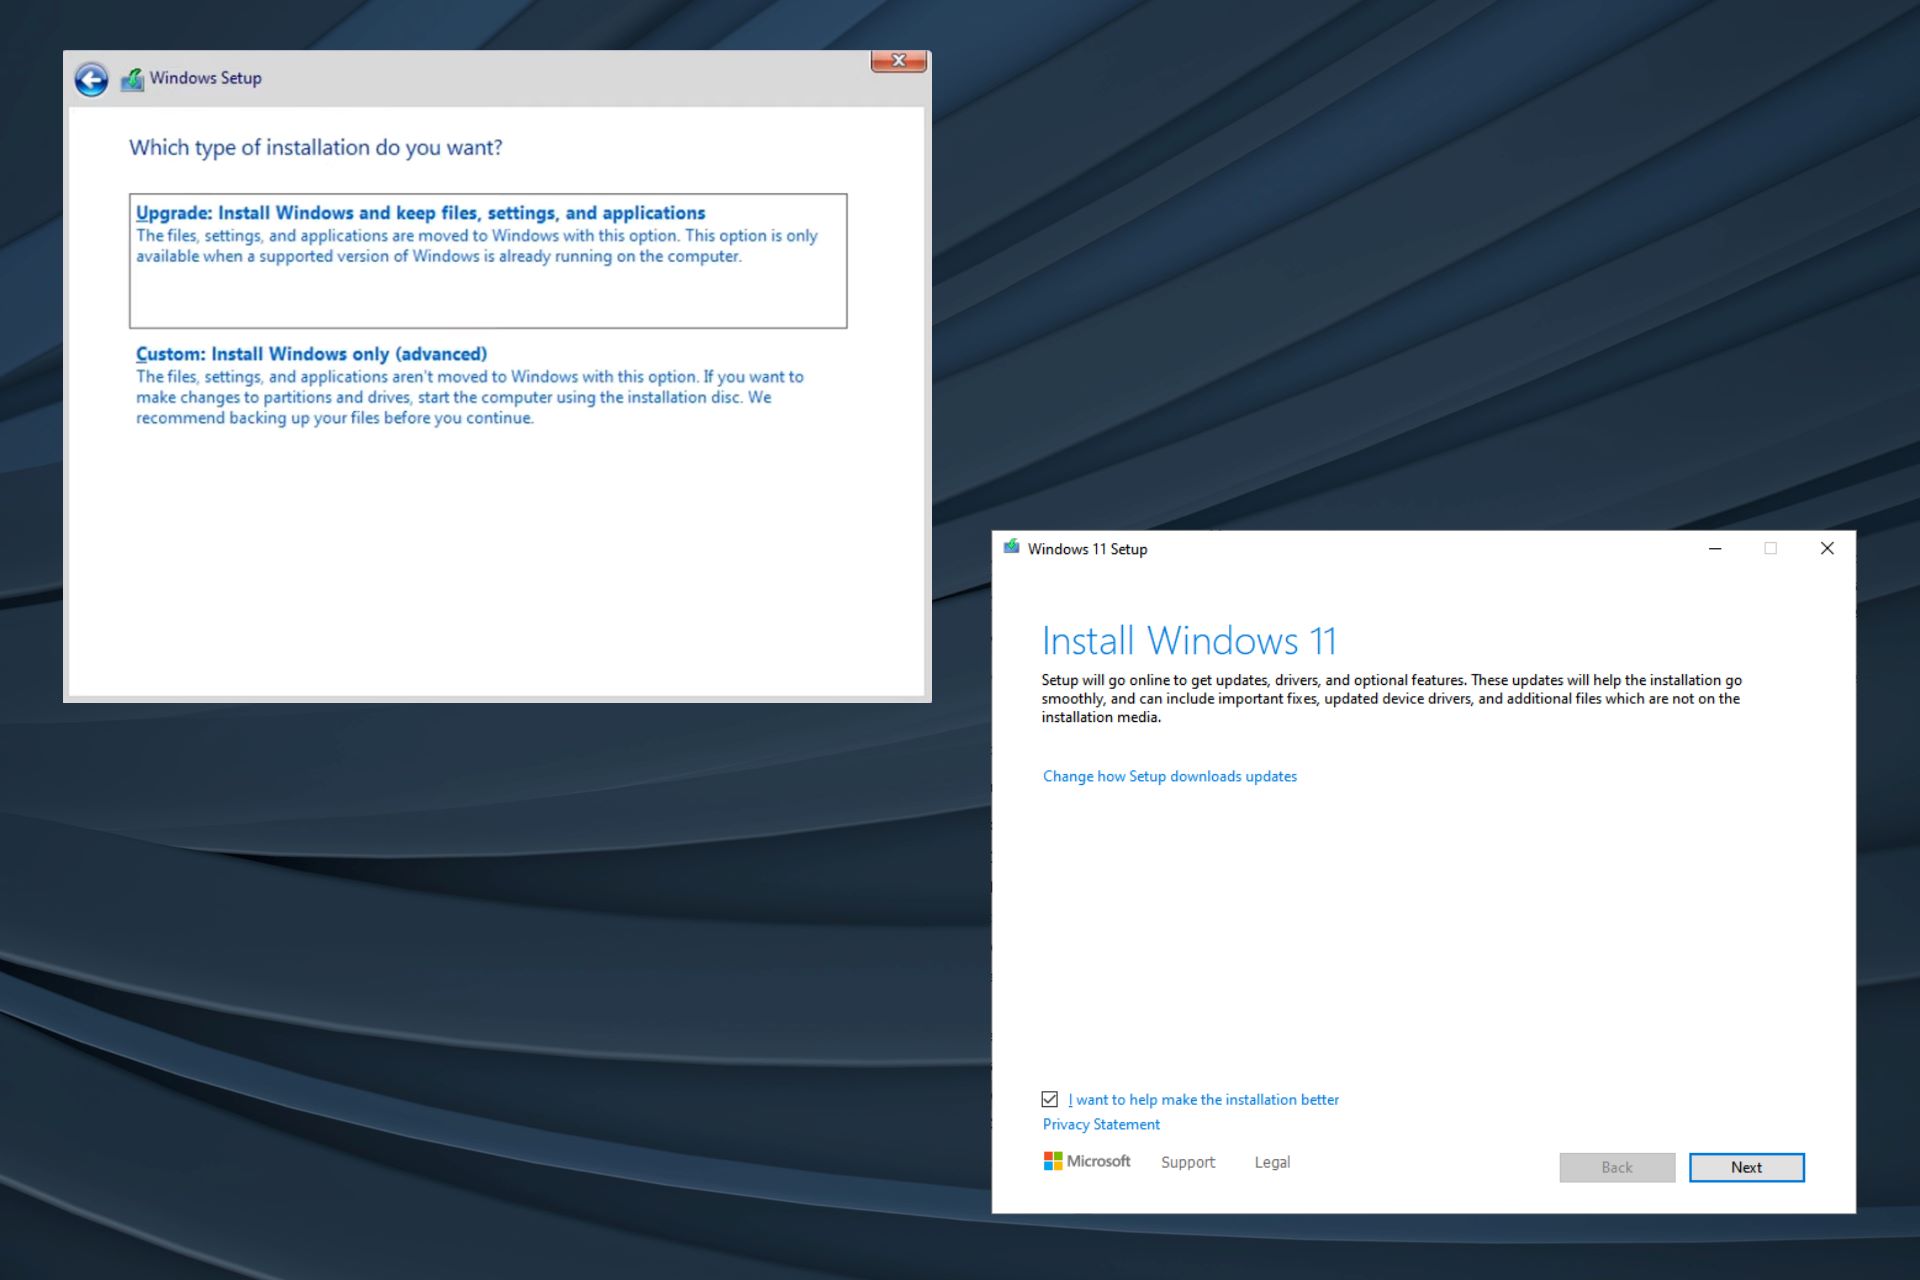
8. Select installation type: On the next screen, choose “Custom: Install Windows only (advanced)” as the installation type. This will allow you to select the newly installed SSD as the installation destination.
9. Select the SSD: You’ll see a list of available drives. Select the SSD drive where you want to install Windows. Ensure that you choose the correct SSD and not any other existing drives or partitions.
10. Begin the installation: Click “Next” to begin the installation process. Windows will now install on your new SSD. This may take some time, so be patient and let the process complete.
By successfully booting from a Windows installation media, you’re now ready to proceed with the installation of Windows on your new SSD. Ensure that you follow the on-screen instructions and make the necessary selections to ensure a smooth installation process. Once the installation is complete, you can move on to the next step of installing necessary drivers and updates.
Step 5: Begin the Windows installation process
Now that you’ve booted from the Windows installation media, it’s time to begin the Windows installation process on your newly installed SSD. Follow these steps to get started:
1. Choose your region and language: The first screen you’ll see is the Windows installation screen. Select your region and language preferences and click “Next” to proceed.
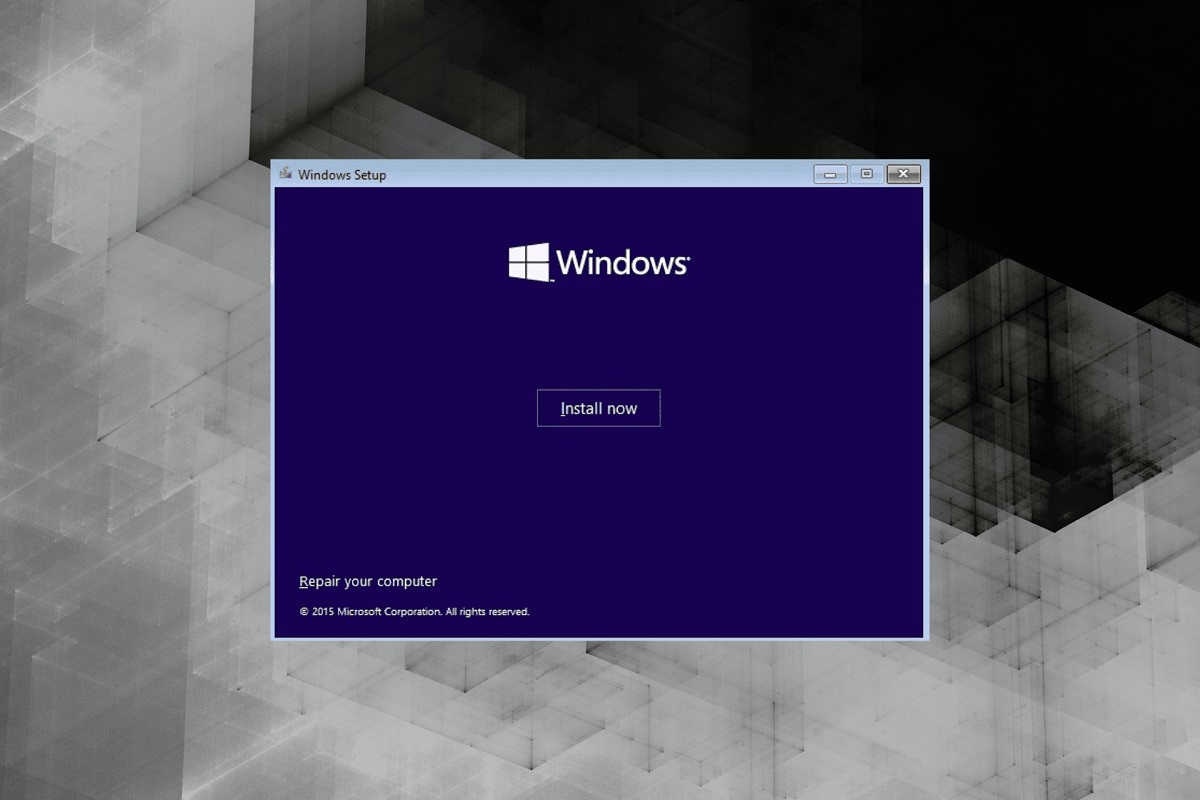
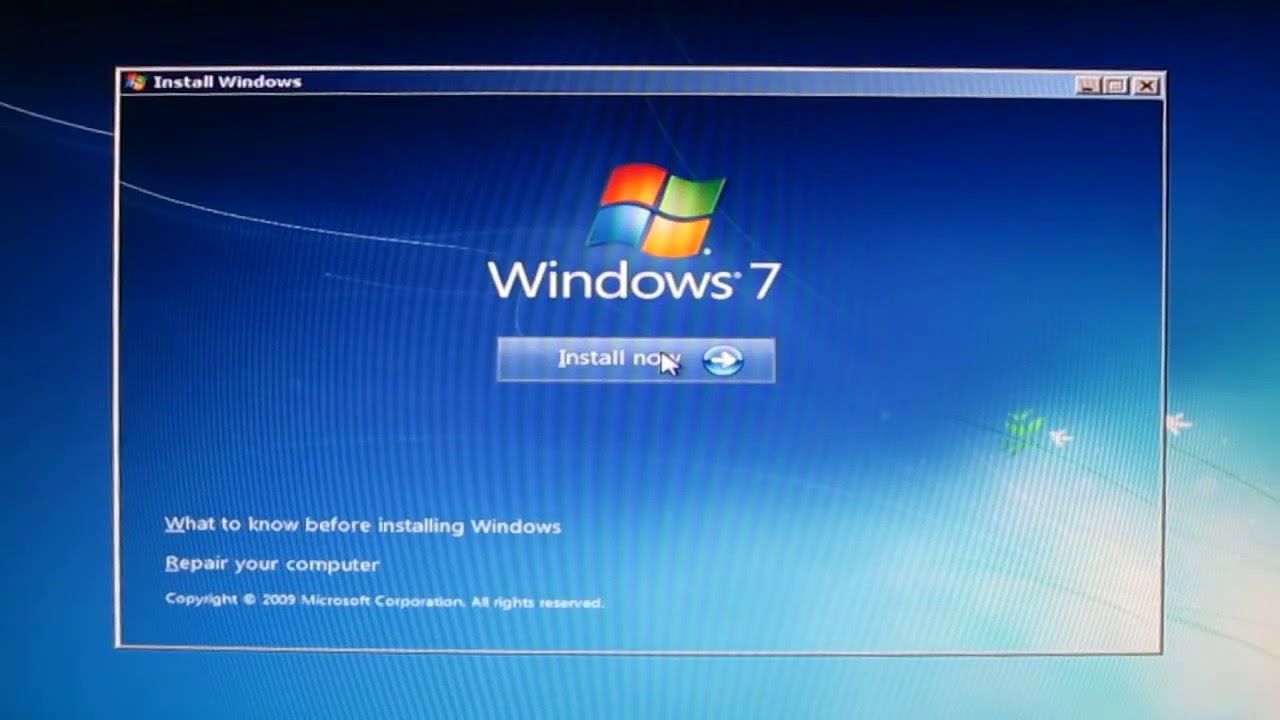
2. Install now: On the next screen, click the “Install now” button to initiate the installation process.
3. Enter your product key: If prompted, enter the product key for your version of Windows. This is usually found on the packaging of your Windows installation media or in the confirmation email if you purchased a digital copy. Click “Next” to continue.
4. Accept the license terms: Read through the license terms and conditions and accept them by clicking the checkbox. Click “Next” to proceed.
5. Choose the installation type: Select “Custom: Install Windows only (advanced)” as the installation type. This will allow you to choose the SSD as the installation destination.
6. Select the SSD: On the next screen, you’ll see a list of available drives. Select the SSD where you want to install Windows. Ensure that you choose the correct SSD and avoid selecting any other existing drives or partitions.
7. Format the SSD: If the SSD is new or doesn’t have any partitions, you’ll have the option to format it. Click “Format” to create a new partition for Windows.
8. Wait for the installation: Windows will now begin the installation process on your SSD. This may take some time, so be patient and avoid interrupting the process.
9. Restart your computer: Once the installation is complete, your computer will automatically restart. Remove the Windows installation media (USB drive or DVD) from your computer during the restart process.
10. Follow on-screen setup: After the restart, Windows will continue the setup process. Follow the on-screen instructions to customize your settings, create user accounts, and personalize your Windows installation.
By following these steps, you’ll initiate the Windows installation process on your new SSD. Be sure to follow the on-screen instructions carefully and make the necessary selections throughout the installation process. Once the installation is complete, you can proceed to the next step of installing necessary drivers and updates to ensure optimal performance.
Step 6: Select the SSD as the installation destination
Now that you’ve begun the Windows installation process, it’s time to select your newly installed SSD as the destination for the installation. Follow these steps to ensure a successful selection:
1. Choose the installation type: During the installation process, you’ll reach a screen that asks you to choose the type of installation. Select “Custom: Install Windows only (advanced)” to proceed.
2. Select the SSD: On the next screen, you’ll see a list of available drives. Locate the SSD drive that you have installed in your computer. Make sure you carefully identify the correct SSD to avoid installing Windows on the wrong drive.
3. Format the SSD: If the SSD is brand new or doesn’t have any existing partitions, you’ll have the option to format it. Formatting the drive will erase any existing data, so be cautious and ensure you have backed up any important files beforehand. To format the SSD, select the drive and click on the “Format” option.
4. Create a new partition: After formatting, click on the “New” button to create a new partition on your SSD. You can assign a specific size for the partition or allocate the entire available space to it. Keep in mind that Windows typically requires a minimum of 30 GB for installation, but you may allocate more space if needed.
5. Set the partition as the installation destination: Once you have created a partition on the SSD, select it and click “Next” to confirm it as the installation destination for Windows. Ensure that you have selected the correct partition and haven’t accidentally chosen any other drives or partitions.
6. Begin the installation: After selecting the SSD as the installation destination, click on the “Next” button to start the installation process. Windows will now install on the selected SSD.
7. Wait for the installation to complete: The installation process may take some time to finish. Avoid interrupting the process or turning off your computer during this time. Windows will automatically restart your computer once the installation is complete.
By carefully selecting your SSD as the installation destination, you ensure that Windows is installed on the correct drive. Take your time to double-check your choices and ensure that you haven’t accidentally selected another drive or partition. Once the installation is complete, you can move on to the next step of following the on-screen prompts to finish setting up Windows.
Step 7: Follow the on-screen prompts to complete the installation
After selecting your SSD as the installation destination, you will need to follow the on-screen prompts to complete the installation of Windows. Here are the steps to finish setting up Windows:
1. Wait for the installation to complete: During the installation process, your computer will restart several times. Allow the installation to finish without interrupting it. The progress will be displayed on the screen.
2. Choose your region and language preferences: Once the installation is complete, you will be prompted to select your region, language, and keyboard layout preferences. Choose the appropriate settings and click “Next” to continue.
3. Accept the license terms: Read and accept the license terms presented on the screen. Tick the checkbox to indicate that you agree to the terms, then click “Next” to proceed.
4. Customize your settings: On the next screen, you will have the option to customize various settings, such as privacy options and personalization settings. Make the desired selections and click “Next” to continue.
5. Create a user account: Windows will then prompt you to create a user account. Enter your desired username and password, and provide any additional information requested. Click “Next” to proceed.
6. Oobeuser: If prompted to sign in with a Microsoft account, you can choose to either sign in with an existing account or create a new one. If you prefer to use a local account instead, select the “Offline account” option.
7. Set up security options: Windows will offer you the option to set up additional security features, such as a PIN or password for your user account. Follow the instructions on the screen to set up your desired security options.
8. Wait for updates: Once the initial setup is complete, Windows will check for and download any available updates. This may take some time, depending on the size and number of updates. Allow Windows to complete this process without interruption.
9. Finalize the installation: After all the updates have been installed, your computer will be ready for use. Windows will present you with the desktop screen, indicating that the installation and setup process is complete.
By following these on-screen prompts, you will complete the installation of Windows on your new SSD. Be sure to carefully review and make the desired selections for each prompt. Once the installation is finished, you can start exploring your new Windows environment and enjoy the improved performance provided by your SSD.
Step 8: Install necessary drivers and updates
After completing the installation of Windows on your new SSD, it’s important to install the necessary drivers and updates to ensure optimal performance and compatibility with your hardware and software. Follow these steps to install the required drivers and updates:
1. Check for Windows updates: Once you’re logged into your Windows account, open the “Windows Update” settings by searching for it in the Start menu. Click on “Check for updates” to see if there are any available updates for your system. If updates are found, click on “Install” to begin the update process. It may take some time to download and install the updates, so be patient.
2. Install driver software: Windows usually installs generic drivers for most hardware devices during the installation process. However, it’s advisable to download and install the latest drivers provided by the manufacturers of your specific hardware components. Visit the manufacturer’s website for each device, locate the drivers section, and download the latest drivers for your operating system. Run the installer for each driver and follow the on-screen instructions to install them on your system.
3. Update graphics card driver: If you have a dedicated graphics card, it’s important to update its driver for optimal performance. Visit the website of your graphics card manufacturer (such as NVIDIA or AMD) and download the latest driver for your graphics card model and operating system. Install the driver following the provided instructions. This will ensure that you have the latest features and stability improvements for gaming and other graphical applications.
4. Install additional software: Install any additional software applications that you regularly use, such as antivirus software, office productivity suites, or media players. Make sure to download them from reputable sources to avoid malware or other security risks. Keep in mind that it’s important to only install software that you actually need, as unnecessary applications can contribute to system clutter and reduced performance.
5. Restart your computer: After installing all necessary drivers and updates, it’s a good practice to restart your computer. This will ensure that all changes are applied and that your system is functioning optimally.
6. Monitor ongoing updates: It’s essential to regularly check for and install any new updates that become available for your operating system, drivers, and installed software. Set up automatic Windows updates, and configure your driver update software or check the manufacturer’s website periodically for updates. Keeping your system up-to-date will help maintain stability, security, and performance.
By following these steps to install necessary drivers and updates, you’ll ensure that your computer is running smoothly on your new SSD. Regularly updating your system will help enhance the stability, security, and performance of your Windows installation. With the latest drivers and updates, you’ll be able to fully take advantage of the capabilities of your hardware and software.
Step 9: Restore your backed-up data
Now that you have successfully installed Windows on your new SSD and completed the necessary updates, it’s time to restore your backed-up data. Follow these steps to ensure a smooth data restoration:
1. Connect your backup storage device: Connect the external hard drive, USB drive, or access your cloud storage account that contains your backed-up data. Ensure that the device is recognized by your computer and accessible.
2. Locate and transfer your files: Identify the files and folders that you backed up before the installation. Use the file explorer or backup software to navigate to the backup storage device and locate your files and folders.
3. Restore your files: Copy and paste or drag and drop the files and folders from the backup storage device to their respective locations on your new SSD. Alternatively, if you used backup software, use the restore or recovery feature to initiate the restoration process. Follow the instructions provided by the software to restore your files.
4. Verify the restored files: After the restoration process is complete, take some time to verify that your files have been successfully restored. Open the files and check for any data corruption or missing content. If you encounter any issues, refer back to your backup device and try restoring the files again.
5. Organize your restored data: Once your files are successfully restored, take the opportunity to reorganize and sort them in a way that suits your needs. Create folders, rename files, and ensure that everything is properly labeled and organized for easy access in the future.
6. Install any necessary applications: If you had applications installed on your previous Windows installation, reinstall them on your new SSD. Use the original installation files or download them from reliable sources. Make sure to enter any required license keys or registration information during the installation process.
7. Delete backup files: Once you have confirmed that all your files have been successfully restored, you may consider deleting the backup files from your external storage device or deactivating your cloud storage backup. This will help free up storage space and ensure that your backup remains up to date with future changes.
By following these steps, you can easily restore your backed-up data and ensure that everything is properly transferred to your new SSD. Take the time to verify the integrity of your files and organize them in a way that makes it convenient for you to access and manage your data moving forward.
Step 10: Optimize your new SSD for better performance
After installing Windows on your new SSD, it’s important to optimize it for better performance and longevity. Here are some steps you can take to maximize the benefits of your new SSD:
1. Enable TRIM: TRIM is a feature that helps the SSD maintain optimum performance over time. By enabling TRIM, you allow your operating system to inform the SSD which blocks of data are no longer in use, allowing the SSD to efficiently manage and allocate storage space. To enable TRIM, open the Command Prompt as an administrator and type the command “fsutil behavior set DisableNotify 0”. Press Enter to execute the command.
2. Disable hibernation: Hibernation can take up precious storage space on your SSD. To disable hibernation, open the Command Prompt as an administrator and type the command “powercfg /hibernate off”. Press Enter to execute the command. This will free up disk space and prevent frequent write operations associated with hibernation.
3. Turn off unnecessary visual effects: Windows has various visual effects that can impact performance. To optimize your SSD, go to the Control Panel and search for “Performance”. Click on “Adjust the appearance and performance of Windows” and select the “Adjust for best performance” option, or manually uncheck specific visual effects that you don’t require.
4. Disable unnecessary startup programs: Running unnecessary programs at startup can slow down your system boot times. Open the Task Manager by right-clicking on the taskbar and selecting “Task Manager”. Navigate to the “Startup” tab and disable any programs that you don’t need to launch at startup. This will help improve the overall startup speed of your computer.
5. Enable AHCI mode: AHCI (Advanced Host Controller Interface) mode allows the SSD to make use of its full potential. To enable AHCI mode, access your computer’s BIOS settings by restarting your computer and pressing the designated key (often Del, F2, or F10) during the boot process. Once in the BIOS, navigate to the SATA Configuration or Storage Configuration section and set the SATA mode to AHCI. Save the settings and exit the BIOS.
6. Update firmware: SSD manufacturers may release firmware updates that address performance and compatibility issues. Check the manufacturer’s website regularly for any available firmware updates for your SSD model. Follow their instructions to safely update the firmware, as it may require specific tools or procedures.
7. Regularly update drivers: Keeping your drivers up to date ensures compatibility and optimal performance. Check the manufacturer’s website for your computer’s components, such as the motherboard, chipset, and SSD. Download and install the latest drivers as necessary.
8. Monitor SSD health: Install SSD health monitoring software to keep track of your SSD’s health and performance. This software can provide insights into various metrics, such as temperature, lifespan, and wear leveling. Regularly check the status of your SSD and take appropriate action if any issues are detected.
By following these optimization steps, you can enhance the performance and longevity of your new SSD. Enjoy the improved speed and responsiveness that your SSD brings to your computing experience while ensuring that it operates at its full potential.
Conclusion
Congratulations! You have successfully installed Windows on your new SSD and optimized it for better performance. By following the steps outlined in this guide, you have significantly improved the speed, responsiveness, and overall efficiency of your computer.
Installing Windows on an SSD offers a multitude of benefits, including faster boot times, quicker application loading, and improved system performance. The steps provided in this guide have walked you through the process of physically installing the SSD, booting from a Windows installation media, selecting the SSD as the installation destination, and completing the installation process. You have also learned how to backup and restore your important data and optimize your SSD for better performance.
Remember, regular maintenance is essential to ensure the longevity and continued optimal operation of your SSD. Stay updated with the latest drivers and firmware, monitor the health and performance of your SSD, and follow best practices for SSD management.
With your new SSD running Windows, you can now enjoy a streamlined computing experience, with faster system responsiveness and improved productivity. Take advantage of the increased speed and reliability that your SSD provides and explore new possibilities in your digital endeavors.
Thank you for following this guide. We hope it has been helpful in assisting you with the installation and optimization of Windows on your new SSD. If you have any further questions or need additional support, feel free to consult the manufacturer’s documentation or seek assistance from relevant online communities.