Introduction
Installing a new operating system on a fresh solid-state drive (SSD) can breathe new life into your computer, giving it a performance boost and faster start-up times. If you’re considering installing Windows 7 on a new SSD, this guide will walk you through the step-by-step process to ensure a smooth and successful installation.
Windows 7 remains a popular choice for many users due to its user-friendly interface and compatibility with a wide range of software and hardware. However, it’s important to note that Windows 7 is an older operating system that is no longer officially supported by Microsoft. Nevertheless, if you have specific reasons for installing Windows 7 on a new SSD, this guide will help you get started.
Before diving into the installation process, it’s crucial to be well-prepared. This includes gathering the necessary tools and materials, creating a backup of your important data, and ensuring that your system meets the minimum requirements. Additionally, choosing the right SSD and formatting it correctly are essential steps to avoid any complications during installation.
Throughout this guide, we’ll provide detailed instructions and tips to help you install Windows 7 on a new SSD with ease. By following these steps, you’ll be able to enjoy improved performance and responsiveness from your computer.
Note that this guide assumes you have a basic understanding of computer hardware and are comfortable with making changes to your system. It’s also important to back up all your important files before proceeding with any kind of software installation or modification, as there is always a risk of data loss. Let’s get started on this exciting journey of installing Windows 7 on a new SSD.
Preparing for Installation
Before embarking on the installation process, it’s important to take some necessary steps to ensure a smooth and hassle-free experience. By properly preparing for the installation of Windows 7 on a new SSD, you’ll minimize the chances of encountering any issues during the process. Here’s what you need to do:
Step 1: Gathering the necessary tools and materials
To begin, collect all the essential tools and materials you’ll need for the installation. This includes a USB drive with at least 8GB of storage capacity, a Windows 7 installation disc or ISO file, and, of course, your new SSD. Ensure that you have a reliable and stable internet connection as well, as it may be required to download updates or drivers during the installation process.
Step 2: Creating a backup
Before proceeding with the installation, it’s highly recommended to create a backup of all your important files and documents. This will protect your data in the event that anything goes wrong during the installation process. You can use an external hard drive, cloud storage, or any other backup method of your choice. It’s always better to be safe than sorry, so don’t skip this important step.
Step 3: Checking system requirements
Make sure that your computer meets the minimum system requirements for Windows 7. These requirements include a 1 GHz or faster processor, at least 1GB of RAM for the 32-bit version or 2GB for the 64-bit version, and a minimum of 16GB of free hard disk space. Additionally, ensure that your computer is compatible with Windows 7 by checking the hardware and software compatibility list provided by Microsoft.
Step 4: Choosing the right SSD
When selecting an SSD for your Windows 7 installation, consider factors such as storage capacity and speed. Look for an SSD with enough space to accommodate your operating system, applications, and files without running out of storage quickly. Additionally, opt for an SSD with good read and write speeds to ensure optimal performance. Take your time to research and choose the SSD that best fits your needs and budget.
Step 1: Gathering the necessary tools and materials
Before you can begin the installation process, it’s crucial to gather all the necessary tools and materials. By having everything prepared in advance, you can ensure a smooth and efficient setup. Here’s a list of the essential items you will need:
1. USB Drive: You will need a USB drive with a minimum capacity of 8GB. This will be used to create a bootable USB installer for Windows 7. Make sure the USB drive is empty, or that you have backed up any important data on it before using it for this purpose.
2. Windows 7 Installation Disc or ISO File: Obtain a copy of the Windows 7 installation disc or an ISO file. If you have a physical disc, ensure it is clean and free from scratches. If you have an ISO file, you can either burn it to a disc or use it to create a bootable USB installer.
3. New SSD: Purchase a new solid-state drive (SSD) that meets your desired specifications. Consider factors such as storage capacity, read and write speeds, and compatibility with your computer. Ensure that the SSD has a sufficient amount of storage space to accommodate the Windows 7 operating system and any additional programs or files you plan to install.
4. Stable Internet Connection: A stable internet connection is necessary during the installation process. It may be required to download updates or drivers for your hardware. Ensure that you have a reliable connection to avoid any interruptions or delays during the installation.
Now that you have gathered all the necessary tools and materials, you are ready to proceed to the next steps in the installation process. These include creating a backup of your important files, checking system requirements, choosing the right SSD, formatting the SSD, and ultimately installing Windows 7 on it.
Note that it’s always a good idea to double-check that you have all the required tools and materials before starting the installation process. This will help you avoid any unnecessary delays or frustrations during the setup. Ready yourself for an exciting journey of installing Windows 7 on your new SSD, and enjoy the enhanced performance and efficiency it brings to your computer.
Step 2: Creating a backup
Creating a backup of your important files is an essential step before proceeding with the installation of Windows 7 on your new SSD. This ensures that you have a copy of your data in case anything goes wrong during the installation process. Here’s how you can create a backup:
1. Determine what needs to be backed up: Take some time to identify the files and data that are crucial to you. This may include documents, photos, videos, music, and any other files that are important or irreplaceable. Make a list or create a folder to help you keep track of what needs to be backed up.
2. Choose a backup method: There are several methods you can use to create a backup of your files. You can use an external hard drive, a cloud storage service, or even burn the files to DVDs or CDs. Consider the amount of storage you need, the level of convenience, and the safety of your data when choosing a backup method.
3. External hard drive backup: If you have an external hard drive, connect it to your computer and transfer your files to it. You can do this manually by copying and pasting the files, or you can use backup software to automate the process. Make sure you organize your files in a way that makes it easy to restore them later.
4. Cloud storage backup: Cloud storage services such as Google Drive, Dropbox, or OneDrive offer convenient and secure backup options. Sign up for an account with one of these services, upload your important files, and make sure they are synced and backed up. This method allows you to access your files from anywhere with an internet connection.
5. Test your backup: Once you have created a backup, it’s crucial to test whether you can successfully restore your files if needed. Select a few random files and restore them to another location or different device to ensure that the backup is functioning properly.
By creating a backup of your important files, you can have peace of mind knowing that your data is safe even if something unexpected happens during the installation process. Take the time to ensure that your backup is complete and functional before moving on to the next steps. With your data securely backed up, you are now ready to proceed to the next stage of installing Windows 7 on your new SSD.
Step 3: Checking system requirements
Before installing Windows 7 on your new SSD, it’s important to verify that your computer meets the minimum system requirements. Checking the system requirements ensures that your computer can handle the operating system and that you won’t encounter any compatibility issues. Here’s how you can check the system requirements for Windows 7:
1. Processor: Windows 7 requires a 1 gigahertz (GHz) or faster processor. Check the specifications of your computer’s processor to ensure it meets this requirement. You can typically find this information in the manufacturer’s documentation or by checking your computer’s system information settings.
2. Memory (RAM): The minimum RAM requirement for Windows 7 is 1 gigabyte (GB) for the 32-bit version or 2 GB for the 64-bit version. Verify how much RAM your computer has installed by going to the system information settings. If your computer falls short of the required amount, consider upgrading your RAM for optimal performance.
3. Hard Disk Space: Windows 7 requires a minimum of 16 GB of available hard disk space for the 32-bit version and 20 GB for the 64-bit version. Check the available disk space on your current system to ensure you have enough space to accommodate the Windows 7 installation on your new SSD.
4. Graphics Card: While not a strict requirement, a graphics card with DirectX 9 support is recommended for Windows 7. This will ensure that you can take advantage of the visual features and performance enhancements offered by the operating system. Check your graphics card specifications to determine if it meets the recommended requirements.
5. Other Requirements: Apart from the above, ensure that your computer meets other necessary requirements such as having a DVD drive or USB ports for installation, a compatible display with at least 800×600 resolution, and a stable internet connection for downloading updates or drivers.
By checking and confirming that your computer meets the system requirements for Windows 7, you can avoid installation problems or issues with performance. If your system falls short in any area, it may be necessary to upgrade certain hardware components before proceeding with the installation. With a compatible computer, you are now ready to move on to the next steps in the installation process of Windows 7 on your new SSD.
Step 4: Choosing the right SSD
Selecting the right solid-state drive (SSD) for your Windows 7 installation is essential to ensure optimal performance and compatibility. With a wide range of SSD options available in the market, it’s important to consider several factors before making your decision. Here’s what you need to know when choosing the right SSD for your Windows 7 installation:
1. Storage Capacity: Consider your storage needs when selecting an SSD. Determine how much space you require for the Windows 7 operating system, applications, and files. It’s recommended to opt for an SSD with ample storage capacity to accommodate your needs and allow room for future growth.
2. Read and Write Speeds: SSDs offer faster performance compared to traditional hard drives. Look for an SSD with high read and write speeds to ensure speedy data access and improved system responsiveness. Faster read speeds enable quicker boot times and application launch times.
3. Compatibility: Ensure that the SSD you choose is compatible with your computer’s connectors and interfaces. Verify if your system supports SATA III (6.0 Gbps) or SATA II (3.0 Gbps) connectivity. Most modern systems are SATA III compatible, offering faster transfer speeds.
4. Brand and Reliability: Consider reputable brands known for producing reliable and high-quality SSDs. Research customer reviews and ratings to gain insights into the reliability and durability of different SSD models. Reliability is crucial to ensure that your data is safe and your SSD operates smoothly.
5. Price: SSD prices have become more affordable over the years, but they can still vary significantly depending on capacity, performance, and brand. Set a budget and balance your requirements against the cost to make an informed decision.
6. Warranty: Check the warranty details provided by the manufacturer before purchasing an SSD. A longer warranty period indicates the manufacturer’s confidence in their product’s quality and performance.
7. Considerations for Windows 7: Although Windows 7 is an older operating system, it can still benefit from the improved performance of an SSD. Ensure that the SSD you choose is fully compatible with Windows 7 and has appropriate drivers available for installation.
Taking the time to research and choose the right SSD for your Windows 7 installation can significantly enhance your computer’s performance. By considering storage capacity, read and write speeds, compatibility, reliability, price, warranty, and specific considerations for Windows 7, you can make a well-informed decision. Once you have selected the perfect SSD, you are one step closer to enjoying the benefits of a faster and more efficient system with Windows 7.
Step 5: Formatting the SSD
Before installing Windows 7 on your new solid-state drive (SSD), it’s necessary to format the SSD to ensure that it’s ready to receive the operating system and any other files. Formatting the SSD prepares it for use by creating a file system and initializing it for data storage. Here’s how to format the SSD for Windows 7:
1. Connect the SSD: Ensure that your computer is powered off, and then connect the SSD to your computer using the appropriate cables or connectors. If necessary, consult the SSD’s manual or manufacturer’s website for guidance on proper installation.
2. Access Disk Management: Once the SSD is connected, power on your computer and log in to your Windows account. Press the Windows Key + R to open the Run dialog box. Type “diskmgmt.msc” and press Enter. Disk Management will open, displaying all connected storage devices, including the SSD.
3. Locate the SSD: In Disk Management, locate the SSD among the listed drives. It will likely be labeled as “Unallocated” or “RAW”. Right-click on the SSD and select “New Simple Volume”. This will initiate the formatting process.
4. Format the SSD: In the New Simple Volume Wizard, click Next to begin formatting the SSD. Select the desired file system, typically NTFS, as it offers the most compatibility and features for Windows 7. Assign a drive letter to the SSD and give it a descriptive volume label, if desired. Leave the allocation unit size as the default setting, unless you have specific requirements.
5. Complete the Formatting Process: Review the settings in the Summary window and click Finish to start the formatting process. Disk Management will format the SSD and assign it the specified drive letter. The time taken for formatting will depend on the size of the SSD. Once the process is complete, you will see the SSD labeled with the assigned drive letter and the file system label.
6. Verify Formatting: To ensure that the SSD has been properly formatted, you can open File Explorer and navigate to the newly assigned drive letter. Check that you are able to create new folders, copy files, and perform other operations on the SSD. This confirms that the SSD is ready for the installation of Windows 7.
By following these steps, you can successfully format your SSD in preparation for the installation of Windows 7. Formatting ensures that the SSD is set up correctly and ready to receive the operating system. With your SSD properly formatted, you are now ready to proceed to the next steps of installing Windows 7 on your newly prepared SSD.
Installing Windows 7
Once you have prepared your system and formatted the SSD, you are ready to proceed with the installation of Windows 7. Installing the operating system on your new SSD will rejuvenate your computer and provide faster performance. Here is a step-by-step guide to installing Windows 7:
Step 6: Creating a bootable USB installer
To begin the installation process, create a bootable USB installer for Windows 7. This involves using a tool like Rufus or the Windows 7 USB/DVD Download Tool to transfer the Windows 7 installation files to your USB drive. Follow the instructions provided by the tool to create the bootable USB installer.
Step 7: Changing the boot order
Power off your computer and insert the USB drive containing the Windows 7 installation files. Restart your computer and access the BIOS settings by pressing a specific key during startup (common keys include Esc, F2, F10, or Del). In the BIOS settings, navigate to the Boot section and change the boot order to prioritize the USB drive. Save the changes and exit the BIOS settings.
Step 8: Installing Windows 7 on the SSD
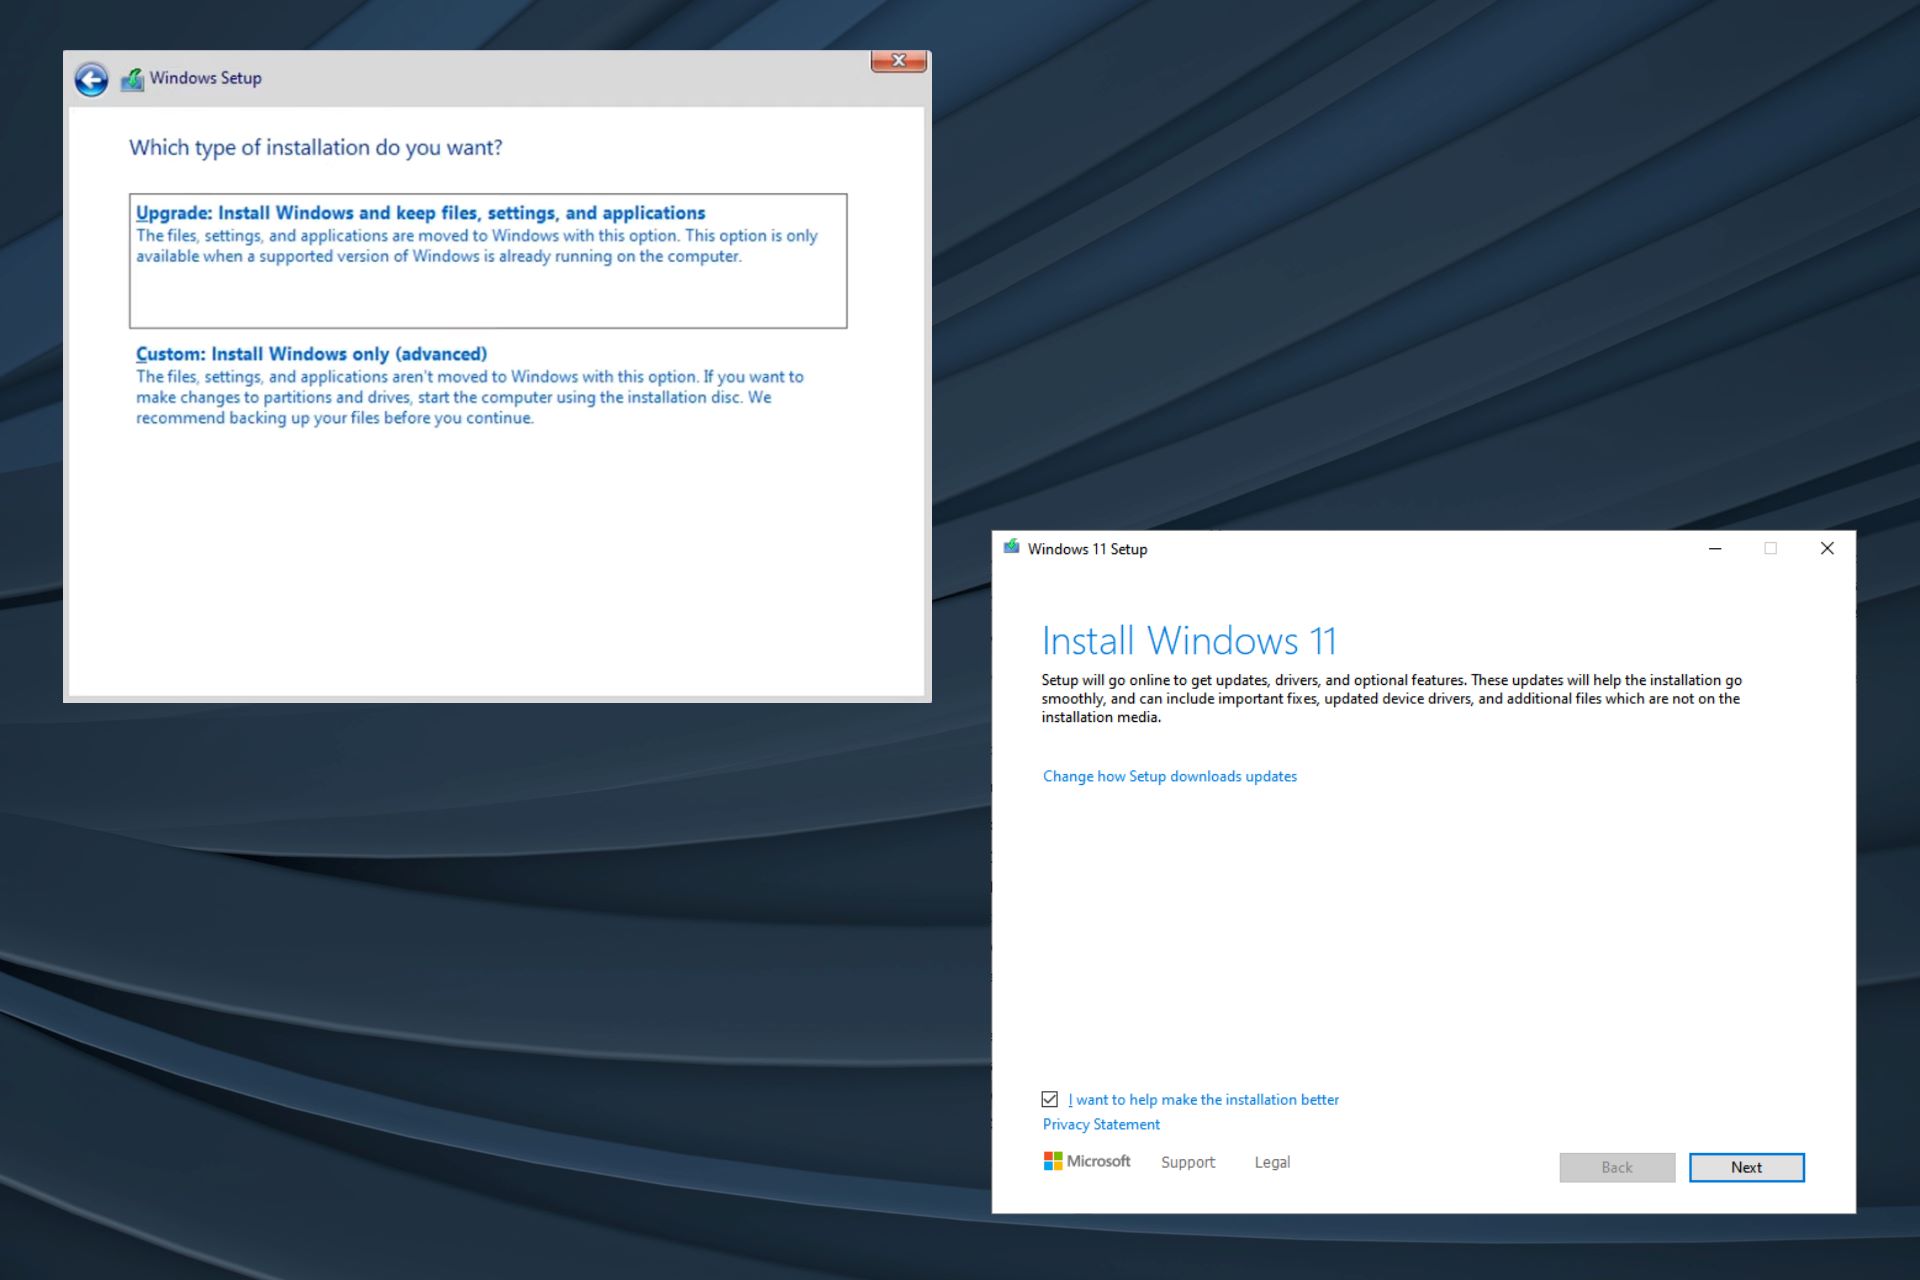
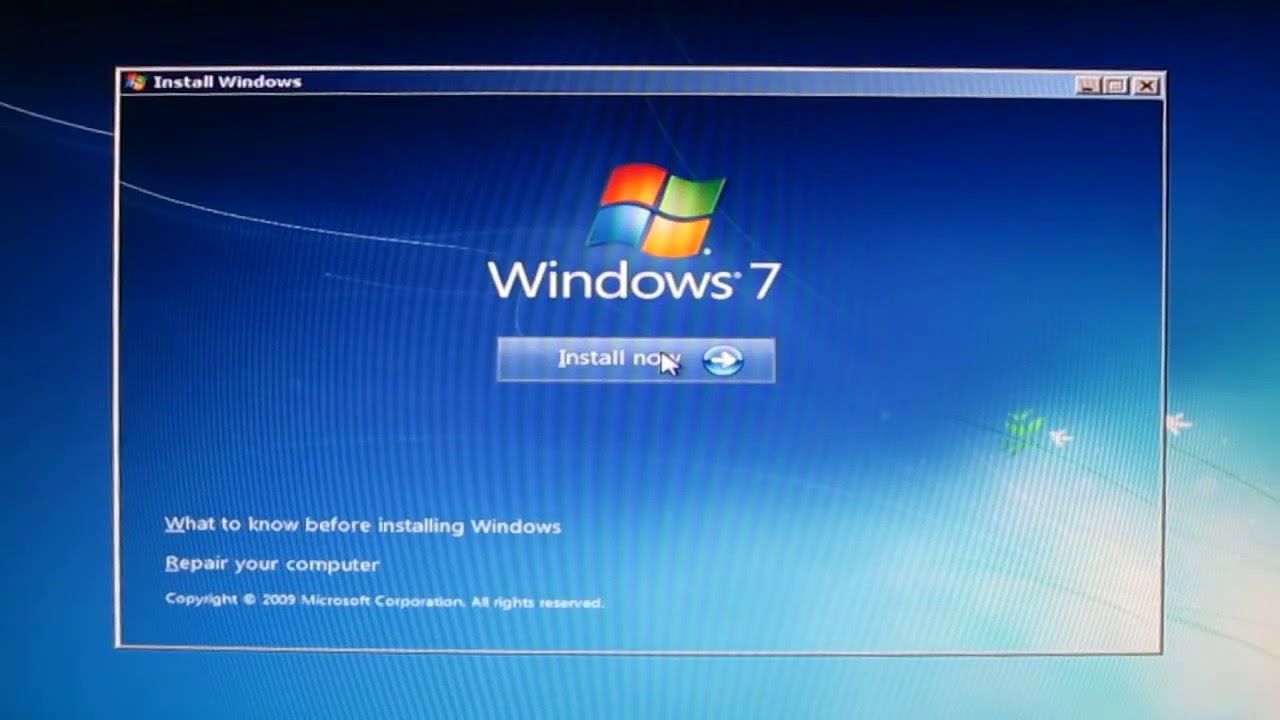
Once your computer restarts, it will boot from the USB drive. The Windows 7 installation process will begin. Follow the on-screen prompts to select the language, time, and currency format, and keyboard layout. Click on “Install Now” to begin the installation process. Accept the license terms and choose the “Custom (advanced)” installation option.
On the next screen, you will see the list of available drives. Select the SSD on which you want to install Windows 7 and click on “Next.” Windows 7 will begin the installation process, copying the necessary files and configuring the system. The installation process may take some time, so be patient.
Step 9: Configuring Windows settings
After the installation process completes, your computer will restart. Follow the on-screen instructions to configure your Windows 7 settings. This includes setting up a username and password, selecting your time zone, and customizing other preferences. Once you have completed the initial setup, Windows 7 will load and you can start exploring your newly installed operating system.
Step 10: Updating drivers and software
After successfully installing Windows 7, it’s recommended to update your drivers and software to ensure optimal performance and compatibility. Install the latest drivers for your hardware components and update Windows 7 with the latest security patches and updates. Additionally, install any necessary software and applications that you require for your computing needs.
With Windows 7 installed on your new SSD, you can enjoy faster boot times, improved overall performance, and a smoother computing experience. Take the time to customize your settings and install the necessary updates and drivers to ensure a seamless experience. Congratulations on successfully installing Windows 7 on your new SSD!
Step 6: Creating a bootable USB installer
Creating a bootable USB installer is an important step in installing Windows 7 on your new SSD. This will allow you to easily load the installation files and begin the installation process. Follow these steps to create a bootable USB installer:
1. Obtain Windows 7 ISO: If you haven’t already, download the Windows 7 ISO file from a trusted source. Ensure that you download the version corresponding to your product key or desired edition of Windows 7.
2. Choose a USB drive: Select a USB drive with a minimum capacity of 8GB. Ensure that the USB drive is empty or that you have backed up any important data on it, as the process will erase everything on the drive.
3. Download a USB tool: There are various third-party tools available that help create a bootable USB installer. Popular options include Rufus, Windows USB/DVD Download Tool, and UNetbootin. Choose a tool that is compatible with your system and download it.
4. Run the USB tool: Launch the USB tool and follow the on-screen instructions. Most tools will prompt you to select the Windows 7 ISO file and the USB drive you want to use. Make sure to double-check the selected options to avoid accidental formatting of the wrong drive.
5. Format and create the bootable USB drive: Depending on the USB tool you are using, you may have the option to format the USB drive to ensure it is ready for the installation files. Select the appropriate formatting options, such as file system (FAT32 or NTFS) and allocation unit size. Then click on the “Start” or “Create” button to initiate the process.
6. Wait for the process to complete: The tool will start to create the bootable USB installer by copying the necessary files from the Windows 7 ISO to the USB drive. The time required for this process may vary depending on the speed of your computer and the size of the ISO.
7. Confirm the bootable USB drive: Once the process finishes, the USB tool will display a message indicating the successful creation of the bootable USB installer. You can now eject the USB drive and proceed to the next steps in the installation process.
By creating a bootable USB installer for Windows 7, you can proceed with the installation on your new SSD smoothly. Remember to keep the bootable USB drive in a safe place as it will be needed during the installation process. With the bootable USB installer in hand, you are now ready to move forward with the next steps of installing Windows 7 on your new SSD.
Step 7: Changing the boot order
Changing the boot order in your computer’s BIOS settings is essential to ensure that it boots from the USB drive containing the Windows 7 installation files. Here’s how you can change the boot order to prioritize the USB drive:
1. Restart your computer: Save any work you have open and click on the Start menu. Choose the “Restart” option, or hold down the power button for a few seconds and then turn it back on. You may need to press a specific key during startup to access the BIOS settings. The exact key to press varies depending on the manufacturer and model of your computer, but common keys include Esc, F2, F10, or Del. Refer to your computer’s manual or search online for the specific key for your system.
2. Access the BIOS settings: Once your computer starts up, it will display a screen with the manufacturer’s logo or a brief message. Look for a prompt or message that prompts you to press a specific key to enter the BIOS or setup. Press the designated key before the Windows logo appears.
3. Navigate to the “Boot” section: Once you’re in the BIOS settings, use the arrow keys on your keyboard to navigate through the options. Look for a section labeled “Boot,” “Boot Options,” or something similar. Press Enter to access this section.
4. Change the boot order: In the “Boot” section, you will see a list of connected storage devices, such as hard drives, optical drives, and USB drives. Locate the USB drive that contains the Windows 7 installation files. Use the designated keys displayed at the bottom of the screen (or instructions provided by your computer’s manufacturer) to move the USB drive to the top of the boot order list. This will prioritize the USB drive as the first boot device.
5. Save and exit: Once you’ve adjusted the boot order, save your changes by following the on-screen instructions. Usually, you need to press F10, an assigned function key, or select the option to save and exit. Confirm your choice to save and exit, and your computer will restart.
6. Verify the boot order change: After your computer restarts, it should boot from the USB drive. If successful, you will see the Windows 7 installation screen. If not, repeat the steps to access the BIOS settings and double-check the boot order. Make sure the USB drive is correctly recognized and placed at the top of the boot order list.
By changing the boot order in your computer’s BIOS settings, you ensure that it starts from the USB drive and initiates the Windows 7 installation process. Once you’ve confirmed the boot order change, you can proceed to the next steps and install Windows 7 on your new SSD.
Step 8: Installing Windows 7 on the SSD
With the bootable USB installer and the boot order configured, you are now ready to install Windows 7 on your new solid-state drive (SSD). Follow these step-by-step instructions to proceed with the installation:
1. Start the installation: Restart your computer if it’s not already powered off. It should boot from the USB drive and display the Windows 7 installation screen. Select your preferred language, time, and currency format, and keyboard layout. Click on the “Install Now” button to begin the installation process.
2. Accept the license terms: On the next screen, carefully read through the license terms and conditions. Once you have reviewed them, check the box indicating that you accept the terms and click the “Next” button to proceed.
3. Choose the installation type: Select the “Custom (advanced)” installation option. This allows you to choose the specific drive on which you want to install Windows 7.
4. Select the SSD: On the following screen, you will see a list of available drives. Locate your SSD in the list and select it as the destination for the Windows 7 installation. If you need to create new partitions or modify existing ones, you can do so by clicking on the “Drive options (advanced)” link.
5. Begin the installation: After selecting the SSD as the installation destination, click on the “Next” button to start the installation process. Windows 7 will begin copying the necessary files, expanding them, and configuring the system.
6. Restart your computer: Once the installation is complete, your computer will automatically restart. At this point, it’s important to remove the USB drive to prevent booting from it again. Remove the USB drive and let the computer restart.
7. Complete the setup: After the restart, you will be prompted to personalize your Windows 7 installation. Set your desired username and password, choose a computer name, and customize other preferences like desktop background and Windows Update settings. Follow the on-screen instructions until you reach the desktop.
Now that Windows 7 is installed on your SSD, you can start exploring the operating system, installing necessary updates and drivers, and enjoying the improved performance and responsiveness that an SSD offers. Keep in mind that there may still be some additional configuration and personalization steps to complete, such as installing software and restoring files from your backup. Take the time to set up your system according to your needs and enjoy the benefits of Windows 7 on your new SSD.
Step 9: Configuring Windows settings
After successfully installing Windows 7 on your new solid-state drive (SSD), it’s time to configure the settings and personalize your operating system. Follow these steps to ensure that your Windows 7 installation is set up to meet your needs:
1. Set up a username and password: During the initial setup, Windows 7 will prompt you to create a username and password. Enter the desired username and a strong, secure password to protect your account and data. Ensure that you remember the password or store it in a safe location.
2. Select your time zone and regional preferences: Choose your correct time zone to ensure that your system clock displays the accurate time. Additionally, customize other regional preferences, such as currency format and keyboard layout, if necessary.
3. Customize desktop and display settings: Right-click on the desktop and select “Personalize” to access various customization options. Here, you can change the desktop background, screen saver, theme, and other display settings to personalize your Windows 7 experience.
4. Set up Windows Update: Enable automatic updates to ensure your system stays up to date with the latest security patches and bug fixes. Go to Start Menu > Control Panel > System and Security > Windows Update, and configure the desired update settings.
5. Install necessary software and drivers: Check for any available updates or drivers for your hardware devices, such as graphics cards, printers, and peripherals. Visit the manufacturers’ websites or use Windows Update to download and install the most up-to-date versions of drivers and software.
6. Customize system settings: Explore the Control Panel to customize various system settings to your preference. Adjust settings related to power management, performance, sound, display, and network to optimize your Windows 7 experience.
7. Set up antivirus and firewall: Install a reputable antivirus program and enable the built-in Windows Firewall to protect your system from malware and unauthorized access. Regularly update and scan your computer to maintain a secure environment.
8. Set up user accounts (optional): If multiple people will be using the computer, you can set up additional user accounts with separate settings and preferences. This allows each user to have their own personalized experience within the Windows 7 environment.
Ensure that you take the necessary time to configure your Windows 7 settings according to your preferences and needs. This will help you optimize your workflow and create a personalized computing experience on your new SSD. As you adjust and customize your system settings, take note of any additional software or applications you may have to install to meet your specific requirements. With your Windows 7 settings configured to your liking, you can now begin to enjoy the benefits of your new operating system.
Step 10: Updating drivers and software
After installing Windows 7 on your new solid-state drive (SSD), it’s important to update your drivers and software to ensure optimal performance, compatibility, and security. Addressing outdated drivers and software can help resolve compatibility issues, improve system stability, and provide access to new features. Follow these steps to update your drivers and software:
1. Windows Update: Start by running Windows Update to check for and install any available updates. Go to Start Menu > Control Panel > System and Security > Windows Update. Click on “Check for updates” and then install any critical, recommended, or important updates that are available.
2. Graphics drivers: Visit the website of your graphics card manufacturer to download and install the latest drivers for your specific card model. Up-to-date graphics drivers can improve performance, fix graphical glitches, and enable additional features. Note that it’s essential to select the correct drivers for your specific graphics card and Windows 7 version (32-bit or 64-bit).
3. Network drivers: Ensure that you have the necessary drivers for your network devices, including Ethernet, Wi-Fi, and Bluetooth. Visit the manufacturer’s website or use Windows Update to locate and install the latest drivers for your network adapters. This will ensure a stable and reliable network connection.
4. Printer and scanner drivers: If you have any printers or scanners connected to your computer, download and install the latest drivers from the manufacturer’s website. This will ensure proper functionality and compatibility with Windows 7.
5. Update other hardware drivers: Check for driver updates for other hardware devices connected to your computer, such as sound cards, USB devices, and peripherals. Visit the respective manufacturer’s website to download and install the latest drivers for each device.
6. Software updates: Update your software applications to their latest versions to benefit from bug fixes, performance improvements, and new features. Many software programs have built-in update mechanisms, or you can visit the manufacturer’s website for the latest downloads.
7. Antivirus and security software: Ensure that your antivirus program is up to date with the latest virus definitions. Run a full system scan to detect and remove any potential threats. Update other security software, such as firewalls and anti-malware tools, to provide comprehensive protection for your system.
Keep in mind that it’s essential to download drivers and software updates only from trusted sources, such as the manufacturer’s official websites. Avoid using third-party driver updater tools, as they may install incorrect or incompatible drivers, leading to system instability or security issues. Regularly check for updates to keep your system running smoothly and securely.
By updating your drivers and software, you can ensure that your Windows 7 installation is optimized for performance, stability, and security. Following these steps will help keep your system up to date and provide the best possible experience with your new SSD and operating system.
Conclusion
Congratulations! You have successfully completed the process of installing Windows 7 on your new solid-state drive (SSD). By following the steps outlined in this guide, you now have a fresh installation of Windows 7 that is optimized for performance, responsiveness, and compatibility.
Throughout the installation process, you took the necessary precautions to ensure a smooth installation. You gathered the necessary tools and materials, created a backup of your important files, checked system requirements, selected the right SSD, formatted the SSD, and installed Windows 7 using a bootable USB installer. Additionally, you configured Windows settings, updated drivers and software, and made your system ready for use.
With your new Windows 7 installation on the SSD, you can enjoy faster boot times, improved overall system performance, and enhanced productivity. Windows 7, despite being an older operating system, still offers a familiar and user-friendly interface, making it a popular choice for many users.
Remember to regularly update your Windows 7 installation by running Windows Update and keeping your drivers and software up to date. This will ensure that your system remains secure, stable, and functional.
It’s worth noting that while Windows 7 is no longer officially supported by Microsoft, it can still be a viable option for certain situations. However, it’s essential to keep in mind the security risks associated with using an unsupported operating system. Consider upgrading to a more recent version of Windows to receive continued support and access to the latest features and security updates.
We hope that this guide has provided you with the necessary information and guidance to successfully install Windows 7 on your new SSD. Enjoy the enhanced performance, reliability, and speed that your new SSD brings to your computing experience!