Introduction
Welcome to the guide on how to format an SSD for a Windows 10 installation. If you’re planning to install Windows 10 on a new or existing SSD, it is crucial to properly format the SSD to ensure optimal performance and compatibility. In this article, we will walk you through the step-by-step process of formatting your SSD and preparing it for a seamless Windows 10 installation.
Windows 10 is the latest operating system from Microsoft, known for its improved performance, enhanced security features, and user-friendly interface. By formatting your SSD before installing Windows 10, you can ensure that the operating system is installed on a clean and optimized storage device, eliminating any potential issues or conflicts that may arise from previous installations or data remnants.
Formatting an SSD involves erasing all existing data on the drive, setting up a new file system, and partitioning it for the Windows 10 installation. It also allows you to align the SSD for optimal performance, as well as optimize the drive for improved longevity and efficiency.
Before we dive into the formatting process, it’s important to note that formatting the SSD will erase all data on the drive. Therefore, it is crucial to back up any important files or documents before proceeding with the formatting process. Once you have made the necessary preparations, you will be ready to format your SSD and start the Windows 10 installation.
In the following sections, we will guide you through each step of the process, from backing up your data to installing Windows 10 on the formatted SSD. The step-by-step instructions provided will enable both beginners and experienced users to successfully format their SSDs and set up Windows 10 with ease. So, let’s get started on formatting your SSD for a seamless Windows 10 installation!
Why Format SSD for Windows 10 Install?
Formatting your SSD before installing Windows 10 is an essential step that offers several important benefits. Let’s take a closer look at why it is necessary to format your SSD:
1. Optimized Performance: Formatting your SSD ensures that it is set up with the correct file system and alignment, which can significantly improve performance. By formatting the SSD specifically for Windows 10, you are maximizing the potential of your hardware and allowing the operating system to run smoothly and efficiently.
2. Clean Installation: Formatting the SSD removes all existing data and previous operating system remnants. This ensures a clean slate for Windows 10, preventing any conflicts or issues that may arise from incompatible files or settings. A clean installation also reduces the risk of system errors and instability.
3. Compatibility and Stability: Formatting the SSD for Windows 10 guarantees compatibility between the operating system and the storage drive. It aligns the SSD with Windows 10’s requirements, optimizing the compatibility and stability of the system. This reduces the chances of encountering errors, driver conflicts, or compatibility issues.
4. Improved Security: Formatting your SSD allows you to start fresh with a secure installation of Windows 10. During the formatting process, all data on the drive is erased, ensuring that no personal or sensitive information remains. This is especially important if you are upgrading from an older operating system or if you’re using a second-hand SSD.
5. Longevity and Efficiency: By formatting your SSD, you can optimize its performance and extend its lifespan. Proper alignment, file system setup, and partitioning ensure that the SSD operates at its peak efficiency, minimizing unnecessary wear and tear. This can prolong the lifespan of the drive, allowing you to get the most out of your investment.
6. Ease of Troubleshooting: Formatting the SSD creates a clean environment for Windows 10, making it easier to troubleshoot any issues that may arise in the future. With a fresh installation, it becomes simpler to identify problems and find solutions without needing to sift through previous system files or configurations.
7. Future Flexibility: Formatting your SSD ensures that it is ready for future updates, upgrades, or changes. With a properly formatted drive, you can easily perform system updates, upgrade hardware components, or even switch to a different operating system without any complications or compatibility issues.
Now that we understand the importance of formatting an SSD for a Windows 10 installation, let’s move on to the steps required to prepare your SSD for the formatting process.
Preparing Your SSD for Formatting
Before you proceed with the formatting process, there are a few important steps to take in order to properly prepare your SSD. By completing these steps, you will ensure a smooth and successful formatting process. Let’s dive into the preparation phase:
Step 1: Backing Up Your Data
The first and most critical step is to back up all your important data. Formatting the SSD will erase all the existing data on the drive, so making a backup is essential to avoid permanent data loss. Copy your files, documents, photos, and any other important data to an external storage device or cloud-based service. By having a backup, you can easily restore your data once the formatting and installation process is completed.
Step 2: Creating a Bootable USB Drive
To install Windows 10 on your formatted SSD, you will need a bootable USB drive containing the Windows 10 installation files. Create a bootable USB drive by downloading the Windows 10 Media Creation Tool from the official Microsoft website. Follow the instructions provided by the tool to create a bootable USB drive. This will allow you to boot the computer from the USB drive and begin the Windows 10 installation process.
Step 3: BIOS/UEFI Configuration
Before formatting the SSD, you may need to access the BIOS (Basic Input/Output System) or UEFI (Unified Extensible Firmware Interface) settings of your computer. Restart your computer and enter the BIOS/UEFI by pressing the designated key (usually Esc, F2, or Del) during the startup process. Configure the settings to boot from the USB drive first in the boot order. This will ensure that the computer recognizes the bootable USB drive and allows you to proceed with the Windows 10 installation.
Step 4: Disconnecting Other Drives
If you have multiple drives connected to your computer, it is recommended to disconnect them before proceeding with the SSD formatting process. This will prevent any accidental formatting or installation on the wrong drive. By disconnecting the other drives, you can ensure that the formatting and installation are performed exclusively on the intended SSD.
Once you have completed these preparation steps, you are ready to proceed with the formatting process. In the following sections, we will guide you through each step of formatting the SSD and installing Windows 10 to create a clean and optimized system.
Step 1: Backing Up Your Data
The first and most crucial step in preparing your SSD for formatting is to back up all your important data. Formatting the SSD will erase all existing data on the drive, so it’s essential to make a backup to avoid permanent data loss. Here’s how you can back up your data:
1. Identify and prioritize your data: Start by identifying the important files, documents, photos, videos, and any other data that you want to back up. Focus on the data that you can’t afford to lose, such as personal documents, work files, or sentimental photos.
2. Choose a backup method: There are various backup methods you can choose from, depending on your preferences and available resources. Here are a few popular options:
- External hard drive or SSD: Connect an external hard drive or SSD to your computer and copy your files onto it. Make sure the external drive has enough space to accommodate all your data.
- Cloud-based storage: Sign up for a cloud-based storage service such as Google Drive, Dropbox, or OneDrive. Upload your files to the cloud, ensuring that they are securely stored and accessible from any device.
- Network-attached storage (NAS): If you have a NAS device on your network, you can back up your data directly to the NAS. This offers the advantage of centralized storage and easy access.
3. Transfer your data: Once you have chosen a backup method, start transferring your data. Organize your files into folders to make them easier to organize and retrieve later. You can either manually copy and paste the files or use backup software that automates the process.
4. Verify your backup: After transferring your data, it’s crucial to verify the backup. Open a few files or check a sample of your photos to ensure that everything has been properly copied. This step provides peace of mind and ensures that you can confidently proceed with the formatting process.
5. Store your backup securely: Once your data is backed up, store the backup in a safe and secure location. If you are using an external hard drive or SSD, keep it in a cool and dry place. If you are using a cloud-based solution, ensure that your account credentials are secure.
Backing up your data is a crucial step in preparing your SSD for formatting. It safeguards your important files and ensures that you can easily restore them once the formatting and installation process is complete. With your data safely backed up, you’re ready to proceed to the next step: creating a bootable USB drive for the Windows 10 installation.
Step 2: Creating a Bootable USB Drive
In order to install Windows 10 on your formatted SSD, you will need to create a bootable USB drive. This USB drive will contain the necessary installation files for Windows 10. Here’s a step-by-step guide on how to create a bootable USB drive:
1. Download the Windows 10 Media Creation Tool: Start by downloading the Windows 10 Media Creation Tool from the official Microsoft website. This tool allows you to create a bootable USB drive and download the necessary Windows 10 installation files.
2. Run the Media Creation Tool: Once the tool is downloaded, run it on your computer. You may need administrator privileges to run the tool.
3. Accept the license terms: In the Media Creation Tool, you will be presented with the license terms. Read through them and click on the ‘Accept’ button to proceed.
4. Choose ‘Create installation media (USB flash drive, DVD, or ISO file) for another PC’: In the next step, you will be prompted to select the type of installation media you want to create. Choose the option that says ‘Create installation media (USB flash drive, DVD, or ISO file) for another PC’ and click on ‘Next’.
5. Select the language, edition, and architecture: On the next screen, you will be asked to select the language, edition, and architecture of Windows 10 you want to install. Make the appropriate selections and click on ‘Next’ to proceed.
6. Choose ‘USB flash drive’: In the following step, you will have to choose the media to use. Select the option that says ‘USB flash drive’ and click on ‘Next’.
7. Select the USB drive: Connect your USB drive to your computer and select it from the list of available drives. Make sure to choose the correct USB drive, as the process will erase all data on it. Once you have selected the USB drive, click on ‘Next’.
8. Download and create: The Media Creation Tool will now proceed to download the necessary Windows 10 installation files and create a bootable USB drive. This process may take some time, depending on the speed of your internet connection.
9. Completion: Once the process is complete, you will see a completion message. Click on ‘Finish’ to close the Media Creation Tool.
Now you have a bootable USB drive with the Windows 10 installation files. This USB drive will allow you to boot your computer and start the installation process on the formatted SSD. In the next step, we will guide you on how to configure the BIOS/UEFI settings to boot from the USB drive and proceed with the Windows 10 installation.
Step 3: Installing Windows 10
Once you have prepared a bootable USB drive with the Windows 10 installation files, you can proceed with the installation process. Follow these steps to install Windows 10 on your formatted SSD:
1. Connect the bootable USB drive: Insert the bootable USB drive into a USB port on your computer.
2. Restart your computer: Restart your computer. As it boots up, press the designated key (such as Esc, F2, or Del) to enter the BIOS/UEFI settings.
3. Configure the boot order: In the BIOS/UEFI settings, navigate to the Boot or Boot Order section. Set the boot priority so that the USB drive is the first boot device.
4. Save and exit: Save your changes and exit the BIOS/UEFI settings. The computer will restart and boot from the USB drive.
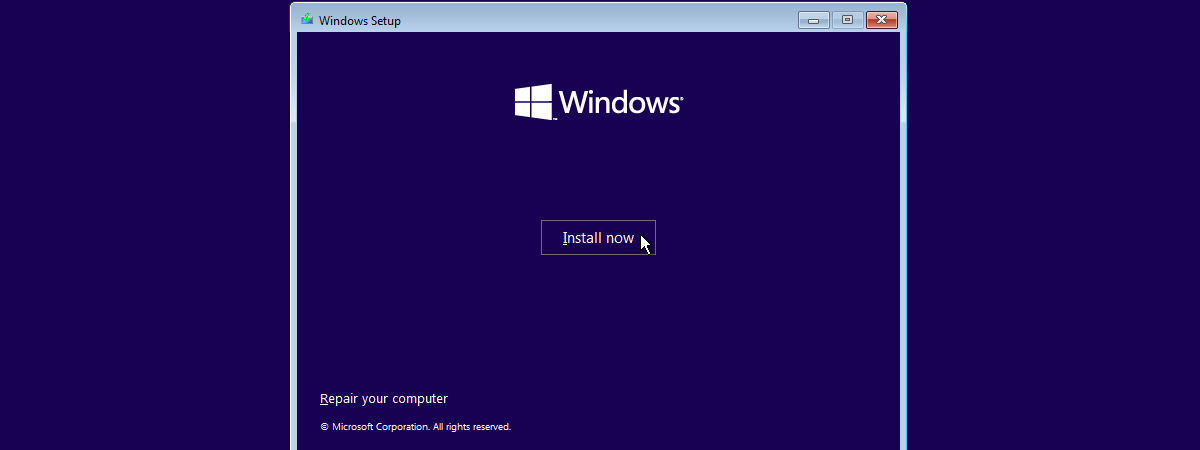
5. Start the Windows 10 installation: On the Windows 10 installation screen, select your language preferences and click on ‘Next’.
6. Activate Windows 10: If prompted, enter the product key for Windows 10. If you don’t have a product key, you can choose the option to activate Windows later. Click on ‘Next’.
7. Accept the license terms: Read the license terms and click on ‘Accept’ to proceed.
8. Choose the installation type: Select the option for a Custom installation. This will allow you to choose the formatted SSD as the destination drive for the installation.
9. Select the SSD: On the drive selection screen, choose the formatted SSD where you want to install Windows 10. Click on ‘Next’ to begin the installation process.
10. Wait for the installation: Windows 10 will now start the installation process. The installation time can vary depending on your system’s hardware and the size of the SSD.
11. Set up Windows 10: Follow the on-screen prompts to set up Windows 10. This includes selecting your region, keyboard layout, and creating a user account.
12. Windows 10 installation completion: Once the installation is complete, you will be greeted with the Windows 10 desktop. Congratulations! You have successfully installed Windows 10 on your formatted SSD.
Now you have a fresh and optimized installation of Windows 10 on your SSD. In the next steps, we will guide you through the final steps of formatting the SSD and partitioning it for optimal use with Windows 10.
Step 4: Formatting the SSD
After installing Windows 10 on your SSD, it’s time to format the drive to ensure it is clean and optimized for use with the operating system. Follow these steps to format your SSD:
1. Open the Disk Management utility: Right-click on the Start button and select “Disk Management” from the context menu. This will open the Disk Management window.
2. Locate the SSD: In the Disk Management window, locate your SSD. It should be listed as a drive without a partition or with unallocated space.
3. Right-click on the SSD: Right-click on your SSD and select “New Simple Volume” from the context menu.
4. Follow the New Simple Volume Wizard: The New Simple Volume Wizard will guide you through the formatting process. Click “Next” to proceed.
5. Specify volume size: By default, the wizard will select the maximum available size for the partition. If desired, you can adjust the size or select the maximum size. Click “Next” to continue.
6. Assign drive letter or path: Choose a drive letter or path for your SSD. You can either select an available letter or let the wizard assign one automatically. Click “Next” to proceed.
7. Format the volume: Choose the file system and allocation unit size for the SSD. For Windows 10, it is recommended to use the NTFS file system and the default allocation unit size. You can also give the volume a label if desired. Click “Next” to continue.
8. Confirm the settings: Review the settings you have chosen and ensure they are correct. Click “Finish” to begin formatting the SSD.
9. Wait for the formatting process: The Disk Management utility will now format the SSD. This may take some time depending on the size of your SSD.
10. Formatting completion: Once the formatting process is complete, the SSD will be ready for use. It will now appear as a formatted and allocated drive in the Disk Management utility.
Congratulations! You have successfully formatted your SSD. The drive is now clean, optimized, and ready to be used as your primary storage for Windows 10.
Next, we will proceed to partition the SSD to further organize and optimize the storage space for your needs.
Step 5: Partitioning the SSD
Partitioning your SSD allows you to divide the storage space into separate sections, also known as partitions. Each partition functions as an individual drive, enabling you to organize your data and improve efficiency. Follow these steps to partition your SSD:
1. Open the Disk Management utility: Right-click on the Start button and select “Disk Management” from the context menu. The Disk Management window will open.
2. Locate the SSD: In the Disk Management window, find your SSD drive. It should be listed with its current partition and allocated space.
3. Shrink the existing partition (optional): If your SSD already has a partition and you want to create new ones, you may need to shrink the existing partition. Right-click on the partition and select “Shrink Volume.” Follow the prompts to specify the amount of space to shrink.
4. Create a new partition: Right-click on the unallocated space or free space on your SSD and select “New Simple Volume.” This will open the New Simple Volume Wizard.
5. Follow the New Simple Volume Wizard: The wizard will guide you through the process of creating a new partition. Click “Next” to proceed.
6. Specify partition size: Enter the desired size for the new partition. If you haven’t shrunk an existing partition, you can allocate the entire unallocated space to the new partition. Click “Next” to continue.
7. Assign drive letter or path: Choose a drive letter or path for the new partition. You can select an available letter or allow the system to assign one automatically. Click “Next” to proceed.
8. Format the partition: Select the file system, allocation unit size, and volume label for the new partition. It’s recommended to choose the NTFS file system and the default allocation unit size. Click “Next” to continue.
9. Confirm the settings: Review the settings you have chosen for the partition. Ensure they are correct, then click “Finish” to create the partition.
10. Repeat for additional partitions (if needed): If you want to create more partitions on your SSD, repeat steps 4 to 9 for each additional partition, utilizing the remaining unallocated space.
11. Partitioning completion: Once you have created all the desired partitions, you will see them listed in the Disk Management utility. The partitions are formatted and ready for use.
Partitioning your SSD provides a more organized and efficient storage system, allowing you to separate data, applications, and system files into different sections. With your SSD partitioned, you can enjoy improved data management and optimized performance.
In the next step, we will guide you on how to install Windows 10 on the formatted and partitioned SSD, ensuring a seamless and stable operating system experience.
Step 6: Installing Windows 10 on the Formatted SSD
Now that you have formatted and partitioned your SSD, it’s time to install Windows 10 on the drive. Follow these steps to complete the installation:
1. Connect the bootable USB drive: Connect the bootable USB drive with the Windows 10 installation files to your computer.
2. Restart your computer: Restart your computer and enter the BIOS/UEFI settings by pressing the appropriate key (Esc, F2, Del) during startup.
3. Configure the boot order: In the BIOS/UEFI settings, set the boot priority so that the USB drive is the first boot device. Save your changes and exit the BIOS/UEFI settings.
4. Start the Windows 10 installation: Your computer will now boot from the USB drive. Follow the on-screen prompts to start the Windows 10 installation process.
5. Select language and region settings: Choose your preferred language and region settings and click on “Next” to proceed.
6. Activate Windows 10: If prompted, enter your product key to activate Windows 10. You can also choose to activate later. Click on “Next” to continue.
7. Accept the license terms: Read and accept the license terms to proceed with the installation.
8. Select the installation type: Choose the “Custom: Install Windows only (advanced)” option.
9. Choose the partition: Select the partition you created on the formatted SSD and click on “Next.” If you have multiple partitions, choose the one where you want to install Windows 10.
10. Wait for the installation: Windows 10 will now install on the chosen partition. The installation process may take some time, depending on your computer’s speed and SSD capacity.
11. Set up Windows 10: Follow the prompts to configure various settings, such as your region, keyboard layout, and privacy preferences.
12. Sign in to your Microsoft account: If desired, sign in to your Microsoft account or create a new one. This will allow you to access additional features and services offered by Microsoft.
13. Customize Windows settings: Customize your Windows 10 settings, such as Cortana integration, default apps, and privacy options. Click on “Next” to proceed.
14. Wait for the final setup: Windows 10 will finalize the installation and set up your system. This may take some time, so be patient.
15. Log in to Windows 10: Once the setup is complete, you will be prompted to log in to your Windows 10 account. Enter your credentials and click on “Next” to access the desktop.
Congratulations! You have successfully installed Windows 10 on your formatted and partitioned SSD. Your system is now ready to take advantage of the optimized performance and efficient storage management provided by the SSD.
With Windows 10 installed, you can now begin using your computer and enjoying all the features and benefits that the operating system has to offer.
Conclusion
Congratulations on successfully formatting your SSD and installing Windows 10! By following the step-by-step instructions in this guide, you have ensured optimal performance, compatibility, and efficiency for your operating system. Let’s recap the key points we covered:
First, we highlighted the importance of formatting your SSD before installing Windows 10. Formatting provides a clean slate, optimizing performance and stability while eliminating compatibility issues that may arise from previous installations or data remnants.
We then guided you through the preparation phase by emphasizing the need to back up your data prior to formatting. Backing up your important files ensures that you can easily restore them after the installation is complete.
Next, we walked you through the process of creating a bootable USB drive using the Windows 10 Media Creation Tool. This bootable USB drive enables you to start the Windows 10 installation and ensures a smooth transition to your formatted SSD.
Following that, we detailed the installation process itself, from configuring the BIOS/UEFI settings to selecting the language and region settings, activating Windows 10, and accepting the license terms. These steps paved the way for a successful installation of the operating system on your formatted SSD.
Moreover, we covered the essential steps of formatting the SSD itself, partitioning it to enhance data organization and storage efficiency. Partitioning allows you to separate different types of data and optimize performance for your individual needs.
Finally, we concluded with the step-by-step instructions for installing Windows 10 on the formatted and partitioned SSD. These included selecting the appropriate partition and following the prompts to configure the operating system.
With Windows 10 up and running on your formatted SSD, you can now enjoy a clean, efficient, and optimized system environment. Remember to regularly update your operating system and back up your data to ensure its safety and security.
Thank you for following this guide on how to format an SSD for a Windows 10 install. We hope this information has been helpful in your journey towards a seamless Windows 10 experience.