Introduction
Welcome to the world of faster and more efficient computing with Solid State Drives (SSDs). If you’re tired of waiting for your computer to boot up or load programs, upgrading to an SSD is the perfect solution. Not only do SSDs offer lightning-fast speed, but they also provide improved durability and reliability compared to traditional hard drives. In this article, we will explore the process of cloning the Windows 10 operating system to an SSD, allowing you to enjoy the benefits of faster performance without the hassle of reinstalling your operating system and applications.
Cloning your Windows 10 operating system to an SSD is a convenient way to transfer all your data, settings, and applications to the new drive. By replicating your entire system, you can seamlessly switch to the SSD without losing any valuable data or experiencing any downtime. In addition to the speed boost, SSDs also offer better power efficiency, quieter operation, and improved shock resistance. Whether you’re a gamer looking for faster load times, a professional needing to run resource-intensive software, or simply someone who wants a faster and more responsive computer, cloning your Windows 10 to an SSD is the way to go.
While the idea of cloning might sound complex, rest assured that the process is relatively straightforward with the right tools and preparation. In the following sections, we will guide you through the steps needed to successfully clone your Windows 10 to an SSD. We will cover the necessary preparations, recommend the best cloning software, and provide a step-by-step walkthrough of the entire process. So, without further ado, let’s get started on our journey to blazing-fast computing with a cloned Windows 10 on an SSD!
Understanding SSDs and their Benefits
Before we dive into the process of cloning Windows 10 to an SSD, let’s take a moment to understand what SSDs are and the advantages they offer over traditional hard drives. Unlike mechanical hard drives, which store data on spinning disks, SSDs use flash memory chips to store and retrieve data. This key difference in technology leads to a host of benefits that can greatly enhance your computing experience.
One of the primary advantages of SSDs is their speed. SSDs have significantly faster read and write speeds compared to traditional hard drives. This means faster boot times, quicker application launches, and improved overall system responsiveness. With an SSD, you’ll experience reduced loading times in games, shorter file transfer durations, and shorter wait times when performing intensive tasks like video editing or rendering.
Another benefit of SSDs is their durability and reliability. Unlike traditional hard drives, which are comprised of moving parts that can wear out over time, SSDs have no moving parts. This makes them more resistant to mechanical failure and less prone to damage from drops or knocks. With an SSD, you can have peace of mind knowing that your data is stored in a more reliable medium.
SSDs also offer improved power efficiency. Since SSDs don’t have spinning disks, they consume less power, resulting in longer battery life for laptops and decreased energy costs for desktop systems. This makes SSDs an excellent choice for mobile devices where battery life is crucial.
In addition to improved speed, durability, and power efficiency, SSDs also operate silently. Without the noise created by spinning disks, SSDs provide a quiet computing environment, ideal for those who prefer a noise-free workspace or gaming experience.
Furthermore, SSDs are less susceptible to data fragmentation compared to traditional hard drives. Data fragmentation occurs when files are split and scattered across different sectors on the drive, leading to reduced performance. Since SSDs don’t rely on physical read/write heads, they can access data quickly, regardless of its physical location, eliminating the need for frequent disk defragmentation.
In summary, SSDs offer significant performance improvements over traditional hard drives. Whether you’re a casual computer user, a content creator, or a professional gamer, upgrading to an SSD can provide a noticeable boost in speed, durability, and energy efficiency. Now that you understand the benefits of SSDs, let’s move on to the preparations required for cloning your Windows 10 operating system to an SSD.
Preparing for the Cloning Process
Before you begin the cloning process, it’s important to take a few preparatory steps to ensure a smooth and successful transition to your new SSD. These steps will help safeguard your data and minimize any potential issues during the cloning process.
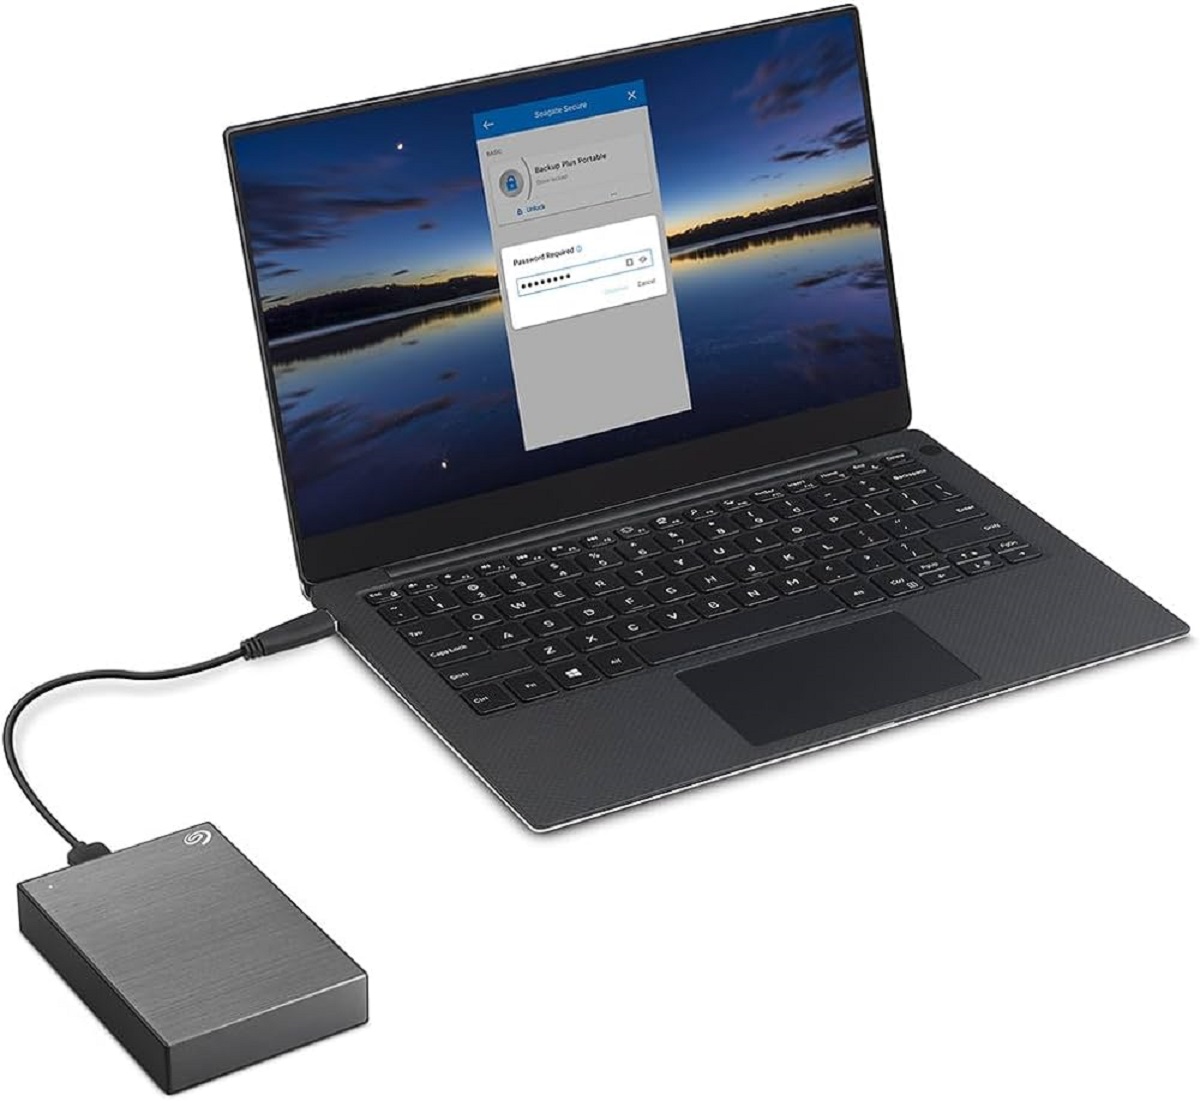
1. Backup your data: It’s always a good idea to create a backup of your important files before making any changes to your system. Although cloning typically preserves your data, accidents can happen. Backup your files to an external hard drive, cloud storage, or another reliable backup solution to safeguard against any potential data loss.
2. Clean up your current drive: To optimize the cloning process and ensure you have enough space on your new SSD, it’s a good idea to clean up your current drive. Delete unnecessary files, uninstall unused applications, and run a disk cleanup utility to free up storage space. This will help make the cloning process faster and more efficient.
3. Check system requirements: Confirm that your system meets the requirements for cloning and using an SSD. Check the specifications of your SSD and ensure that your computer’s hardware and operating system are compatible. Also, make sure you have an available SATA port on your motherboard to connect the new SSD.
4. Gather necessary tools: Before you begin cloning, gather the necessary tools and equipment. You will need a SATA cable to connect the SSD to your computer, as well as a screwdriver in case you need to install the SSD internally. Additionally, you might need a USB flash drive to create a bootable drive, depending on the cloning software you choose.
5. Disable encryption and secure boot: If your current drive is encrypted or if secure boot is enabled in the BIOS settings, you will need to disable these features before starting the cloning process. Check your system’s BIOS settings to ensure that these options are turned off. Failure to do so may result in complications during the cloning process.
By following these preparation steps, you’ll set yourself up for a successful cloning process and minimize the chance of encountering any unexpected issues. Once you have completed these preparations, the next step is to choose the right cloning software for your needs. We will explore some popular options in the next section.
Choosing the Right Cloning Software
When it comes to cloning your Windows 10 to an SSD, selecting the right cloning software is crucial to ensure a seamless and successful transition. There are several reliable options available, each with its own set of features and benefits. Here are some popular cloning software options to consider:
1. EaseUS Todo Backup: EaseUS Todo Backup is a user-friendly and feature-rich cloning software that offers both disk clone and system clone options. It allows you to clone your entire system, including the operating system, applications, files, and settings. EaseUS Todo Backup also offers flexible cloning options, such as sector-by-sector cloning, which ensures that all data, including unused space, is cloned to the new SSD.
2. Macrium Reflect: Macrium Reflect is a powerful cloning and imaging software that provides comprehensive backup and recovery solutions. It offers a user-friendly interface and various cloning options, such as intelligent sector copy and rapid delta cloning. Macrium Reflect also includes features like scheduling backups, differential imaging, and encryption for added data security.
3. Acronis True Image: Acronis True Image is a popular cloning and backup software known for its reliability and ease of use. It offers fast and efficient cloning capabilities, allowing you to migrate your complete system to an SSD with just a few clicks. Acronis True Image also provides additional features, such as backup validation, data archiving, and cloud backup integration.
4. Clonezilla: Clonezilla is a free and open-source cloning software that provides a range of cloning options, including disk cloning and partition cloning. It offers a text-based interface and supports various file systems, making it a versatile choice for different cloning scenarios. Clonezilla is best suited for users who are comfortable with command-line interfaces and prefer a lightweight and customizable cloning solution.
These are just a few examples of cloning software available in the market. When choosing the right software for your needs, consider factors such as user-friendliness, features, compatibility, and customer support. It’s also a good idea to read user reviews and do some research to ensure that you select the software that best fits your requirements.
Now that you have chosen the cloning software that suits your needs, you’re ready to move on to the next steps in the cloning process. In the following sections, we will guide you through each step of the process, from backing up your data to enjoying the benefits of your newly cloned Windows 10 on an SSD.
Step 1: Backing Up Your Data
Before embarking on the cloning process, it is crucial to back up your data to ensure its safety. While cloning typically preserves your data, unforeseen circumstances can occur, and having a backup provides an extra layer of protection. Follow the steps below to back up your data:
1. Identify important files: Take some time to identify the files and folders that are valuable to you. This includes documents, photos, videos, music, and any other personal or work-related data that you cannot afford to lose.
2. Choose a backup method: Several backup methods are available, depending on your preferences and resources. You can back up your data to an external hard drive, a network-attached storage (NAS) device, or cloud storage services such as Google Drive, Dropbox, or OneDrive. Select the method that best suits your needs.
3. Use backup software: Utilize backup software to streamline the process and automate backups. There are numerous backup tools available, both free and paid, that offer features such as incremental backups, scheduled backups, and encryption for added security. Research and choose a backup software that suits your requirements.
4. Initiate the backup process: With your chosen backup method and software ready, initiate the backup process. Follow the prompts provided by the backup software to select the files and folders you wish to back up, choose the backup destination, configure any necessary settings, and start the backup. Depending on the size of your data, this process may take some time.
5. Verify the backup: Once the backup process is complete, take a moment to verify the backup. Check that all the files and folders you intended to back up are present and can be accessed without any errors. This step ensures the integrity of your backup and lets you have peace of mind knowing that your data is securely stored.
By backing up your data, you create a safety net in case any issues arise during the cloning process. In the event that something goes wrong, you can confidently restore your files from the backup and continue working without losing any important data.
Now that you have successfully backed up your data, you are ready to proceed to the next step: creating a bootable USB drive. This step is crucial for booting your computer from the USB drive and initiating the cloning process. In the next section, we will guide you through the process of creating a bootable USB drive.
Step 2: Creating a Bootable USB Drive
A bootable USB drive is essential for initiating the cloning process and transferring your Windows 10 operating system to the new SSD. Follow the steps below to create a bootable USB drive:
1. Prepare a USB drive: Obtain a USB drive with sufficient capacity to accommodate the cloning software. It is recommended to use a blank USB drive with at least 8GB of storage space to ensure that all necessary files can be copied.
2. Download the cloning software: Visit the website of the cloning software you have chosen and download the installation package for creating a bootable USB drive. Ensure that you select the appropriate version of the software that is compatible with your operating system.
3. Install the cloning software on the USB drive: Insert the USB drive into an available port on your computer. Launch the installation package and follow the prompts to install the cloning software onto the USB drive. Be careful to choose the USB drive as the installation destination during the process.
4. Verify the bootable USB drive: Once the installation is complete, verify that the USB drive is bootable. Restart your computer and enter the BIOS or UEFI settings by pressing the designated key (usually Del, F2, or F10) during startup. Navigate to the boot options menu and ensure that the USB drive is listed as a bootable device. Save the changes and exit the BIOS or UEFI settings.
5. Test the bootable USB drive: Restart your computer once again and boot from the USB drive. During startup, you may need to press a specific key (such as F11 or F12) to access the boot device selection menu. Select the USB drive from the menu and wait for the computer to boot into the cloning software on the USB drive. This confirms that the bootable USB drive has been successfully created.
Creating a bootable USB drive allows you to initiate the cloning process and prepare your computer for transferring the Windows 10 operating system to the new SSD. With the bootable USB drive in hand, you are now ready to move on to the next step: connecting the new SSD to your computer. In the following section, we will guide you through the process of properly connecting the new SSD.
Step 3: Connecting the New SSD
In order to clone your Windows 10 operating system to the new SSD, you need to physically connect the SSD to your computer. Follow the steps below to properly connect the new SSD:
1. Shut down your computer: Before handling any internal components, make sure your computer is completely powered off. This will prevent any electrical issues or accidental damage while connecting the SSD.
2. Choose the appropriate connection method: Depending on your computer’s hardware configuration, you can connect the new SSD using either a SATA cable or an M.2 slot. Determine which method is compatible with your computer and SSD.
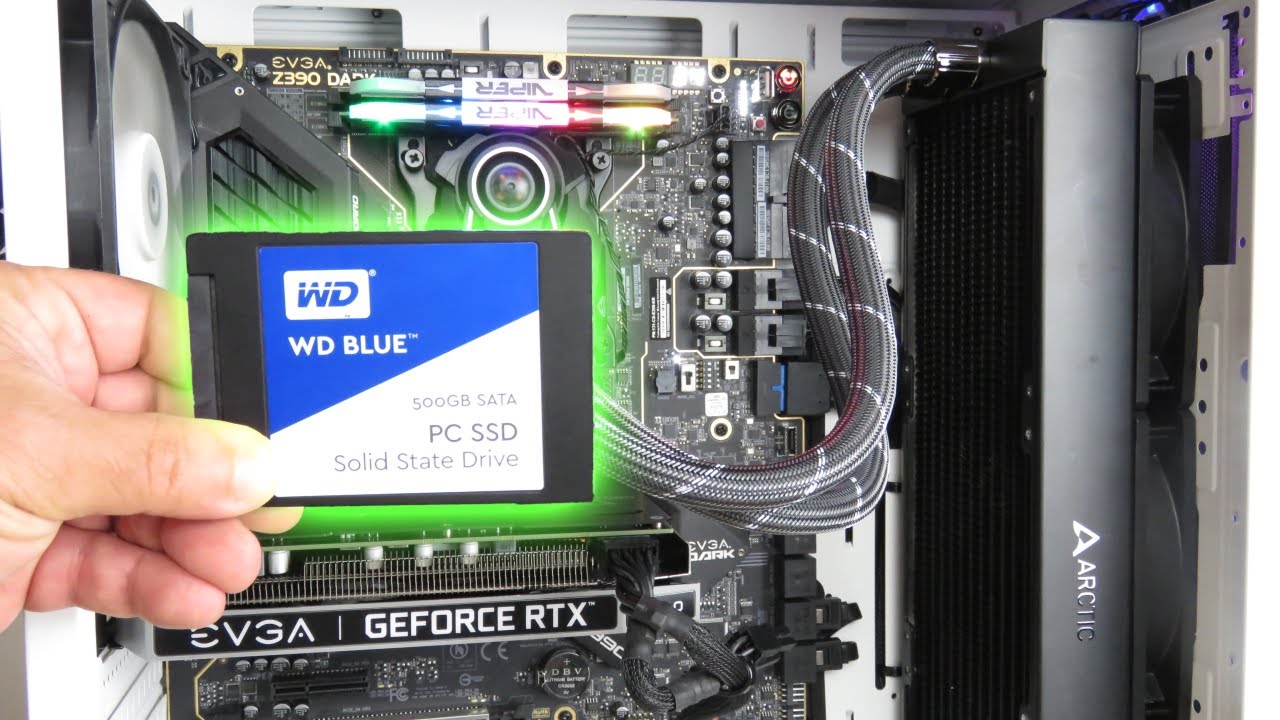
3. SATA connection: If you are using a SATA SSD, locate an available SATA port on your motherboard. Connect one end of the SATA cable to the appropriate port on the motherboard and the other end to the SATA port on the SSD. Ensure a secure connection by firmly attaching the cable to both the motherboard and SSD.
4. M.2 connection: If your SSD is an M.2 NVMe or SATA SSD, locate the M.2 slot on your motherboard. Depending on your motherboard’s specifications, you may need to use a screw to secure the SSD in place. Insert the M.2 SSD into the slot at a slight angle and gently press it down until the SSD is fully seated. Use the screw provided to secure the SSD in place if necessary.
5. Additional power connections (if required): Some SSDs, especially SATA SSDs, may require additional power connections. If this is the case, locate an available power connector from your power supply unit (PSU) and connect it to the designated port on the SSD. Take care to align the pins correctly and ensure a secure connection.
6. Close up your computer: Once you have successfully connected the new SSD, carefully close up your computer case. Ensure that all cables and connections are neatly arranged and secured to avoid any interference or damage to the components.
With the new SSD successfully connected to your computer, you are now ready to move on to the next step: launching the cloning software and initiating the cloning process. In the following section, we will guide you through this crucial step to clone your Windows 10 operating system to the new SSD.
Step 4: Launching the Cloning Software
Now that you have successfully connected the new SSD to your computer, it’s time to launch the cloning software and prepare for the cloning process. Follow the steps below to launch the cloning software:
1. Power on your computer: Make sure your computer is powered on and logged in to the operating system.
2. Insert the bootable USB drive: Insert the bootable USB drive, which contains the cloning software, into an available USB port on your computer.
3. Restart your computer: Restart your computer to initiate the boot process from the bootable USB drive. Depending on your computer’s configuration, you may need to press a specific key (like F11 or F12) during startup to access the boot menu and select the USB drive as the boot device.
4. Select the cloning software: Once your computer boots from the bootable USB drive, you’ll see a menu with different options. Choose the option that allows you to launch the cloning software. The name and location of this option may vary depending on the cloning software you’ve chosen.
5. Launch the cloning software: After selecting the cloning software option, the software should launch automatically. If not, navigate to the designated location where the cloning software is stored and launch it manually.
6. Familiarize yourself with the cloning software: Take a moment to explore the cloning software interface and familiarize yourself with its features and options. Read any instructions or tooltips provided by the software to understand how to navigate through the cloning process.
By following these steps, you’ll successfully launch the cloning software and be ready to proceed with the next steps of the cloning process. The precise steps and options within the cloning software may vary depending on the software you’ve chosen, so make sure to read the documentation or help resources provided by the software to guide you through the process.
Now that you have launched the cloning software, it’s time to proceed to the next step: selecting the source and target drives. In the following section, we will guide you through the process of selecting the appropriate drives for cloning.
Step 5: Selecting the Source and Target Drives
Now that you have launched the cloning software, it’s time to select the source drive (your current Windows 10 installation) and the target drive (the new SSD) for the cloning process. Follow the steps below to select the appropriate drives:
1. Identify your drives: In the cloning software interface, you should see a list of available drives connected to your computer. Take note of the drive sizes and their corresponding labels to help you differentiate between the source and target drives.
2. Select the source drive: In the cloning software, locate the option to select the source drive. This is typically labeled or identified by the name or label of your current Windows 10 installation. Choose the appropriate drive that contains your operating system, applications, and data that you want to clone.
3. Select the target drive: Find the option to select the target drive for the cloning process. This is the new SSD that you connected in the previous step. Ensure that you choose the correct drive that matches the size and label of the new SSD.
4. Confirm the drive selection: Double-check that you have selected the source and target drives correctly. Verify that the drive sizes and labels match your expectations before proceeding to the next step.
5. Review any additional options: Some cloning software may provide additional options or settings at this stage. Take the time to review these options, such as cloning method or destination partition alignment, and adjust them if necessary. However, it’s generally recommended to keep the default settings unless you have specific requirements.
6. Ensure sufficient space on the target drive: Before continuing, ensure that the target drive (new SSD) has enough free space to accommodate the clone of your Windows 10 installation. The cloning software should display this information, so double-check that there is sufficient space available.
By following these steps, you’ll successfully select the source and target drives for the cloning process. Once you have verified and confirmed your drive selections, you are ready to proceed to the next step: adjusting cloning settings (if necessary). In the following section, we will guide you through this important step to ensure optimal cloning results.
Step 6: Adjusting Cloning Settings (if necessary)
After selecting the source and target drives for the cloning process, it’s time to review and adjust any cloning settings if necessary. While most cloning software provides default settings that work well in most cases, you may have specific requirements or preferences that warrant customization. Follow the steps below to adjust cloning settings:
1. Access the cloning settings: In the cloning software interface, navigate to the settings or options menu that allows you to adjust cloning settings. This section may be labeled differently depending on the software you are using.
2. Review available settings: Take the time to carefully review the available cloning settings. These settings may include options for cloning method, partition alignment, sector size, or any other advanced configuration options provided by the software.
3. Adjust settings if necessary: If you have specific requirements or preferences, you can customize the cloning settings accordingly. For example, you may want to choose a specific cloning method if given the option, or configure the sector size to match the original source drive. However, it’s important to note that you can usually leave the settings at their default values if you’re unsure and do not have any specific needs.
4. Consider partition adjustments: Depending on the cloning software, you may have the option to adjust the partition layout on the target drive. If you want to make changes to the partition size or create additional partitions, carefully review the options and make the necessary adjustments. However, exercise caution when modifying partitions to prevent any data loss or unintended consequences.
5. Verify your settings: Before proceeding, double-check your adjusted settings to ensure they align with your requirements. Confirm that any changes you’ve made are accurately reflected in the cloning software interface.
6. Proceed with the cloning: Once you are satisfied with the cloning settings, save any changes if necessary, and proceed with the cloning process. Depending on the cloning software, this may involve clicking a “Start” button or initiating the cloning process through a specific menu option.
By following these steps, you’ll successfully review and adjust any necessary cloning settings. However, keep in mind that in most cases, the default settings provided by the cloning software will work perfectly fine, and adjustments may not be required. Now that you have adjusted the cloning settings (if necessary), you are ready to move on to the next step: initiating the cloning process. In the following section, we will guide you through starting the cloning process to transfer your Windows 10 operating system to the new SSD.
Step 7: Initiating the Cloning Process
With the source and target drives selected and any necessary cloning settings adjusted, it’s time to initiate the actual cloning process. Follow the steps below to start the cloning process and transfer your Windows 10 operating system to the new SSD:
1. Confirm your drive selections: Double-check that you have selected the correct source and target drives for the cloning process. Verify the drive sizes and labels to ensure accuracy.
2. Start the cloning process: Locate the option to start the cloning process within the cloning software interface. This may be a button or a menu option, depending on the software you are using. Click or select the option to initiate the cloning process.
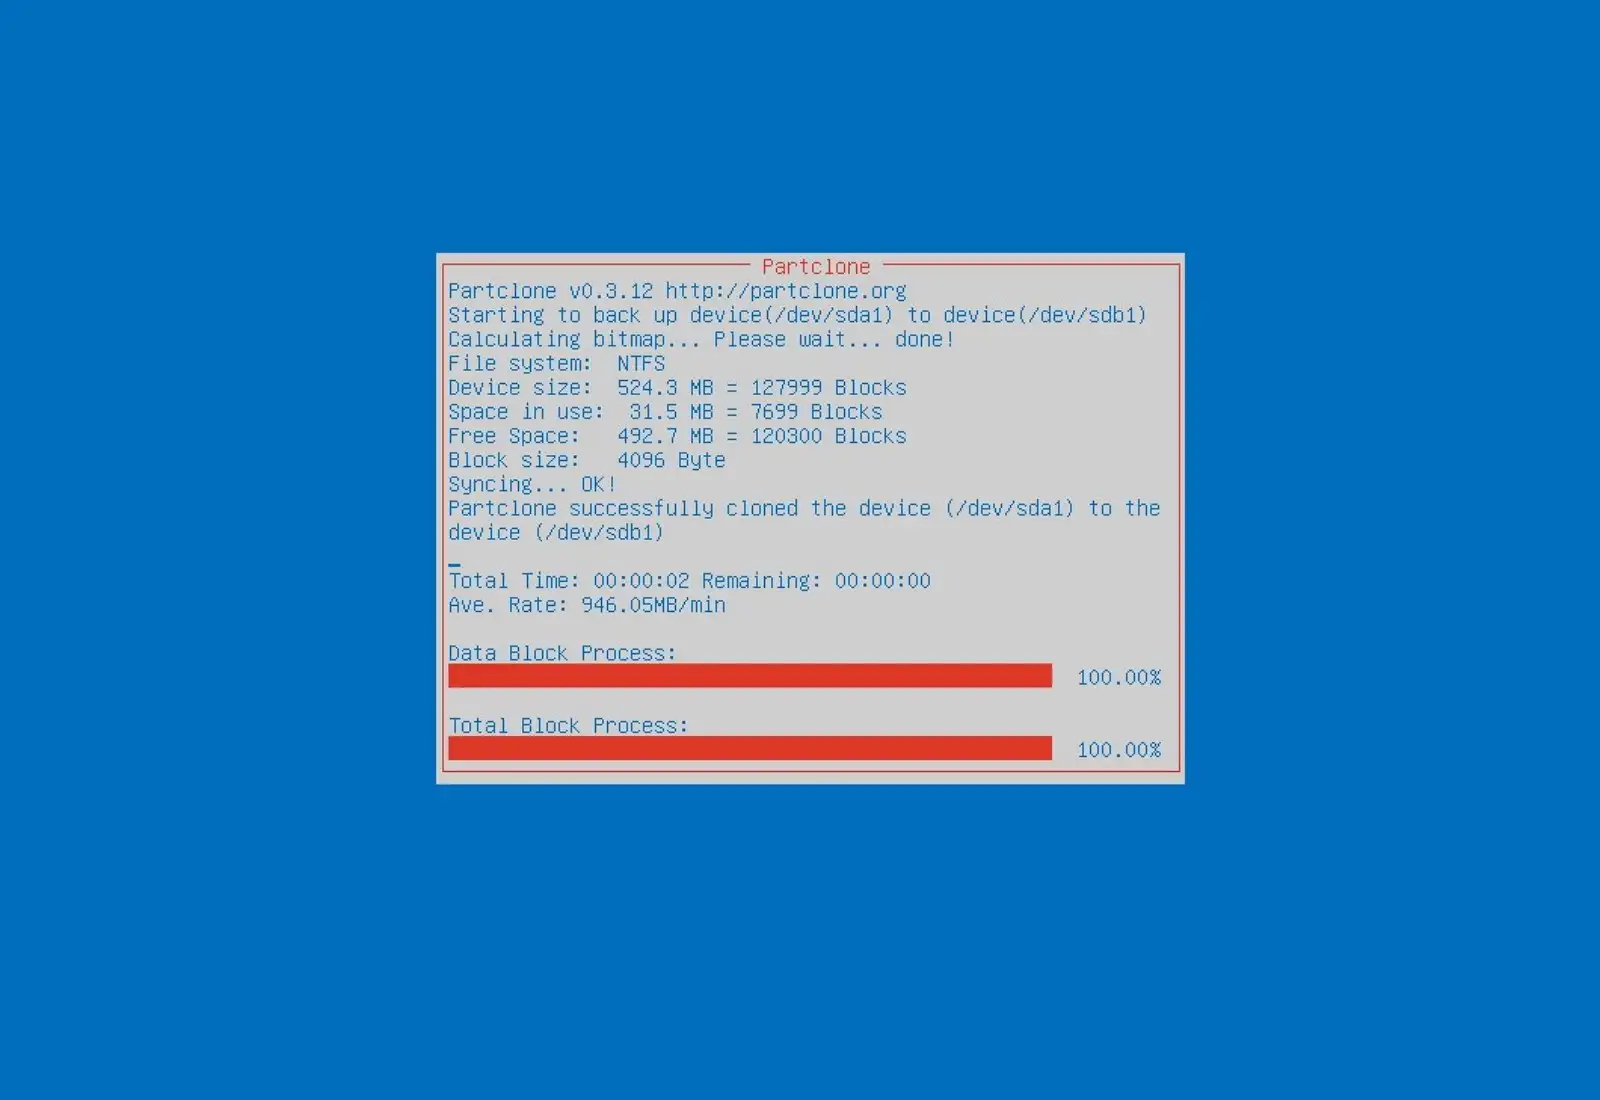
3. Monitor the progress: Once the cloning process begins, closely monitor the progress. The cloning software may provide a progress bar or status indicators to keep you informed about the cloning process. Depending on the size of your Windows 10 installation and the speed of your drives, the process may take some time to complete.
4. Avoid interruptions: While the cloning process is underway, it’s important to avoid any interruptions to ensure a successful and seamless transfer. Avoid shutting down or hibernating your computer, disconnecting any drives, or interrupting the power supply during the cloning process.
5. Take note of any prompts or instructions: During the cloning process, the software may provide prompts or instructions for additional steps or actions. Pay close attention to these prompts and follow them accordingly to ensure a smooth and error-free cloning process.
6. Monitor cloning completion: Once the cloning process is complete, the cloning software will usually notify you or present a completion message. Verify that the cloning process has successfully finished without any errors or issues.
7. Quit the cloning software: Close or quit the cloning software once the cloning process is complete. You can usually find an option within the software interface to close or exit the program.
Congratulations! You have successfully initiated the cloning process to transfer your Windows 10 operating system to the new SSD. With the cloning completed, you can now proceed to the next step: verifying the successful cloning process. In the following section, we will guide you through the steps to verify that the cloning was successful and that your data has been transferred correctly to the new SSD.
Step 8: Verifying Successful Cloning
After completing the cloning process, it’s crucial to verify that the cloning was successful and that your data has been transferred correctly to the new SSD. Follow the steps below to verify the success of the cloning process:
1. Shut down and disconnect the drives: Before proceeding with verification, shut down your computer and disconnect any drives apart from the new SSD to avoid any confusion or conflicts.
2. Power on your computer: Power on your computer and allow it to boot up. It should now boot from the new SSD, which contains your cloned Windows 10 operating system.
3. Check system performance: Once your computer has booted up, check its performance and responsiveness. Verify that the system runs smoothly without any glitches or abnormalities. Open some applications and perform common tasks to ensure everything is working as expected.
4. Verify data integrity: Take a closer look at your data on the new SSD. Open files and folders to verify that all your documents, photos, and other important files have been successfully transferred. Double-check that everything looks intact and that no data has been lost during the cloning process.
5. Ensure system settings correctness: Pay attention to system settings and configurations. Verify that your personalized settings, such as wallpaper, desktop icons, and taskbar preferences, have been transferred correctly. Additionally, ensure that system preferences, such as power settings, display settings, and network configurations, are properly configured on the new SSD.
6. Test application functionality: Launch applications and test their functionality on the new SSD. Verify that all your programs, including productivity software, games, and specialized tools, are working as expected without any errors or issues.
7. Test internet connectivity: Connect to the internet and test your network connectivity. Ensure that Wi-Fi or Ethernet is functioning correctly and that you can browse the web and access online services without any difficulties.
8. Take note of any discrepancies: If you encounter any issues, errors, or missing data during the verification process, take note of them. It’s essential to address these discrepancies as soon as possible to ensure a fully functional and error-free Windows 10 installation on the new SSD.
By following these steps, you can verify the success of the cloning process and ensure that your Windows 10 operating system, applications, and data have been transferred correctly to the new SSD. If you encounter any problems during the verification process, consult the documentation of the cloning software you used or seek assistance from the software’s support team for further troubleshooting steps.
Now that you have successfully verified the cloning process, you’re ready to proceed to the next steps: configuring the BIOS and boot order. In the following section, we will guide you through the process of configuring these settings to ensure your computer boots from the new SSD.
Step 9: Configuring the BIOS and Boot Order
Configuring the BIOS and boot order is necessary to ensure that your computer recognizes the new SSD as the primary boot device. Follow the steps below to configure these settings:
1. Restart your computer: Start by restarting your computer. As it reboots, be ready to access the BIOS or UEFI settings.
2. Access the BIOS or UEFI settings: During the startup process, you’ll need to press a specific key, such as Del, F2, or F10, to access the BIOS or UEFI settings. The key to press may vary depending on your computer’s manufacturer. Refer to your computer’s documentation or look for on-screen prompts during startup to identify the correct key.
3. Navigate to the boot order settings: Once in the BIOS or UEFI settings, navigate to the section that controls the boot order. This section may be labeled as “Boot,” “Boot Options,” or something similar.
4. Set the new SSD as the first boot device: In the boot order settings, locate the option to change the boot order sequence. Set the new SSD, which contains your cloned Windows 10 operating system, as the first boot device. This ensures that your computer will boot from the new SSD upon startup.
5. Save and exit: After setting the new SSD as the first boot device, save the changes made to the BIOS or UEFI settings and exit the configuration utility. The option to save and exit is usually located within the BIOS or UEFI settings menu. Confirm the changes when prompted.
6. Restart your computer: Finally, restart your computer once again to apply the changes you made to the boot order settings. Your computer should now boot directly from the new SSD, and you should be able to access your Windows 10 operating system and all your cloned data.
By configuring the BIOS or UEFI settings to prioritize the new SSD as the first boot device, you ensure that your computer boots directly from the newly cloned Windows 10 operating system on the SSD. This step is crucial to complete the transition and fully take advantage of the speed and performance benefits provided by the new SSD.
Now that you have successfully configured the BIOS and boot order, you’re ready to enjoy the benefits of your newly cloned Windows 10 operating system on the SSD. In the final section, we will summarize the process and highlight the advantages you can expect from using an SSD for your computing needs.
Step 10: Enjoying the Benefits of SSD Speed
Congratulations, you have completed the process of cloning your Windows 10 operating system to the new SSD! Now, it’s time to reap the rewards of faster performance and improved efficiency. Here’s what you can look forward to:
1. Lightning-fast boot times: With the Windows 10 operating system installed on the SSD, you’ll experience significantly faster boot times. Your computer will start up quickly, allowing you to jump into your work or entertainment without any delay.
2. Speedy application launches: Applications stored on the SSD will launch near-instantaneously, reducing wait times and increasing productivity. Whether you’re running productivity software or playing graphics-intensive games, you’ll notice a significant boost in performance.
3. Improved multitasking capability: The SSD’s fast read and write speeds enable smoother multitasking. You’ll be able to switch between multiple applications seamlessly without experiencing lags or slowdowns.
4. Enhanced file transfer speeds: Transferring files between drives or external devices will be much quicker with the SSD. Large files and folders will be copied or moved in a fraction of the time it used to take, saving you valuable time and increasing productivity.
5. Reduced power consumption: SSDs are more power-efficient than traditional hard drives as they do not have any moving parts. This means improved battery life for laptops and lower energy costs for desktop systems.
6. Silent operation: With no mechanical components, SSDs operate silently, providing a noise-free computing experience. You’ll enjoy a quiet environment while working, gaming, or watching multimedia content.
7. Increased durability and reliability: SSDs are more resistant to physical damage and have a longer lifespan compared to traditional hard drives. They can withstand shocks, vibrations, and temperature fluctuations, reducing the risk of data loss due to drive failure.
8. Better overall system responsiveness: The combination of faster boot times, quicker application launches, and improved file transfer speeds culminate in an overall more responsive system. You’ll notice a significant improvement in the overall user experience, making your computing tasks feel smoother and more enjoyable.
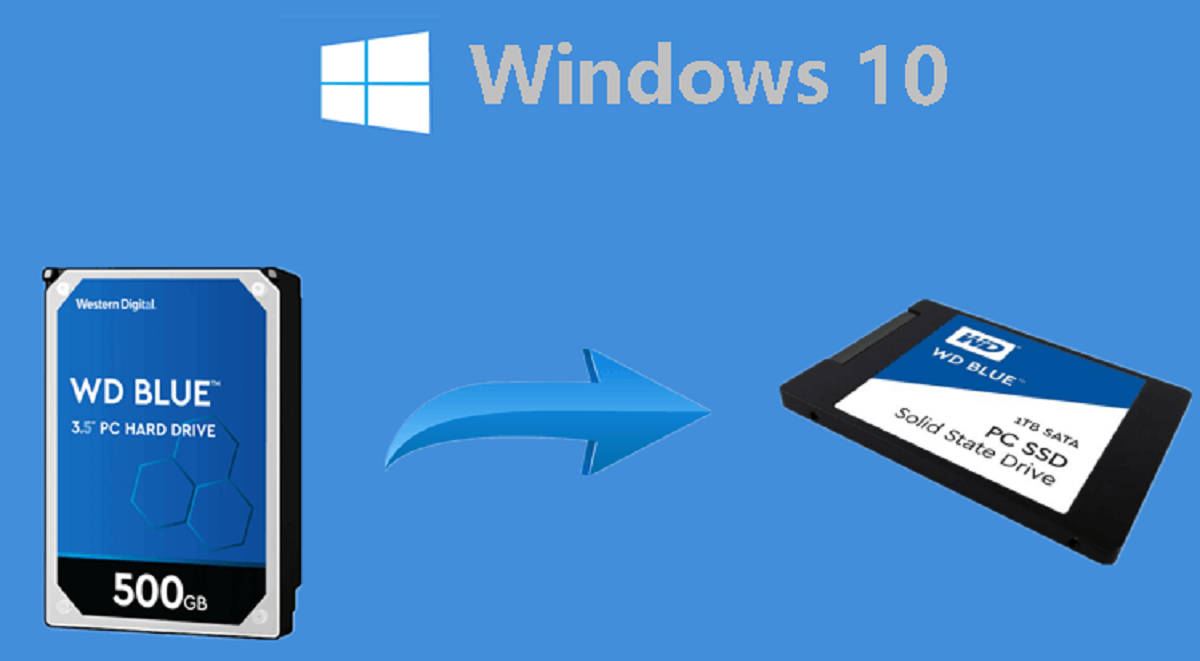
By following the ten steps outlined in this guide, you have successfully cloned your Windows 10 operating system to an SSD. Now, sit back, relax, and enjoy the benefits of your newfound speed and efficiency. Harness the full potential of your computer and experience a significant upgrade in performance with your newly cloned Windows 10 on the SSD!
Conclusion
Congratulations on successfully cloning your Windows 10 operating system to an SSD! By following the steps outlined in this guide, you have transformed your computer into a faster, more efficient machine. The benefits of using an SSD, such as faster boot times, improved application performance, and enhanced file transfer speeds, will greatly enhance your productivity and overall computing experience.
Throughout the process, you learned about the advantages of SSDs over traditional hard drives, the importance of backing up your data, and the significance of selecting the right cloning software. You also gained knowledge on preparing for the cloning process, creating a bootable USB drive, connecting the new SSD, launching the cloning software, adjusting cloning settings, initiating the cloning process, verifying its success, configuring the BIOS and boot order, and ultimately enjoying the benefits of SSD speed.
With the Windows 10 operating system successfully transferred to the new SSD, you can now enjoy lightning-fast boot times, quicker application launches, improved multitasking capabilities, and reduced file transfer durations. Additionally, the reliability, durability, power efficiency, and silent operation of SSDs will further enhance your computing experience.
As technology continues to advance, upgrading to an SSD becomes essential for maximizing your computer’s potential. With the increased demands of modern computing, an SSD ensures that your system can handle resource-intensive tasks, gaming, and multimedia consumption without any performance bottlenecks.
Remember to regularly backup your data and keep your SSD firmware up to date for optimal functionality. Continually monitoring your system’s performance and maintaining a clutter-free environment will help ensure that you get the most out of your SSD.
Thank you for following this guide and embracing the benefits of SSD speed. Enjoy your faster, more efficient computing experience with your newly cloned Windows 10 operating system on the SSD!