Introduction
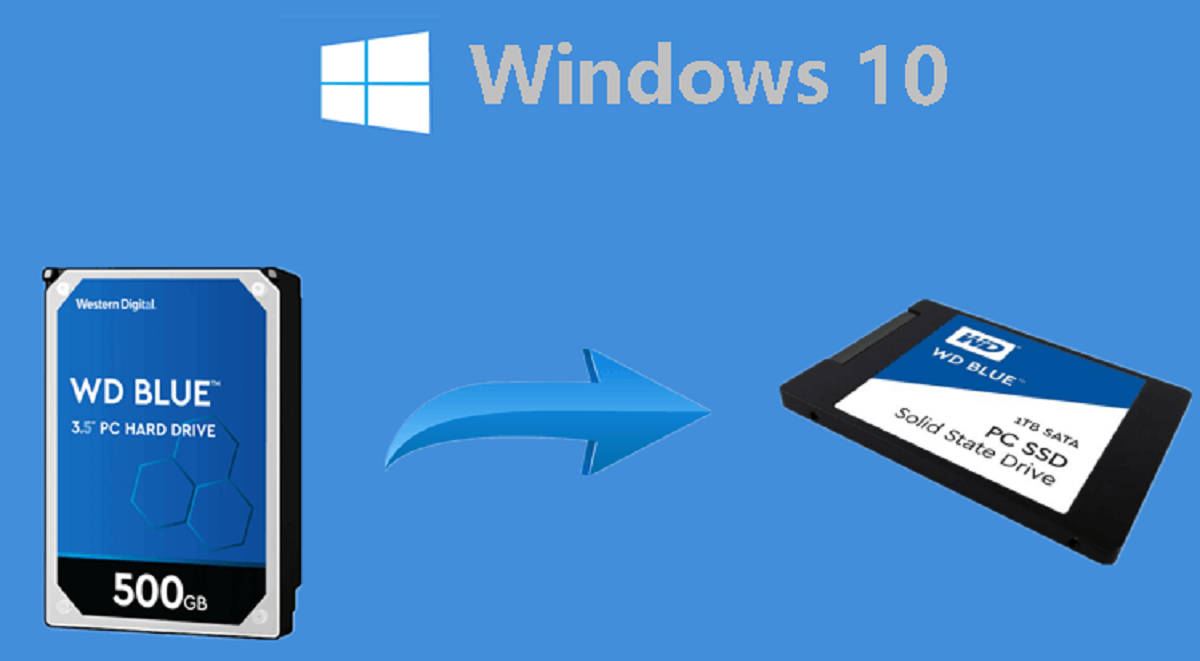
Upgrading your computer’s hard drive from a traditional mechanical disk drive (HDD) to a solid-state drive (SSD) can greatly enhance the performance and responsiveness of your system. In particular, migrating your Windows 10 operating system to an SSD can significantly reduce boot times, decrease application load times, and improve overall system functionality.
SSDs offer many advantages over HDDs, including faster data access, lower power consumption, and greater durability. With Windows 10 becoming increasingly resource-demanding, an SSD can provide the necessary speed and efficiency to keep your system running smoothly.
In this guide, we will walk you through the step-by-step process of migrating Windows 10 to an SSD. By following these instructions, you will be able to seamlessly transfer your operating system and all your files to the new drive, ensuring a smooth transition without any data loss.
Before we dive into the details, it’s important to note that the migration process can vary depending on the specific hardware and software configurations of your system. Therefore, it is always recommended to consult your device’s user manual or manufacturer’s website for any specific instructions or updates related to your computer model.
Now, let’s explore the benefits of migrating Windows 10 to an SSD and how this upgrade can breathe new life into your computer.
Benefits of Migrating Windows 10 to SSD
Migrating your Windows 10 operating system to an SSD offers numerous benefits that can enhance your overall computing experience. Let’s take a closer look at some of the key advantages:
- Improved Speed and Performance: One of the most notable benefits of SSDs is their blazing-fast read and write speeds. When you migrate Windows 10 to an SSD, you’ll experience significantly reduced boot times and faster application loading, making your system more responsive and efficient.
- Enhanced Productivity: With an SSD, your computer will be able to handle multitasking more smoothly. Launching multiple applications simultaneously, switching between them, and handling resource-intensive tasks will become seamless, allowing you to work faster and more efficiently.
- Faster File Transfers: SSDs offer incredibly fast data transfer rates, allowing you to move files and folders at lightning speed. Whether you’re transferring large media files, backing up data, or working with complex projects, the quick transfer speeds provided by an SSD can save you significant time.
- Improved Durability: Unlike traditional HDDs, SSDs have no moving parts, making them more resistant to physical damage caused by vibrations or accidental drops. This enhanced durability ensures that your data remains safe, reducing the risk of data loss due to mechanical failures.
- Energy Efficiency: SSDs consume less power than HDDs, leading to increased battery life in laptops and lower electricity bills for desktop computers. This energy efficiency not only benefits the environment but also allows you to enjoy longer untethered usage.
- Silent Operation: Since SSDs lack mechanical components that produce noise, they operate silently. This absence of noise enhances the overall user experience by eliminating distracting sounds, creating a more peaceful and enjoyable computing environment.
The benefits mentioned above make migrating Windows 10 to an SSD a highly worthwhile investment. Not only will you notice a significant boost in performance, but you’ll also enjoy increased productivity, improved durability, and energy efficiency. With these advantages in mind, let’s move on to the step-by-step process of preparing for the migration.
Step 1: Preparing for the Migration
Before you begin the process of migrating Windows 10 to an SSD, it’s essential to take some preparatory steps to ensure a successful and hassle-free transition. Follow these guidelines to get your computer ready:
- Create a Backup: It’s always a good idea to create a backup of your important files and documents before starting the migration process. While the chances of data loss are minimal, having a backup will provide an extra layer of security. You can use an external hard drive, cloud storage, or even a USB flash drive to store your backup data.
- Update Windows 10: Make sure your operating system is up to date with the latest updates and patches. Updating Windows 10 ensures that you have the most stable and compatible version of the operating system, reducing the risk of any potential issues during the migration process.
- Uninstall Unnecessary Programs: Take some time to uninstall any unnecessary applications or software from your computer. Removing unwanted programs not only frees up valuable storage space but also helps streamline the migration process.
- Clean Up Your Hard Drive: Perform a disk cleanup to remove temporary files, system caches, and other unnecessary files from your hard drive. This will minimize the amount of data that needs to be transferred during the migration and ensure a smoother process.
- Check System Compatibility: Verify that your computer’s hardware and firmware are compatible with an SSD. While most modern computers support SSDs, it’s always a good idea to consult your device’s manual or manufacturer’s website to ensure compatibility and look for any specific instructions or updates related to your computer model.
- Gather Required Tools: Ensure you have all the necessary tools for the migration, including a screwdriver (if you need to physically install the SSD), an external USB housing (if you plan to clone your drive), and a USB flash drive for creating a bootable installation media.
By following these preparatory steps, you’ll be well-equipped and ready to proceed with the migration process. Once you’ve completed these initial preparations, you can move on to the next step, which involves choosing the right SSD for your needs.
Step 2: Choosing the Right SSD
When migrating Windows 10 to an SSD, selecting the right solid-state drive is crucial to ensure optimal performance and compatibility. Here are some factors to consider when choosing an SSD:
- Storage Capacity: Determine the amount of storage space you require for your needs. SSDs are available in various capacities, ranging from 128GB to several terabytes. Consider the size of your current hard drive and the amount of data you have, including the operating system, applications, and personal files.
- Form Factor: Check the form factor of your computer’s hard drive bay to ensure compatibility. Most modern laptops and desktops support the standard 2.5-inch form factor. However, if you have a smaller form factor or an ultrabook, you might need an M.2 or mSATA SSD.
- Read and Write Speeds: Look for SSDs with high read and write speeds for faster data access. Higher speeds result in quicker boot times, faster application loading, and smoother overall system performance. The read and write speeds are typically listed in the SSD’s specifications.
- Endurance and Longevity: Consider the endurance rating of the SSD, which indicates its ability to handle multiple read and write cycles. SSDs with higher endurance ratings are more reliable and tend to last longer. This is especially important if you plan to use your computer for resource-intensive tasks or heavy gaming.
- Brand and Reputation: Stick to reputable brands known for their quality and reliability. Research customer reviews, ratings, and expert recommendations to ensure you choose a reliable SSD from a trusted manufacturer.
- Budget: Set a budget for your SSD purchase and look for options that offer a balance between performance and cost. While SSDs tend to be more expensive than traditional hard drives, the improved performance and longevity they provide are well worth the investment.
Consider these factors carefully and choose an SSD that meets your specific requirements and budget. Once you’ve selected the right SSD, you can move on to the next step, which involves backing up your important data before the migration.
Step 3: Backing Up Important Data
Prior to migrating your Windows 10 operating system to an SSD, it is essential to create a backup of all your important data. This ensures that even in the unlikely event of any data loss during the migration process, you will have a copy of your files and documents. Here’s how to back up your data:
- Identify Critical Data: Take a moment to determine the files and folders that hold the utmost importance to you. These may include documents, photos, videos, music, and any other personal files that you cannot afford to lose.
- Choose a Backup Method: You have several options for backing up your data. One common method is to copy your files to an external hard drive or USB flash drive. Alternatively, you can utilize cloud storage services such as Google Drive, Dropbox, or Microsoft OneDrive to store your files online.
- Organize and Transfer: Organize your files into easily manageable folders and transfer them to your chosen backup destination. Create a logical folder structure to make it easier to locate and restore specific files later.
- Verify and Test: Once the backup process is complete, take the time to verify that all your important files and documents have been successfully copied. Test the integrity of the backup by trying to open a few files to ensure they are accessible and intact.
- Create a System Image: In addition to backing up your personal files, consider creating a system image of your current Windows 10 installation. This image will serve as a complete snapshot of your operating system and installed programs, allowing you to restore the entire system if needed.
- Regularly Update Your Backup: It is recommended to regularly update your backup to ensure the latest versions of your files are secured. Consider implementing an automated backup solution or setting a reminder to manually update your backup at regular intervals.
By following these steps, you can safeguard your important data and have peace of mind throughout the migration process. Once your data is securely backed up, you can proceed to the next step, which involves creating a bootable USB drive.
Step 4: Creating a Bootable USB Drive
In order to migrate Windows 10 to an SSD, you’ll need to create a bootable USB drive containing the operating system installation files. This will allow you to install Windows 10 on your new SSD. Follow these steps to create a bootable USB drive:
- Download Windows 10 ISO: Visit the official Microsoft website and download the Windows 10 ISO file. Make sure to select the correct version and edition of Windows 10 that matches your current installation.
- Prepare USB Drive: Insert a USB flash drive with a capacity of at least 8GB into your computer. Ensure that the USB drive is empty or does not contain any files that you need, as the creation process will erase all existing data.
- Create Bootable USB: Download and install a reliable third-party tool such as Rufus, WinToUSB, or Microsoft’s official Windows USB/DVD Download Tool. Open the tool and follow the on-screen instructions to create a bootable USB drive using the Windows 10 ISO file you downloaded.
- Set USB as Boot Device: Restart your computer and access the BIOS settings by pressing the designated key during startup (usually F2, F10, or Delete). Navigate to the Boot or Boot Order section and set the USB drive as the first boot device. Save the changes and exit the BIOS.
- Restart and Boot from USB: Restart your computer again, and this time it will boot from the USB drive. Follow the prompts to begin the Windows 10 installation process.
- Note Your Windows 10 Product Key: During the installation process, you may be prompted for a product key. Take note of your Windows 10 product key or ensure that you have it handy, as you will need it to activate Windows 10 later.
- Proceed with Installation: Follow the on-screen instructions to install Windows 10 on your SSD. When prompted, select the SSD as the installation destination. The installation process may take some time, so be patient.
Once the installation is complete, your Windows 10 operating system will be ready to use on your new SSD. In the next step, we will discuss how to clone Windows 10 onto the SSD to transfer all your files and settings.
Step 5: Cloning Windows 10 onto the SSD
To transfer your Windows 10 operating system and all your files from the existing hard drive to the new SSD, you can make use of cloning software. Cloning is an efficient method that ensures a complete and identical copy of your system. Follow these steps to clone Windows 10 onto the SSD:
- Choose a Cloning Software: There are several reliable cloning software options available, including Acronis True Image, EaseUS Todo Backup, and Clonezilla. Download and install the software of your choice.
- Connect the SSD: Install the SSD in your computer if you haven’t already. Connect it using SATA or, if applicable, an M.2 slot. Make sure the SSD is recognized by your computer before proceeding.
- Launch the Cloning Software: Open the cloning software on your computer. Select the option to clone your system or disk.
- Select Source and Destination Drives: In the cloning software, choose your existing hard drive as the source drive and the newly installed SSD as the destination drive for the cloning process.
- Start the Cloning Process: Review the cloning settings and ensure that all necessary partitions and system files are selected for cloning. Start the cloning process and wait for it to complete. The duration of the process may vary depending on the size of your files and the speed of your drives.
- Verify the Cloned Data: Once the cloning process is finished, verify that the data has been successfully cloned to the SSD. You can do this by accessing the SSD and checking if all your files, folders, and system settings are intact.
- Restart Your Computer: Shut down your computer and disconnect the power source. Disconnect the old hard drive and leave only the SSD connected. Restart your computer to ensure that it boots from the SSD.
By following these steps, you will have successfully cloned your Windows 10 operating system onto the SSD, preserving all your files and settings. Once you have verified the cloned data and ensured that the SSD is working correctly, you can proceed to the next step, which involves configuring the BIOS settings.
Step 6: Configuring BIOS Settings
After successfully cloning your Windows 10 operating system onto the SSD, you need to configure the Basic Input Output System (BIOS) settings to ensure that your computer recognizes the SSD as the bootable drive. Here’s how to configure the BIOS settings:
- Restart Your Computer: Restart your computer and enter the BIOS setup by pressing the designated key during startup (usually F2, F10, or Delete).
- Navigate to the Boot Settings: In the BIOS setup, navigate to the “Boot” or “Boot Order” section. This section contains the settings related to the boot sequence of your computer.
- Set SSD as the First Boot Device: Locate the option to set the boot order and ensure that the SSD is listed as the first boot device. If it is not, use the designated keys to move the SSD to the top of the boot priority list.
- Save and Exit: Once you have made the necessary changes, save the settings and exit the BIOS setup. This will restart your computer with the new configuration.
- Verify the Boot Order: After the restart, pay attention to the boot process. Your computer should now boot from the SSD where Windows 10 is installed. This confirms that the BIOS settings have been successfully configured.
- Check SSD Recognition: Once Windows 10 has fully loaded, check in the operating system if the SSD is recognized and functioning correctly. You can do this by accessing the “Disk Management” tool and ensuring that the SSD is listed and allocated.
Configuring the BIOS settings ensures that the SSD is recognized as the bootable drive, allowing for faster and smoother system startup. Once you have verified the boot order and the correct recognition of the SSD, you can proceed to the next step, which involves booting Windows 10 from the SSD.
Step 7: Booting Windows 10 from the SSD
With the BIOS settings configured to recognize the SSD as the bootable drive, it’s time to boot into Windows 10 on your newly installed SSD. Follow these steps to ensure a successful boot:
- Restart Your Computer: If your computer is still on, restart it to initiate the booting process.
- Monitor the Startup: Pay close attention to the startup process, as you may need to press a key or combination of keys to access the boot menu or choose the boot device. The specific key or combination varies depending on your computer’s manufacturer, but commonly used keys include F8, F12, or Escape. Look for the on-screen message indicating the key to press.
- Access the Boot Menu: Press the designated key to access the boot menu. This menu allows you to select the boot device from which your computer will start. Choose the SSD where you installed Windows 10. Typically, the SSD will be listed as its model name or as a generic “Hard Disk” option.
- Boot from the SSD: After selecting the SSD as the boot device, press Enter or the designated key to confirm your selection. Your computer will now boot from the SSD, and you will soon see the familiar Windows 10 login screen.
- Login and Verify: Once Windows 10 has loaded, log in using your credentials. Take a few moments to verify that all your files, applications, and system settings are intact and functioning correctly. If everything appears as expected, congratulations! You have successfully booted into Windows 10 from the SSD.
Booting Windows 10 from the SSD ensures faster startup and improved overall system performance due to the SSD’s faster read and write speeds. Now that you have successfully booted into Windows 10 from the SSD, it’s time to move on to the final step: verifying the migration process.
Step 8: Verifying the Migration
After completing the migration process and booting into Windows 10 from the SSD, it is important to verify that the migration was successful and that everything is functioning properly. Follow these steps to ensure that the migration was a success:
- Check System Performance: Test the overall performance of your system. Pay attention to boot times, application loading times, and general responsiveness. You should notice a significant improvement compared to your previous hard drive.
- Confirm System Settings: Verify that all your personalized settings, including desktop background, taskbar layout, and display preferences, have been transferred correctly to the SSD installation of Windows 10.
- Test Installed Applications: Open and test some of your commonly used applications to ensure they are functioning as expected. Check for any missing files or settings that may not have been migrated properly.
- Access Data and Files: Navigate through your files and folders to confirm that all your important data has been successfully migrated and is accessible from the SSD. Open various file types to ensure they open without any issues.
- Perform System Updates: Run a Windows Update to ensure that your system is up-to-date with the latest security patches and features. This will help maintain the stability and compatibility of your Windows 10 installation.
- Check Device Manager: Open the Device Manager and ensure that all your hardware components, including the SSD, are recognized and functioning properly without any yellow exclamation marks or error messages.
- Verify Drive Allocation: Open the Disk Management tool in Windows 10 and double-check that the SSD has been correctly allocated and that all partitions appear as expected.
By following these steps and verifying the migration process, you can ensure that everything has been successfully transferred to the SSD and that your Windows 10 installation is fully functional. If any issues arise, consult the user manual, manufacturer’s website, or seek professional assistance to resolve them.
Congratulations on successfully migrating Windows 10 to your SSD! Enjoy the improved performance and responsiveness of your system.
Conclusion
By following the step-by-step process outlined in this guide, you have successfully migrated your Windows 10 operating system to an SSD. This upgrade offers numerous benefits, including improved speed and performance, enhanced productivity, faster file transfers, improved durability, energy efficiency, and silent operation.
Throughout the migration process, you have prepared your computer, chosen the right SSD, backed up your important data, created a bootable USB drive, cloned Windows 10 onto the SSD, configured BIOS settings, booted into Windows 10 from the SSD, and verified the migration.
The migration to an SSD not only provides immediate performance improvements, but it also ensures a more efficient and reliable computing experience for the long term. You will enjoy faster boot times, quicker application loading, and smoother overall system performance, allowing you to work more efficiently and enjoy a seamless user experience.
Remember, it is always recommended to refer to your device’s user manual or manufacturer’s website for any specific instructions or updates related to your computer model.
Now that you have successfully completed the migration process, make sure to regularly maintain and update your SSD and Windows 10 installation for optimal performance. Stay informed about the latest updates, backup your data regularly, and utilize best practices to keep your system running smoothly.
Thank you for following this guide, and we hope that your newly migrated Windows 10 on SSD provides you with a faster, more responsive, and enjoyable computing experience.