Introduction
When it comes to optimizing the performance and longevity of your computer, formatting your SSD is an essential task. If you’re using Windows 7, you may be wondering how to go about formatting your SSD effectively. Fear not, as this article will guide you through the step-by-step process.
Before diving into the specifics of formatting your SSD, it’s important to understand the significance of this task. Formatting allows you to erase all data on the SSD, effectively resetting it to its factory state. This ensures that any previous files or configurations are completely removed, providing a clean slate for your operating system and applications.
Additionally, formatting an SSD can help resolve any performance issues or errors that may have arisen over time. It can also maximize the storage space available on your drive, allowing for smooth and efficient operation. However, before proceeding with the formatting process, it’s crucial to back up any important files or data on the SSD. This ensures that you don’t lose any valuable information during the formatting procedure.
While Windows 7 is now considered an older operating system, many individuals still rely on it for various reasons. Whether it’s for compatibility with certain software or preferences, knowing how to format your SSD in Windows 7 can be highly beneficial.
In this article, we will provide you with a detailed step-by-step guide on how to format an SSD in Windows 7. From backing up your data to creating a Windows 7 installation media and formatting the SSD, we will take you through each stage of the process.
So, if you’re ready to optimize your computer’s performance and start afresh with a formatted SSD, let’s get started!
Step 1: Back up your Data
Before proceeding with the formatting process, it’s crucial to back up all of your important data on the SSD. Formatting will erase all the data on the drive, so it’s essential to create a backup to avoid losing any valuable files.
There are several ways to back up your data, depending on your preferences and resources. Here are a few common methods:
- External Hard Drive: Connect an external hard drive to your computer and transfer all the relevant files and folders from the SSD to the external drive. This method is ideal for those with a significant amount of data to back up.
- Cloud Storage: Upload your important files to a cloud storage service such as Google Drive, Dropbox, or Microsoft OneDrive. This allows you to access your files from any device with an internet connection.
- Network Backup: If you have multiple computers connected on a local network, you can create a network backup by copying your files to a shared network storage device.
Consider the size of your SSD and the amount of data you need to back up when choosing a backup method. Make sure to double-check that all your essential files, documents, photos, and any other data are included in the backup.
Take the time to organize your data and remove any unnecessary files or duplicates. This will not only save time during the backup process but also help you keep your data more organized after formatting the SSD.
Once you have successfully backed up your data, it’s recommended to verify the backup’s integrity by accessing a few files to ensure they have been properly saved. This will give you peace of mind knowing that your important data is secure before proceeding with the formatting process.
Remember, having a backup of your data is crucial as it eliminates the risk of losing irreplaceable files. Whether it’s personal documents, work-related files, or cherished memories in the form of photos or videos, taking the time to back up your data ensures that you can restore them after formatting your SSD.
Step 2: Check SSD Health and S.M.A.R.T Status
Before formatting your SSD, it’s important to check its health and S.M.A.R.T (Self-Monitoring, Analysis, and Reporting Technology) status. S.M.A.R.T is a feature integrated into most modern SSDs that monitors various parameters related to drive health and performance.
To check the health and S.M.A.R.T status of your SSD, you can follow these steps:
- Download a S.M.A.R.T monitoring tool: There are several free software programs available that can provide detailed information about your SSD’s health and S.M.A.R.T status. Examples of popular tools include CrystalDiskInfo, HWMonitor, and SSD Life. Download and install one of these tools that is compatible with your operating system.
- Run the S.M.A.R.T monitoring tool: Once installed, launch the S.M.A.R.T monitoring tool and let it scan your system for connected storage devices. It will display a list of detected drives, including your SSD.
- Check the SSD health: Look for the entry corresponding to your SSD in the software interface. It will provide information about the overall health of the drive, including any potential issues or warnings. If your SSD is in good health, you can proceed with the formatting process. However, if there are any indications of severe issues, such as a high number of bad sectors or a low remaining lifespan, it may be advisable to replace the drive before formatting.
- Inspect S.M.A.R.T attributes: S.M.A.R.T attributes provide detailed information about various aspects of your SSD’s performance and health, including temperature, read/write error rate, and power-on hours. Take some time to analyze these attributes and check for any values that are outside the normal range. This can give you valuable insights into the condition of your SSD.
By checking the health and S.M.A.R.T status of your SSD before formatting, you can identify any potential issues that may affect the drive’s performance or lifespan. This information can help you make informed decisions regarding the formatting process and future storage solutions.
If your SSD shows signs of significant health deterioration or if any S.M.A.R.T attributes raise concerns, it may be a good idea to back up your data and consider replacing the drive. Continued use of a failing SSD can lead to data loss and system instability. However, if your SSD is in good health and there are no significant issues, you can proceed with confidence to the next step of preparing for formatting.
Step 3: Prepare for Formatting
Before formatting your SSD, it is important to properly prepare your system and gather the necessary resources. This step will ensure a smooth and successful formatting process. Here are the essential tasks to complete:
- Disconnect unnecessary devices: Remove any external devices connected to your computer, such as USB drives, external hard drives, or printers. This minimizes the risk of accidentally formatting the wrong drive during the process.
- Ensure a stable power source: It is crucial to have a stable power source during the formatting process to avoid any interruptions that may cause data loss or system instability. If you are using a laptop, make sure it is connected to a power outlet, and if you are using a desktop, consider using an uninterruptible power supply (UPS) to safeguard against power outages.
- Gather necessary resources: You will need a valid Windows 7 installation media to install the operating system after formatting the SSD. This can be a DVD or a USB drive containing the Windows 7 setup files. Make sure you have the necessary media ready before proceeding further.
- Obtain necessary drivers and updates: It is recommended to download the latest drivers for your system’s hardware components, such as the motherboard, graphics card, and network adapter, from the manufacturer’s official website. Additionally, download the latest Windows 7 updates to ensure a secure and up-to-date operating system installation.
By disconnecting unnecessary devices, ensuring a stable power source, and gathering the necessary resources, you are setting the stage for a successful formatting process. Being prepared will save you time and minimize the risk of encountering complications during the installation and formatting.
Remember, formatting your SSD will erase all the data on the drive, so it is crucial to back up your important files beforehand. Additionally, ensure that you have any necessary software licenses, product keys, or activation information for your software applications, as you will need to reinstall them after the formatting process.
Once you have completed the necessary preparations, you are ready to move on to the next step: creating a Windows 7 installation media.
Step 4: Create a Windows 7 Installation Media
In order to format your SSD and install Windows 7, you’ll need a Windows 7 installation media. Here are the steps to create one:
- Obtain a Windows 7 ISO file: If you don’t already have a Windows 7 installation disc, you can download the Windows 7 ISO file from the Microsoft website. Make sure to choose the correct version and language that matches your product key.
- Create a bootable USB drive: To create a bootable USB drive, you’ll need a USB flash drive with at least 4 GB of storage capacity. Insert the USB drive into your computer and download a tool like Rufus or Windows USB/DVD Download Tool. Run the tool and follow the instructions to create a bootable USB drive using the Windows 7 ISO file you obtained.
- Create a bootable DVD: If you prefer to use a DVD instead, you can use a DVD burning software like ImgBurn or Nero to burn the Windows 7 ISO file to a blank DVD. Insert the DVD into your computer and follow the software’s instructions to create a bootable DVD.
Creating a Windows 7 installation media allows you to have a physical copy of the Windows 7 setup files. This is essential for formatting your SSD and installing the operating system. Additionally, having a bootable USB drive or DVD provides the flexibility to reinstall Windows 7 in the future if needed.
Ensure that the USB drive or DVD is created successfully without any errors in order to proceed with the next steps. It’s also a good idea to test the bootable media on your computer to verify that it can correctly start the Windows 7 installation process.
With the Windows 7 installation media ready, you are now equipped to move on to the next step: booting from the installation media.
Step 5: Boot from the Installation Media
In order to format your SSD and install Windows 7, you need to boot your computer from the Windows 7 installation media. Here’s how you can do it:
- Insert the bootable USB drive or DVD: Insert the USB drive or DVD containing the Windows 7 installation files into your computer’s USB port or DVD drive, respectively.
- Restart your computer: Restart your computer and access the BIOS or UEFI settings. The method to access these settings may vary depending on your computer manufacturer and model. You can usually enter the BIOS or UEFI by pressing a specific key such as F2, F12, ESC, or Delete during the startup process. Check your computer’s manual or manufacturer’s website for the specific instructions.
- Set the boot priority: Once in the BIOS or UEFI settings, navigate to the Boot or Boot Options section. Set the boot priority so that the USB drive or DVD drive containing the Windows 7 installation media is the first boot device.
- Save and exit the BIOS or UEFI: Save the changes you made to the boot priority and exit the BIOS or UEFI settings. Your computer will now restart.
- Boot from the installation media: During the restart process, your computer will recognize the Windows 7 installation media as the primary boot device. The Windows 7 setup screen should appear, indicating that you have successfully booted from the installation media.
Booting from the Windows 7 installation media allows you to initiate the formatting process and install the operating system on your SSD. It is important to properly set the boot priority in the BIOS or UEFI settings to ensure that your computer recognizes the installation media as the primary boot device.
If you encounter any issues during the boot process or if your computer does not recognize the installation media, double-check the boot priority settings in the BIOS or UEFI. Additionally, ensure that the installation media is created correctly and is compatible with your computer.
With the successful booting from the installation media, you are now prepared for the next steps in the Windows 7 installation and formatting process.
Step 6: Enter BIOS Setup and Change Boot Order
In order to boot your computer from the Windows 7 installation media, you need to enter the BIOS (Basic Input/Output System) setup and change the boot order. This will ensure that your computer recognizes the installation media as the primary boot device. Here’s how you can do it:
- Restart your computer: Begin by restarting your computer. Once the restart process is initiated, you need to access the BIOS setup.
- Enter the BIOS setup: To enter the BIOS setup, you will need to press a specific key during the startup process. Common keys to access the BIOS setup include F2, F12, ESC, or Delete. Consult your computer’s manual or the manufacturer’s website for the exact key for your computer model.
- Navigate to the Boot menu: Once you are in the BIOS setup, navigate to the Boot or Boot Order menu using the arrow keys on your keyboard. The location of the Boot menu may vary depending on your computer’s manufacturer and model.
- Change the boot order: In the Boot menu, you will see a list of devices. Use the arrow keys to highlight the CD/DVD drive or USB drive that contains the Windows 7 installation media. Move this device to the top of the boot order by using the designated keys specified in the BIOS setup screen. This will ensure that the computer boots from the installation media first.
- Save and exit the BIOS setup: After changing the boot order, save the changes you made by selecting the appropriate option (usually F10) and exit the BIOS setup. This will initiate a restart of your computer.
Entering the BIOS setup and changing the boot order is necessary to prioritize the Windows 7 installation media as the primary boot device. By adjusting the boot order, your computer will recognize the installation media and start the Windows 7 installation process.
If you encounter any issues accessing the BIOS setup or modifying the boot order, refer to your computer’s manual or the manufacturer’s website for specific instructions. Keep in mind that the BIOS setup interface may vary, and the instructions provided here are general guidelines.
With the boot order successfully changed, your computer is now ready to boot from the Windows 7 installation media and proceed with the formatting and installation process.
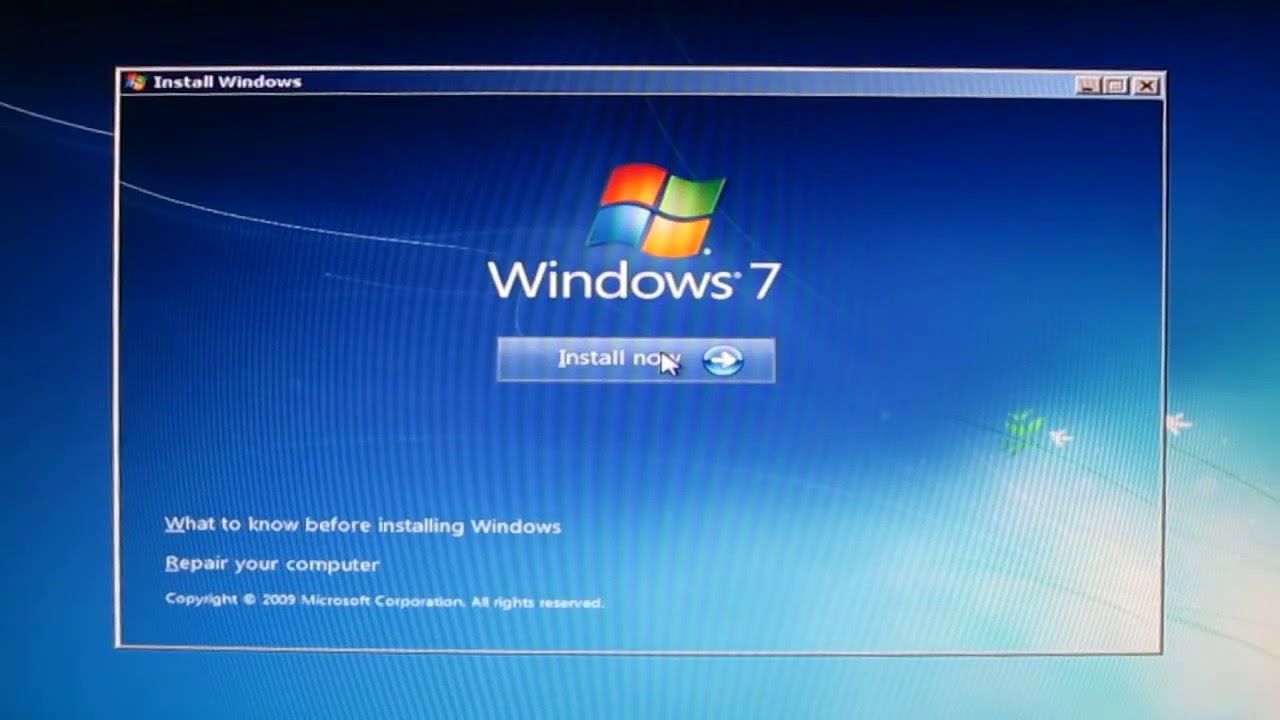
Step 7: Install Windows 7
With the boot order properly set, you are now ready to install Windows 7 on your SSD. Follow these steps to complete the installation process:
- Boot from the Windows 7 installation media: Restart your computer and ensure that the Windows 7 installation media is still inserted. Your computer will boot from the installation media and display the Windows 7 setup screen.
- Choose your language and keyboard settings: Select your preferred language and keyboard layout from the options provided on the Windows 7 setup screen. Click “Next” to continue.
- Accept the license agreement: Read and accept the license agreement by selecting the checkbox stating that you agree to the terms. Click “Next” to proceed.
- Select the installation type: Choose the type of installation you want, such as an upgrade or a custom installation. For a fresh installation on your SSD, select the “Custom (advanced)” option.
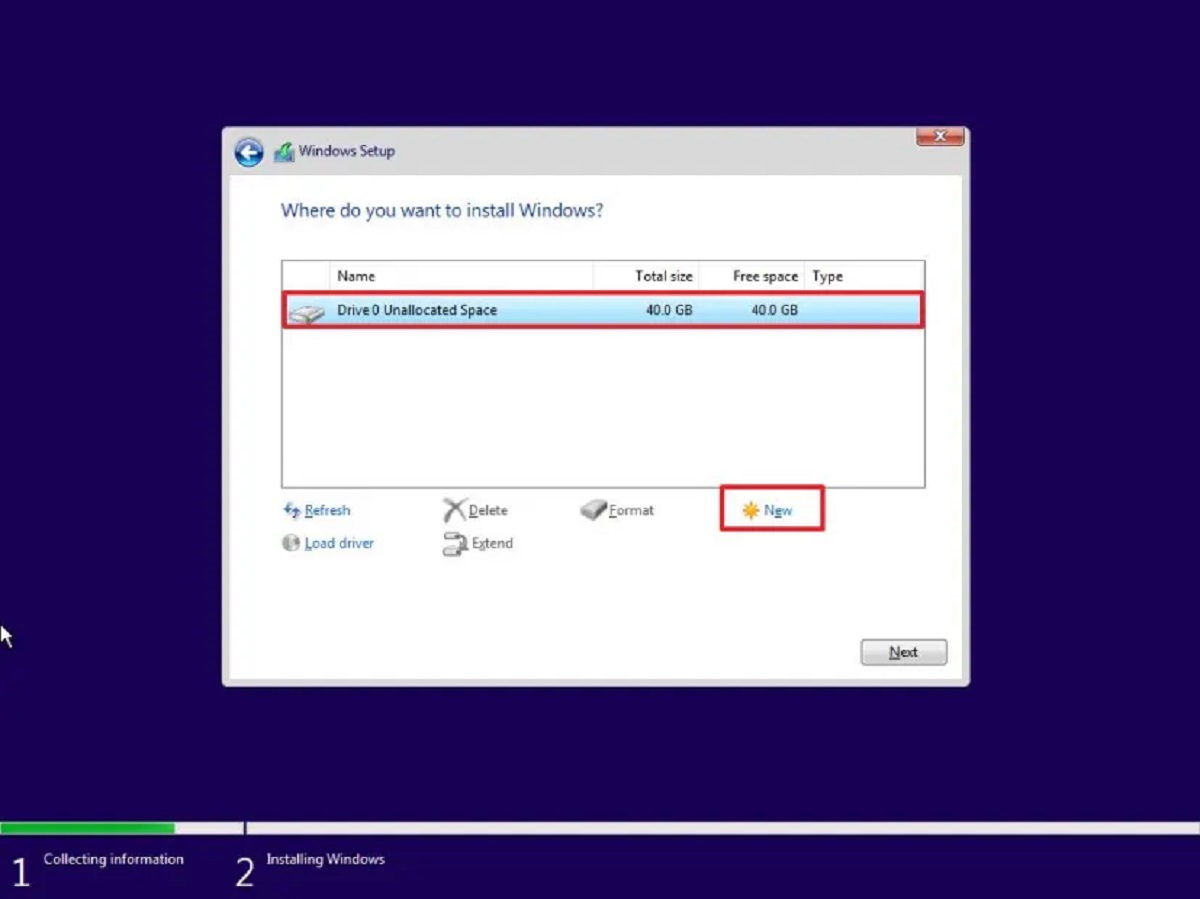
- Select the SSD as the installation location: In the next window, you will see a list of available drives. Select your SSD as the installation destination. Be cautious not to accidentally format any other drives containing important data.
- Format the SSD: On the next screen, you will have the option to format the SSD. Select the SSD and click “Drive options (advanced)”. Choose the “Format” option to erase all existing data on the drive and prepare it for the Windows 7 installation.
- Begin the installation: Once the SSD is formatted, click “Next” to start the Windows 7 installation process. The installation may take some time, so be patient and avoid interrupting the process.
- Complete the installation: Follow the on-screen prompts to complete the installation. You will be asked to provide a username and password, as well as finalize additional settings such as time zone and network preferences.
- Install updates and drivers: After the installation is complete, it is recommended to install the necessary updates and drivers for your system. This ensures stability, compatibility, and security for your Windows 7 installation.
Follow these steps carefully to successfully install Windows 7 on your SSD. It is important to select the correct installation destination, format the SSD if necessary, and complete the setup process with the required settings and updates.
Keep in mind that the installation steps may slightly vary depending on your specific computer manufacturer or any customizations made by your system builder. Refer to your computer’s manual or manufacturer’s website for any specific instructions or considerations.
Once you have completed the installation, you can proceed to the next steps of partitioning the SSD, installing necessary drivers and updates, and restoring your data.
Step 8: Format the SSD
Now that Windows 7 is successfully installed on your SSD, you need to format the SSD to ensure it is properly prepared for use. Formatting the SSD will erase any residual data and optimize the drive for performance. Follow these steps to format the SSD:
- Open Disk Management: Right-click on the “Computer” or “This PC” icon on your desktop and select “Manage.” This will open the Computer Management window.
- Navigate to Disk Management: In the Computer Management window, click on “Disk Management” under the “Storage” section in the left-hand panel. This will display a list of all the storage devices connected to your computer.
- Select the SSD: Locate your SSD in the list of drives. It should be labeled as “Disk 1,” “Disk 2,” or a similar designation. Ensure that you correctly identify the SSD to avoid formatting the wrong drive.
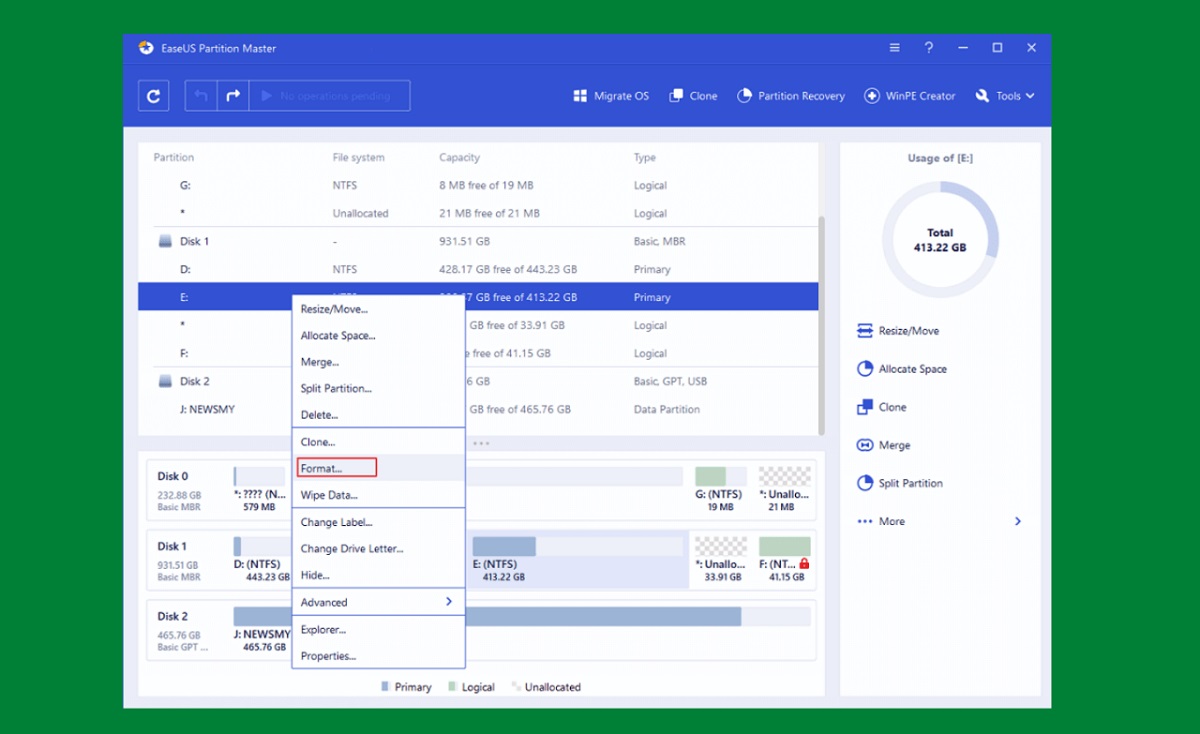
- Format the SSD: Right-click on the SSD in Disk Management and select “Format.” In the Format dialog box, choose the desired file system (typically NTFS) and provide a volume label if desired. You can also choose whether to perform a quick format or a full format. A quick format will be faster, while a full format will thoroughly check and mark bad sectors on the SSD.
- Confirm the format: Review the format options and click “OK” to confirm and initiate the formatting process.
- Wait for the formatting to complete: The formatting process may take some time, depending on the size of the SSD. During the process, Windows will create a new file system on the SSD and prepare it for use.
- Verify the formatted SSD: Once the formatting is complete, the SSD should be listed as a healthy, formatted volume in Disk Management. You can confirm this by checking the status and capacity of the SSD.
By following these steps, you will format the SSD and ensure that it is ready for use. The formatting process creates a clean file system on the drive, allowing it to be properly utilized by the operating system and applications.
Remember, formatting an SSD will erase all data on the drive. Therefore, it is crucial to back up any important data before proceeding with the formatting process.
Once the SSD is successfully formatted, you can proceed to the next step of partitioning the SSD to optimize storage space and efficiently manage your data.
Step 9: Partition the SSD
After formatting the SSD in the previous step, the next step is to partition the SSD. Partitioning allows you to divide the SSD into separate sections, each functioning as its own storage drive. Follow these steps to partition the SSD:
- Open Disk Management: Open the Computer Management window by right-clicking on the “Computer” or “This PC” icon on your desktop and selecting “Manage.” Then, click on “Disk Management” under the “Storage” section in the left-hand panel.
- Select the SSD: Locate your SSD in the list of drives in Disk Management. It should be labeled as “Disk 1,” “Disk 2,” or a similar designation.
- Shrink the volume: Right-click on the existing partition on the SSD and select “Shrink Volume.” This will open a dialog box where you can specify the amount of space to shrink. Enter the desired size for the new partition and click “Shrink.”
- Create a new partition: Right-click on the unallocated space that was created from shrinking the volume and select “New Simple Volume.” This will open the New Simple Volume Wizard.
- Specify partition size: In the New Simple Volume Wizard, specify the size for the new partition (the maximum value will be pre-filled based on the available unallocated space). Click “Next” to continue.
- Assign a drive letter or mount point: Choose a drive letter or mount point to assign to the new partition. This will be the letter that appears in Windows Explorer for this partition. Click “Next” to proceed.
- Format the partition: Select the file system (typically NTFS) and choose whether to perform a quick format or a full format. A quick format will be faster, while a full format will thoroughly check and mark bad sectors on the partition. Click “Next” to continue.
- Complete the wizard: Review the settings and click “Finish” to complete the New Simple Volume Wizard. The new partition will now be created and formatted.
- Repeat if desired: If you want to create additional partitions on the SSD, repeat steps 4 to 8 for each desired partition size.
Partitioning the SSD allows you to organize your data and separate it into logical sections. This can be useful for managing different types of files or creating separate storage areas for different purposes.
Keep in mind that the size of each partition can be adjusted during the partitioning process, so you can allocate the desired amount of storage space to each partition. However, be mindful of the total available capacity of the SSD to avoid running out of space on any partition.
Once the partitions are created and formatted, you can begin storing data on the SSD and easily access it from the assigned drive letter or mount point in Windows Explorer.
Step 10: Install necessary Drivers and Updates
After formatting and partitioning your SSD, the next crucial step is to install the necessary drivers and updates for your system. This ensures that your hardware components are recognized and functioning optimally, as well as provides the latest security patches and improvements to your Windows 7 installation. Follow these steps to install the necessary drivers and updates:
- Connect to the internet: Ensure that your computer is connected to the internet. This allows you to conveniently download the latest drivers and updates.
- Check for Windows 7 updates: Open the Start menu, go to the Control Panel, and select “Windows Update.” Click on “Check for updates” to search for available updates for your Windows 7 operating system. Install any important and recommended updates that are found.
- Visit the manufacturer’s website: Visit the websites of your computer’s hardware component manufacturers (such as the motherboard, graphics card, and network adapter) to download the latest drivers specific to your system. Locate the appropriate driver downloads section and search for the latest Windows 7 drivers for your hardware components.
- Download and install the drivers: Download the driver files from the manufacturer’s website and follow the installation instructions provided. It is usually recommended to run the downloaded driver installer program, which will guide you through the installation process.
- Restart your computer: After installing each driver, it is recommended to restart your computer to ensure that the changes take effect.
- Verify driver installations: Once your computer has restarted, verify that the drivers are installed correctly. You can do this by checking the Device Manager in the Control Panel. Ensure that there are no exclamation marks or error symbols next to any hardware components.
- Update other software: Install updates for other software applications that you commonly use, such as web browsers, media players, or productivity software. This helps ensure compatibility, security, and optimal performance of these applications with your Windows 7 installation.
Installing the necessary drivers and updates is crucial for maintaining a stable and secure system. It ensures that your hardware components are functioning properly and that your software is up to date. Regularly checking for and installing these updates also helps protect your system from security vulnerabilities.
Remember to periodically check for new drivers and updates from the hardware component manufacturers to keep your system running smoothly and efficiently.
Once you have completed the installation of drivers and updates, you are now ready to proceed with the final step of restoring your data.
Step 11: Restore your Data
After formatting and setting up your SSD, the final step is to restore your data. This includes transferring back the files, documents, applications, and other important data from your backup to the newly installed Windows 7 system. Follow these steps to restore your data:
- Connect your backup device: If you backed up your data to an external hard drive, connect it to your computer. If you used cloud storage or a network backup, ensure you have access to the respective service or device.
- Locate your backup files: Open the backup device or service and navigate to the files you had previously backed up. This may involve exploring folders or using specific software or tools provided by the backup service.
- Transfer the files: Select the files and folders you want to restore and copy them to your newly installed Windows 7 system. You can do this by dragging and dropping the files to their respective locations.
- Reinstall applications: If you had any applications installed before formatting, you will need to reinstall them on your Windows 7 system. Locate the installation files for each application and run the setup process to install them.
- Configure settings: As you restore your data, consider any custom settings or configurations you had on your previous system. Take the time to set them up on your Windows 7 system to match your preferences.
- Verify data integrity: After transferring your files, ensure that they are intact and not corrupted. Open a few files from different folders to confirm that they open correctly and contain the expected data.
- Organize your data: Take the opportunity to organize your restored data effectively. Create folders, sort files into appropriate categories, and utilize file naming conventions to make it easy to locate and access your data in the future.
Restoring your data is the final step in the process of formatting and setting up your SSD. It ensures that you regain access to your files, applications, and settings, allowing you to resume your normal activities without any loss of productivity.
Remember to keep a backup of your data even after restoring it. Regularly back up your files to prevent the risk of permanent data loss due to hardware failure, system errors, or unforeseen circumstances.
With your data successfully restored, you can now enjoy the optimized performance and storage capacity offered by your freshly formatted SSD on your Windows 7 system.
Conclusion
Formatting an SSD in Windows 7 is a process that can provide significant benefits in terms of performance, organization, and data integrity. By following the steps outlined in this guide, you can successfully format your SSD and install Windows 7 with confidence.
Throughout the process, it is important to remember to back up your data before formatting, check the health and S.M.A.R.T status of your SSD, and properly prepare your system by creating a Windows 7 installation media. Remember to enter the BIOS setup to change the boot order, install necessary drivers and updates, and restore your data after the formatting process is complete.
Formatting your SSD and reinstalling Windows 7 can optimize your computer’s performance and provide a fresh start. It allows you to free up space, resolve issues, and ensure a clean and efficient operating system for your day-to-day tasks.
Keep in mind that formatting erases all data on the SSD, so it is essential to back up your important files and applications beforehand. Additionally, always exercise caution to avoid formatting the wrong drive or making any irreversible changes to your system.
After successfully formatting your SSD and installing Windows 7, make sure to regularly update your system, including drivers and operating system updates, to maintain optimal performance and security.
Remember that technology continues to evolve, and Windows 7 is an older operating system. If possible, consider upgrading to a newer version to benefit from the latest features, security patches, and compatibility improvements.
By following the step-by-step process outlined in this guide, you can efficiently format your SSD and set up Windows 7, ensuring a smooth and reliable experience on your computer. Enjoy the enhanced performance and storage capabilities that a formatted SSD can offer for your Windows 7 system.